RKC INSTRUMENT CB100 Instruction Manual
Digital controller
Hide thumbs
Also See for CB100:
- Connection manual (292 pages) ,
- Communication instruction manual (44 pages) ,
- Initial setup manual (39 pages)

Related Manuals for RKC INSTRUMENT CB100


Summary of Contents for RKC INSTRUMENT CB100
- Page 1 Digital Controller CB100/CB400 CB500/CB700 CB900 Communication Instruction Manual IMCB03-E3 RKC INSTRUMENT INC. ®...
- Page 2 ! RKC assumes no responsibility for any of the following damage which the user or third party may suffer. (1) Damage incurred as a result of using this instrument. (2) Damage caused by the failure of the instrument, which cannot be predicted by RKC. (3) Other indirect damage. All Rights Reserved, Copyright ! 1998, RKC INSTRUMENT INC.
- Page 3 Before using this instrument, please carefully read this manual for its correct use. In addition, after reading the manual keep it available easily anytime. USERS OF THIS MANUAL This manual is prepared for all personnel who use CB100/CB400/CB500/CB700/CB900. However, it is desirable that they have a fundamental knowledge of electrical engineering, process control and communication.
- Page 4 NOTES ON INDICATIONS The following indications are used in this manual to ensure the safe, correct use of the CB100/CB400/ CB500/CB700/CB900. SIGNAL WORDS : Where there are possible dangers such as electric shock, fire(burns), etc. Which...
- Page 5 Name and number of this instruction manual : Digital Controller CB100/CB400/CB500/CB700/CB900 Name : Communication Instruction Manual Manual number : IMCB03-E3 " " " " Revisions Date of revision Manual number Reason for revision IMCB03-E1 May 29, 1998 The first edition issue...
-
Page 6: Table Of Contents
CONTENTS Page 1. SPECIFICATIONS..............1 2. WIRING .................2 3. SETTING FOR COMMUNICATION ........5 3.1 Transfer to communication setting mode............5 3.2 Communication parameter selection ...............6 3.3 Device address setting ..................7 3.4 Communication speed setting .................9 3.5 Data construction setting ................11 3.6 Interval time setting..................13 3.7 Notes under communication ................16 4. -
Page 7: Specifications
1. SPECIFICATIONS Interface: Based on EIA standard RS-485 Connection method: 2-wire system, half-duplex multidrop connection Communication distance: 1 km (max.) * However, the maximum communication distance varies slightly with the surroundings such as cables etc. Synchronous method: Start/stop synchronous type Communication speed: 2400 bps, 4800 bps, 9600 bps, 19200 bps Data type:... -
Page 8: Wiring
In order to prevent electric shock or instrument failure, do not turn on the power until all the wiring is finished. Up to 32 CB100/CB400/CB500/CB700/CB900 digital controller (hereinafter, the "controller") including the host computer can be connected if multidrop connected by RS-485. - Page 9 2. WIRING ! When host computer interface is RS-485 It is necessary that a circuit to transfer send and receive be built-in the host computer. Paired wire RS-485 Controller Host computer T/R(A) T/R(A) SD (TXD):Send data T/R(B) T/R(B) RD (RXD):Receive data Controller Send/receive Twisted pair wire...
- Page 10 2. WIRING ! Connection example (When up to 32 controllers including host computer are connected) Host computer Host computer RS-232C RS-485 Communication level converter RS-485 BRA-100B-2 BRA-100B-2 BRA-100B-2 RS-485 Device address example Controller Controller Controller NOTE For details of the communication level converter and junction branch box BRA-100B-2, see each Instruction Manual.
-
Page 11: Setting For Communication
3. SETTING FOR COMMUNICATION In order to make communication between the CB100/CB400/CB500/CB700/CB900 digital controller (hereinafter, the "controller") and the host computer, it is necessary to set the device address, communication speed, data construction and interval time. Communication settings are made in communication setting mode. -
Page 12: Communication Parameter Selection
3. SETTING FOR COMMUNICATION 3.2 Communication parameter selection Parameters in communication setting mode are selected in the order of device address "Add," communication speed "bPS," data construction "bIT" and interval time set value "InT." Each parameter is selected by pressing the SET key. ! Display flowchart (Display for approx. -
Page 13: Device Address Setting
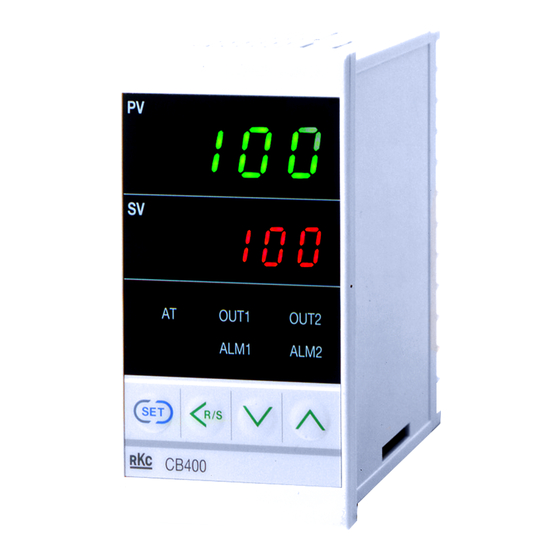
3. SETTING FOR COMMUNICATION 3.3 Device address setting Set the device address by using numerals from 0 to 99. Press the UP or DOWN key to change the numeral, and also press the <R/S key to shift the digit. Factory set Symbol Name Setting range... - Page 14 3. SETTING FOR COMMUNICATION 2. Set the device address. Press the UP key to enter "5" in the lowest digit. OUT1 OUT2 ALM1 ALM2 3. Press the <R/S key to brightly light the tens digit. OUT1 OUT2 ALM1 ALM2 4. Press the UP key to enter "1" in the tens digit. OUT1 OUT2 ALM1...
-
Page 15: Communication Speed Setting
3. SETTING FOR COMMUNICATION 3.4 Communication speed setting Set a communication speed of 2400 bps, 4800 bps, 9600 bps or 19200 bps by using numerals from 0 to 3. Press the UP or DOWN key to change the numeral. Factory set Symbol Name Setting range... - Page 16 3. SETTING FOR COMMUNICATION 2. Press the DOWN key to enter "1" in the lowest digit. As a result, a communication speed of 4800 bps is set. OUT1 OUT2 ALM1 ALM2 3. Press the SET key to change to the next communication parameter. As a result, the set communication speed is registered.
-
Page 17: Data Construction Setting
3. SETTING FOR COMMUNICATION 3.5 Data construction setting Set the data bit construction during communication by using numerals from 0 to 5. Press the UP or DOWN key to change the numeral. Factory set Symbol Name Setting range Description value Data construction 0 to 5 Selects data construction... - Page 18 3. SETTING FOR COMMUNICATION ! Setting procedure Example: When setting data construction to "1: 8 data bits, no parity bit and 2 stop bits." 1. Change the controller to communication setting mode, and then display the data construction (See P. 5, 6). Data construction OUT1 OUT2...
-
Page 19: Interval Time Setting
3. SETTING FOR COMMUNICATION 3.6 Interval time setting Set the interval time. Press the UP or DOWN key to change the numeral, and press the <R/S key to shift the digit. Factory set Symbol Name Setting range Description value Interval time set 0 to 150 Sets the value to set the value... - Page 20 3. SETTING FOR COMMUNICATION 2. Here, as an interval time of 250 ms needs to be set, calculate the interval time set value using the equation (See P. 13). Interval time set value: 250 ms # 1.666 ms 150 (Round to the nearest whole number.) Interval time: 150 "...
- Page 21 3. SETTING FOR COMMUNICATION 5. Press the UP key to enter "5" in the tens digit. OUT1 OUT2 ALM1 ALM2 6. Press the <R/S key to brightly light the hundreds digit. OUT1 OUT2 ALM1 ALM2 7. Press the UP key to enter "1" in the hundreds digit. OUT1 OUT2 ALM1...
-
Page 22: Notes Under Communication
3. SETTING FOR COMMUNICATION 3.7 Notes under communication (1) If polling is made by specifying the identifier of the function which is not added to the controller, the controller sends [EOT]. In addition, if selecting is made, the controller sends [NAK]. (2) When the communication parameter was changed, always turn on the power again. - Page 23 3. SETTING FOR COMMUNICATION ! RS-485 (2-wire system) send/receive timing The transmission and reception of RS-485 communication are operated by a transmitting wire. Therefore, the timing of switching should be acted correctly. Send/receive example in the host computer and controller is show in the following. Polling procedure Send Possible...
- Page 24 3. SETTING FOR COMMUNICATION ! When host computer is selected from data sending to data receiving When switching the host computer into reception from transmission, it must be confirmed that the data was surely put on line. This is not observe the transmission buffer of host computer itself, but confirming with shift register.
-
Page 25: Communication Protocol
4. COMMUNICATION PROTOCOL The CB100/CB400/CB500/CB700/CB900 digital controller (hereinafter, the "controller") uses the polling/selecting method to establish a data link. The basic procedure is followed ANSI X3.28 subcategory 2.5, A4 basic mode data transmission control procedure (Fast selecting is established for selecting). -
Page 26: Polling Procedure
4. COMMUNICATION PROTOCOL 4.1.1 Polling procedure (1) Initialize of data link Host computer sends [EOT] for initializing of data link before polling sequence. (2) Polling sequence send Host computer sends polling sequence with a format shown below. " Example: Device Identifier address "... - Page 27 4. COMMUNICATION PROTOCOL # # # # Identifier [Number of digits: 2] (See P. 28.) This is for identifying data (measured value, status and set value) sent to the host computer. $ $ $ $ Data [Number of digits: 6] Data indicated by the identifier belonging to the controller.
- Page 28 4. COMMUNICATION PROTOCOL (6) Acknowledgment [ACK] Send [ACK] when the host computer could receive data items correctly. Next, the controller sends the identifier data following the identifier just sent in succession shown in "'Communication identifier list" (P. 28). If data send from the controller is suspend, send [EOT] to terminate the data link. (7) Negative acknowledge [NAK] If the host computer cannot receive send data correctly from the controller, it sends [NAK] to the controller.
-
Page 29: Polling Procedure Example (When The Host Computer Requests Data)
4. COMMUNICATION PROTOCOL 4.1.2 Polling procedure example (When the host computer requests data) ' Normal transmission Host computer send Host computer send Host computer send 31H 4DH 31H Polling Identifier address 02H 4DH 31H 30H 30H 31H 30H 2EH 30H 03H 60H 02H 41H 41H 30H 30H 30H 30H 30H 30H 03H 03H Data Next send data... -
Page 30: Selecting
4. COMMUNICATION PROTOCOL 4.2 Selecting Selecting is an operation in which the host computer selects one from among the controllers multidrop connected and then of recommending data receive. The procedure is as the following. Due to adopted fast selecting in controllers therefore becomes the type to send the data which connected to selecting sequence. - Page 31 4. COMMUNICATION PROTOCOL (3) Data send Host computer to send the data with a format indicated below continuing the selecting sequence. " Identifier Data * For [STX], [ETX] and [BCC], see item "4.1 Polling" (P. 19). " " " " Identifier [Number of digits : 2] (See P.
- Page 32 4. COMMUNICATION PROTOCOL (5) Negative acknowledge [NAK] The controller sends [NAK] in the following cases. Then the appropriate recovery processing steps, such as data resend on the host computer side should be taken. ! When an error occurs on the line (parity, framing error, etc.). ! When a BCC check error occurs.
-
Page 33: Selecting Procedure Example (When The Host Computer Sends A Set Value)
4. COMMUNICATION PROTOCOL 4.2.2 Selecting procedure example (When the host computer sends a set value) ' Normal transmission Host computer send Host computer send Host computer send 02H 53H 31H 32H 30H 30H 2EH 30H 03H 4DH 02H 50H 31H 31H 2EH 30H 03H 4DH Data Selecting Next send data... -
Page 34: Communication Identifier
5. COMMUNICATION IDENTIFIER ' Communication identifier list NOTES ! Note that there are identifiers which indicate that communication is not possible depending on the specification. ! The number of digits is 6 for all data. (Attributes RO: Read only, R/W: Read/Write) Iden- Factory set Name... - Page 35 5. COMMUNICATION IDENTIFIER Iden- Factory set Name Data range Attribute tifier value Heater break alarm 1 0.0 to 100.0 A setting See *1. Heater break alarm 2 0.0 to 100.0 A setting See *2. Control loop break alarm 0.1 to 200.0 min. setting (0 can not be set.) See *1, *3.
- Page 36 5. COMMUNICATION IDENTIFIER Iden- Factory set Name Data range Attribute tifier value Derivative time 1 to 3600 sec (0: PI control) *Cannot be set while the self-tuning (ST) function is activated. Only polling can be made. Anti-reset windup 1 to 100 % of heat-side proportional band.
- Page 37 5. COMMUNICATION IDENTIFIER *1: The communicable identifier differs depending on the alarm type specified in alarm 2. " : Communication is impossible # : Communication is possible The alarm type specified in alarm 2 Name Iden- Deviation Process SV alarm tifier alarm alarm...
- Page 38 5. COMMUNICATION IDENTIFIER *5: This is an identifier which enables communication at PID action with autotuning (Reverse action/Direct action). Relay contact output: Voltage pulse output, Trigger output for triac driving, Triac output: 2 sec *7: This is an identifier which enables communication at heat/cool PID action with autotuning (Water cooling/Air cooling).
- Page 39 5. COMMUNICATION IDENTIFIER ! Input range table Thermocouple input Code Code Input type Input type Input Range Input Range 0 to 200 0 to 1300 0 to 400 PL II 0 to 1390 0 to 600 0 to 1200 0 to 800 0 to 2400 0 to 1000 0 to 2534...
-
Page 40: Troubleshooting
6. TROUBLESHOOTING The causes of and measures to be used for faulty controller status during communication are described in the following. For trouble other than the below, contact us or your nearest RKC agent after confirming Model No. and specifications. Details Cause Measures... -
Page 41: Ascii 7-Bit Code Table (Reference)
7. ASCII 7-BIT CODE TABLE (REFERENCE) b5 to b7 b4 b3 b2 b1 ‘ ” & ’ < > ˜ IMCB03-E3... - Page 42 MEMO IMCB03-E3...
- Page 43 RKC INSTRUMENT INC. HEAD OFFICE: 16-6, KUGAHARA 5-CHOME, OHTA-KU TOKYO 146-8515 JAPAN PHONE: 03-3751-9799 (+81 3 3751 9799) E-mail: info@rkcinst.co.jp IMCB03-E3 DEC.1998...
Need help?
Do you have a question about the CB100 and is the answer not in the manual?
Questions and answers