Table of Contents
Advertisement
Advertisement
Table of Contents

Related Manuals for Neopost AS-940


Summary of Contents for Neopost AS-940
- Page 1 AS-940 Addressing Solution Operating Guide...
-
Page 2: Table Of Contents
Cleaning the Inkjet Cartridge (Printhead) _____________________________________________ 3 8 Limitations of this document: The information presented herein is subject to change. 10/14/2009 Neopost USA Inc. assumes no liability whatsoever for any losses or damages resulting from use of this information. © 2009 Neopost USA Inc. All rights reserved. - Page 3 INDEX ___________________________________________________________________________ 49 Limitations of this document: The information presented herein is subject to change. 10/14/2009 Neopost USA Inc. assumes no liability whatsoever for any losses or damages resulting from use of this information. © 2009 Neopost USA Inc. All rights reserved.
-
Page 4: Section 1 - Getting Acquainted
Follow any specific occupational safety and health standards for your workplace or area. Limitations of this document: The information presented herein is subject to change. 10/14/2009 Neopost USA Inc. assumes no liability whatsoever for any losses or damages resulting from use of this information. © 2009 Neopost USA Inc. All rights reserved. -
Page 5: Packaging/Shipping
Note: Parallel and USB interface cables and Ink cartridges are not included with the printer. Interface USB cables (recommend 6 ft or less) can be purchased from computer and office supply stores. Ink cartridges can be purchased through your local Neopost dealer or branch. Figure 1 © 2009 Neopost USA Inc. All rights reserved. -
Page 6: Initial Assembly
Attach the Media Side Guides Figure 2 Using the 4 flat-head Philips screws supplied; attach the Media Side Guides to the printer. Note: The screws are shipped; attached to side guide securing plates, on the printer. © 2009 Neopost USA Inc. All rights reserved. -
Page 7: Attach The Rear Paper Support And Rear Media Guide
Microsoft Internet Explorer 5.0 or higher. • System memory depending on your operating system. • At least 120 Mb free hard-disk space. • CD-ROM drive • Centronics Parallel and or USB port © 2009 Neopost USA Inc. All rights reserved. -
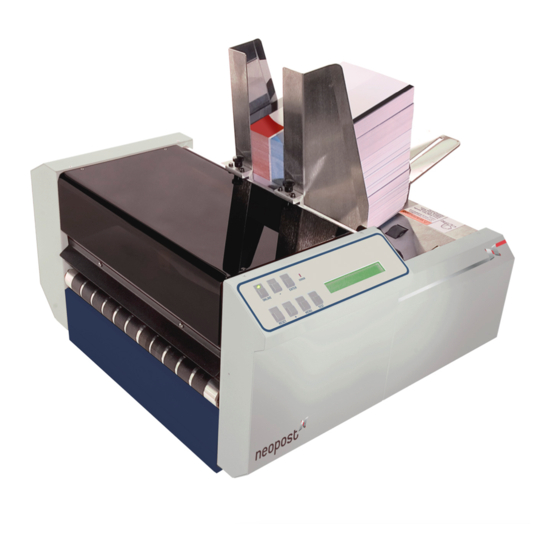
Page 8: Operator View
REAR PAPER SUPPORT – Provides the proper angle to enhance media feeding and separation. LCD DISPLAY – Displays information about the status of the printer. PRINTER CONTROL PANEL – The keys on the printer control panel are used to operate the printer. © 2009 Neopost USA Inc. All rights reserved. -
Page 9: Rear View
MAIN POWER SWITCH – This switch turns the printer ON and OFF. MAIN POWER FUSE – This fuse protects all of the electronic circuits in the printer. POWER RECEPTACLE – The power cord is plugged in here. © 2009 Neopost USA Inc. All rights reserved. -
Page 10: Print Carriage View
PRINT UNIT SECURING KNOBS – Used to secure the print unit positions. PRINT AREA REFERENCE – Visual reference to help the operator adjust print area position. MEDIA TRANSPORT BELTS – Drives the material through the system. © 2009 Neopost USA Inc. All rights reserved. -
Page 11: Control Panel
NOTE: A complete description of the functions and operation of the printer keys can be found in Section 3 – Operating the Printer. © 2009 Neopost USA Inc. All rights reserved. - Page 12 SECTION 1 GETTING ACQUAINTED Notes © 2009 Neopost USA Inc. All rights reserved.
-
Page 13: Section 2 - Printer Installation And Setup
NOTE: The cable used to connect the printer to the computer must not exceed 6 feet long. The parallel port may be used for all versions of Windows. The USB Port is used only for Windows ME, 2000, and XP. © 2009 Neopost USA Inc. All rights reserved. -
Page 14: Installing The Ink Cartridges
The ink in the cartridge may be harmful if swallowed. Keep new and used cartridges out of reach of children. Discard empty cartridges immediately. © 2009 Neopost USA Inc. All rights reserved. -
Page 15: Setting Up The Feed System
Figure 18 6. Raise the Separator Locking Lever, by lifting it up and back, as shown in Figure 19 . This will lock the separator positions. © 2009 Neopost USA Inc. All rights reserved. -
Page 16: Media Side Guide Adjustments
Position it so that the trailing edge of the media is raised approximately ½ to 1 inch above the Rear Media Support, as shown in Figure 22 0.5” – 1” Figure 21 © 2009 Neopost USA Inc. All rights reserved. -
Page 17: Loading Media
3. Additional pieces can be placed onto the stack, as described in the above step. 4. If the printer runs out of material, be sure to reload the printer beginning with the first step. Figure 23 © 2009 Neopost USA Inc. All rights reserved. -
Page 18: Media Thickness Adjustment
2 to 3 1/16” to 1/8” 3 to 7 1/8” to 1/4” 7 to 10 NOTE: The chart show general guidelines. It is best to adjust the carriage height using the procedure outlined above. © 2009 Neopost USA Inc. All rights reserved. -
Page 19: Print Unit Positioning (Vertical Address Positioning)
Note: Horizontal print position is adjusted via your software (mailing program). Figure 26 PRINT AREA 5, 4 3, 2, 1 No. 10 Envelope Figure 27 Note: The minimum gap (distance) between the print units (between heads 3 and 4) is 1 5/16”. © 2009 Neopost USA Inc. All rights reserved. -
Page 20: Paper Feed (Media Transport) Test
Note: Turning the printer on, while holding down the TEST key, will erase the previous TEST image. If a new TEST image is not loaded, then a TEST image will not be available to print when you press the TEST key. © 2009 Neopost USA Inc. All rights reserved. -
Page 21: Section 3 - Operating The Printer
Address Recovery – In event of a jam or misprint; in the printer you can recover up to the last 9 records by using this feature. See “Print Recovery After a Jam” for details on the use of this feature. © 2009 Neopost USA Inc. All rights reserved. - Page 22 Press ON LINE key and then the ENTER key to get back to normal printing. Note. If paper jam occurs during the purge, after purge, you should use address recovery feature to get back to normal printing. Otherwise you will lose records. © 2009 Neopost USA Inc. All rights reserved.
-
Page 23: Print Recovery After A Jam
5. Then press the ENTER key again to restart the printer. 6. You may repeat this process a many times as required. When you reach the end of the database if the last piece jams, then enter 1 piece to be recovered. © 2009 Neopost USA Inc. All rights reserved. -
Page 24: Installing The Printer Driver
3. You will be brought to the welcome screen of the Printer Installation Wizard. The wizard will walk you through the process of installing the driver. Click Next. 4. Select Local printer attached to this computer. Click Next. © 2009 Neopost USA Inc. All rights reserved. - Page 25 Process", before you attempt to print. 6. Choose your printer model from the menu. Click Next. 7. Select whether or not you wish to set this as your default printer. Click Next. © 2009 Neopost USA Inc. All rights reserved.
- Page 26 USB Users: Do NOT print a test page until you have verified and tested proper port selection. See section titled"USB Port Selection and Verification Process". 10. Verify all of your information and click Finish to complete the installation. © 2009 Neopost USA Inc. All rights reserved.
- Page 27 Continue Anyway to complete the installation. Installation is now complete. USB Users: Do NOT attempt to print to the printer until you have reviewed the next section "USB Port Selection and Verification Process". © 2009 Neopost USA Inc. All rights reserved.
-
Page 28: Usb Port Selection And Verification Process
3. Click on the “Ports” tab and locate the fist USB selection choice in the list. If you have more than one USB choice, they are normally labeled as “USB001”, “USB002”, etc...). The first choice would be “USB01”. Then click on Apply. © 2009 Neopost USA Inc. All rights reserved. - Page 29 8. You are Finished. Your printer driver has been properly configured for the USB port you are connected to and the driver is communicating with printer. You are ready to begin printing. © 2009 Neopost USA Inc. All rights reserved.
-
Page 30: Printer Driver Properties
SECTION 3 OPERATING THE PRINTER Printer Driver Properties The drivers for your AS-940 contain several settings that can be useful when using this type of printer: head alignment, feeder delay, text DPI and belt speed. Head Alignment The purpose of the Head Alignment is to permit slight (0.001-inch) horizontal adjustments to the position of the print heads to each other. - Page 31 600 DPI Low(1), Belt speed. • The Belt speed (IPS) automatically changed to the optimum speed for the resolution selected. You can, however change the speeds to a lower speed as follows: © 2009 Neopost USA Inc. All rights reserved.
-
Page 32: Software Setup Examples
This example was designed for the Envelope Imager 1.5. Notice how the address data is positioned at the top of the page, within the first 1.5 inches of the top of the page. When using the AS-940, it can accommodate print on the first 2.5 inches of the page. - Page 33 4. Click on the printer icon , to open the "Mail Print Setup" dialog box. - Make sure the corresponding Neopost printer driver is selected as your “Printer”. - Use the "Advance Settings..." button to select the desired print quality and or orientation.
-
Page 34: Printing From Microsoft Word
When you have completed the steps above the layout should look like the one shown. When setting up a layout for the AS-940, be aware NOTE: that the printheads are aligned in two banks and these banks face each other. The minimum distance between printheads 3 and 4 is 1-5/16-inch. - Page 35 ON, the printer will start. Pressing the ENTER key will start the printing process. If you have a graphic or fixed text to be printed with the data, refer to the section on Overlays. © 2009 Neopost USA Inc. All rights reserved.
- Page 36 SECTION 3 OPERATING THE PRINTER Notes © 2009 Neopost USA Inc. All rights reserved.
-
Page 37: Purging The Nozzles
CLEAR THE NOZZLES BOTH OF THESE ACTIONS ACTUALLY HURT THE PRINT QUALITY BECAUSE THEY ALLOW BUBBLES TO FORM NEAR THE INK FIRING CHAMBERS. THESE BUBBLES PREVENT THE NOZZLES FROM FIRING CAUSING WHITE STREAKS IN THE PRINT IMAGE. © 2009 Neopost USA Inc. All rights reserved. -
Page 38: Inkjet Cartridge Storage 3
Note: Do not shake the cartridge; as this will cause air bubbles to form, which will negatively affect the performance of the cartridge. It is recommended that you perform a purge, before starting to print again. Figure 29 © 2009 Neopost USA Inc. All rights reserved. - Page 39 [B.] Then remove the separator [C] by prying it out of the holder. 5. Install a new separator in place and replace the separator support plate and screw. 6. Adjust the separators. See the section titled “Setting up the Feed System”. © 2009 Neopost USA Inc. All rights reserved.
-
Page 40: Cleaning The Printer
CAUTION! Media Transport Belts can be damaged by some chemicals and solvents. Avoid using all solvents and untested chemicals on the Media Transport Belts. © 2009 Neopost USA Inc. All rights reserved. -
Page 41: Cleaning The Media Sensor
CAUTION! Do not allow any liquids, chemicals or solvents to touch the sensor. If this occurs, the sensor will be damaged. Figure 30 Media Sensor © 2009 Neopost USA Inc. All rights reserved. - Page 42 Notes © 2009 Neopost USA Inc. All rights reserved.
-
Page 43: Section 5 - Troubleshooting Guide
Remove and reinsert the cartridge into the pen stall. Insert a new Print Cartridge. WARNING DO NOT REMOVE THE SIDE COVERS OF THE PRINTER! THERE ARE HIGH VOLTAGES PRESENT BEHIND THE COVERS! © 2009 Neopost USA Inc. All rights reserved. -
Page 44: The Printer
A Example shows part of the image printhead carriage that is set too (STE 140) ghosting and skewing. high or too low may cause media to jam, hesitate, slip, or skew. © 2009 Neopost USA Inc. All rights reserved. -
Page 45: Printer Display Messages
Make sure material is feeding. The printer has timed out and has stopped the transport. Press appropriate key to Transport Time-Out No data, no paper, no operator continue. response, etc… for >5 minutes. © 2009 Neopost USA Inc. All rights reserved. - Page 46 Error in ESC Sequence formatted incorrectly. vendor. Try again. If problem persists, The Escape command sent is not report problem to software Ignore Unknown ESC Comnd supported. vendor. © 2009 Neopost USA Inc. All rights reserved.
-
Page 47: Appendix A - As-940 Specifications
11.5” H x 19.56” L x 20” W (292.1 mm H x 496.8 mm L x 508 mm W) DIMENSIONS 69 lbs. (331.4 kg.) WEIGHT 115VAC 50/60 Hz (special order: 240VAC) ELECTRICAL Conveyor/Stacker, Dryer OPTIONS All Specifications Subject To Change Without Notice © 2009 Neopost USA Inc. All rights reserved. -
Page 48: Appendix B - Supplies, Service And Support
Conveyor /Stacker Available Obtaining Supplies, Service and Support Please contact your local Neopost dealer to obtain supplies, service and support for your printer. You can also order ink and other supplies by clicking the link below and then clicking the NEOSHOP link. -
Page 49: Index
Print-Carriage Cover..........5, 8 Ink Level Monitor Reset ..........14 Printer Control Panel........... 8, 21 Inkjet Cartridge ..........37, 38, 48 printer driver..........5, 24, 29, 33 Printhead Carriage ..........18 Purge............21, 22, 39 Jams ...............23,39 © 2009 Neopost USA Inc. All rights reserved. - Page 50 USB Port ............9, 13, 28 Safety Precautions ............4 sensor................41 Service and Support ..........48 Service Menu ............21 Setup Menu ...............22 Sheet Separator Locking Lever ........9 Sheet Separators ...........9, 39 speeds................31 Supplies..............48 Systems Requirements..........7 © 2009 Neopost USA Inc. All rights reserved.
Need help?
Do you have a question about the AS-940 and is the answer not in the manual?
Questions and answers