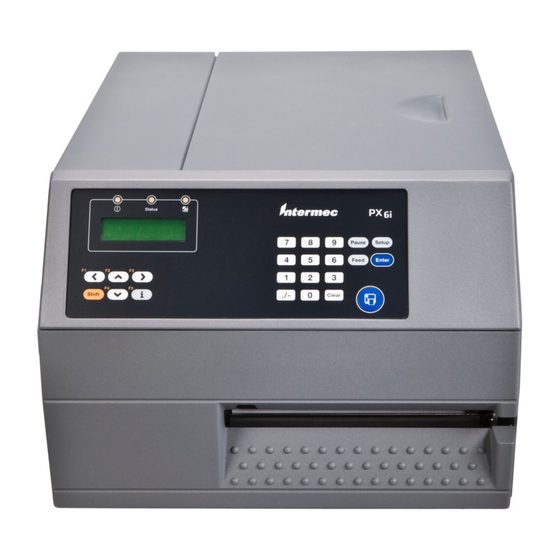
Honeywell PX4i User Manual

Honeywell PX4i User Manual

High perfomance printer
Table of Contents

Advertisement

Quick Links

PX
| PX
4i
6i
High Performance Printer
User Guide

Advertisement

Table of Contents
loading

Summary of Contents for Honeywell PX4i

  • Page 1 | PX High Performance Printer User Guide...
  • Page 2 Disclaimer Honeywell International Inc. (“HII”) reserves the right to make changes in specifications and other information contained in this document without prior notice, and the reader should in all cases consult HII to determine whether any such changes have been made. The information in this publication does not represent a commitment on the part of HII.
  • Page 3: Table Of Contents

    Loading Media for Printing From an External Supply ........... 36 Loading Ribbon ........................38 Printing a Test Label ........................45 Creating and Printing Labels ....................47 Printing on RFID Media ......................47 PX4i and PX6i High Performance Printer User Guide...
  • Page 4 Configuring Avalanche Settings ..................75 Configuring SmartSystems Settings................76 Configuring Wireless LAN Settings ................77 Configuring 802.1x Settings ....................78 Configuring Your Printer With PrintSet ................80 Configuring Your Printer With Commands Sent From Your PC ......80 PX4i and PX6i High Performance Printer User Guide...
  • Page 5 Adjusting the Printhead Pressure ...................99 Adjusting the Label Taken Sensor ................100 Maintaining the Printer ......................100 Cleaning the Printer ......................101 Cleaning the Exterior of the Printer................101 Cleaning the Media Guides ....................101 Replacing the Printhead ......................105 PX4i and PX6i High Performance Printer User Guide...
  • Page 6 Printer File System (Fingerprint)..................139 Device Tree Structure......................139 Devices and Directories ....................140 Customizing the Printer Home Page ................141 Web Style Guide Files ....................... 141 Content of a Web Style Guide File ................142 PX4i and PX6i High Performance Printer User Guide...
  • Page 7 Creating a Web Style Guide File ...................144 PX4i and PX6i High Performance Printer User Guide...
  • Page 8 PX4i and PX6i High Performance Printer User Guide...
  • Page 9 PX4i and PX6i High Performance Printer User Guide...
  • Page 10 PX4i and PX6i High Performance Printer User Guide...
  • Page 11: Customer Support

    For our latest contact information, see www.honeywellaidc.com/locations. Product Service and Repair Honeywell International Inc. provides service for all of its products through service centers throughout the world. To find your service center, go to www.honeywellaidc.com and select Support.
  • Page 12 PX4i and PX6i High Performance Printer User Guide...
  • Page 13: Chapter 1 - Using The Printer

    24/7 printing in harsh industrial environments and easily adapt to changes in host environments or applications. The PX4i and PX6i support a maximum print width of four or six inches, respec- tively. Throughout this manual, both models of the printer are referred to as “printer”...
  • Page 14: Selecting A Printer Language

    DSim is a Datamax™ simulation program that runs Datamax programs. To setup, configure, and use DSim, see the DSim Programmer’s Guide. Printer Start Up Screen Press the key that corresponds to the printer language you want to run on your printer. PX4i and PX6i High Performance Printer User Guide...
  • Page 15: Understanding The Control Panel

    The control panel provides buttons, LEDs, and a liquid crystal display (LCD) for you to interact with the printer. Use this illustration to familiarize yourself with the buttons and lights on the printer. Status Pause Setup Feed Enter Shift Clear PX4i and PX6i High Performance Printer User Guide...
  • Page 16: Understanding The Buttons

    Setup mode (you pressed on the keypad). Indicator • is in Information mode (you pressed on the keypad). • firmware is being upgraded. Solid blue The printer is powered on and operating. PX4i and PX6i High Performance Printer User Guide...
  • Page 17: Understanding The Screen

    For help, see the Fingerprint Developer’s Guide. Loading Media The PX4i and PX6i can print on labels, tickets, tags, and continuous stock in vari- ous forms. The method you use to load media depends on how you want the printer to operate.
  • Page 18: Loading Media For Tear-Off Printing

    If you are running IPL, save the label indicating the sensitivity number attached to the media roll. You need this number to set the media sensitivity. To load media for tear-off printing 1. Turn off the printer. PX4i and PX6i High Performance Printer User Guide...
  • Page 19 2. Open the front door and media cover. 3. (PX6i only) Pull the locking handle down. PX4i and PX6i High Performance Printer User Guide...
  • Page 20 4. Raise the printhead by turning the printhead lift lever counter-clockwise. 5. If necessary, remove the empty core from the media supply roll post. PX4i and PX6i High Performance Printer User Guide...
  • Page 21 6. If you are using a media roll with a 76 mm (3 in) core, install a 3-inch adapter on the media supply hub. 7. Fit a new roll of media on the supply post and push the roll in as far as it will go. PX4i and PX6i High Performance Printer User Guide...
  • Page 22 The slack absorber can be routed for better access and then snap- locked in open position. 9. Route the media through the print unit and push it in as far as it will go. Route the Media PX4i and PX6i High Performance Printer User Guide...
  • Page 23 Media Path 10. Lower the printhead by turning the printhead lift lever clockwise. 11. (PX6i only) Push the locking handle up. PX4i and PX6i High Performance Printer User Guide...
  • Page 24: Loading Media For Peel-Off Printing

    • sets high demands on the media, such as label stiffness, release characteristics of the adhesive and liner, and resistance against electrostatic charging. Consult PX4i and PX6i High Performance Printer User Guide...
  • Page 25 "Accessories for the Printer" on page 124. To load media for peel-off printing 1. Turn off the printer. 2. Open the front door and media cover. 3. (PX6i only) Pull the locking handle down. PX4i and PX6i High Performance Printer User Guide...
  • Page 26 4. Raise the printhead by turning the printhead lift lever counter-clockwise. 5. Pull out the green clip on the liner takeup hub and dispose of any wound-up liner. 6. Remove any empty core from the media supply hub. PX4i and PX6i High Performance Printer User Guide...
  • Page 27 7. If your are using a media roll with a 76 mm (3 in) core, fit an adapter on the media supply hub. 8. Fit a new roll of media onto the media supply hub and push the roll in as far as it will go. PX4i and PX6i High Performance Printer User Guide...
  • Page 28 The slack absorber can be rotated for better access and then snap- locked in open position. 10. Route the media through the print unit and push it in as far as it will go. PX4i and PX6i High Performance Printer User Guide...
  • Page 29 11. Pull out approximately 40 cm (15 in) of labels and remove the labels from the liner. 12. Route the liner around the tear bar and back under the print unit. PX4i and PX6i High Performance Printer User Guide...
  • Page 30 13. Secure the liner to the takeup hub with the green clip and rotate the hub until the media is pulled tight. Secure the Liner Media Path PX4i and PX6i High Performance Printer User Guide...
  • Page 31 14. Turn the printhead lift lever clockwise to lower the printhead. 15. (PX6i only) Push the locking handle up. PX4i and PX6i High Performance Printer User Guide...
  • Page 32: Loading Media For Cut-Off Printing

    37 mm (1.5 in) in front of the printer’s dot line. Make sure to properly adjust the media feed. For help, see "Configuring the Printer" on page 63. PX4i and PX6i High Performance Printer User Guide...
  • Page 33 Turn off the power or disconnect the cutter before cleaning. Keep your fingers away from cutting edges. To load media for cut-off printing 1. Turn off the printer. 2. Open the cutter and media cover. PX4i and PX6i High Performance Printer User Guide...
  • Page 34 3. (PX6i only) Pull the locking handle down. 4. Turn the printhead lift lever counter-clockwise to raise the printhead. PX4i and PX6i High Performance Printer User Guide...
  • Page 35 5. Remove any empty core from the media supply hub. 6. If your are using a media roll with a 76 mm (3 in) core, fit an adapter on the media supply hub. PX4i and PX6i High Performance Printer User Guide...
  • Page 36 8. Route the media under the slack absorber and forward toward the print mechanism. The slack absorber can be rotated for better access and then snap- locked in open position. PX4i and PX6i High Performance Printer User Guide...
  • Page 37 9. Route the media through the print unit and push it in as far as it will go. Route the Media Media Path PX4i and PX6i High Performance Printer User Guide...
  • Page 38 10. Turn the printhead lift lever clockwise to lower the printhead. 11. (PX6i only) Push the locking handle up. PX4i and PX6i High Performance Printer User Guide...
  • Page 39 12. Adjust the position of the green edge guides so that the media is guided with a minimum of play. 13. Route the media through the cutter between the two guide plates. PX4i and PX6i High Performance Printer User Guide...
  • Page 40: Loading Media For Internal Batch Takeup Printing

    Internal batch takeup can be used for these types of media: • Self-adhesive labels fitted on liner • Pre-perforated tickets with gaps • Pre-perforated tickets with marks To load media for internal batch takeup printing 1. Turn off the printer. PX4i and PX6i High Performance Printer User Guide...
  • Page 41 2. Open the front door and media cover. 3. Turn the printhead lift lever counter-clockwise to raise the printhead. 4. Remove any empty core from the media supply hub. PX4i and PX6i High Performance Printer User Guide...
  • Page 42 5. Loosen the single screw that holds the guide plate at the rear of the media compartment. 6. Remove the tear bar from the print unit and replace it with the guide plate. PX4i and PX6i High Performance Printer User Guide...
  • Page 43 7. If you are using a media roll with a 76 mm (3 in) core, fit an adapter on the media supply hub. 8. Fit a new roll of media onto the media supply hub and push the roll in as far as it will go. PX4i and PX6i High Performance Printer User Guide...
  • Page 44 The slack absorber can be rotated for better access and then snap- locked in open position. 10. Route the media through the print unit and push it in as far as it will go. PX4i and PX6i High Performance Printer User Guide...
  • Page 45 11. Pull out approximately 40 cm (15 in) of labels. 12. Route the labels around the guide plate and back under the print unit to the takeup hub. PX4i and PX6i High Performance Printer User Guide...
  • Page 46 13. Wind up some of the media on the takeup hub and secure it with the green clip. Winding and Securing the Media Media Path PX4i and PX6i High Performance Printer User Guide...
  • Page 47 14. Turn the printhead lift lever clockwise to lower the printhead. 15. Adjust the position of the green edge guides so that the media is guided with a minimum of play. 16. Close the media cover, but keep the front door open. PX4i and PX6i High Performance Printer User Guide...
  • Page 48: Loading Media For Printing From An External Supply

    40 mm (1.57 in). Note: Make sure to protect the media from dust, dirt, or other foreign particles that can impair the printout quality or cause unnecessary wear to the printhead. PX4i and PX6i High Performance Printer User Guide...
  • Page 49 Fit the fanfold guide into the lower slot in the rear plate when the supply is placed lower than the printer. 2. Feed the media through the slot in the rear plate. Feeding Media Through the Upper Slot PX4i and PX6i High Performance Printer User Guide...
  • Page 50: Loading Ribbon

    Make sure to select ribbon that matches the type of receiving face material and set up the printer accordingly. To load ribbon for thermal transfer printing 1. Open the front door and media cover. PX4i and PX6i High Performance Printer User Guide...
  • Page 51 2. (PX6i only) Pull the locking handle down. 3. Turn the printhead lift lever counter-clockwise to raise the printhead. PX4i and PX6i High Performance Printer User Guide...
  • Page 52 If your ribbon is 55 to 60 mm (2.16 to 2.3 in) wide, compress the ribbon supply bobbin and move it so it snaps into the first (innermost) groove. 55-60 mm (2.1-2.3”) PX4i and PX6i High Performance Printer User Guide...
  • Page 53 80-90 mm (3.5”) • If your ribbon is 110 mm (4.3 in) wide, compress the ribbon supply bobbin and move it so it snaps into the third (outermost) groove. 110 mm (4.3”) PX4i and PX6i High Performance Printer User Guide...
  • Page 54 6. Press the ribbon roll onto the ribbon supply bobbin and route the ribbon through the print unit. Pull out 20 cm (8 in) of ribbon. 7. Without releasing the ribbon, turn the printhead lift lever clockwise to lower the printhead and lock the ribbon. PX4i and PX6i High Performance Printer User Guide...
  • Page 55 8. Press the cardboard core at the front end of the ribbon onto the rewind hub. During printing, the rewind hub rotates counter-clockwise. 9. Turn the printhead lift lever counter-clockwise to raise the printhead. PX4i and PX6i High Performance Printer User Guide...
  • Page 56 10. Wind up the ribbon until all of the transparent leader has passed the printhead and the ribbon becomes tight. 11. Turn the printhead lift lever clockwise to lower the printhead. PX4i and PX6i High Performance Printer User Guide...
  • Page 57: Printing A Test Label

    If you are running Fingerprint, go to SETUP > PRINT DEFS > TESTPRINT. • If you are running IPL, go to SETUP > TEST/SERVICE > TESTPRINT > CONFIG. 2. Select a testprint to perform. For more information, see the next tables. PX4i and PX6i High Performance Printer User Guide...
  • Page 58 Contains a single format that you can use to evaluate the print quality of a Formats particular format. This option prints labels for all the formats stored in the printer’s memory. Page PX4i and PX6i High Performance Printer User Guide...
  • Page 59: Creating And Printing Labels

    • For printers running IPL: • Start with the sensitivity set to 565. You may need to adjust this value depending on the type of media you choose. PX4i and PX6i High Performance Printer User Guide...
  • Page 60 To write to Gen 2 RFID tags, set the start and length parameters of the RFID tag field setup command (a) to even numbers. For help configuring RFID parameters, see the Fingerprint Command Reference Manual or the IPL Command Reference Manual. PX4i and PX6i High Performance Printer User Guide...
  • Page 61: Chapter 2 - Connecting The Printer

    You can use a serial connection to communicate with your PC and run PrintSet, LabelShop, or Honeywell print driver. You can also use the serial port to send com- mands directly to the printer through a terminal connection, for instance with Tel- net.
  • Page 62: Connecting The Printer To A Pc Through The Usb Device Port

    You do not need to set up any parameters for USB communications. Connecting the Printer to a PC Through the IEEE 1284 Port You can use the parallel connection with LabelShop or Honeywell Print Driver. The parallel port supports Universal Plug and Play (UPnP) and additional status reporting through IEEE 1284 nibble ID mode.
  • Page 63: Connecting The Printer To Your Network

    Alert handling. Setting Up Ethernet Communications Use the Ethernet port to set up the PX4i or PX6i as a network printer. If Ethernet is selected as your Network Type, when you turn on your printer, it automatically retrieves an IP address from the network (DHCP+BOOTP). You can use the network connection with LabelShop or the Honeywell Printer Driver.
  • Page 64: Manually Configuring Ip Settings

    "network,IP selection,manual" setup "network,IP address,xxx.xxx.xxx.xxx" setup "network,netmask,xxx.xxx.xxx.xxx" setup "network,default router,xxx.xxx.xxx.xxx" setup "network,nameserver,xxx.xxx.xxx.xxx" where xxx is a number from 0 to 255. 3. Disconnect the printer from the PC. PX4i and PX6i High Performance Printer User Guide...
  • Page 65: Setting Up 802.11 Radio Communications

    WPA2 Personal and Enterprise mode (802.1x authentication) Note: WPA and WPA2 Enterprise mode currently support PEAP, TTLS, LEAP, and EAP- FAST. For LEAP authentication, the printer supports Open EAP, but does not support Network EAP. PX4i and PX6i High Performance Printer User Guide...
  • Page 66 8. Step through the Wireless Setup Wizard to set up wireless network and security parameters. To set up the printer for 802.11 communications using HyperTerminal 1. Connect one end of the serial cable to your printer, and connect the other end to your PC. PX4i and PX6i High Performance Printer User Guide...
  • Page 67 1. Send the following commands to login as an admin and set the SSID: run "su -p pass admin" setup write "wlan","uart1:" setup "wlan","SSID","xxxxx" where xxxxx can be from 0 to 32 ASCII characters, not including the double quote. PX4i and PX6i High Performance Printer User Guide...
  • Page 68 Note: The default password for logging in as an admin is “pass.” If you have changed the password, you will need to use your password instead of “pass.” PX4i and PX6i High Performance Printer User Guide...
  • Page 69 8 characters but less than 96 characters. • Send the following commands to make sure your values match those used by the access point: setup write "8021x","uart1:" setup write "wlan","uart1:" PX4i and PX6i High Performance Printer User Guide...
  • Page 70 Send the WPA-PSK or WPA2-PSK command to set a pre-shared key: <STX><SI>ws,WPA,OFF<ETX> <STX><SI>ws,WPA2,ON<ETX> <STX><SI>ws,WPA_PSK,xxxxxxxxxx<ETX> where xxxxxxxxxx is a value between 8 and 64 characters. 3. Send the following command to activate the settings: <STX><SI>ws,ACTIVE,1<ETX> PX4i and PX6i High Performance Printer User Guide...
  • Page 71 • Send the following commands to set a certificate and enable validation: <STX><SI>ws,CA_CERT,c:/testCA.pfx@export<ETX> <STX><SI>ws,VALIDATE,ON<ETX> where c:/testCA.pfx is the location and name of the certificate on the printer and export is the passphrase. PX4i and PX6i High Performance Printer User Guide...
  • Page 72: Connecting Peripherals To The Usb Host Port

    USB memory stick connected • USB memory stick not supported If no status message appears when you insert the USB storage device, you can manually verify the USB storage device is supported using HyperTerminal. PX4i and PX6i High Performance Printer User Guide...
  • Page 73: Connecting A Keyboard To The Usb Host Port

    USB keyboard. You can then use this data in a Fingerprint application. The keyboard layout you choose (see the previous procedure) applies for con- nected scanners too. PX4i and PX6i High Performance Printer User Guide...
  • Page 74: Connecting A Usb Hub To The Usb Host Port

    HID (keyboard or scanner) peripheral to the USB hub at a time. If the USB hub is powered, you can connect multiple USB mass storage devices and multiple HID peripherals at once. PX4i and PX6i High Performance Printer User Guide...
  • Page 75: Chapter 3 - Configuring The Printer

    Use This Key: To Do This: Scroll through the main menu and sub-menus. Select a sub-menu item. Exit a sub-menu without changing the setting. Select a sub-menu item. Enter Exit Setup mode. Setup PX4i and PX6i High Performance Printer User Guide...
  • Page 76: Configuring Your Printer From The Printer Home Page

    If you are using an Ethernet or 802.11 wireless connection, you can change config- uration settings from your printer’s home page. Note: You should have already connected your printer to your network and obtained an IP address. PX4i and PX6i High Performance Printer User Guide...
  • Page 77: Configuring Communications Settings

    Use the next sections to understand and configure the settings on each configura- tion page. Configuring Communications Settings Use the communications page to configure serial communications, the communi- cations interface, and the keyboard layout. PX4i and PX6i High Performance Printer User Guide...
  • Page 78: Configuring Media Settings

    2. Enter the correct information for the media you are using. 3. Click Submit Setup. Configuring RFID Settings (Printer With RFID Option) Use the RFID page to configure settings for printing on RFID media. PX4i and PX6i High Performance Printer User Guide...
  • Page 79: Configuring Print Engine Settings

    To configure print engine settings 1. Click Printer > Print Engine. 2. Enter the correct information for the print engine. 3. Click Submit Setup. PX4i and PX6i High Performance Printer User Guide...
  • Page 80: Configuring Web Shell Settings

    Defines the application to run as the default on startup. You need to reboot Application the printer for the change to take effect. Standard I/O Defines the port the printer listens to. You need to reboot the printer for the change to take effect. PX4i and PX6i High Performance Printer User Guide...
  • Page 81: Configuring Alerts

    Application Break A running Fingerprint application has been interrupted manually or (Fingerprint only) because of an error. PX4i and PX6i High Performance Printer User Guide...
  • Page 82: Configuring General Network Settings

    Use the following table to understand the general network settings. Setting Description Printer Name The network identification name (WINS name) of the printer. The default name is HONEYWELL followed by the last six positions of the MAC address. System Location (Optional) The printer location. System Contact (Optional) The printer administrator.
  • Page 83: Configuring Mail Settings

    2. Select the mail server settings and enter mail addresses. 3. Click: • Submit Mail Settings to send the changes to the printer. • Submit & Send test mail to send the changes to the printer and test your new settings. PX4i and PX6i High Performance Printer User Guide...
  • Page 84: Configuring Snmp Settings

    4. After you add a trap, it appears in the Trap Address Settings list. You can edit or delete each trap in the list by clicking Edit or Delete. 5. Click Submit SNMP settings. PX4i and PX6i High Performance Printer User Guide...
  • Page 85: Configuring Tcp/Ip Settings

    Use the TCP/IP settings page to view and change TCP/IP network settings. To configure TCP/IP settings 1. Click Network Admin > TCP/IP. 2. View or update your settings. 3. Click Submit TCP/IP settings. PX4i and PX6i High Performance Printer User Guide...
  • Page 86: Configuring The Network Type

    NET1 Queuing: Determines whether queuing for the TCP port is turned on, off, or enabled for multiple network connections (Multi). Configuring the Network Type Use the Network Type page to choose whether you are using an Ethernet or wire- less 802.11 network. PX4i and PX6i High Performance Printer User Guide...
  • Page 87: Configuring Avalanche Settings

    Ethernet. You need to change the command through the Setup menu or send a command through a serial connection. Configuring Avalanche Settings Use the Avalanche page to view and change Wavelink Avalanche settings. PX4i and PX6i High Performance Printer User Guide...
  • Page 88: Configuring Smartsystems Settings

    Enter your user name and password in the entry fields. authorization Configuring SmartSystems Settings Use the SmartSystems page to view or change the SmartSystems server IP address and the master port number. PX4i and PX6i High Performance Printer User Guide...
  • Page 89: Configuring Wireless Lan Settings

    Note: The Wireless LAN settings are only available if your printer has the wireless 802.11 radio interface option installed and is running Fingerprint 8.77.0 or later, or IPL v2.77.0 or later To configure wireless LAN settings 1. Click Network Admin > Wireless LAN. PX4i and PX6i High Performance Printer User Guide...
  • Page 90: Configuring 802.1X Settings

    Configuring 802.1x Settings The 802.1x settings page is only available if you have the optional wireless inter- face installed in your printer. Use the 802.1x page to view and change 802.1x secu- rity settings. PX4i and PX6i High Performance Printer User Guide...
  • Page 91 PAC file fails authenticating the printer to the network. You can manually import a PAC file using a pass phrase the same way you install a certificate. Automatic Provision Set Automatic PAC file Provisioning to on or off. (PAC) PX4i and PX6i High Performance Printer User Guide...
  • Page 92: Configuring Your Printer With Printset

    To configure the printer with PrintSet 1. Make sure that you have a PC running Microsoft Windows 2000 or later. 2. Download PrintSet from the Downloads page of the Honeywell website at www.honeywellaidc.com. 3. Connect your printer to your PC using a serial cable. For help, see "Connecting the Printer to a PC Through the Serial Port"...
  • Page 93: Configuring Your Printer Using Smartsystems Foundation

    The license also enables Scan-to-Connect, which makes con- necting additional PX4i and PX6i printers to your secure wireless network as easy as reading bar codes.
  • Page 94: Choosing An Ethernet Or Wireless Network

    2. Schedule the printer updates or manually initiate an update using the Avalanche Administrative Console. For more information on using Wavelink Avalanche, contact your local Honeywell representative or visit the Wavelink website at www.wavelink.com. Choosing an Ethernet or Wireless Network If you have an 802.11 wireless radio option installed in your printer, you need to...
  • Page 95: Choosing The Network Type Using Printer Commands

    3. Reboot the printer for the change to take effect. Upgrading Firmware The latest firmware and software is available for download from the Downloads page on the Honeywell website at www.honeywellaidc.com. You can upgrade your printer’s firmware using: • PrintSet. You can download PrintSet from the downloads page for the printer on the Honeywell website at www.honeywellaidc.com.
  • Page 96: To Upgrade Using Printset

    To upgrade using PrintSet 1. Download the latest version of PrintSet from the Honeywell website at www.honeywellaidc.com. 2. Select File > Add Printer. The Add Printer Wizard starts. 3. Under My Printers, select your printer. 4. Go to Printer > Firmware Wizard.
  • Page 97: To Upgrade Using A Serial Or Usb Connection

    Honeywell website at www.honeywellaidc.com. • Fingerprint or IPL commands. For help, see the Fingerprint Command Reference Manual or the IPL Command Reference Manual. • a CompactFlash card or external 2 GB USB mass storage device. PX4i and PX6i High Performance Printer User Guide...
  • Page 98 PX4i and PX6i High Performance Printer User Guide...
  • Page 99: Chapter 4 - Troubleshooting

    Keep in mind that some error messages: • are specific to the type of firmware you are running. • have corresponding error numbers. • cause the Ready-to-Work indicator to blink or turn off. PX4i and PX6i High Performance Printer User Guide...
  • Page 100: Fingerprint Error Messages

    ERROR statement. When errors added to the built-in error handling occur, this event is set. The text included in the SNMP trap is the standard text corresponding to the error. PX4i and PX6i High Performance Printer User Guide...
  • Page 101: Ipl Error Messages

    Blinking 1005 "Loading Media" on page 5. Ribbon Out The printer is out of transfer ribbon. Load a new roll of ribbon. For Blinking 1031 helps, see "Loading Ribbon" on page 38. PX4i and PX6i High Performance Printer User Guide...
  • Page 102 Ready-to-Work indicator to turn off. Printer turned off Maintenance Psu Over Temp Power supply over temperature Printhead Hot The printhead is overheated and needs to cool down. Wait for printing to resume automatically. PX4i and PX6i High Performance Printer User Guide...
  • Page 103: Troubleshooting Printer Problems And Finding Solutions

    Try these possible solutions in order: • The printhead may be failing. Replace the printhead. For help, see "Replacing the Printhead" on page 105. • The strobe signal may be failing. For help, contact your service representative. PX4i and PX6i High Performance Printer User Guide...
  • Page 104 The sensors may be dirty. Clean the media guides. For help, see "Cleaning the Media Guides" on page 101. • The sensors may need to be replaced. For help, contact your Honeywell service representative. PX4i and PX6i High Performance Printer User Guide...
  • Page 105: Networking Problems And Possible Solutions

    RFID media. • is being used with a level of security that is not allowed by the tag type. Make sure that you are using the appropriate media for your application. PX4i and PX6i High Performance Printer User Guide...
  • Page 106: Resetting The Printer

    To reset the printer using the keypad 1. Turn off the printer. 2. Open the right cover and lift the printhead. 3. Turn on the printer and press and hold the key until the printer beeps. PX4i and PX6i High Performance Printer User Guide...
  • Page 107: Adjusting The Printer

    A poorly adjusted pressure arm may be detected by a weaker printout on either side of the media path. To adjust the pressure arm 1. Turn off the printer. PX4i and PX6i High Performance Printer User Guide...
  • Page 108 6. When the pressure arm is centered, tighten the knob to secure the arm. 7. Adjust the edge guides. 8. If necessary, load ribbon. 9. Close the front door and media cover. PX4i and PX6i High Performance Printer User Guide...
  • Page 109: Adjusting The Label Stop Sensor

    Note: You can also use the markings, spaced at 1 cm (0.39 in) intervals, on the lower guide plate. This method can be especially useful for black marks. Be sure to measure the lateral position of the black marks with a ruler before loading the media. PX4i and PX6i High Performance Printer User Guide...
  • Page 110 LSS AUTO 10. Check mark detection: • Lift the printhead. • Slowly pull out the media. When the LSS detects a black mark, the cursor moves to the left. LSS AUTO PX4i and PX6i High Performance Printer User Guide...
  • Page 111: Adjusting The Printhead Pressure

    To adjust the printhead pressure 1. Turn the adjustment knob clockwise for more pressure and a darker printout (+) or counter-clockwise for less pressure (-) and a lighter printout. PX4i and PX6i High Performance Printer User Guide...
  • Page 112: Adjusting The Label Taken Sensor

    Step 2. Enter a new LTS value within the range indicated in the LTS Adjust menu (0 to 10). Maintaining the Printer To keep your printer working properly, you should perform regular maintenance. PX4i and PX6i High Performance Printer User Guide...
  • Page 113: Cleaning The Printer

    Caution: Use only the cleaning agents specified in this section. Honeywell is not responsible for damage caused by any other cleaning materials used on this printer. Clean the printer with a cotton swab saturated with alcohol.
  • Page 114 Warning: Isopropyl alcohol [(CH 3)2CHOH; CAS 67-63-0] is a highly flammable, moderately toxic, and mildly irritating substance. To clean the media guides 1. Open the front door and media cover. 2. Pull the upper guide straight out. PX4i and PX6i High Performance Printer User Guide...
  • Page 115 Warning: Isopropyl alcohol [(CH 3)2CHOH; CAS 67-63-0] is a highly flammable, moderately toxic, and mildly irritating substance. To clean the printhead 1. Turn off the printer. PX4i and PX6i High Performance Printer User Guide...
  • Page 116 3. Turn the printhead lift lever counter-clockwise to raise the printhead. 4. Remove any media and transfer ribbon. 5. Open the cleaning card envelope and pull out the cleaning card. Read the warning text. PX4i and PX6i High Performance Printer User Guide...
  • Page 117: Replacing The Printhead

    You must turn off the power before replacing the printhead. The firmware can only detect the new printhead when the printer is restarted. To replace the printhead 1. Turn off the printer. PX4i and PX6i High Performance Printer User Guide...
  • Page 118 2. Open the front door and media cover. 3. (PX6i only) Pull the locking handle down. PX4i and PX6i High Performance Printer User Guide...
  • Page 119 4. Turn the printhead lift lever counter-clockwise to raise the printhead. 5. Remove any media and transfer ribbon. 6. Pull the printhead bracket away from the magnet in the pressure arm. PX4i and PX6i High Performance Printer User Guide...
  • Page 120 7. Disconnect the hooks of the printhead bracket from the shaft, and pull out the printhead as far as the cables allow. 8. Disconnect the cables from the printhead. Note the snap-lock on the inner connector. Pull at the connectors, not at the cables. PX4i and PX6i High Performance Printer User Guide...
  • Page 121 9. Connect the two cables to the replacement printhead. 10. Connect the hooks of the printhead bracket to the headlift shaft. Make sure that the cables are not in the way. PX4i and PX6i High Performance Printer User Guide...
  • Page 122 12. (PX6i only) Push the locking handle up. 13. Load a new supply of media and ribbon. For help, see "Loading Media" on page 5 and "Loading Ribbon" on page 38. PX4i and PX6i High Performance Printer User Guide...
  • Page 123: Appendix A - Specifications

    APPENDIX SPECIFICATIONS Physical Specifications PX4i Dimensions:27.5 x 48.2 x 23.8 cm (10.8 x 19.0 x 9.4 in) PX4i Weight:12.85 kg (28.4 lb) PX6i Dimensions:33.5 x 48.2 x 23.8 cm (13.2 x 19.0 x 9.4 in) PX6i Weight:14.8 kg (32.6 lb)
  • Page 124: Interfaces

    ± 450 m (1476 ft) of ribbon Ribbon Roll Core Inner 25 mm (1 in) Diameter Print Directions Interfaces This section describes the standard interfaces available on the PX4i and PX6i printers. PX4i and PX6i High Performance Printer User Guide...
  • Page 125: Rs-232 Serial Interface

    The printer supports USB full speed v2.0 Host. To use the USB interface to print from a PC, you need to have the Honeywell printer driver installed on your PC. For help setting up USB communications, see "Connecting the Printer to a PC Through the USB Device Port"...
  • Page 126: Usb Host Interface

    The interface supports 10/100 Mbps Fast Ethernet (10BASE-T, 100BASE-TX) and is fully compliant with the IEEE 802.3u standard. The network card MAC address can be found on the label below the socket. Ethernet Socket Ethernet Connector PX4i and PX6i High Performance Printer User Guide...
  • Page 127: Parallel Ieee 1284 Interface

    Printer nAutoFd 15 to 16 Not connected Chassis ground External +5 V DC Max 500 mA 19 to 30 Signal ground nInit nFault Printer Signal ground 34 to 35 Not connected nSelectIn PX4i and PX6i High Performance Printer User Guide...
  • Page 128: Media Specifications

    170 mm (6.69 in) Minimum 76.0 mm (3.00 in) Media Type Set media type to one of these values: • Fingerprint: • FIX LENGTH STRIP • VAR LENGTH STRIP • IPL: CONTINUOUS PX4i and PX6i High Performance Printer User Guide...
  • Page 129: Self-Adhesive Strip

    External Media Width Excluding Liner (c) Printer Measurement Value PX4i Maximum 118.4 mm (4.66 in) Minimum 23.8 mm (0.94 in) PX6i Maximum 168.4 mm (6.63 in) Minimum 74.4 mm (2.93 in) PX4i and PX6i High Performance Printer User Guide...
  • Page 130: Self-Adhesive Labels

    Liner (b) The backing paper must not extend more than a total of 1.6 mm (0.06 in) outside the labels and should protrude equally on both side. Recommended minimum transparency: 40% (DIN 53147). PX4i and PX6i High Performance Printer User Guide...
  • Page 131 (0.28 in), that batch printing is used, and that no pull back of the media is performed. Honeywell does not guarantee that such short labels will work, but it is up to users to test this in their unique application.
  • Page 132: Tickets With Gaps (Gap Stock)

    Tickets With Gaps (Gap Stock) Media Width (a) Printer Measurement Value PX4i Maximum 120 mm (4.72 in) Minimum 25.0 mm (1.00 in) PX6i Maximum 170 mm (6.69 in) Minimum 76.0 mm (3.00 in) PX4i and PX6i High Performance Printer User Guide...
  • Page 133 7 mm (0.28 in), that batch printing is used, and that no pull back of the media is performed. Honeywell does not guarantee that such short tickets will work, but it is up to users to test this in their unique application LSS Detection Position (c) This position is variable.
  • Page 134: Tickets With Black Mark (Mark Stock)

    20.0 mm (0.8 in) Maximum 6,143 mm (241 in) Depends on SDRAM size. LSS Detection Position (c) This position is variable. For help, see "Adjusting the Label Stop Sensor" on page 97. PX4i and PX6i High Performance Printer User Guide...
  • Page 135 Fingerprint, you can use the command LBLCOND to temporarily disable the sensor for a specified amount of media feed to avoid unintentional detection. For help, see the Fingerprint Command Reference Manual. PX4i and PX6i High Performance Printer User Guide...
  • Page 136: Media With Rfid Tags Or Inlays

    Media With RFID Tags or Inlays When printing on RFID media, special consideration must be taken to the position and shape of the tag. Specific recommendations for different kinds of Honeywell- approved RFID media can be found on the Honeywell website at www.honey- wellaidc.com.
  • Page 137 The printer can accommodate these interface boards: • 802.11 Radio Interface Board • Parallel Interface Board (IEEE 1284) • Double Serial Interface Board PX4i and PX6i High Performance Printer User Guide...
  • Page 138 • Serial/Industrial Interface Board • RFID/Serial Interface Board PX4i and PX6i High Performance Printer User Guide...
  • Page 139: Appendix B - Default Settings

    Character length Parity None Stop bits Flow control RTS/CTS Disable ENQ/ACK Disable XON/XOFF; data to host Disable XON/XOFF; data from host Disable New line CR/LF Receive buffer 1024 bytes Transmit butter 1024 bytes PX4i and PX6i High Performance Printer User Guide...
  • Page 140 Ethernet (if no 802.11 radio is installed) Wireless 802.11 (if an 802.11 radio is installed) RFID Parameters Parameter Default Value Mode Enable Tagadjust Retries Voidtext Fieldstrength Feedadjust Parameters Parameter Default Value Startadjust Stopadjust PX4i and PX6i High Performance Printer User Guide...
  • Page 141 Len (slow mode) Print Defines Parameters Parameter Default Value Head resistance Testprint Print speed 100 mm/sec LSS test Clip default Cmd language Label taken sensor (LTS) LTS adjust LTS test LTS value PX4i and PX6i High Performance Printer User Guide...
  • Page 142: Ipl Default Configuration

    Broadcast MAC address Network type Ethernet (if no 802.11 radio is installed) Wireless 802.11 (if an 802.11 radio is installed) RFID Parameters Parameter Default Value Mode Enable Tagread Tagadjust Retries Voidtext Fieldstrength PX4i and PX6i High Performance Printer User Guide...
  • Page 143 LBL rest point Form adj dots X Form adj dots Y Ribbon low Paper low Configuration Parameters Parameter Default Value Emulation mode None Print speed 4 in/sec Cutter Not installed LTS calibration Not installed PX4i and PX6i High Performance Printer User Guide...
  • Page 144 PX4i and PX6i High Performance Printer User Guide...
  • Page 145: Appendix C - Setup Menus

    DATA TO HOST XON/XOFF: 19200 BAUDRATE: DATA FROM HOST 38400 SER-COM,UART1: SER-COM,UART1: SER-COM,UART1: NEW LINE REC BUF TRANS BUF NEW LINE: REC BUF: TRANS BUF: CR/LF 10000 1024 NEW LINE: NEW LINE: PX4i and PX6i High Performance Printer User Guide...
  • Page 146 RFID RFID: RFID: RFID: RFID: RFID: MODE TAGADJUST RETRIES VOIDTEXT FIELDSTRENGTH MODE: TAGADJUST: RETRIES: VOIDTEXT: FIELDSTRENGTH: ENABLE VOID MODE: DISABLE Read-only Fingerprint Feedadj Menu SETUP: FEEDADJ FEEDADJ: FEEDADJ: STARTADJ STOPADJ STARTADJ: STOPADJ: PX4i and PX6i High Performance Printer User Guide...
  • Page 147 LTS TEST CLIP DEFAULT: CMD LANGUAGE: Direct Protocol CMD LANGUAGE: CMD LANGUAGE: REMOVE LABEL AND REMOVE LABEL LTS VALUE: ZSim CMD LANGUAGE: PRESS ENTER ENTER TO STOP DSim SENSITIVITY 10 OUT OF 9-10 PX4i and PX6i High Performance Printer User Guide...
  • Page 148: Ipl Setup Menus

    NETWORK: NETWORK: NETWORK: NAMESERVER NAMESERVER6 DHCP RESPONSE MAC ADDRESS NETWORK TYPE NAMESERVER: NAMESERVER6: DHCP RESPONSE: MAC ADDRESS: NETWORK TYPE: 0.0.0.0 00::0 BROADCAST nnnnnnnnnnnn Ethernet DHCP RESPONSE: NETWORK TYPE: UNICAST Wireless 802.11 Read_only PX4i and PX6i High Performance Printer User Guide...
  • Page 149 PAPER LOW LBL REST POINT: FORM ADJ DOTS X: FORM ADJ DOTS Y: RIBBON LOW: PAPER LOW: 0/2/4/6/8/10/15/20/25/ 0/2/4/6/8/10/15/20/25/ 0/2/4/6/8/10/15/20/25/ 0/5/10/15/20/25/30/35/ 0/10/20/30/40/50/60/70/ 30/-30/-25/-20/-15/-10/ 30/-30/-25/-20/-15/-10/ 30/-30/-25/-20/-15/-10/ 40/45/50/55/60/65/70/ 80/90/100/110/120/130/ -8/-6/-4/-2 -8/-6/-4/-2 -8/-6/-4/-2 75/80 140/150 PX4i and PX6i High Performance Printer User Guide...
  • Page 150 Press E 86XX-10MIL 86XX-10MIL EMULATION MODE: EMULATION MODE: 4 IN/SEC 4 IN/SEC SENSITIVITY 9 SENSITIVITY 9 86XX-15MIL 86XX-15MIL OUT OF 8-14 OUT OF 8-14 Read only, Read only, press E press E PX4i and PX6i High Performance Printer User Guide...
  • Page 151: Appendix D - Advanced Configuration

    Device Tree Structure This illustration shows the device tree structure of the printer. / (root) ADMIN boot card1 pffs images secure PX4i and PX6i High Performance Printer User Guide...
  • Page 152: Devices And Directories

    This directory is the CompactFlash (CF) card file system used to store files such as large fonts and images. You can also use the CF card to upgrade printer firmware. /dev This directory contains devices used for input/output, such as uart1, Flash, net1, parallel IEEE 1284. PX4i and PX6i High Performance Printer User Guide...
  • Page 153: Customizing The Printer Home Page

    From this file you can easily link to the printer configuration pages. The web server generates these web pages with dynamic information on the fly. This pro- cess makes the real-time generated pages of the printer appear in the Honeywell style. The colors and logo of the customer are ignored.
  • Page 154: Content Of A Web Style Guide File

    The optional environment variables are used to specify extra parameters; for instance, these variables permit to change the printer’s model name. The web server only recognizes the following model names: • PF2i • PF4i • PM4i • PX4i • PX6i PX4i and PX6i High Performance Printer User Guide...
  • Page 155 Due to the memory limits of the pffs the environment variables have very short name (4 bytes), which may make them less user friendly to use, but this allows more space to be used for the value of the variable. PX4i and PX6i High Performance Printer User Guide...
  • Page 156 If variables are specified more than one time, the last value is the one assumed. Use the FTP server to transfer the files. Example: The default Web Style Guide: bgco=%23ffffff&loat=src%3d\%22/rom/images/ itclogo1.gif\%22+align%3dbottom+alt%3d\%22Honeywell\ %22+border%3d0&cona=Honeywell&coli=copyright.htmf&suli=support.h tmf&suna=Support&suon=t&trna=EasyCoder PX4i and PX6i High Performance Printer User Guide...
  • Page 158 Honeywell 9680 Old Bailes Road Fort Mill, SC 29707 www.honeywellaidc.com ™ 935-024-004 REV A 05/18...

This manual is also suitable for:

Px6i

Table of Contents