Table of Contents
Advertisement
Quick Links
Advertisement
Table of Contents

Related Manuals for Honeywell PX940


Summary of Contents for Honeywell PX940
-
Page 1: User Guide
PX940 High Performance Industrial Printer User Guide... - Page 2 Disclaimer Honeywell International Inc. (“HII”) reserves the right to make changes in specifications and other information contained in this document without prior notice, and the reader should in all cases consult HII to determine whether any such changes have been made. The information in this publication does not represent a commitment on the part of HII.
-
Page 3: Table Of Contents
TABLE OF CONTENTS Customer Support ........................xi Technical Assistance ......................xi Product Service and Repair ....................xi Limited Warranty ........................xi Safety Warnings ........................xii Caution Statements......................xii Shipping the Printer ......................xiii Chapter 1 - Get Started ..................1 Features ............................. - Page 4 ZSim...............................7 DPL ..............................8 Smart Printing ...........................8 Access the Printer Web Page......................8 Set the Printer Command Language..................8 From the Printer Web Page ....................8 From the Main Menu ......................9 Chapter 2 - Set Up the Printer ..............11 Power Up the Printer........................11 Calibrate the Touch Screen......................12 To calibrate the screen from the website: ..............12 About the Media ...........................12...
- Page 5 Configure Wi-Fi Communications from the Web Page ........27 Configure Wi-Fi Communications from the Main Menu ........28 Install Authentication Certificates ................28 Printer Drivers..........................29 Install Honeywell Windows Driver ..................29 USB Host Port..........................29 Connect a USB Device ......................30 Chapter 4 - Configure the Printer..............31 Printer Configuration Menus ....................31...
- Page 6 Chapter 5 - About the Verifier..............41 Setting up the Verifier ........................41 Webpage ...........................42 Front Panel..........................42 Calibration ............................42 Verifier Calibration Card.....................42 Handling Instructions....................42 Calibrating the Printer......................43 Verifier Settings ..........................44 Verification Type ........................44 Passing Grade.........................44 Aperture ............................44 Maximum Consecutive Failures..................44 Verification Failure Action ....................44 Save Failed Label Images ....................44 Void Pattern ..........................45 Print Modes and Speed.......................45...
- Page 7 Report Header .........................51 Barcode Information ......................53 All Supported 1D Barcodes Overall Parameters ............54 2D Barcode, DataMatrix Overall Parameters .............55 1D barcode 10 line Profile Grading Parameters ............57 Summary Report........................58 Restore Default Verification Files..................58 Fingerprint Command ......................59 Chapter 6 - Troubleshooting.................61 System Information........................61 Statistics............................61 Printer Odometer .........................62...
- Page 8 Clean the Verifier (PX940V)....................73 Clean the Media Path ......................73 Clean the Exterior of the Printer..................73 Replace the Printhead .......................73 Replace the Platen Roller ......................74 Label Taken Sensor Calibration..................76 Label Gap and Black Mark Sensor Adjustments ............76 Chapter 8 - Product Specifications............. 79 Printer and Environmental Specifications ................79 Command Languages and Simulator Support Features ..........79 Print Sensors ..........................79...
- Page 9 System Network Services ....................92 Verifier Settings ..........................93 Maintenance Alerts ........................94 Appendix B - Print Labels with INPrint............95 The INPrint Page ..........................95 Print INPrint Labels ......................95 Appendix C - Accessories and Options............97 Printer Accessories and Options....................97 PX900/PX900V User Guide...
- Page 10 PX900/PX900V User Guide...
-
Page 11: Customer Support
Honeywell International Inc. provides service for all of its products through service centers throughout the world. To obtain warranty or non-warranty service, return your product to Honeywell (postage paid) with a copy of the dated purchase record. To learn more, go to www.honeywellaidc.com... -
Page 12: Safety Warnings
Caution: You must make sure that dangerous conditions cannot occur under any circumstances, even for a brief period of time. Caution: Carefully read the warning text on the envelope before using a cleaning card. PX940 User Guide... -
Page 13: Shipping The Printer
2. Remove media and ribbon (if installed) from the printer. 3. Lower the printhead and front arm. 4. Pack the printer in the original container. Note: Honeywell is not responsible for any damage caused during shipment/transit. PX940 User Guide xiii... - Page 14 PX940 User Guide...
-
Page 15: Chapter 1 - Get Started
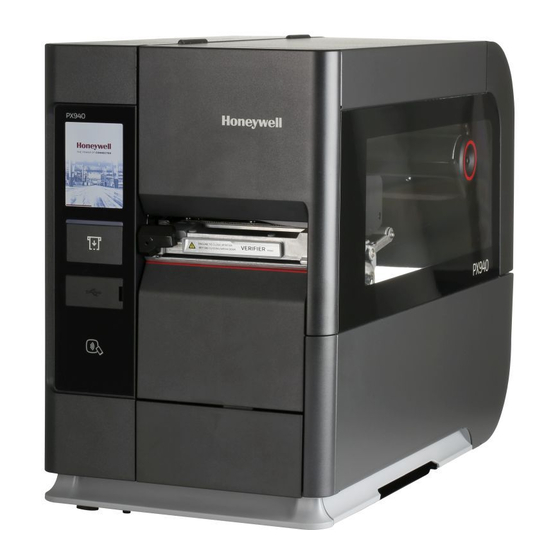
The PX940 industrial printer series includes: • PX940 productivity version (PX940A) • PX940 Verifier version (PX940V) with an integrated barcode verification module. Both PX940A and PX940V printers are rugged label printers that include integrated USB, RS-232, Ethernet, and Bluetooth LE interfaces. You can connect the printers to a single PC, a wired network, or a wireless (optional) network. -
Page 16: Back View (Ports And Power)
Press the Print button to advance the media. Ready Screen The Ready Screen appears when the printer is powered on and has completed its startup process. Note: The icon for Wi-Fi status appears only when the optional Wi-Fi module is installed. PX940 User Guide... - Page 17 Press the icon to view communications information for your printer. Printing Press the icon to view specific printer information. Bluetooth Press the icon to view Bluetooth LE information for your printer. Back Press this icon to navigate back through the printer menus. PX940 User Guide...
-
Page 18: Main Menu
Select Wizards to see a list of wizards that help you configure printing or communication settings, or calibrate the media sensors. Note: The printer cannot print while the Main Menu is showing. Exit the Main Menu and return to the Ready screen to begin printing. PX940 User Guide... -
Page 19: Navigate The Main Menu
Main menu except for the startup wizard. The startup wizard appears the first time you turn on the printer and after the printer has been reset to the factory default state. PX940 User Guide... -
Page 20: Printing Wizard
Return the status of the printer. • Control peripheral devices. • Format a label or receipt for printing. The printer supports these command languages and language simulator support options: • Autosense • Direct Protocol • Fingerprint • PX940 User Guide... -
Page 21: Autosense
ZSim The ZSim (Zebra Printer Language Simulator) interprets Zebra™ programs (ZPL II or later) without requiring any host programming changes. If you are sending ZPL label files to the printer, select ZSim as your printer command language. PX940 User Guide... -
Page 22: Dpl
Make sure that the printer has media and ribbon installed (if necessary). Follow the directions to Access the Printer Web Page. Once you are logged in to the printer web page, click the Configure tab. PX940 User Guide... -
Page 23: From The Main Menu
From the Ready screen, press the Main Menu button. From the Main Menu, press Settings > System Settings > General. Scroll down until you reach Command Language, and make your selection. Restart the printer: the printer starts up in the command language that you selected. PX940 User Guide... - Page 24 PX940 User Guide...
-
Page 25: Chapter 2 - Set Up The Printer
AC power. Press the power switch to turn on the printer. As the printer starts up, a progress bar appears, then the startup wizard appears. Follow the steps on the touch screen to complete the startup wizard. PX940 User Guide... -
Page 26: Calibrate The Touch Screen
Note: The PX940 series printers only support out-wound media. Load Media for Tear-Off Printing Tear-off printing is applicable to media with perforation. Printed labels, tickets, and other printed media are manually torn from the front of the printer. - Page 27 (PX940A) printhead and front arm lifted (PX940V) Load a media roll onto the media supply hub. Note: Make sure you push the roll all the way against the inner wall of the printer. PX940 User Guide...
- Page 28 Insert the media roll holder and tighten the screw. Route the media through the print mechanism, through the front arm. Adjust the media and dancer guides to hold the media in place. PX940 User Guide...
- Page 29 Turn the printhead lift lever clockwise to close the printhead and lower the front arm and click into place. front arm in place (PX940A) front arm in place (PX940V) Press the Print button to advance the media. 10. Close the media cover. PX940 User Guide...
-
Page 30: Load Media For Rewind Printing
Insert an empty media core onto the rewinder take-up hub. Round the media through the rewinder batch plate and tape leading edge of label to the empty media core to secure position. Route the media around the media rewinder. PX940 User Guide... -
Page 31: Load Media For Peel-Off Printing
Go to Main Menu > Setting > Printing > Media > Printing Mode, select Rewind from the list. Note: Honeywell recommends using non-perforated labels when using rewinder mode. Load Media for Peel-Off Printing Follow steps 1-9 from Load Media for Tear-Off Printing, then: Insert the media in the opening between the label dispenser and the platen roller. -
Page 32: Load Fanfold Media
Go to Main Menu > Setting > Printing > Media > Printing Mode, select Peel-Off from the list. Note: Honeywell recommends using non-perforated labels when using peel-off mode. Load Fanfold Media Note: Before loading fanfold media, insert an empty media core onto the rewinder take-up hub. -
Page 33: About The Ribbon
If you see a mark on the paper, your ribbon is wound ink out. = Ink in = Ink out Load Ribbon Open the media cover. Turn the printhead lift lever counterclockwise to raise the printhead and lift the front arm. Slide the ribbon roll onto the ribbon supply hub. PX940 User Guide... -
Page 34: Ribbon Removal
Remove used ribbon from the ribbon take-up hub when you change the roll of ribbon. Remove the used ribbon each time you change a new roll of media if the ribbon is less than the width of the printhead. To remove the used ribbon: PX940 User Guide... -
Page 35: Print A Test Label
Your test label prints. If print quality is low, go to Wizards > Printing > Print Quality. Note: You can use command languages, like Direct Protocol, and language simulators, like ZSim, to create and print labels. For more information, see the command reference manual for the language. PX940 User Guide... -
Page 36: Printhead Pressure And Toggle Position
If you are using media that is less than full-width (4 inches or 102mm), adjust the position of the toggle as necessary to provide the even pressure on the media. PX940 User Guide... -
Page 37: Toggle Settings
Media and ribbon slippage during Increase the pressure on both left and right printing at retract mode toggles. Narrow media (less than 2inch) Move the left toggle to the center of the media and decrease the pressure on the right toggle. PX940 User Guide... - Page 38 PX940 User Guide...
-
Page 39: Chapter 3 - Connect The Printer
When prompted, connect one end of the USB Type A cable to the back of the printer and connect the other end to your PC. Connect the Printer to Your Network These network interfaces provide features such as security, FTP server, web page, and Alert handling. PX940 User Guide... -
Page 40: Connect The Printer To An Ethernet Network
IP address. Open a web browser on your PC and click Login Type your Username and Password and click Login. Click the Configure tab. The Configuration Summary page appears. Click Communications > Bluetooth. The Bluetooth settings page appears. PX940 User Guide... -
Page 41: Configure Bluetooth Communications From The Main Menu
Note: If you are not using a DHCP network, Wi-Fi settings must be configured by using Honeywell PrintSet 5 through a USB connection to the printer. Send commands through a serial connection, or use the wizards and settings menus on the printer. -
Page 42: Configure Wi-Fi Communications From The Main Menu
-la. Note: Use the printer web page the Main Menu, or Honeywell PrintSet 5 to specify the certificate .pem file to use for security. -
Page 43: Printer Drivers
Access the Honeywell Technical Support Downloads portal at https:// hsmftp.honeywell.com. Download Honeywell Software Download Manager by clicking here in the web page. Install the Download Manager. Click on the (+) to expand the list. Then go to Software > Printers > Printer Drivers >... -
Page 44: Connect A Usb Device
FAT16 or FAT32. Connect the device to one of the USB host ports. If you connected a USB storage device to an LCD printer, select Tools > USB Menu for more options. PX940 User Guide... -
Page 45: Chapter 4 - Configure The Printer
Not all configuration items appear in each type of interface. Configuration Menu Description Printing Media and Print Quality System Settings General, Display, Audio, Manage I/O, Manage Services, and Maintenance Alerts Verification Settings Verification Settings Alerts Error, Warning, and Information Communications General, Security, and Network PX940 User Guide... -
Page 46: Printer Configuration
Access the Printer Web Page Open a browser window on your PC. In the location or address bar, type the printer IP address and press Enter. The printer web page appears. Click Login. The login page appears. PX940 User Guide... -
Page 47: Printer Webpage User Name And Password
Network Services. Make any changes to the settings you want to configure. To save your changes, click Save. 10. To reset all parameters on the page to the default settings, click Default Settings. PX940 User Guide... -
Page 48: Configure The Printer With Printset 5 Or Print Set Mc
Download the PrintSet 5 or Print Set MC from the App Store on iOS or Google Play Store on Android devices. You can download Honeywell applications to extend the capabilities of the printer. You may need to purchase a license to run some applications. To learn more about, licenses and other Honeywell software solutions, go to www.honeywellaidc.com... -
Page 49: Uploading From A Usb Storage Device
You may customize the Ready screen that appears on the printer. The background image you create must be: • 320 x 240 pixels. • named background_idle.png. Create a /display directory on your USB storage device. Copy your background_idle.png file to the /display directory on the USB storage device. PX940 User Guide... -
Page 50: Printer Profiles
Activate. The profile is loaded. To load a profile from another location, lick Browse and browse to the location of the file. Double-click the file to select it, then click Upload. The profile is uploaded to the printer. PX940 User Guide... -
Page 51: Save A Printer Profile From The Main Menu
HyperTerminal), a serial connection, or a network connection. All commands are case-sensitive. Note: To load printer profiles that modify communication settings that require itadmin rights, you must log in as an itadmin: RUN “su- p pass itadmin” for FD/DP. PX940 User Guide... -
Page 52: Install A Configuration File From A Usb Storage Device
From the Ready screen, press the Main Menu button. The Main Menu appears. Select Tools > USB Menu. Select Configuration. Select Export Configuration. A list of the available files appears. Select the file to export. Press OK when the confirmation message appears. PX940 User Guide... -
Page 53: Menu Shortcuts
Select the check mark icon at the bottom of the screen. To select applications: a. Select Programs. b. To add a Program, select each program and a check mark appears in each box. c. Select the check mark icon at the bottom of the screen. PX940 User Guide... -
Page 54: Customize The Printer Web Page
On the Home Page this area will show the current status of the printer. Right Top Bar define Displays the information about the printer/login/language as well as in maintop.lua printer’s status. Main Content Here is where all the content is displayed to the user. PX940 User Guide... -
Page 55: Chapter 5 - About The Verifier
Note: Do not power off the printer during printing/verification. This can result in loss of current verification reports. Setting up the Verifier The verifier can be configured through the webpage by clicking on Configure > Verification Settings. Through the front touch panel: PX940 User Guide... -
Page 56: Webpage
Calibration Calibrating the verifier maintains the accuracy of the verifier when scanning an image. Calibration is performed prior to the shipment of the printer. Note: Honeywell recommends calibrating the verifier every six months for maximum performance. Verifier Calibration Card The calibration card is used to calibrate the verifier. It is very important to follow the instructions on the calibration card packaging for proper care of the calibration card. -
Page 57: Calibrating The Printer
The card will move forward as the calibration process is running. Once completed, the front panel will show if the calibration pass or fail. Note: If Calibration fails, see Verifier Error Alerts and Solutions, beginning on page 65. PX940 User Guide... -
Page 58: Verifier Settings
Save Failed Label Images When enabled, the printer saves all failed label images in non-volatile memory. Maximum 100 images can be saved (if memory available). At maximum capacity oldest image file will be replaced by newest. PX940 User Guide... -
Page 59: Void Pattern
UPC-E • Interleaved 2 of 5 • ITF-14 • Data Matrix (square and rectangular) ECC 200 • ISBT Data Matrix Barcode Orientations • Picket or ladder orientation Barcode Size Supported • Minimum 1D barcode size: 10 mils PX940 User Guide... -
Page 60: Verification Length
Reprint all unverified labels and verification failed labels. The following diagrams show which labels will be reprinted in different scenarios. Scenario 1 • All blue labels will be reprinted and verified after error recovery. PX940 User Guide... - Page 61 All blue labels will be marked as FAIL in verification result database. Scenario 3 • Label verification in progress. • This label will be marked PASS in verification result database. Scenario 4 • Label verification in progress. • This label will be marked FAIL in verification result database. PX940 User Guide...
-
Page 62: Printing Errors
• Voiding the label and reprinting (default) • No voiding and proceed with subsequent print jobs. Note: In the Webpage menu, Verification > Verifier Image, you can access the last label image scan (if available) PX940 User Guide... -
Page 63: Failed Label Image File
• The printer will start saving from the next verification XML report and failed label image if any to the USB thumbdrive. • Select Remove USB in USB menu in order to safely remove the USB thumbdrive. PX940 User Guide... -
Page 64: Reporting And Statistics
ANSI grade. Each individual label report consists of 3 parts. • Report header • Barcode information • Barcode grading parameter (not applicable for Read/No Read verification type) • 1D Barcode 10 line profile grading parameter (not applicable for Read/No Read verification type) PX940 User Guide... -
Page 65: Report Header
Label Grade Indicate the lowest grade of the barcode in the label Example: <LabelGrade>3.3 (B)</LabelGrade> Label Status Verification status for the label, Pass or Fail Example: <LabelStatus>Pass</LabelStatus> Failure Reason for failed label. Reason Example: <FailureReason>Barcode verification fail</FailureReason> PX940 User Guide... - Page 66 Read/No ISO 15415/ General Content Description Read 15416 (out of scope) Image Failed label image file name Example: <Image>PX940V 0000001234567 1 20180322 093000.jpg</Image> Barcodes A total number of barcodes in this label PX940 User Guide...
-
Page 67: Barcode Information
X position Barcode X coordinate start position in pixel. Example: <XPos>100</XPos> Y position Barcode Y coordinate start position in pixel. Example: <YPos>100</YPos> Width Barcode width in pixels Example: <Width>720 pixels</Width> Height Barcode height in pixels Example: <Height>480 pixels</Height> PX940 User Guide... -
Page 68: All Supported 1D Barcodes Overall Parameters
Threshold reflectance profile, used for the initial identification of elements. Example: <GlobalThreshold>42.5%</GlobalThreshold> Print The contrast between bars and spaces or background. Contrast Example: Signal <PCS>99.4%</PCS> Average Bar Average bar gain or loss in percentage Gain Example: <BarGain>-1.1%</BarGain> PX940 User Guide... -
Page 69: 2D Barcode, Datamatrix Overall Parameters
Example: <L1 Grade="4.0"/> QZL1 (left quiet QZL1 in grade zone) Example: <QZL1 Grade="4.0"/> QZL2 (bottom QZL2 in grade quiet zone) Example: <QZL2 Grade="4.0"/> OCTASA (overall OCTASA in grade clock track and Example: solid area) <OCTASA Grade="4.0"/> PX940 User Guide... - Page 70 The minimum MOD value found in any module contained in the data region of the symbol Uniformity and does not affect the overall grade. Example: <ContrastUniformity>52.8%</ContrastUniformity> Print Growth X Print growth X in percentage Example: <PrintGrowthX>9.3%</PrintGrowthX> Print Growth Y Print growth Y in percentage Example: <PrintGrowthY>9.3%</PrintGrowthY> MatrixSize Matrix size Example: <MatrixSize>16x16</MatrixSize> PX940 User Guide...
-
Page 71: 1D Barcode 10 Line Profile Grading Parameters
The reflectance level midway between the maximum and minimum reflectance values in a scan reflectance profile used for the initial identification of elements. Example: <GlobalThreshold>41.0%</GlobalThreshold> Print Contrast Print Contrast Signal (PCS) in percentage Signal Example: <PCS>97.0%</PCS> Average Bar Gain Average bar gain in percentage Example: <BarGain>3.0%</BarGain> PX940 User Guide... -
Page 72: Summary Report
• PrintSet 5 • Web page • To restore the default verification database: Go to Webpage > Services > Restore Defaults > Verification Files Click Restore. PX940 User Guide... -
Page 73: Fingerprint Command
Read the label verification status 0 = Label verification not completed 1 = Label verification completed Read Label Verification Result Read label verification result 0 = Label verification pass Non-Zero = Label verification failed, and error code is returned. PX940 User Guide... - Page 74 PX940 User Guide...
-
Page 75: Chapter 6 - Troubleshooting
In the address bar, type the IP address of your printer and press Enter. The printer web page appears. Click the System Information tab. Click Statistics > System Information. The System Information page appears. For more detailed statistics, click another choice in the Statistics list. PX940 User Guide... -
Page 76: Printer Odometer
Click Login. The Login page appears. Type your Username and Password and then click Login. The default value for Username is itadmin and the default value for Password is pass. Click the Configure tab. The Configuration Summary page appears. PX940 User Guide... -
Page 77: Alert Notifications
From the printer Main Menu, select Settings > System Settings > General > Alert Notification Method. • From the printer web page, login and then click the Configure tab > System Settings > General > Alert Notification Method. PX940 User Guide... -
Page 78: Error Alerts And Solutions
The printer is going to start upgrading the firmware. Do not try to send anything to the printer. Printer is Rebooting The printer is going to restart. Wait until the printer is ready before attempting to communicate with it. Started The printer is in the process of starting up. PX940 User Guide... -
Page 79: Verifier Error Alerts And Solutions
• The contrast may be too low. Increase the contrast. • The printhead pressure may be too low. Increase the printhead pressure. • Replace the printhead. The printout is weaker on one Adjust the printhead balance. side PX940 User Guide... - Page 80 Make sure that bidirectional support is disabled. From the printer PC using a virtual COM port properties dialog box, click the Ports tab, and then clear the and printing stops. There are no Enable bidirectional support check box. errors. PX940 User Guide...
-
Page 81: Verifier Problems
There may be foreign particles on the media. Clean or replace the media • The printhead may be dirty. Clean the printhead. Decodability low grading Make sure that your print quality setting is appropriate for the type of media that you are using. PX940 User Guide... -
Page 82: Networking Problems
To restore all current system settings, select the System Settings check box. When you receive a message to reboot the printer on your desktop PC, click OK and restart the printer. Restore Defaults from the Main Menu Restore the printer’s defaults from the Tools menu. PX940 User Guide... -
Page 83: Restore Defaults With A Hardware-Based Reset
Upgrade the Printer Firmware Check for periodic updates to the printer firmware. The latest version of the firm- ware is available from the Honeywell Technical Support Downloads portal (https://hsmftp.honeywell.com). Go to Software > Printers > Industrial > PX940A PX940V > Current > Firmware) You can upgrade the printer firmware using: •... -
Page 84: Upgrade Firmware From The Printer Web Page
Insert the USB storage device into a USB host port. Restart your printer. An upgrading firmware message appears as the upgrade file is loaded into the printer memory. This process may take a few minutes. Remove the USB storage device. PX940 User Guide... -
Page 85: Chapter 7 - Maintenance
Caution: To avoid possible personal injury or damage to the printer, never insert any pointed or sharp objects into the printer. Caution: Use only the cleaning agents specified in this section. Honeywell is not responsible for damage caused by any other cleaning materials used on this printer. -
Page 86: Clean The Printhead
Cleaning the printhead on a regular basis is important for the life of the printhead and for the print quality. Note: Honeywell recommends cleaning the printhead each time you replace the media. Follow this procedure to clean the printhead using the cleaning card. If you need to clean additional residue from the platen roller or tear bar, use a cotton swab moistened with isopropyl alcohol. -
Page 87: Clean The Verifier (Px940V)
You need to replace the printhead periodically when it wears out due to the rapid heating and cooling process used during printing. How often you need to replace the printhead depends on factors such as what type of images you print, the type PX940 User Guide... -
Page 88: Replace The Platen Roller
14. Replace the media (and ribbon) in the printer. 15. Close the media cover, reconnect power, and turn on the printer. Replace the Platen Roller If the printer platen roller gets damaged or wears out, it may need to be replaced. PX940 User Guide... - Page 89 4. Turn the printhead lift lever counterclockwise to raise the printhead. 5. Pull out the verifier or front sensor knob toward the outside. 6. Pull down the front sensor (on PX940Amodel) or the verifier module (on PX940V model) toward the front side. PX940 User Guide...
-
Page 90: Label Taken Sensor Calibration
The sensor contains a blue LED that is strong enough to see through media. You can use the blue LED to help determine the proper location for the sensor. 1. Open the media cover. 2. Adjust the label gap and black mark sensor: PX940 User Guide... - Page 91 Turn the sensor adjustment knob counterclockwise to move the sensor toward the outside of the printer. • Turn the sensor adjustment knob clockwise to move the sensor toward the inside of the printer. 3. Close the media cover. PX940 User Guide...
- Page 92 PX940 User Guide...
-
Page 93: Chapter 8 - Product Specifications
CHAPTER PRODUCT SPECIFICATIONS Printer and Environmental Specifications 1. Go to www.honeywellaidc.com. 2. Navigate to PX940 product page. 3. Locate the Products tab. 4. Click on your printer model. 5. Select one of the following tabs: • Specifications Printer specifications are listed here. -
Page 94: Network Services
Ping • IPSEC/IKEv2 over IPv6 • • • Supports 10/100Mbps Ethernet (10BASE-T, 100BASE-T) • Sentience Fonts Resident Fonts • Andale Mono • Andale Mono Bold • CG Times • CG Times Bold • CG Triumvirate Condensed Bold PX940 User Guide... -
Page 95: Downloadable Fonts
• Century Schoolbook Roman • Dutch 801 Roman • Honeywell Sans TT Bold • Letter Gothic • MHeiGB18030C-Medium • Monospace 821 • Monospace 821 Bold • OCR A • OCR B • Univers • Univers Bold • Univers Condensed Bold •... -
Page 96: Supported Font Types
2D Barcode Symbologies • Aztec • Code 16K • Code 49 • Data Matrix • DotCode • Grid Matrix • MaxiCode • MicroPDF417 • MSI (modified Plessey) • PDF417 • Planet Code • Plessey Code PX940 User Guide • Postnet... -
Page 97: Graphic File Types
• QR Code • RSS-14 • USPS 4-State Customer barcode Graphic File Types • • • • PX940 User Guide... - Page 98 PX940 User Guide...
-
Page 99: Appendix A - Default Settings
Specifies if software flow control (XON/XOFF) is used to Disable manage the rate of data transmission from the host. New Line Character Defines the characters that the printer echoes to the host to CR/LF indicate that it has moved to a new line. PX940 User Guide... -
Page 100: Ethernet
Bluetooth network. Maximum length is 16 characters. and serial number. Media Settings To view these settings: • From the printer Main Menu, select Settings > Printing > Media. • From the printer web page, click the Configure tab. Go to Printing > Media. PX940 User Guide... - Page 101 Measurement parameter. Media margin (X) Media Width Sets the width of the printable area measured from the Variable media margin (X) across the printhead. Unit of measurement is defined in the Unit of Measure parameter. Media width (X) PX940 User Guide...
- Page 102 10 mm. This value sets an additional amount of media to be printed. Unit of measurement is defined in the Unit of Measurement parameter. Range is 0 to 3200. LTS Sensitivity Sets the sensitivity of the label taken sensor. Level PX940 User Guide...
-
Page 103: Print Quality Settings
Sets the image darkness for media and ribbon. Adjust this parameter with the Media Sensitivity parameter. Range is 1 to 100. Contrast Adjusts the blackness of the printing on the label in 2% increments from -10% to +10%. PX940 User Guide... -
Page 104: System Settings
Determines how the zero character is printed Disable and displayed on the screen. Disable (0) or Enable ( Time Zone Sets the time zone. (UTC 00:00) Universal Time DST Adjust Determines if Daylight Saving Time is Disable automatically adjusted. PX940 User Guide... -
Page 105: Display And Audio Settings
Volume Sets the printer volume. Note: PX940 printers are Energy Star qualified, but require the brightness set to Low and power consumption may vary in actual application with Applicator Board or Industrial Interface Board. Energy Star is qualified only for Non-Applicator or Non-Industrial Interface. -
Page 106: System Network Services
Address is ntp0.cornell.edu, and the default Port Number is 123. Device Determines if the printer can use 9300 TCP/IP port to Disable Management communicate with HCD. Connectivity Determines if the printer can communicate with Honeywell Cloud Disable Agent on port 10000. PX940 User Guide... -
Page 107: Verifier Settings
Label Images non-volatile memory. Maximum 100 images can be saved (if memory available). At maximum capacity oldest image file will be replaced by newest. Void Pattern Select the void pattern type to mark the failed label. Diamond PX940 User Guide... -
Page 108: Maintenance Alerts
Ribbon Low alert is sent, if this alert is configured. Range is 0 to 200 mm. Memory Low Sets the minimum percentage of free RAM memory and/or Flash memory before the Memory Low alert (if this alert is configured) is sent. Unit is percentage. PX940 User Guide... -
Page 109: Appendix B - Print Labels With Inprint
If you created the web form yourself, click Customer Downloaded and then select the web form in the list. • To use one of the Honeywell resident web forms, click Resident and then select the web form in the list. 5. Type information in the web form as needed. - Page 110 PX940 User Guide...
-
Page 111: Appendix C - Accessories And Options
UART port and GPIO port on the back of the printer. Verifier Calibration PX940V Use this card to calibrate the verifier. Card Note: To view the accessory manuals, visit the PX940 product page at www.honeywellaidc.com PX940 User Guide... - Page 112 PX940 User Guide...
- Page 114 Honeywell 9680 Old Bailes Road Fort Mill, SC 29707 www.honeywellaidc.com ™ PX900-EN-UG Rev B 06/19...
Need help?
Do you have a question about the PX940 and is the answer not in the manual?
Questions and answers
Printing will print test page but not data from connected PC
The Honeywell PX940 printer may be able to print a test page but not data from a connected PC because the required printer drivers are not installed on the PC. Although Windows may auto-detect the printer when connected via USB, the correct Honeywell printer drivers must still be manually installed for proper operation.
This answer is automatically generated
I have a PX940 that has a broken verifier, it snapped at the hinge. I'm looking for a parts manual.