Table of Contents
Advertisement
Quick Links
Advertisement
Table of Contents

Related Manuals for Honeywell PX45


Summary of Contents for Honeywell PX45
- Page 1 PX45 and PX65 High Performance Industrial Printer User Guide...
- Page 2 Disclaimer Honeywell International Inc. (“HII”) reserves the right to make changes in specifications and other information contained in this document without prior notice, and the reader should in all cases consult HII to determine whether any such changes have been made. HII makes no representation or warranties regarding the information provided in this publication.
-
Page 3: Table Of Contents
ZPL Command Language Simulator (ZSim) ..............7 Datamax Programming Language (DPL)..............7 Smart Printing (C#) ........................ 7 Set the Printer Command Language ..................7 Set the Command Language from the Main Menu........... 8 PX45 and PX65 High Performance Printer User Guide... - Page 4 Connect the Printer to an Ethernet Network..............54 Printer Drivers ..........................54 Install Printer Drivers......................55 Install Authentication Certificates .................55 USB Host Port ..........................56 Connect a USB Device......................56 Chapter 4 - Configure the Printer ............... 57 Printer Configuration Menus....................57 Printer Configuration......................57 PX45 and PX65 High Performance Printer User Guide...
- Page 5 Replace Standard Web Page.....................68 Save and Upload the Customized file ................68 Chapter 5 - Troubleshooting.................69 System Information........................69 Statistics............................69 Printer Odometer .........................70 Maintenance Alerts ........................70 Set Alerts ...........................70 Alert Notifications .........................71 Error Alerts and Solutions....................72 PX45 and PX65 High Performance Printer User Guide...
- Page 6 Chapter 7 - Product Specifications............. 91 Printer and Environmental Specifications ................91 Supported Command Languages ..................91 Media Sensors ..........................91 Network Services..........................92 Fonts ..............................92 Resident Fonts........................92 Downloadable Fonts ......................94 Supported Font Types ......................94 Bar Code Symbologies ......................95 PX45 and PX65 High Performance Printer User Guide...
- Page 7 System Alerts ..........................107 Error ............................108 Warning ..........................108 Information ...........................109 Network Services........................109 Avalanche ..........................109 DNS ............................110 Net1............................111 Email Server..........................111 SNMP ............................112 WINS ............................113 Web Server..........................113 Time Server ...........................113 Connectivity Agent......................114 XML Printing ........................114 PX45 and PX65 High Performance Printer User Guide...
- Page 8 Chapter B - Print Labels with INPrint............115 The INPrint Page ........................115 Create and Save a Web Form..................115 Sample Code ........................116 Print INPrint Labels......................117 viii PX45 and PX65 High Performance Printer User Guide...
-
Page 9: Customer Support
For our latest contact information, go to sps.honeywell.com. Product Service and Repair Honeywell International Inc. provides service for all of its products through service centers throughout the world. Go to sps.honeywell.com and select Support to find a service center near you or to get a Return Material Authorization number (RMA #) before returning a product. -
Page 10: Safety Warnings
Caution: Observe all safety and accident prevention regulations applicable to your specific region and application. Caution: You must implement both hardware and software safety precautions to prevent the possibility of undefined system states. PX45 and PX65 High Performance Printer User Guide... -
Page 11: Chapter 1 - Get Started
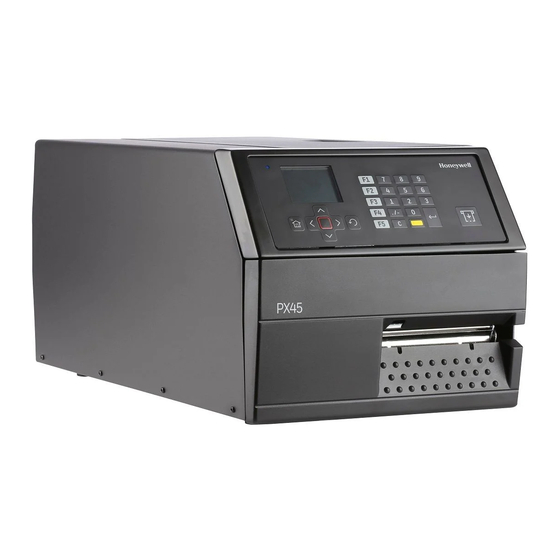
24/7 printing in harsh industrial, environments and easily adapt to changes in host environments or applications. The PX45 and PX65 support a maximum print width of four and six inches, respectively. Throughout this manual, both models of the printer are referred to as “printer”... -
Page 12: Print/Feed Button
Press the Enter button to select the highlighted item or save settings in a menu or list. Back button. Returns to the previous menu or page, or stops a running Fingerprint application. PX45 and PX65 High Performance Printer User Guide... -
Page 13: About The Ready Screen
About the Main Menu The Main Menu contains features to help you configure and manage your printer. Note: The printer cannot print while the Main Menu is on the screen. PX45 and PX65 High Performance Printer User Guide... -
Page 14: About The On-Screen Keypads
About the On-screen Keypads When you select a setting that requires you to type characters, an alphanumeric or numeric keypad appears. To access the extended numeric keypad, select the 123 key on the alphanumeric keypad. PX45 and PX65 High Performance Printer User Guide... -
Page 15: About The Printer Wizards
Calibrates the label stop sensor and displays current print settings. Date & Time Calibrates date and time settings, such as time zone. Lets you set the date and time and specify the format. PX45 and PX65 High Performance Printer User Guide... -
Page 16: Printer Command Languages
Smart Printing applications. Direct Protocol lets you combine predefined layouts and variable data to create labels, tickets, and tags. If you are using barcode software, select Direct Protocol as your printer command language. PX45 and PX65 High Performance Printer User Guide... -
Page 17: Fingerprint
C#, select Smart Printing as your printer command language. Set the Printer Command Language Use one of these methods to change the printer command language: • Main Menu • Printer Web Page • PrintSet 5 PX45 and PX65 High Performance Printer User Guide... -
Page 18: Set The Command Language From The Main Menu
8. Select a different printer command language from the Command Language list, and then click Save. 9. Click the Services tab. 10. Click Reboot Printer, and then click Reboot. The printer restarts in the command language you selected. PX45 and PX65 High Performance Printer User Guide... -
Page 19: Printer Options And Accessories
The printer can accommodate these interface boards: -802.11 Radio Interface Board -Parallel Interface Board (IEEE 1284) -Double Serial Interface Board -Serial/Industrial Interface Board -RFID Interface Board -Applicator Interface Board PX45 and PX65 High Performance Printer User Guide... - Page 20 PX45 and PX65 High Performance Printer User Guide...
-
Page 21: Chapter 2 - Set Up The Printer
SET UP THE PRINTER About the Media The PX45 and PX65 can print on labels, tickets, tags, and continuous stock in vari- ous forms. The method you use to load media depends on how you want the printer to operate. The PX45 and PX65 can print in these modes: •... - Page 22 To load media for tear-off printing 1. Turn off the printer. 2. Open the front door and media cover. 3. (PX65 only) Pull the locking handle down. PX45 and PX65 High Performance Printer User Guide...
- Page 23 4. Raise the printhead by turning the printhead lift lever counter-clockwise. 5. If necessary, remove the empty core from the media supply roll post. PX45 and PX65 High Performance Printer User Guide...
- Page 24 6. If you are using a media roll with a 76 mm (3 in) core, install a 3-inch adapter on the media supply hub. 7. Fit a new roll of media on the supply post and push the roll in as far as it will go. PX45 and PX65 High Performance Printer User Guide...
- Page 25 The slack absorber can be routed for better access and then snap- locked in open position. 9. Route the media through the print unit and push it in as far as it will go. Route the Media PX45 and PX65 High Performance Printer User Guide...
- Page 26 Media Path 10. Lower the printhead by turning the printhead lift lever clockwise. 11. (PX65 only) Push the locking handle up. PX45 and PX65 High Performance Printer User Guide...
-
Page 27: Loading Media For Peel-Off Printing
Consult your media supplier or test the media to make sure that it is suitable for your application. PX45 and PX65 High Performance Printer User Guide... - Page 28 To load media for peel-off printing 1. Turn off the printer. 2. Open the front door and media cover. 3. (PX65 only) Pull the locking handle down. PX45 and PX65 High Performance Printer User Guide...
- Page 29 4. Raise the printhead by turning the printhead lift lever counter-clockwise. 5. Pull out the red clip on the liner take-up hub and dispose of any wound-up liner. 6. Remove any empty core from the media supply hub. PX45 and PX65 High Performance Printer User Guide...
- Page 30 7. If your are using a media roll with a 76 mm (3 in) core, fit an adapter on the media supply hub. 8. Fit a new roll of media onto the media supply hub and push the roll in as far as it will go. PX45 and PX65 High Performance Printer User Guide...
- Page 31 The slack absorber can be rotated for better access and then snap- locked in open position. 10. Route the media through the print unit and push it in as far as it will go. PX45 and PX65 High Performance Printer User Guide...
- Page 32 11. Pull out approximately 40 cm (15 in) of labels and remove the labels from the liner. 12. Route the liner around the tear bar and back under the print unit. PX45 and PX65 High Performance Printer User Guide...
- Page 33 13. Secure the liner to the take-up hub with the red clip and rotate the hub until the media is pulled tight. Secure the Liner Media Path PX45 and PX65 High Performance Printer User Guide...
- Page 34 14. Turn the printhead lift lever clockwise to lower the printhead. 15. (PX65 only) Push the locking handle up. PX45 and PX65 High Performance Printer User Guide...
-
Page 35: Loading Media For Cut-Off Printing
60 to 175 grams/m2 (basis weight 40 to 120 lb). • cuts through the media approximately 37 mm (1.5 in) in front of the printer’s print line. Make sure to properly adjust the media feed. PX45 and PX65 High Performance Printer User Guide... - Page 36 Always power off the printer first before installing or removing the cutter from the printer. To load media for cut-off printing 1. Turn off the printer. 2. Open the cutter and media cover. PX45 and PX65 High Performance Printer User Guide...
- Page 37 3. (PX65 only) Pull the locking handle down. 4. Turn the printhead lift lever counter-clockwise to raise the printhead. PX45 and PX65 High Performance Printer User Guide...
- Page 38 5. Remove any empty core from the media supply hub. 6. If your are using a media roll with a 76 mm (3 in) core, fit an adapter on the media supply hub. PX45 and PX65 High Performance Printer User Guide...
- Page 39 8. Route the media under the slack absorber and forward toward the print mechanism. The slack absorber can be rotated for better access and then snap- locked in open position. PX45 and PX65 High Performance Printer User Guide...
- Page 40 9. Route the media through the print unit and push it in as far as it will go. Route the Media Media Path PX45 and PX65 High Performance Printer User Guide...
- Page 41 10. Turn the printhead lift lever clockwise to lower the printhead. 11. (PX65 only) Push the locking handle up. PX45 and PX65 High Performance Printer User Guide...
- Page 42 12. Adjust the position of the red edge guides so that the media is guided with a minimum of play. 13. Route the media through the cutter between the two guide plates. PX45 and PX65 High Performance Printer User Guide...
-
Page 43: Loading Media For Internal Batch Takeup Printing
The takeup hub can accommodate 30 to 40% of a full-size media roll. Internal batch takeup can be used for these types of media: • Self-adhesive labels fitted on liner • Pre-perforated tickets with gaps • Pre-perforated tickets with marks PX45 and PX65 High Performance Printer User Guide... - Page 44 1. Turn off the printer. 2. Open the front door and media cover. 3. Turn the printhead lift lever counter-clockwise to raise the printhead. 4. Remove any empty core from the media supply hub. PX45 and PX65 High Performance Printer User Guide...
- Page 45 5. Loosen the single screw that holds the guide plate at the rear of the media compartment. 6. Remove the tear bar from the print unit and replace it with the guide plate. PX45 and PX65 High Performance Printer User Guide...
- Page 46 7. If you are using a media roll with a 76 mm (3 in) core, fit an adapter on the media supply hub. 8. Fit a new roll of media onto the media supply hub and push the roll in as far as it will go. PX45 and PX65 High Performance Printer User Guide...
- Page 47 The slack absorber can be rotated for better access and then snap- locked in open position. 10. Route the media through the print unit and push it in as far as it will go. PX45 and PX65 High Performance Printer User Guide...
- Page 48 11. Pull out approximately 40 cm (15 in) of labels. 12. Route the labels around the guide plate and back under the print unit to the take-up hub. PX45 and PX65 High Performance Printer User Guide...
- Page 49 13. Wind up some of the media on the takeup hub and secure it with the red clip. Winding and Securing the Media Media Path PX45 and PX65 High Performance Printer User Guide...
- Page 50 14. Turn the printhead lift lever clockwise to lower the printhead. 15. Adjust the position of the red edge guides so that the media is guided with a minimum of play. 16. Close the media cover, but keep the front door open. PX45 and PX65 High Performance Printer User Guide...
-
Page 51: Loading Media For Printing From An External Supply
Fit the fanfold guide into the lower slot in the rear plate when the supply is placed lower than the printer. 2. Feed the media through the slot in the rear plate. PX45 and PX65 High Performance Printer User Guide... -
Page 52: About The Ribbon
If you see a mark on the paper, your ribbon is wound ink out. PX45 and PX65 High Performance Printer User Guide... -
Page 53: Load Ribbon
To load ribbon for thermal transfer printing 1. Open the front door and media cover. 2. (PX65 only) Pull the locking handle down. PX45 and PX65 High Performance Printer User Guide... - Page 54 3. Turn the printhead lift lever counter-clockwise to raise the printhead. 4. Remove any unused ribbon and the empty ribbon core. PX45 and PX65 High Performance Printer User Guide...
- Page 55 80- 90 mm (3.5”) • If your ribbon is 110 mm (4.3 in) wide, compress the ribbon supply bobbin and move it so it snaps into the third (outermost) groove. PX45 and PX65 High Performance Printer User Guide...
- Page 56 6. Press the ribbon roll onto the ribbon supply bobbin and route the ribbon through the print unit. Pull out 20 cm (8 in) of ribbon. 7. Without releasing the ribbon, turn the printhead lift lever clockwise to lower the printhead and lock the ribbon. PX45 and PX65 High Performance Printer User Guide...
- Page 57 8. Press the cardboard core at the front end of the ribbon onto the rewind hub. During printing, the rewind hub rotates counter-clockwise. 9. Turn the printhead lift lever counter-clockwise to raise the printhead. PX45 and PX65 High Performance Printer User Guide...
- Page 58 10. Wind up the ribbon until all of the transparent leader has passed the printhead and the ribbon becomes tight. 11. Turn the printhead lift lever clockwise to lower the printhead. PX45 and PX65 High Performance Printer User Guide...
-
Page 59: Connect The Printer To Power
3. Follow the instructions to configure basic printer settings. 4. Run another wizard to configure more printer settings, or go to the Ready screen. If a condition occurs that will prevent printing, the Ready-to-Work indicator blinks. PX45 and PX65 High Performance Printer User Guide... -
Page 60: About Smart Calibration
How to Create and Print Labels Use one of these methods to create and print labels: Use Honeywell printer software. You can download label design software and printer drivers from sps.honeywell.com. Use the Fingerprint or IPL printer command language. For help, see the Finger- print Command Reference or the IPL Command Reference manuals. - Page 61 To write to Gen 2 RFID tags, set the start and length parameters of the RFID tag field setup command (a) to even numbers. Note: For help configuring RFID parameters, see the Fingerprint Command Reference Manual or the IPL Command Reference Manual. PX45 and PX65 High Performance Printer User Guide...
- Page 62 PX45 and PX65 High Performance Printer User Guide...
-
Page 63: Chapter 3 - Connect The Printer
When prompted, connect one end of the USB Type A cable to the back of the printer and connect the other end to your PC. Connect the Printer to Your Network These network interfaces provide features such as security, FTP server, web page, and Alert handling. PX45 and PX65 High Performance Printer User Guide... -
Page 64: Connect The Printer To An Ethernet Network
If your printer uses a DHCP server to assign IP addresses, the IP address appears in the lower left corner of the screen. • For an icon printer, use Honeywell PrintSet 5 to retrieve the printer IP address. If you are not using a DHCP server to automatically assign IP addresses to devices in your network, you must set a static IP address and other network information manually. -
Page 65: Install Printer Drivers
You can access the Honeywell Technical Support Downloads portal at https://hsmftp.honeywell.com. Click on Software > Printers > Printer Software and Drivers> Print Drivers > Windows Print Drivers > Current) Note: Although Windows may auto-detect the printer when you connect it to a PC through a USB port, you still need to install printer drivers on the PC for the printer to operate correctly. -
Page 66: Usb Host Port
10. Use the printer web page, the Main Menu on a full touch printer, or Honeywell PrintSet 5 to specify the certificate .pem file to use for security. USB Host Port Use the USB host interface port on the printer to connect these peripheral devices:... -
Page 67: Chapter 4 - Configure The Printer
From the Ready screen, press the Main Menu button. From the Main Menu, press the Settings button. The Settings menu appears. Select the settings you want to configure and make your changes. Save your changes when prompted. PX45 and PX65 High Performance Printer User Guide... -
Page 68: Restrict Access To The Main Menu
Configure the Printer from the Web Page If you are using Ethernet or WiFi communications, you can change configuration settings from the web page of the printer. Connect the printer to your network and obtain an IP address. PX45 and PX65 High Performance Printer User Guide... -
Page 69: Configure The Printer With Printset 5
Configure the Printer with PrintSet 5 You can use PrintSet 5 to change configuration settings on your printer. You can download Honeywell applications to extend the capabilities of the printer. You may need to purchase a license to run some applications. To learn more about, licenses and other Honeywell software solutions, go to sps.honeywell.com... -
Page 70: Uploading From The Web Page
You can use a USB storage device to install fonts, images, applications, formats, and web forms to the printer. Use this table to understand where your files need to be located on the USB storage device for the printer to install them. PX45 and PX65 High Performance Printer User Guide... -
Page 71: Change Background Image For The Ready Screen
Insert the USB storage device into one of the USB host ports on the printer. If you have an icon printer the file is automatically uploaded to the /home/ user/display directory on the printer. PX45 and PX65 High Performance Printer User Guide... -
Page 72: Printer Profiles
To load a profile from another location, lick Browse and browse to the location of the file. Double-click the file to select it, then click Upload. The profile is uploaded to the printer. PX45 and PX65 High Performance Printer User Guide... -
Page 73: Save A Printer Profile From The Main Menu
(such as HyperTerminal), a serial connection, or a network connection. All commands are case-sensitive. Note: To load printer profiles that modify communication settings that require itadmin rights, you must log in (from Fingerprint command language) as an itadmin: RUN “su -p pass”. PX45 and PX65 High Performance Printer User Guide... -
Page 74: Import A Configuration File From A Usb Storage Device
. When the file is successfully exported, a message appears. To close the message, press From the Main Menu, select Tools > USB Menu > Remove USB. Remove the USB storage device. PX45 and PX65 High Performance Printer User Guide... -
Page 75: Create Menu Shortcuts
. A check mark appears the box. Or, select individual wizards and press after each selection. A check mark appears in the box. c. Select the arrow at the bottom of the screen and press PX45 and PX65 High Performance Printer User Guide... -
Page 76: Customize The Printer Web Page
Customize the Printer Web Page PX45 and PX65 High Performance Printer User Guide... -
Page 77: Customize The Printer Web Page
2. Modify the wcss.css style sheet with your desired font, color, etc. and save the file as style.css in your local directory. Example: home_title{ font-family:HoneywellSans-Bold; font-size:16px; color:#0090e8; letter-spacing:-0.01px; text-align:left; height:40px; margin-top: 10px 3. Upload the style.css to the printer via /home/user/webpage/ PX45 and PX65 High Performance Printer User Guide... -
Page 78: Replace Standard Web Page
2. Modify the files with your desired changes and save the files in your local directory. 3. Upload the saved file to the printer via /home/user/webpage/ You can refresh your printer web page to see the changes. PX45 and PX65 High Performance Printer User Guide... -
Page 79: Chapter 5 - Troubleshooting
In the address bar, type the IP address of your printer and press Enter. The printer web page appears. Click the System Information tab. Click Statistics > System Information. The System Information page appears. For more detailed statistics, click another choice in the Statistics list. PX45 and PX65 High Performance Printer User Guide... -
Page 80: Printer Odometer
Type your Username and Password and then click Login. The default value for Username is itadmin and the default value for Password is pass. Click the Configure tab. The Configuration Summary page appears. PX45 and PX65 High Performance Printer User Guide... -
Page 81: Alert Notifications
From the printer Main Menu, select Settings > System Settings > General > Alert Notification Method. • From the printer web page, login and then click the Configure tab > System Settings > General > Alert Notification Method. PX45 and PX65 High Performance Printer User Guide... -
Page 82: Error Alerts And Solutions
Printer is Rebooting The printer is going to restart. Wait until the printer is ready before attempting to communicate with it. Started The printer is in the process of starting up. PX45 and PX65 High Performance Printer User Guide... -
Page 83: Troubleshoot Printer Problems And Find Solutions
The print speed may be too high. Lower the print speed. compressed Nothing shows up on the The ink-coated side of the ribbon may not be facing the media. thermal transfer printout. Reload the ribbon. PX45 and PX65 High Performance Printer User Guide... -
Page 84: Networking Problems
If you are connecting your printer with a crossover network cable, web page you may need to disable the web browser’s proxy settings on your computer to access the printer web page. PX45 and PX65 High Performance Printer User Guide... -
Page 85: Restore Printer Defaults
To keep all applications, fonts, and other files you have installed on the printer, clear the User files check box. • To keep all current system settings, clear the System Settings check box. PX45 and PX65 High Performance Printer User Guide... -
Page 86: Restore Defaults With A Hardware-Based Reset
Upgrade the Printer Firmware Check for periodic updates to the printer firmware. The latest version of the firmware is available from the Honeywell Technical Support Downloads portal (https://hsmftp.honeywell.com). Go to Software > Printers > Industrial. You can upgrade the printer firmware using: •... -
Page 87: Upgrade Firmware From A Usb Storage Device
Insert the USB storage device into a USB host port. Restart your printer. An upgrading firmware message appears as the upgrade file is loaded into the printer memory. This process may take a few minutes. Remove the USB storage device. PX45 and PX65 High Performance Printer User Guide... - Page 88 PX45 and PX65 High Performance Printer User Guide...
-
Page 89: Chapter 6 - Maintenance
Caution: Use only the cleaning agents specified in this section. Honeywell is not responsible for damage caused by any other cleaning materials used on this printer. Caution: Isopropyl alcohol is a highly flammable, moderately toxic, and mildly irritating substance. -
Page 90: Clean The Media Guides
Clean the guides with a cleaning card or soft cloth moistened with isopropyl alcohol. Be careful not to scratch the guides. Replace the upper and lower guides. PX45 and PX65 High Performance Printer User Guide... -
Page 91: Clean The Printhead
3. Turn the printhead lift lever counter-clockwise to raise the printhead. 4. Remove any media and transfer ribbon. 5. Open the cleaning card envelope and pull out the cleaning card. Read the warning text. PX45 and PX65 High Performance Printer User Guide... -
Page 92: Replace The Printhead
The firmware detects the new printhead when you restart the printer. Turn off the printer. Open the front door and media cover. PX45 and PX65 High Performance Printer User Guide... - Page 93 Pull the locking handle down (PX65 only) Turn the printhead lift lever counterclockwise to raise the printhead. Remove any media and transfer ribbon. Pull the printhead bracket away from the magnet in the pressure arm. PX45 and PX65 High Performance Printer User Guide...
- Page 94 Disconnect the cables from the printhead. Note the snap-lock on the inner connector. Pull at the connectors, not at the cables. Connect the two cables to the replacement printhead. PX45 and PX65 High Performance Printer User Guide...
- Page 95 11. Turn the printhead lift lever clockwise so the magnet engages the printhead bracket. 12. Push the locking handle up (PX65 only) 13. Load a new supply of media and ribbon. PX45 and PX65 High Performance Printer User Guide...
-
Page 96: Adjusting The Printer
A poorly adjusted pressure arm may be detected by a weaker printout on either side of the media path. To adjust the pressure arm Turn off the printer. Open the front door and media cover. If necessary, remove the ribbon. PX45 and PX65 High Performance Printer User Guide... -
Page 97: Adjusting The Label Stop Sensor
To adjust the LSS Use a slotted screwdriver to turn the adjustment screw. • Rotate the screw clockwise to move the sensor toward the center section. PX45 and PX65 High Performance Printer User Guide... -
Page 98: Adjusting The Printhead Pressure
Do not use a higher printhead pressure than necessary because it may increase wear of the printhead and shorten printhead life. PX45 and PX65 High Performance Printer User Guide... -
Page 99: Label Taken Sensor Calibration
Before you calibrate the sensor, load media and ribbon in the printer as necessary. 1. In the Main Menu, select Wizards > Calibration > Label Taken Sensor. 2. Follow the prompts to calibrate the sensor. PX45 and PX65 High Performance Printer User Guide... - Page 100 PX45 and PX65 High Performance Printer User Guide...
-
Page 101: Chapter 7 - Product Specifications
Information, and other product documentation. Supported Command Languages • Autosense • Fingerprint • Direct Protocol • • • ZSim • Smart Printing (C#) Media Sensors • Label gap/tag notch • Black mark • Printhead lift PX45 and PX65 High Performance Printer User Guide... -
Page 102: Network Services
Andale Mono • Andale Mono Bold • CG Times • CG Times Bold • CG Triumvirate Condensed Bold • Century Schoolbook Roman • Dutch 801 Roman • EPL203FNT1 • EPL203FNT2 • EPL203FNT3 PX45 and PX65 High Performance Printer User Guide... - Page 103 • IPLFNT30 • IPLFNT30H • IPLFNT31 • IPLFNT31H • IPLFNT32 • IPLFNT32H • IPLFNT33 • IPLFNT33H • IPLFNT34 • IPLFNT34H • IPLFNT35 • IPLFNT36 • IPLFNT37 • IPLFNT7H • IPLFONT0 • IPLFONT1 PX45 and PX65 High Performance Printer User Guide...
-
Page 104: Downloadable Fonts
MSung HK Medium • HYGothic-Medium • TBMinPro-Light • NarkisClassicMF • WorldType Collection J • WorldType Collection K • WorldType Collection S • WorldType Collection T Supported Font Types • TrueType • OpenType • Bitmap PX45 and PX65 High Performance Printer User Guide... -
Page 105: Bar Code Symbologies
• Grid Matrix • MaxiCode • MicroPDF417 • MSI (modified Plessey) • PDF417 • Planet Code • Plessey Code • Postnet • QR Code • RSS-14 • USPS 4-State Customer Bar Code PX45 and PX65 High Performance Printer User Guide... -
Page 106: Graphic File Types
Graphic File Types • • • • PX45 and PX65 High Performance Printer User Guide... -
Page 107: Chapter A - Default Settings
New Line Character Defines the characters that the printer echoes to the host to CR/LF indicate that it has moved to a new line. PX45 and PX65 High Performance Printer User Guide... -
Page 108: Ethernet
Selects the radio behavior of the printer. Infrastructure Roaming Controls the roaming inclination of the printer. The higher the level, the less inclined the printer is to switch access points. Based on the printer RSSI (received signal strength) PX45 and PX65 High Performance Printer User Guide... - Page 109 Sets the certificate name that is on the primary Name 1 - 2 authentication server. If this value is none, then the value for Server Common Name 2 is used. Range is 1 to 96 characters. PX45 and PX65 High Performance Printer User Guide...
-
Page 110: Printing
• From the printer web page, click Configure > Printing > Media. Media Setting Description Default Media Type Selects the type of media that is loaded in the printer. Media With Gaps PX45 and PX65 High Performance Printer User Guide... - Page 111 Sets the length of the printable area measured from one edge of the label to the edge that is closest to the printhead. Unit of measurement is defined in the Unit of Measurement parameter. Media length (X) PX45 and PX65 High Performance Printer User Guide...
- Page 112 (ribbon or no- ribbon), and calibrates media length. Label Counter Specifies a label counter (from 1 to 49) that SNMP uses 0 (off) to report media counts. PX45 and PX65 High Performance Printer User Guide...
-
Page 113: Print Quality
Sets the amount of output power the antenna applies to read from the RFID tag. RFID Tag Type Select the type of RFID tag used in the printer. Read and Write Encode Order Select RFID Encoding before or during printing While Print PX45 and PX65 High Performance Printer User Guide... -
Page 114: System Settings
Determines if Daylight Saving Time is Disable automatically adjusted. Disable Legacy Mode Selects the EasyCoder PF/PM/PX Compatibility Mode. Display To view these settings: • From the printer Main Menu, select Settings > System Settings > Display. PX45 and PX65 High Performance Printer User Guide... -
Page 115: Manage I/O
To view these services: • From the printer Main Menu, select Settings > System Settings > Manage Services. • From the printer web page, go to Configure > System Settings > Manage Services. PX45 and PX65 High Performance Printer User Guide... - Page 116 Determines if the printer obtains its time from a time server. Disable Device Sets the hostconfigd net 9300 port can read XML commands. Enable Management Connectivity Determines if the printer can communicate with Honeywell Cloud. Disable Agent PX45 and PX65 High Performance Printer User Guide...
-
Page 117: Maintenance Alerts
Status Determines if an alert is sent out for a specific error. Delay Repeats Sets how often the alert is sent out for a specific printer event. Range is 1 to 65535. PX45 and PX65 High Performance Printer User Guide... -
Page 118: Error
From the printer web page, click Configure > Alerts > Warning. Default Values Warning Alerts Status Delay Repeat Delay Unit Message Ribbon installed Disable Occurrences Warning-Ribbon installed Media Low Enable Occurrences Warning-Media Low PX45 and PX65 High Performance Printer User Guide... -
Page 119: Information
Network Services Avalanche To view these settings: • From the printer Main Menu, select Settings > Network Services > Avalanche. • From the printer web page, click Configure > Network Services > Avalanche. PX45 and PX65 High Performance Printer User Guide... -
Page 120: Dns
TCP/IP network. Secondary DNS Server Sets the IP address of the secondary server to which the printer sends DNS requests. The DNS server retains IP address and routing information for the TCP/IP network. PX45 and PX65 High Performance Printer User Guide... -
Page 121: Net1
Sets the email address of the person who will receive the alert messages. To Address Sets the email address that appears as the sender of the alert messages. Email Password Sets the password the printer uses to communicate with SMTP SSL service. PX45 and PX65 High Performance Printer User Guide... -
Page 122: Snmp
Selects the algorithm that the printer uses to determine that Authentication the messages are from valid source. Protocol SNMPv3 Encryption Selects the type of encryption that the printer uses to prevent Protocol messages from being seen by an unauthorized user. PX45 and PX65 High Performance Printer User Guide... -
Page 123: Wins
Sets the address the printer uses to communicate with ntp0.cornell. time server. Port Number Sets the port number the printer uses to communicate with the time server. Range is 1 to 65535. PX45 and PX65 High Performance Printer User Guide... -
Page 124: Connectivity Agent
From the printer web page, click Configure > Network Services > XML Printing. Time Server Description Default Port Number Sets the port number that defines the TCP port of XML 9200 printing. Range is 1024 to 65535. PX45 and PX65 High Performance Printer User Guide... -
Page 125: Chapter B - Print Labels With Inprint
3. Create a Webforms folder in the USB thumbdrive and save the .lbx file in the folder. 4. Upload the Web Form to the printer. (See Uploading from a USB Storage Device). PX45 and PX65 High Performance Printer User Guide... -
Page 126: Sample Code
PP 20,20 PX 160,360,4 AN 5 PP 100,100 BT "DATAMATRIX" BM qMag% PB "@"+qVendor$+"@"+qModel$+"@"+qSerial$ AN 5 FONT "Univers Bold", 14 PP 260,110 PT qVendor$ AN 5 FONT "Univers", 14 PP 260,70 PT qModel$ PX45 and PX65 High Performance Printer User Guide... -
Page 127: Print Inprint Labels
If you created the web form yourself, click Customer Downloaded and then select the web form in the list. • To use one of the Honeywell resident web forms, click Resident and then select the web form in the list. 5. Type information in the web form as needed. - Page 128 PX45 and PX65 High Performance Printer User Guide...
- Page 130 Honeywell 855 S. Mint Street Charlotte, NC 28202 sps.honeywell.com ™ PX45-65-EN-UG Rev A 08/22...
Need help?
Do you have a question about the PX45 and is the answer not in the manual?
Questions and answers