Table of Contents
Advertisement
Advertisement
Table of Contents

Subscribe to Our Youtube Channel
Related Manuals for Pyronix Enforcer


Summary of Contents for Pyronix Enforcer
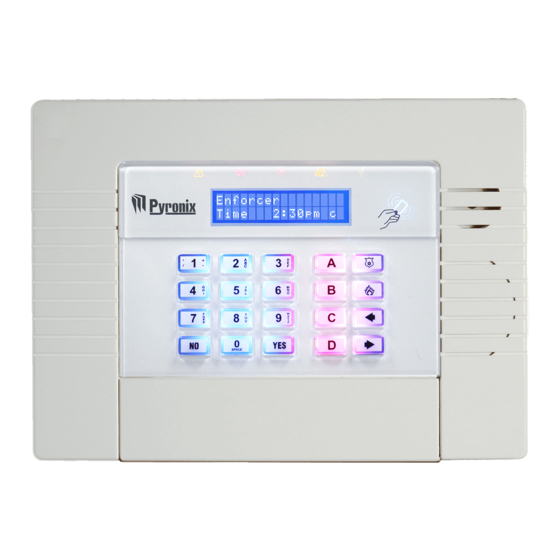
- Page 1 User Manual Wireless Alarm System PIEZO WARNING: This wireless alarm system contains a 100dBA siren, please be aware of this after activation. EN50131-1:2006+A1:2009 EN50131-3:2009 EN50131-6:2008 EN50131-5-3:2005+A1:2008 Security Grade 2 RINS1346-4 Environmental Class II...
- Page 2 Default Codes: User Code: 1234 Master Manager Code: 2222...
-
Page 3: Table Of Contents
CONTENTS CHAPTER 1: INTRODUCTION ................... 4 CHAPTER 2: KEYPADS / READERS ................6 CHAPTER 3: THE KEYFOB ....................7 3.1 L ....................... 7 OCKING THE EYFOB 3.2 B ........................... 7 UTTONS 3.3 Q ......................... 7 UICK ETTING CHAPTER 4: USING PREDICTIVE TEXT ................8 CHAPTER 5: SETTING THE ALARM (CODE/TAG) ............ -
Page 4: Chapter 1: Introduction
C H A P T E R 1 : I N T R O D U C T I O N Two Way Wireless Security Protect Your Family and Property Without Compromise. This wireless alarm system has been designed with your security in mind; with quick and easy installation and minimal maintenance, this system protects your home with a multitude of unique features. - Page 5 This wireless alarm system is a level set system which may be set up in the following way: You can choose which level set to arm, for example: Level Set A: Full set of the house Level Set B: Upstairs set. Downstairs unset. Level Set C: Garage set.
-
Page 6: Chapter 2: Keypads / Readers
C H A P T E R 2 : K E Y P A D S / R E A D E R S There are three different devices that may be used in the process of setting/unsetting the alarm system;... -
Page 7: Chapter 3: The Keyfob
C H A P T E R 3 : T H E K E Y F O B The wireless keyfob has 4 buttons that may be programmed for specific purposes (please see Change codes on page 19 for more information). 3.1 Locking the Keyfob All 4 buttons on the keyfob may be ‘locked’... -
Page 8: Chapter 4: Using Predictive Text
C H A P T E R 4 : U S I N G P R E D I C T I V E T E X T The control panel incorporates predictive text, so the system will predict the word that is being spelt. -
Page 9: Chapter 5: Setting The Alarm (Code/Tag)
C H A P T E R 5 : S E T T I N G T H E A L A R M ( C O D E / T A G ) Enter your user code. Present a valid tag to the symbol circled. -
Page 10: Chapter 6: Unsetting The Alarm (Code/Tag)
C H A P T E R 6 : U N S E T T I N G T H E A L A R M ( C O D E / T A G ) Enter the building ... -
Page 11: Chapter 7: Unsetting After An Alarm
C H A P T E R 7 : U N S E T T I N G A F T E R A N A L A R M Enter your user code Present a valid tag to the symbol circled. -
Page 12: Chapter 8: Using A Tag Reader
C H A P T E R 8 : U S I N G A T A G R E A D E R If you have a tag reader installed, then it will be possible to set and unset the alarm system using a tag (the same tags can also be used to set/unset via the keypad prox). -
Page 13: Chapter 9: Anti Code / Engineer Restore
C H A P T E R 9 : A N T I C O D E / E N G I N E E R R E S T O R E 9.1 Anti-Code Your engineer may have set up the system so that either an ‘anti code’ or engineer restore is required in order to fully restore the system (your code will still silence the alarm, just not restore the system). -
Page 14: Chapter 10: Intelligent Setting
C H A P T E R 1 0 : I N T E L L I G E N T S E T T I N G If intelligent arm is enabled by your engineer, the system automatically recognises whether to full arm (Level Set A), or part arm. -
Page 15: Chapter 11: Fault Indications / Unable To Set
C H A P T E R 1 1 : F A U L T I N D I C A T I O N S / U N A B L E T O S E T 11.1 Fault Indications Any faults that occur on the system will be easily recognised by the flashing ALERT LED. -
Page 16: Chapter 12: Advanced Functions
C H A P T E R 1 2 : A D V A N C E D F U N C T I O N S 12.1 Chime Feature The chime can be used for any input on the system. This can be set up by your engineer. -
Page 17: Chapter 13: Master Manager Menu
C H A P T E R 1 3 : M A S T E R M A N A G E R M E N U The Master Manager Menu has the following functions: Function Description Set Date and Time Programs the date and time Change Codes Adds/Edits/Deletes user/master codes and tags... -
Page 18: Set Date And Time
13.3 Set Date and Time Use the b and A keys to scroll to ‘Set Date & Time’. Press the I key. Enter the Year Press the I key Enter the Month Press the I key ... -
Page 19: Change Codes (Adding Codes, Tags And Keyfobs)
13.4 Change Codes (Adding codes, tags and keyfobs) The ‘Change Codes’ function allows adding, editing and deleting of user codes and the edit of the master manager code. Tags can also be programmed here for any user code, as well as wireless keyfobs (which are each assigned to a user) The control panel can have up to 80 user codes/tags (up to 32 users can be assigned to wireless keyfobs) - Page 20 Select the different buttons to program using the b and D keys. Press the I Select the appropriate action for the button using the b and D keys. Press the I key Choose the type, either ‘user’ or ‘manager’ using the d key ...
-
Page 21: Review Logs
13.5 Review Logs The ‘Review Logs’ function monitors all operational information of the alarm system, such as setting/unsetting information and alarm activations etc. Use the b and A keys to scroll to ‘Review Logs’. Press the I key Press the I key ... -
Page 22: Walk Test
13.7 Walk Test The ‘Walk Test’ function allows the testing of all programmed inputs on the alarm system. Use the b and A keys to scroll to ‘Walk Test’. Press the I key Select which level set to walk test. Press the I key to walk test all inputs or press the A key to walk test an input individually. -
Page 23: Test Chc Communications
13.9 Test CHC Communications This function is used in conjunction with SMS texts. It is used to communicate with the SMS Host computer (the mobile phone server). Use the b and A keys to scroll to ‘Test CHC Communications’. Press the I key ... -
Page 24: Allow Engineer Menu
13.11 Allow Engineer Menu If this function is enabled, the engineer will require authorisation from you before they can access the engineering menu. Use the b and A keys to scroll to ‘Allow Engr Menu’. Press the I key ... -
Page 25: Chapter 14: Disclaimer
Enforcer GSM Pyronix Ltd holds no responsibility in any costs that occur due to numerous test calls. If you are concerned by this, please discuss these test calls with your installer. Pyronix Ltd hold no responsibility for any calls that do not get sent to a telephone number after an alarm due to signal loss, or network failure, this is the responsibility of the network provider. -
Page 26: Chapter 15: Engineer Contacts And Tables
C H A P T E R 1 5 : E N G I N E E R C O N T A C T S A N D T A B L E S 15.1 Engineer Information Alarm Company Date of Installation Site Reference Engineer Name... -
Page 27: Input Contact Table
15.3 Input Contact Table Input No Input Name Input Areas Description 33 (wired) 34 (wired) Page: 27... - Page 28 For electrical products sold within the European Community. At the end of the electrical products useful life, it should not be disposed of with household waste. Please recycle where facilities exist. Check with your Local Authority or retailer for recycling advice in your country.
Need help?
Do you have a question about the Enforcer and is the answer not in the manual?
Questions and answers
White with red buttons Panic fob: control panel says low battery alarm on panic fob, but I've changed the battery but still getting the error message, I need the exact steps to clear the yellow triangle flashing fault apart???
After changing the battery in the Pyronix Enforcer panic fob, you can clear the low battery alarm by pressing "No" on the panel. This will reset the system and return it to normal operation.
This answer is automatically generated