Table of Contents
Advertisement
TMG Corporate Website
Disclaimer:
All trademarks appearing within this PDF are trademarks of their respective owners.
Form 080/01
Complimentary Reference Material
This PDF has been made available as a complimentary service for you to assist in
evaluating this model for your testing requirements.
TMG offers a wide range of test equipment solutions, from renting short to long
term, buying refurbished and purchasing new. Financing options, such as
Financial Rental, and Leasing are also available on application.
TMG will assist if you are unsure whether this model will suit your requirements.
Call TMG if you need to organise repair and/or calibrate your unit.
If you click on the "Click-to-Call" logo below, you can all us for FREE!
TMG Products Website
Advertisement
Table of Contents

Related Manuals for Midtronics Celltron Ultra


Summary of Contents for Midtronics Celltron Ultra
- Page 1 Complimentary Reference Material This PDF has been made available as a complimentary service for you to assist in evaluating this model for your testing requirements. TMG offers a wide range of test equipment solutions, from renting short to long term, buying refurbished and purchasing new. Financing options, such as Financial Rental, and Leasing are also available on application.
- Page 2 Battery Management Innovation ® Universal Stationary Battery Analyzer For testing stationary batteries used in UPS systems, power utility, and telecommunications industries INSTRUCTION MANUAL...
- Page 3 This page intentionally left blank.
-
Page 4: Table Of Contents
Celltron ULTRA Contents Contents Chapter 1: Introduction ..................7 Safety ..........................7 About the analyzer ......................7 Test capability ........................8 Measurements ........................8 Test range ..........................8 Data storage .......................... 8 Kit accessories ........................10 Chapter 2: Description ..................11 Display, keypad, and connections ................11 Selection screens ......................12... - Page 5 Contents Celltron ULTRA Adjusting the display’s backlight duration (BACKLIGHT TIME) .......... 28 Selecting the language (LANGUAGE) ................... 28 Using to install new software ................28 UPDATE Chapter 5: Selecting test parameters ............. 29 Creating a string name (FACTORY TEST) ................29 Creating a TECH ID ......................30...
- Page 6 Celltron ULTRA Contents Identifying jars and straps ....................37 Determining a test pattern ....................37 The test order of posts and straps ..................37 The test pattern for a string ....................38 Starting the test ......................39 Guidelines ........................... 39 Attaching the cable to jar posts ................... 39 Selecting the last used test setup with the TEST option .............
- Page 7 Contents Celltron ULTRA Transferring test results to a PC with the IR receiver (TRANSFER) ........50 Transferring fi les to a PC from the memory card ..............50 Additional options in the REPORTS menu ..............51 Counting the number of tests performed (TEST COUNTER) ..........51 Finding the analyzer software VERSION ................
-
Page 8: Chapter 1: Introduction
Avoid simultaneous contact with the jar and with frame racks or hardware that may be grounded. • Do not operate the Celltron ULTRA with the battery charger (AC adapter) attached. • Battery posts, terminals, and related accessories contain lead and lead compounds, chemicals known to cause cancer and birth defects or other reproductive harm. -
Page 9: Test Capability
200 battery models to expedite testing and record-keeping. Test capability The Celltron ULTRA tests lead-acid batteries that are 2, 4, 6, 8, 10, 12, 14, and 16 V. The analyzer can test batteries providing power to a load (in service) or not providing power (not in service). - Page 10 Celltron ULTRA Chapter 1: Introduction Table 3: Maximum number of stored test results (jars & 2 straps) Number of posts Total straps for a Max. number per jar 2-strap confi guration of jars • •...
-
Page 11: Kit Accessories
Spare extender lamps Lamps are replaceable: peel them off; use alcohol wipes to clean the surface, and attach the new lamps For technical assistance and to purchase replacement parts, call Midtronics Customer Service. (See “Patents, Limited Warranty, Service.”) • •... -
Page 12: Chapter 2: Description
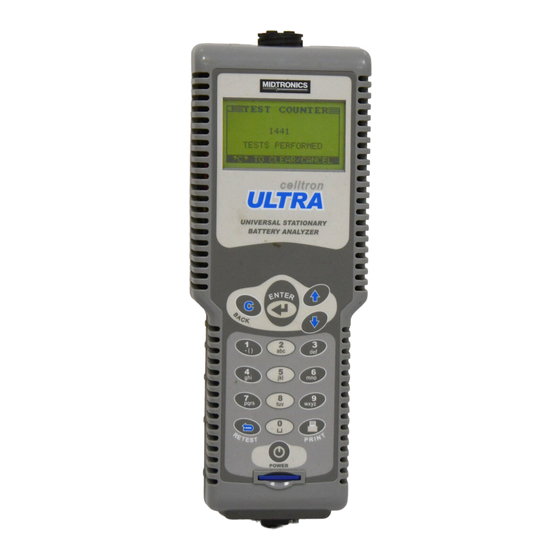
Celltron ULTRA Chapter 2: Description Chapter 2: Description Display, keypad, and connections NOTE: The analyzer shuts off after approximately 2 minutes of inactivity to conserve its battery pack. Connector for the NiMH battery pack charger Infrared (IR) data transmitter Sends test data to an IR printer or to a PC with an... -
Page 13: Selection Screens
Chapter 2: Description Celltron ULTRA Selection screens When you turn on the analyzer it will default to the last menu screen displayed. To move back to the Main Menu, press the BACK key as each submenu appears. The Main Menu has six menus: BATTERY SETUP, TEST, REPORTS, UTILITIES SETUP, DMM (Digital Multimeter), and BATTERY MANAGER. - Page 14 Celltron ULTRA Chapter 2: Description Main Menu (menu icon) BATTERY SETUP (menu icon) The BATTERY SETUP menu displays options for setting new test parameters, starting a test with stored parameters, deleting test fi les, and formatting the memory card. NEW (TEST) (icon) The NEW (test) menu enables you to set test parameters for a string.
- Page 15 Chapter 2: Description Celltron ULTRA Main Menu (menu icon) BATTERY SETUP (menu icon) NEW (TEST) (icon) (Continued from JARS PER STRING) STRING INFO (scrolling parameters list) VOLTS PER JAR Press ENTER to select the number of volts per jar. VOLTS PER JAR (scrolling/numeric) Select the number of volts per jar (2, 4, 6, 8, 10, 12, 14, or 16 V).
- Page 16 Celltron ULTRA Chapter 2: Description Main Menu (menu icon) BATTERY SETUP (menu icon) NEW (TEST) (icon) (Continued from POSTS PER JAR) STRING INFO (scrolling parameters list) BATTERY MANAGER (scrolling) Press ENTER to select a jar manufacturers and model, and computer a reference value.
- Page 17 Chapter 2: Description Celltron ULTRA Main Menu (menu icon) BATTERY SETUP (menu icon) NEW (TEST) (icon) (Continued from REFERENCE) STRING INFO (scrolling parameters list) VOLT & CONDUCTANCE (default) Press ENTER to measure volts only; volts and conductance si- multaneously; or voltage fi rst, then conductance.
- Page 18 Celltron ULTRA Chapter 2: Description Main Menu (menu icon) BATTERY SETUP (menu icon) NEW (TEST) (icon) (Continued from DC FLOAT V.) STRING INFO (scrolling parameters list) DC FLOAT A. Press ENTER to select the string’s DC fl oat current. DC FLOAT (scrolling/numeric) Select from 0.000 to 99.999 volts.
- Page 19 Chapter 2: Description Celltron ULTRA Main Menu (menu icon) BATTERY SETUP (menu icon) (Continued from OPEN) DELETE (icon) To delete a saved test setup, press ENTER . STRING INFO (scrolling) Scroll to the site name and press ENTER . WARNING The analyzer will ask if you want to delete the fi...
- Page 20 JAR [number/letter] (scrolling) TRANSFER (icon) Press ENTER to transfer test results to a PC via the infrared (IR) receiver a nd the PC software included in the Celltron ULTRA kit. TRANSFER DATA (check boxes) TRANSFER ALL DATA Transfer all test data in memory.
- Page 21 VERSION (icon) Press ENTER to display the serial numbers of the analyzer, cable, fl ash memory, and EEPROM fi rmware versions. The information will be helpful when you call Midtronics for software updates, service, and parts. UTILITIES SETUP (menu icon) Press ENTER to display the UTILITIES SETUP menu.
- Page 22 Celltron ULTRA Chapter 2: Description Main Menu (menu icon) UTILITIES SETUP (menu icon) (Continued from WARNING) TEMP (icon) Press ENTER to select the temperature unit of measure. TEMP. UNITS (check boxes) DEGREES F DEGREES C MODE (icon) Press ENTER to select a test startup mode.
- Page 23 Chapter 2: Description Celltron ULTRA Main Menu (menu icon) UTILITIES SETUP (icon) (Continued from DISPLAY) BACKLIGHT TIME (scrolling) Press ENTER . BACKLIGHT TIME (scrolling) Select the duration of the backlight when the analyzer is inactive. The range is 0 to 10 seconds.
- Page 24 Celltron ULTRA Chapter 2: Description Main Menu (menu icon) DMM (icon) (Continued from SCOPE) CURRENT (icon) CURRENT Connect to the jar to estimate the AC ripple current in the jar. BATTERY MANAGER (icon) Press ENTER to add or edit models and reference values in the database.
-
Page 25: Chapter 3: Determining A Reference Value
630-323-7752 (Attn: Reference value list). CAUTION: Do not use the Celltron ULTRA to test the entire string at once. Test only individual jars/ batteries. -
Page 26: Testing A Sample Of Jars
Notes: • The fi rst time you turn on or connect the Celltron ULTRA, it will display a reminder to set preferences for the temperature units (Celsius or Fahrenheit) and the jar and string WARN/ FAIL thresholds. Although you can press the BACK key to bypass the message, it will continue to appear until you change or accept the default settings. -
Page 27: Chapter 4: Utilities
DISPLAY (contrast and backlight duration) • LANGUAGE (selecting the language) • UPDATE (update the Celltron ULTRA software) Selecting a warn/fail threshold (WARNING) The WARNING utility enables you to set the percentages of the reference value below which a jar and string must fall to generate a WARN or a FAIL notice on the printed test results. A question mark (?) appears next to jars and strings as a warning. -
Page 28: Selecting A Manual Or Automatic Test-Start Mode ( Mode)
Celltron ULTRA Chapter 4: Utilities Selecting a manual or automatic test-start mode ( MODE) The MODE utility has two test-start modes. AUTO START starts a test automatically when you connect to the next jar from the jar results screen. The setting allows you to keep your hands free to use probes. -
Page 29: Adjusting The Display's Backlight Duration (Backlight Time)
5. Press ENTER to select. Selecting the language (LANGUAGE) There are seven selectable languages in the Celltron ULTRA software for the display and printed reports: 1. Press the ARROW keys to highlight the UTILITIES SETUP icon, and press ENTER . -
Page 30: Chapter 5: Selecting Test Parameters
Press and hold the POWER button. • The fi rst time you turn on or connect the Celltron ULTRA, it will display a reminder to set preferences for the temperature units (Celsius or Fahrenheit) and the jar and string WARN/ FAIL thresholds. -
Page 31: Creating A Tech Id
Chapter 5: Selecting test parameters Celltron ULTRA Creating a TECH ID Press ENTER to create a technician ID of up to 20 alphanumeric characters. The ID will be linked to the new string ID. The default name is TECH ID (or the last ID created), which you can overwrite with any combination of letters, numbers, or symbols using the alphanumeric keypad. -
Page 32: Setting The Low Voltage Threshold
Celltron ULTRA Chapter 5: Selecting test parameters Setting the threshold LOW VOLTAGE 1. Press the ARROW (or use the numeric keypad) to highlight LOW VOLTAGE, and press ENTER . 2. Press the ARROW to scroll to the number of volts. -
Page 33: Using A Reference Value From The Database (Battery Manager)
Chapter 5: Selecting test parameters Celltron ULTRA Using a reference value from the database (BATTERY MANAGER) If there is no reference value for the string you are testing, you can use a reference value for the jar model in the BATTERY MANAGER database. The reference value is used only for this particular test setup. -
Page 34: Selecting What To Measure (Volt & Conductance)
Celltron ULTRA Chapter 5: Selecting test parameters Selecting what to measure (VOLT & CONDUCTANCE) The default is VOLT & CONDUCTANCE. 1. Press the ARROW keys to highlight VOLT & CONDUCTANCE, and press ENTER . 2. Press the ARROW keys (or use the numeric keypad) to check the box next to your choice: VOLTAGE ONLY, VOLT &... -
Page 35: Adding Jar Model Information To The Database
Chapter 5: Selecting test parameters Celltron ULTRA Adding jar model information to the database To add new jar models and conductance reference values to the database, use BATTERY MANAGER in the Main Menu. The BATTERY MANAGER available in BATTERY SETUP allows you to change a reference value only for a particular data fi... -
Page 36: Chapter 6: Testing
Midtronics recommends that you establish a testing routine to monitor conductance loss and prevent failures. CAUTION: Do not use the Celltron ULTRA to test the entire string at once. Test only individual jars/ batteries. IMPORTANT: Always test on the lead post for the most consistent results. To prevent lower mea- sures, avoid tests on stainless-steel hardware or bolts. -
Page 37: Label Information
Chapter 6: Testing Celltron ULTRA Label information The labels consist of numbers and letters that correspond to the: • locations and connections of jar posts and straps • direction in which you test the jars The label identifi es: •... -
Page 38: Recommendations
• jar rating You can use the Midtronics PC software to enter this information after you test the string and down- load the test results. If you do not have the PC software, keep this information for reference in a convenient area the next time you test. -
Page 39: The Test Pattern For A String
Chapter 6: Testing Celltron ULTRA In Figure 3, step 1 the test pattern shows the clamps/probes connection between the fi rst set of posi- tive and negative posts. Step 2 shows the clamps/probes connection between the negative post and the end of the strap that attaches to the next jar. Step 2 ensures that you test the entire strap and its connections. -
Page 40: Starting The Test
Celltron ULTRA Chapter 6: Testing Starting the test When you insert a memory card and turn on the analyzer, it will scan the card for fi les that are com- patible with the current version of the analyzer’s software. If the fi les are in an older format, you will not be able to save new test results to the card. -
Page 41: Selecting The Last Used Test Setup With The Test Option
Chapter 6: Testing Celltron ULTRA Selecting the last used test setup with the option TEST If you select the TEST option in the Main Menu and connect to a battery, the analyzer tests using the parameters from your last test setup or, if there is no setup in memory, the default parameters. -
Page 42: Attaching The Cable To A Strap
Celltron ULTRA Chapter 6: Testing 7. After reviewing the fi rst set of results, choose one of the following based on the type of testing you are doing: • If you are testing jars only, test the next set of jar posts (if you have more than one set of posts), or test the next jar in the string. -
Page 43: Retesting Jar Posts Or Straps
Chapter 6: Testing Celltron ULTRA Retesting jar posts or straps Factors such as operating and site conditions, and manufacturer changes, can affect test results. If you accept results under these conditions, your maintenance routine might not have an accurate history. To verify results, you can retest a set of jar posts or straps right after you test them. Or you can test the rest of the string before you retest certain jar posts or straps. -
Page 44: When Testing Is Fi Nished
Celltron ULTRA Chapter 6: Testing ===WARNING=== CONNECT TO JAR XX RED LEAD TO POSITIVE POST, BLACK LEAD TO NEGATIVE POST! PRESS ‘5’ TO ADD JAR NOTE: XX is the battery ID of the battery whose place is being taken. 3. If you press 5, the analyzer will add a placeholder to the stored data readings: Battery XX Voltage 0.0 volts... -
Page 45: Chapter 7: Test Results And Reports
Chapter 7: Test results and reports Celltron ULTRA Chapter 7: Test results and reports After you test a string, you can view and interpret test results, and archive the results to establish a maintenance history. Viewing test results After you test a string, the analyzer saves the test results that are displayed on the screen. You can view test results as many times as you want until you delete the string. -
Page 46: Interpreting Test Results
Celltron ULTRA Chapter 7: Test results and reports Interpreting test results String summary (for a string of 12 V jars) The test results in the STRING SUMMARY (STRING STATISTICS on the printout) are averages for the jar posts and straps in the string. If you tested without a reference value, dashes appear in the fi... -
Page 47: Jar Statistics
Chapter 7: Test results and reports Celltron ULTRA Jar statistics The JAR STATISTICS report shows the volt and mhos/siemens results for jars with their measured percentages of the reference value (%REF) you selected in BATTERY SETUP. (If you tested with- out a reference value, dashes appear in reference fi... -
Page 48: Jar Data
Celltron ULTRA Chapter 7: Test results and reports Jar data The values in JAR DATA (JAR STATISTICS on the printout) are the test results for jar posts and straps. The analyzer displays and prints results in the order in which jar and straps were tested. The format is the same for displayed and printed results. -
Page 49: Determining The Strength Of The String
Chapter 7: Test results and reports Celltron ULTRA Determining the strength of the string To help you determine the strength of the string, use the percentages of the reference value from for all of the jar posts and straps. Table 7 lists ranges of reference value percent- STRING SUMMARY ages, jar condition, and a recommended action to take. -
Page 50: Printing The String Summary Results
Celltron ULTRA Chapter 7: Test results and reports Printing the results STRING SUMMARY 1. Turn on the printer by pressing the button. MODE 2. Press the ARROW keys to highlight the REPORTS icon, and press ENTER . 3. Press the ARROW keys to highlight the STRING SUMMARY icon, and press ENTER . -
Page 51: Transferring Test Results To A Pc With The Ir Receiver (Transfer)
Transferring fi les to a PC from the memory card The Celltron ULTRA uses an SD memory card to store test data, which can be uploaded to a PC. An SD card reader, which connects to a USB port, is included in the kit. The fi les have the extension .csv and open in Microsoft Excel. -
Page 52: Additional Options In The Reports Menu
Counting the number of tests performed (TEST COUNTER) The Celltron ULTRA automatically keeps track of the number of tests performed. Select the TEST COUNTER icon and press ENTER to see the total number of tests performed since the analyzer was fi... -
Page 53: Chapter 8: Digital Multimeter (Dmm)
Chapter 8: Digital Multimeter (Dmm) To use the Celltron ULTRA multimeter, press the ARROW keys to highlight the Dmm icon in the Main Menu, and press ENTER . Press the ARROW keys to highlight one of the four meters in the Dmm Menu, and press ENTER to select. -
Page 54: Chapter 9: Troubleshooting
The troubleshooting tips in this section will help you resolve most testing and printing problems. For problems with the printer, digital temperature gun, or the PC software application, refer to their manu- als or call Midtronics Customer Service for assistance. (See Patents, Limited Warranty, Service.) Screen does not power on during testing (no text/graphics) Check the connection to the jar. -
Page 55: Replacing The Analyzer Battery Pack
4. Place the new pack (with the label facing up) into the battery compartment. 5. Connect the battery pack cables. 6. Slide the cover into place. If the problem persists, call Midtronics Customer Service. (See Patents, Limited Warranty, Ser- vice.) Probe tip is bent or stops retracting To replace a damaged a probe tip: 1. -
Page 56: Test Results Do Not Print Or Print Incorrectly
Direct sunlight interferes with infrared data transmission/receiving. If the printer is not receiv- ing data, remove the printer and the Celltron ULTRA from direct sunlight. If the printed char- acters are not clear or are partially missing, recharge the battery and reprint. -
Page 57: Product Specifi Cations
Specifi cations Celltron ULTRA Product Specifi cations Model Number: Display: CTU-6000 (analyzer); CTU-6000 KIT LCD—FSTN 66.52 mm x 33.25 mm (2.62 in x 1.31 in), Applications: 128 x 64 pixels, 40-degree viewing angle, contrast ratio 8, green LED backlight Tests individual lead-acid cells or monoblocs (up to 16 volts) in any common confi... -
Page 58: Patents, Limited Warranty, Service
Motorola, Inc. Limited Warranty The Celltron ULTRA is warranted to be free of defects in materials and workmanship for a period of one year from date of purchase. Midtronics will, at our option, repair or replace the unit with a remanufactured unit.
Need help?
Do you have a question about the Celltron Ultra and is the answer not in the manual?
Questions and answers