
Related Manuals for Midtronics CPX-900 EU


Summary of Contents for Midtronics CPX-900 EU
- Page 1 JAN 2019 167-000888EN-A CPX-900 EU Battery & Electrical Diagnostic Analyzer For testing 6 and 12-volt automotive batteries User Manual...
- Page 2 blank page behind cover...
-
Page 3: Table Of Contents
CPX-900 EU Contents 1: Introduction Personal Precautions Symbols Conventions Description Controls & Connections Main Menu Icons Inspecting the Battery Testing In-Vehicle (System Test) Connecting To The Battery 2 – Car Test (In Vehicle test) - System Test System Test Results... - Page 4 The display does not turn on: The display flickers or is dim: Internal Batteries Replacing The Internal Batteries Appendix: Recommended Test Procedure Appendix B: Test Results Decision Tables Battery Test Results Starter Test Results Alternator Test Results Midtronics BV Hoofdveste 6-8 3992DG Houten...
-
Page 5: 1: Introduction
Consent to Collection and Use of Data: The user of this tool consents that Midtronics may collect, store, transmit, and use technical data and related information, including but not limited to technical information about this device, system and application software, test results, and accessories. This inforamtion is gathered periodically to facilitate the provision of product support, product improvements, product development, and other services related to use of this battery and electrical system analyzer. -
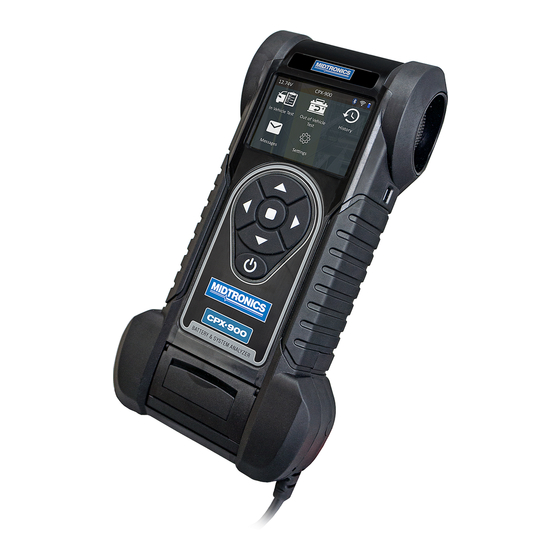
Page 6: Controls & Connections
When displayed under a list of options, the Screen Arrows show which keypad arrow to press to highlight a character or item in a list. Additional Screens The dots at the bottom or side of a menu or results screen indicate additional screens are available. Midtronics BV Hoofdveste 6-8 3992DG Houten... -
Page 7: Main Menu Icons
CPX-900 EU Main Menu Icons Icon Description Automates battery testing for quickly testing in or outside of the vehicle using the fewest steps. Automates battery testing for quickly testing cars using the fewest steps. New Battery Test For testing motorcycle batteries before possible return. -
Page 8: Inspecting The Battery
To make sure both sides of the clamps are gripping the terminals, rock the each clamp back and forth. A poor connection will prevent testing, and the analyzer displays the message CHECK CONNECTION. If the message reappears after you have correctly reconnected the clamps, clean the terminals and reconnect. Midtronics BV Hoofdveste 6-8 3992DG Houten... -
Page 9: Car Test
CPX-900 EU 2 – Car Test 2 – Car Test Use Car Test to perform Battery Tests on car batteries. Using test parameters the battery can be tested both in vehicle and out of vehicle. A System Test is also available for the in vehicle test. -
Page 10: (In Vehicle Test) - System Test
Refer to Appendix B: Decision Tables for a complete explaination of the possible test results. (In Vehicle test) - System Test Start the vehicle's engine and let it idle. Ensure all accessories (High Beam headlights/ventilation blower etc.) are off and select Next. The analyzer tests the alternator output. Midtronics BV Hoofdveste 6-8 3992DG Houten... -
Page 11: System Test Results
CPX-900 EU 2 – Car Test When prompted, rev and hold the engine to between 2000 to 3000 rpm. The analyzer tests the alternator output again. When prompted Idle the engine and and select Next. Turn on the high beam headlights and ventilation blower. -
Page 12: New Battery
100 to 3000 amount of current a battery can provide at 0 ºF (–17.8 ºC). Select Start to advance to the next screen. Temperature - Hold the tester temperature sensor over the battery being tested. Midtronics BV Hoofdveste 6-8 3992DG Houten... - Page 13 CPX-900 EU 3 - New Battery Temp Sensor Select Capture to lock in the live temperature reading and begin the battery test. Test Results - Battery Rated 575 CCA Voltage 12.72 V Measured 599 CCA Good Battery Temperature: 970 F...
-
Page 14: Motorcyle
To print or send the test results to a configured printer select Send Results. To return to the Home Screen, select Done to return to the main screen. Refer to Appendix B: Decision Tables for a complete explaination of the possible test results. Midtronics BV Hoofdveste 6-8 3992DG Houten... -
Page 15: History
CPX-900 EU 5 – History 5 – History Use History to access the tool usage history, a vehicle history based on VID, and user histories. The search function can also be used find test records for specific vehicles and technicians. -
Page 16: Messages
Message Types Critical: An important action cannot be performed and may require user action. Notifications: Indicates an action has been performed or data has been sent. Midtronics BV Hoofdveste 6-8 3992DG Houten... -
Page 17: Settings
CPX-900 EU 7 – Settings 7 – Settings Use Setup to setup and adjust the tester display and time, shop and administrative settings, network connectivity, and BMIS settings. Settings Tool Display Language to select the analyzer default standard language. Use to return to the Display menu. -
Page 18: System Test
A checked box indicates the Admin Enable function is enabled. Admin Use to select a four (4) digit Admin PIN. Select OK to save the PIN or Cancel to exit without saving. Midtronics BV Hoofdveste 6-8 3992DG Houten... -
Page 19: Shop Info
CPX-900 EU 7 – Settings Shop Info Use to enter information about the shop in which the tester will be used. Shop Name Country Shop Address Phone Number Shop Address 2 Email Address City Website State (Blank) Zipcode (Blank) Country... - Page 20 Select the tester Update Settings defaults. Press to return to the Devices screen. Over The Air Save Tool Configurations USB Drive Load Tool Configurations USB PC Link Delete Tool Configurations Devices Copy, load, or manually enter configurations for connected devices such as CVG3s. Midtronics BV Hoofdveste 6-8 3992DG Houten...
-
Page 21: Maintenance & Troubleshooting
If an inspection or a change in test results indicate that the test cables need to be replaced, call Midtronics Customer Service at 1-800-776-1995. Testing The Cable Set If the analyzer frequently displays CHECK CLAMP CONNECTION! there may be an intermittent open circuit along one or both of the battery test cables. -
Page 22: Connecting The Battery Test Cable
To connect the battery test cable to the analyzer align the cable connector with the analyzer’s housing. Hold the part of the cable connector as shown and firmly insert the connector into analyzer’s receptacle. Do not twist. Midtronics BV Hoofdveste 6-8 3992DG Houten... -
Page 23: Printer Paper
CPX-900 EU 8 – Maintenance & Troubleshooting Hold the cable connector here To avoid damaging the battery test cable, always hold the ridged part of the cable connector (as shown in the photo) when inserting and removing the cable. Printer Paper The internal printer is shipped with a roll of thermal printing paper installed in the paper compartment. -
Page 24: Printer Problems
The analyzer’s internal batteries may need to be replaced. • Internal Batteries The tester uses six AA, 1.5-volt batteries (alkaline recommended) to allow testing of batteries down to 1 volt and supply power while the menu is active. Midtronics BV Hoofdveste 6-8 3992DG Houten... -
Page 25: Replacing The Internal Batteries
CPX-900 EU 8 – Maintenance & Troubleshooting Replacing The Internal Batteries Turn the analyzer face down. Use a Phillips screwdriver to remove the screw securing the door to the battery compartment. Battery Cover Screw Lift the door at the tab and place it aside. -
Page 26: Appendix: Recommended Test Procedure
The CPX-900 provides a battery decision along with additional detailed information on battery cranking and reserve capacity. Press to return to the previous screen, select options and when necessary, to enter or continue to the next step. Midtronics BV Hoofdveste 6-8 3992DG Houten... -
Page 27: Appendix B: Test Results Decision Tables
CPX-900 EU Appendix B: Test Results Decision Tables Appendix B: Test Results Decision Tables Battery Test Results Cranking Reserve Decision SOH Message RC Message Health Capacity Good Good The battery shows good cranking The battery has good reserve performance. Test the battery again at capacity. -
Page 28: Starter Test Results
The starter voltage is high but the cranking amps are low. Low Current The engine didn’t start and the test was aborted or the vehicle’s starting profile was not detected and the Starter Test was skipped. No Start Midtronics BV Hoofdveste 6-8 3992DG Houten... -
Page 29: Alternator Test Results
CPX-900 EU Appendix: Recommended Test Procedure Alternator Test Results Decision Action The output from the alternator is normal. CHARGING NORMAL No output detected. Check belts to ensure alternator is rotating when engine is running. √ Check all alternator connections including to the battery. - Page 30 Failure to fully charge the battery before retesting may cause false readings. Cycling Battery needs to be cycled for optimal performance. Required Rest & Battery could have a surface charge, because it has recently been charged. Retest Midtronics BV Hoofdveste 6-8 3992DG Houten...
- Page 31 Midtronics products are warranted to be free of defects in materials and workmanship for a period of one (1) year from date of purchase. Midtronics will, at our option, repair or replace the unit with a re-manufactured unit. This limited warranty applies only to...
Need help?
Do you have a question about the CPX-900 EU and is the answer not in the manual?
Questions and answers