Table of Contents
Advertisement
Quick Links
Advertisement
Table of Contents

Related Manuals for Midtronics TEC-4500


Summary of Contents for Midtronics TEC-4500
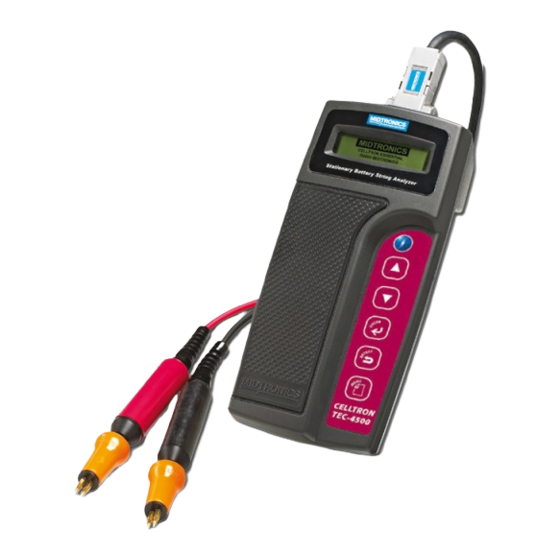
- Page 1 TEC-4500, TEC-4500 BP Stationary Battery String Analyzer INSTRUCTION MANUAL...
- Page 2 Table of Contents Introduction ....................1 Safety instructions....................1 Important ....................... 1 Guidelines ......................1 About the analyzer ..................... 1 Terminology ......................1 Accessories......................1 Chapter 1: Description ................3 Specifications ......................3 Measurements ...................... 3 Test capability ....................... 3 Test range ......................
- Page 3 Setting percentages for warnings and failings (F. SET WARN/FAIL %) ..... 14 Setting the low voltage value (G. LOW VOLTS) ..........14 FAIL % 60......................14 FAIL % 60......................14 Adjusting the screen contrast (H. CONTRAST) ..........15 Setting values in the SET PARAMETERS menu ............. 15 Introduction ......................
- Page 4 Introduction ......................32 Viewing test results ..................... 32 Interpreting test results ..................... 33 STRING SUMMARY ................... 33 REVIEW DATA SET ................... 33 Using the percentages of the reference value ............ 34 Archiving test results ....................34 Advantages of archiving..................34 Printing test results....................
-
Page 6: Introduction
Introduction This manual provides descriptions and operating instructions for the Midtronics Celltron Essential CTE-1000 and CTE-1500 stationary battery string analyzers. It helps you understand the parts of the analyzer and how to use it to test batteries. Safety instructions Important Read the instructions below before you operate the analyzer. - Page 7 Table 2 lists the accessories that come with the CTE-1500. Table 2. TEC-4500 BPaccessories Part Accessory Description Number DuraProbes C087 Cables with 5-inch probes and 2-inch openings to attach to large battery terminals Battery Pack & Boot C016 Protective boot and 1600 mAH battery Table 3 lists additional accessories for the analyzer.
-
Page 8: Chapter 1: Description
Midtronics recommends that you use a reference value to compare the conductance value to the test results. A reference value is a typical conductance value for the type of jars you are testing. -
Page 9: Parts Of The Analyzer
Table 5. Test results when testing jars and straps # of jar # of straps # of jars you can test posts Parts of the analyzer Panels The panels allow you to use, care for, and hook up the analyzer. Figure 1 displays the front, back, and top panels of the analyzer and their parts. -
Page 10: Parts On The Panels
Parts on the panels Table 6 describes the parts of the panels. Table 6. Parts of the panels Part Description Screen Displays menus, options, and test results. Enables you to scroll up in a menu or number selections. DOWN Enables you to scroll down in a menu or number selections. ENTER Moves to the option you select or enters number selections. -
Page 11: Set Parameters Menu
1. SET PARAMETERS menu menu allows you to set values for a string so it is ready to test. The SET PARAMETERS screen displays these options: 1. AUTO START 2. JARS ONLY 3. TEMP 4. REF 5. VOLTS/JAR 6. POSTS/JAR 7. -
Page 12: Print Results Option
4. PRINT RESULTS option option allows you to print test results for a string you tested. PRINT RESULTS 5. VIEW RESULTS menu option allows you to view test results for a string you tested. When you VIEW RESULTS select the string, the screen displays these options: 1. -
Page 13: Utilities Menu
8. UTILITIES menu menu allows you to set up preferences in the analyzer. The screen displays these UTILITIES options: A. PRINTER TYPE B. LANGUAGE C. DATE & TIME D. SET DATE FORMAT E. EDIT STRING NAME F. SET WARN/FAIL % G. -
Page 14: Chapter 2: Pre-Testing
4. 4. Use the average from after you test the string. Refer to “Using the STRING SUMMARY average in ”). STRING SUMMARY 5. Contact the jar manufacturer or Midtronics for a list of reference values for common jar types: www.midtronics.com... -
Page 15: Testing A Sample Of Jars
Note: STRING SUMMARY Midtronics updates the website with new reference values when they are created. If you create a reference value for a jar model, e-mail the value and information to net@midtronics.com or fax it to 630.323.7752 (Attn: Reference value list). -
Page 16: Setting Options In The Utilities Menu
Note: ENGLISH B. LANGUAGE. Accessing the UTILITIES menu To access the menu: UTILITIES 1. Press and hold the button until the analyzer powers on. MENU MIDTRONICS CELLTRON ESSENTIAL © 2003 MIDTRONICS MENU 1. SET PARAMETERS 2. TEST BATTERY 3. VIEW PARAMETERS... -
Page 17: Setting The Printer (A. Printer Type)
2. Press to scroll to in the menu and press 7. UTILITIES MAIN ENTER UTILITIES A. PRINTER TYPE B. LANGUAGE C. DATE & TIME If you select an option you do not want to change, press to return to the Note: ENTER menu. -
Page 18: Setting The Date And Time Format (D. Set Date Format)
Setting the date and time format (D. SET DATE FORMAT) The default is the current date and time in Central Standard Time (CST). The default format is with a 12-hour clock. To set the date and time format in the analyzer: MM/DD/YY ... -
Page 19: Setting Percentages For Warnings And Failings (F. Set Warn/Fail %)
Setting percentages for warnings and failings (F. SET WARN/FAIL %) To set percentages for warnings and failings: 1. Press to scroll to in the menu and press F. WARN/FAIL % UTILITIES ENTER 2. To set percentages for the jars in the string, press and press WARN FAIL... -
Page 20: Adjusting The Screen Contrast (H. Contrast)
Adjusting the screen contrast (H. CONTRAST) To change the screen contrast: 1. Press to scroll to in the menu and press H. CONTRAST UTILITIES ENTER CONTRAST LOWER HIGHER TO SET 2. Do one of the following: Press to increase the screen shade. •... -
Page 21: Accessing The Set Parameters Menu
To access the menu: SET PARAMETERS 1. Press and hold the button. MENU MIDTRONICS CELLTRON ESSENTIAL © 2003 MIDTRONICS MENU 1. SET PARAMETERS 2. TEST BATTERY 3. VIEW PARAMETERS If menus other than the menu is displayed, press... -
Page 22: Selecting 2. Jars Only Or Jars And Straps As A Test Point
2. Press to scroll to and press to select. MANUAL START AUTO START ENTER CONNECTION MODE MANUAL START AUTO START Selecting 2. JARS ONLY or JARS AND STRAPS as a test point You can configure the Celltron Essential to test jars or individual cells and inter-cell connections of the string. -
Page 23: Setting The String Temperature (3. Temp:)
Setting the string temperature (3. TEMP:) To set the temperature of the string: 1. Use the temperature sensor to measure the temperature of one of the jars in the string. 2. Press to scroll to selection in the and press 3. -
Page 24: Setting The Number Of Volts Per Jar (5. Volts/Jar)
Setting the number of volts per jar (5. VOLTS/JAR) To set the number of volts per jar: 1. Press to scroll to in the menu and press 5. VOLTS/JAR SET PARAMETERS ENTER 2. Press to scroll to 2, 6, or 12 VOLTS PER JAR and press ENTER to select SET VOLTS VOLTS PER JAR... -
Page 25: Editing The String Name (7. Edit String Name) In The Parameters Menu
Editing the string name (7. EDIT STRING NAME) in the PARAMETERS Menu To edit the name of a string: 1. Press to scroll to and press 7. EDIT STRING NAME ENTER EDIT STRING NAME 01. STRING 01 ... -
Page 26: Chapter 3: Testing
Chapter 3: Testing Testing a string requires consistent practices in the procedures in this section and keeping records of the test results. Midtronics recommends that you establish a testing routine to monitor conductance loss and prevent failures. Power outages can affect test results. Do not test the string if a power outage occurred Note: recently and the string is boost-charged. -
Page 27: Straps
Figure 2. Labels for a jar J023A J023B J023C If the jars you are testing have one set of posts, the analyzer does not assign a letter. For example, “J023” means the jar has one set of posts. Straps The analyzer uses “S” for strap. It assigns a number to the jar that is connected to the strap. It assigns a letter that corresponds to the letter for the set of posts the strap is connecting. -
Page 28: Recommendations
Recommendations Recording jar information Because conductance values vary with such factors as age, temperature, and site conditions, record the following about the jars you are testing each time you test: • Power load • Physical condition of the jars • Site condition •... -
Page 29: Attaching The Cable To The Analyzer
Table 10. Advantages of cables Probes Clamps (optional) Quick testing of jars and straps in a string Retest without reconnecting Make contact with small posts or straps Attach to straps and post and free both hands to use the analyzer keypad 3. -
Page 30: Determining A Test Pattern
Determining a test pattern Introduction Before you attach the cable to the jar, you should determine a pattern for testing to make testing a consistent and fluid process. Posts and straps You must test all posts and straps on a jar before testing the next jar in the string. You can test jar posts in any direction as long as you are consistent for each jar. -
Page 31: Setting The 2. Test Battery Option
Figure 6. Pattern for testing jars in a string jar cables The numbers on the jars indicate the direction you should test based on the connections. The straps connect the jars from top to bottom and the cables connect the jars from side to side. Setting the 2. -
Page 32: Attaching The Cables
2. Press to scroll to and press 2. TEST BATTERY ENTER READY TO TEST CONNECT TO BATTERY J001A TO TEST You can also start a test by connecting to a jar when the analyzer is turned off. Note: Attaching the cables Introduction After you turn on the analyzer and set the... - Page 33 Figure 7. Attaching the cable to jar posts Screen if the analyzer is in MANUAL START BATTERY TEST READY TO TEST STRING 01 J001A START TEST 3. If you selected when you set values in the menu, MANUAL START SET PARAMETERS press to start testing.
-
Page 34: Attaching The Cable To A Strap
Conductance value is below the reference value and the percentage of the reference • is below the values for WARN FAIL The voltage is below the value LOW VOLTS • The voltage is above 2.5 volts per cell • All 480 memory locations have been used •... -
Page 35: Retesting Jar Posts Or Straps
3. Choose one of the following based on the number of posts the jars have: If the jar has more than one set of posts, attach the black and red clamps or probes • to the next set of posts on the jar. If the jar has one set of posts, test the jar connected to the jar you just tested. - Page 36 MIDTRONICS CELLTRON ESSENTIAL © 2003 MIDTRONICS MENU 1. SET PARAMETERS 2. TEST BATTERY 3. VIEW PARAMETERS 3. Press RETEST 03. STRING 03 REVIEW DATA SET 12.57V 1100 S J007 60 %REF For information about this screen, refer to “Interpreting test results” in Chapter 4.
-
Page 37: Chapter 4: Test Results
Viewing test results To view test results: 1. Press and hold the button to access the menu. MENU MAIN MIDTRONICS CELLTRON ESSENTIAL © 2003 MIDTRONICS MENU 1. SET PARAMETERS 2. TEST BATTERY 3. VIEW PARAMETERS 2. Press to scroll to and press . -
Page 38: Interpreting Test Results
3. Choose one of the following options: To view a summary of averages and high and low values, scroll to STRING • and press SUMMARY ENTER 03. SELECT STRING 03 STRING SUMMARY AVG% AVG SIEMENS: 7723 To view the test results as the analyzer displayed them when you tested the string, scroll to and press REVIEW DATA SET... -
Page 39: Using The Percentages Of The Reference Value
Figure 9. REVIEW DATA SET values 03. SELECT STRING 03 voltage conductance value REVIEW DATA SET in siemens 12.57V 1100 S J007 60 %REF jar post or percentage of the strap label reference value These values are displayed for each set of jar posts and straps in the order you tested them in the string. -
Page 40: Printing Test Results
MODE 3. Press and hold the button to access the menu. MENU MAIN MIDTRONICS CELLTRON ESSENTIAL © 2003 MIDTRONICS MENU 1. SET PARAMETERS 2. TEST BATTERY 3. VIEW PARAMETERS 4. Press to scroll to and press... -
Page 41: Chapter 5: Troubleshooting
Chapter 5: Troubleshooting The sections below describe how to troubleshoot and maintain your Celltron Essential. If you have problems with the printer or temperature sensor, refer to their manuals or call Midtronics Customer Service. Screen does not light during testing Possible causes If the screen does not light when you test a jar, check the connection to the jar. -
Page 42: Probe Tip Is Bent Or Stops Retracting
4. Push the probe tip into a soft surface, such as cardboard, until the tip reaches the bottom of the probe sleeve. To obtain replacement tips, contact Midtronics Customer Service and ask for the part Note: number C069 for the DuraProbes or C059 for the MiniProbes. -
Page 43: Chapter 6: Specifications
Chapter 6: Specifications Model Number: Power Requirements: CTE-1600 (Kit), CTE-1100 (analyzer only) One 9-volt high capacity/heavy duty lithium battery or rechargeable battery pack accessory Applications: Environmental Operating Range: Tests individual lead acid cells or monoblocs 0 to +40°C, 95% relative humidity, (2, 6, 12 volts) in any common configuration non-condensing Voltage:... - Page 44 The analyzer is warranted to be free of defects in materials and workmanship for a period of one year from date of purchase. Midtronics will, at our option, repair the unit or replace the unit with a remanufactured analyzer. This limited warranty applies only to Midtronics battery analyzers and does not cover any other equipment, static damage, water damage, over-voltage, dropping the unit or damage resulting from extraneous causes including owner misuse.
Need help?
Do you have a question about the TEC-4500 and is the answer not in the manual?
Questions and answers