Table of Contents
Advertisement
Quick Links
Advertisement
Table of Contents

Subscribe to Our Youtube Channel
Related Manuals for Lilin CMG052X35


Summary of Contents for Lilin CMG052X35
- Page 1 35X D/N SUPER HI-RES. CAMERA CMG052X35 INSTRUCTION MANUAL...
-
Page 2: Important Safeguards
IMPORTANT SAFEGUARDS CAUTION RISK OF ELECTRIC SHOCK DO NOT OPEN CAUTION TO REDUCE THE RISK OF ELECTRIC SHOCK, DO NOT REMOVE COVER (OR BACK) NO USER SERVICEABLE PARTS INSIDE. REFER SERVICING TO QUALIFIED SERVICE PERSONNEL. GRAPHIC SYMBOL EXPLANATION The lightning flash with arrowhead symbol, within an equilateral triangle, is intended to alert the user to the presence of uninsulated "dangerous voltage"... - Page 3 CAUTION Do not drop or strike this equipment. Sensitive electronics inside are vulnerable to excessive shock. Do not install the equipment near any naked flames or heat sources. Excessive heat could damage this unit. Do not expose this unit to rain or excessive moisture, avoid smoke and dust.
-
Page 4: Table Of Contents
CONTENTS FEATURES PART DESCRIPTION CONFIGURATION OF THE MENU SETTING MENU AND FUNCTIONS LANGUAGE SELECTION CAMERA REBOOT COMMUNICATION SETUP DISPLAY SETUP LENS SETUP CAMERA SETUP PRIVACY ZONE MASK PRESET SETUP FACTORY RESTORE INSTALLATION PRODUCT COMPONENTS CAMERA TITLE CHARACTERS TABLE SPECIFICATIONS... -
Page 5: Features
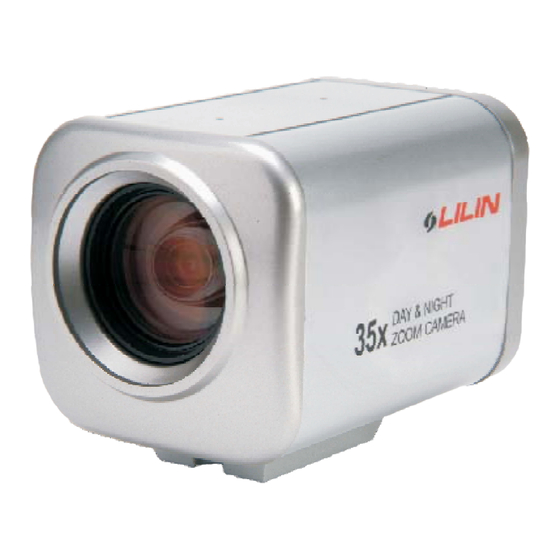
FEATURES The CMG052X35 series 35X Super Hi-Resolution Day&Night Camera introduces supremacy in video quality. This compact yet full functional color DSP camera use SONY high sensitive 1/4" interline transfer CCD. It delivers 520TVL of high resolution, superior color images in day condition and clear sharp monochrome pictures in night condition. -
Page 6: Part Description
APERTURE CORRECTION Refining captured image outlines for a sharper video image. COMMUNICATION INTERFACE RS-485/RS-232 control interface makes our cameras easy to fit into our exist system and compatible with other manufacturer's control systems. PART DESCRIPTION I G H T D A Y & N A M E R A 3 5 x Z O O M C... - Page 7 LENS MOUNT CAP Prevent damages to the optical lens and to keep dust away. CAMERA MOUNTING BRACKET The mounting bracket mounted underneath the main body can be mounted to either the top or bottom of the camera using the attached screws(M2.6x5.0). USER OSD SETTING UP(T) SETTING SWITCHES AND FUNCTIONS...
- Page 8 EXTERNAL CONTROL CONNECTOR ZOOM IN, Lens control input ZOOM OUT, Lens control inpu FOCUS FAR, Lens control input FOCUS NEAR, Lens control input +12V/100mA output EXCTRL IN, D/N control input D/N OUT, D/N control output D/N COM., D/N control output AUTO FOCUS, Lens control input AUTO IRIS, Lens control input IRIS CLOSE, Lens control input...
-
Page 9: Configuration Of The Menu
CONFIGURATION OF THE MENU MAIN MENU LANGUAGE <DISPLAY> CAMERA ID CAMERA TITLE ZOOM RATIO <LENS> FOCUS AUTO ONE PUSH IRIS <AUTO> MANUAL ZOOM SPD FOCUS SPD <CAMERA> EXPOSURE <AUTO> <MANUAL> PRIVACY ZONE SEL ZONE MODE BACKLIGHT <EDIT ZONE> WHITE LUMINANCE PUSH BALANCE <MANUAL>... -
Page 10: Setting Menu And Functions
SETTING MENU AND FUNCTIONS Press [SET] button to enter SETUP MENU. Press [UP/DOWN] button to select desired item. Press [LEFT/RIGHT] button to select or adjust the parameters. Press [SET] button to enter the SUB-MENU of selected item. Move the cursor to the "EXIT" and press [SET] button to exit SETUP MENU. Move the cursor to the "BACK"... -
Page 11: Display Setup
2. BAUD RATE Move the cursor to "BAUD RATE" and select Protocol Baud Rate by using [LEFT/ RIGHT] button. Baud rate changes as follows: 2400 4800 9600 19200 38400 NOTE MLP1/MLP2 protocol baud rate is 9600bps. 3. COMMUNICATION MODE MLP1/MLP2 protocol control mode is N, 8, 1 (none parity check, 8 Data bits, 1 Stop bit). 4. - Page 12 2. CAMERA TITLE DISPLAY Move the cursor to "CAMERA TITLE" and select OFF/ON by using [LEFT/RIGHT] button. OFF: CAMERA TITLE is not displayed. ON: CAMERA TITLE is displayed on the screen. Press [SET] button to display the CAMERA TITLE setup menu. CAMERA TITLE CHARACTER EDIT AREA...
-
Page 13: Lens Setup
(5) Return Display Setup Menu Move the cursor to "OK" and press [SET] button and return to DISPLAY SETUP menu. 3. ZOOM RATIO DISPLAY Move the cursor to "ZOOM RATIO" and select zoom ratio display elapsed time by using [LEFT/RIGHT] button. Display elapsed time change as follows: 1sec 3sec... -
Page 14: Camera Setup
3. ZOOM SPEED Move the cursor to "ZOOM SPD" and select Zoom Speed by using [LEFT/RIGHT] button. ZOOM SPEED: 00~07. 4. FOCUS SPEED Move the cursor to "FOCUS SPD" and select Focus Speed by using [LEFT/RIGHT] button. Focus speed change as follows: SLOW MID. - Page 15 (2) MANUAL MANUAL EXPOSURE Move the cursor to "EXPOSURE" and select SHUT SPEED 1/60 MANUAL by using [LEFT/RIGHT] button. Press [SET] button to display the MANUAL EXPOSURE menu. Select SHUT SPEED by using [LEFT/RIGHT] button. BACK EXIT Shutter Speed change as follows: 1/60(50) 1/100(120) 1/250...
- Page 16 (1) ATW (Auto-Tracing White Balance) Move the cursor to "WHITE BALANCE" and select ATW by using [LEFT/RIGHT] button. ATW is a feed forward system that automatically aligns the white balance by detecting the R, G and B before WB amplifier. The color temperature range for ATW mode is approximately 2500~9500K.
- Page 17 Move the cursor to "DLY TIME" and select Delay Time by using [LEFT/RIGHT] button. The color and monochrome mode switch delay time prevents the image turning from color to monochrome or monochrome to color too quickly under unstable light condition. Delay Time: 02~10 sec.
- Page 18 5. NIGHT ENVIRONMENT Move the cursor to "NIGHT ENV." and select NORMAL or INFRARED by using [LEFT/ RIGHT] button. This function select current night illuminator setting can more focus on object. NORMAL: When use a regular illuminator to be auxiliary at night, the item has to be set. INFRARED: When use a IR illuminator to be auxiliary at night, the item has to be set.
-
Page 19: Privacy Zone Mask
PRIVACY ZONE MASK 1. OFF PRIVACY ZONES Move the cursor to "PRIVACY" and select OFF by ZONE SEL ZONE MODE using [LEFT/RIGHT] button. <EDIT ZONE> LUMINANCE ABOVE NUM. 2. ON (1) Move the cursor to "PRIVACY" and select ON by BACK EXIT using [LEFT/RIGHT] button. -
Page 20: Preset Setup
(5) Move the cursor to "CLR" and select ABOVE NUM. or ALL by using [LEFT/RIGHT] button and press [SET] button to clear the masked zones. ABOVE NUM.: Only cancel parameter of allotted privacy zone. ALL: Cancel parameter of all privacy zone (1~8). PRESET SETUP Move the cursor to "PRESETS"... -
Page 21: Factory Restore
FACTORY RESTORE Move the cursor to "RESTORE" and press [SET] button RESTORE FACTORY DEFAULTS to display the RESTORE FACTORY DEFAULTS setup RESTORE menu. Press [LEFT/RIGHT] button to select ALL or CAMERA to restore. Press [SET] button to confirm, and "Are you sure continue"... -
Page 22: Installation
INSTALLATION 1. Fitting the Camera IG H T D A Y & N A M E R A 3 5 x Z O O M C IG H T D A Y & N A M E R A 3 5 x Z O O M C 2. -
Page 23: Product Components
RS-485 PRODUCT COMPONENTS 1. 35X Super High Resolution D/N Camera 2. Instruction manual 35X D/N SUPER HI-RES. CAMERA CMG052X35 IG H T D A Y & N A M E R A 3 5 x Z O O M C INSTRUCTION MANUAL 3. -
Page 24: Camera Title Characters Table
CAMERA TITLE CHARACTERS TABLE Page 1 " < > Page 2 Page 3... -
Page 25: Specifications
SPECIFICATIONS Model CMG052X35N CMG052X35P System NTSC Zoom Ratio 35X Optical Zoom Focal Length 3.43mm ~ 120mm Lens Max. Aperture Ratio 1:1.6(Wide) ~ 4.5(Tele) Angle of View Wide:68.6 (D) 57.8 (H) 43.7 (V), Tele:2.23 (D) 1.70 (H) 1.30 (V) Image Pick-up Device 1/4"... - Page 26 MERIT LILIN ENT. CO., LTD http://www.meritlilin.com 66-CMG052CSE...
Need help?
Do you have a question about the CMG052X35 and is the answer not in the manual?
Questions and answers