Subscribe to Our Youtube Channel
Summary of Contents for Lilin CMW158X2.2
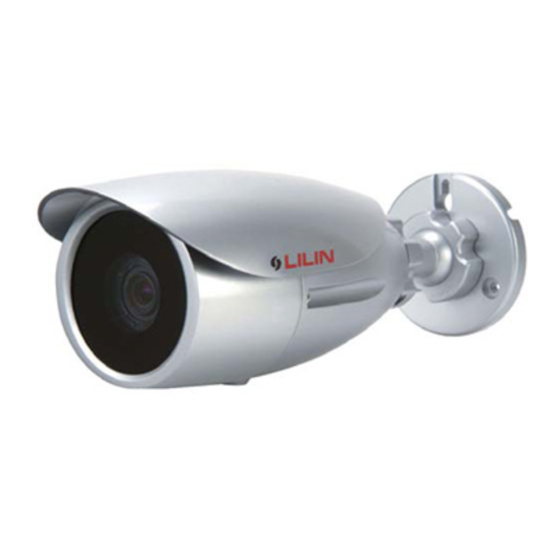
- Page 1 D/N VARI-FOCAL IR CAMERA CMR124X/128X/154X/158X3.6 CMR124X/128X/154X/158X2.2 WATERPROOF VARI-FOCAL COLOR CAMERA CMW124X/128X/154X/158X2.2 INSTRUCTION MANUAL...
-
Page 2: Risk Of Electric Shock
CAUTION The lightning flash with arrowhead symbol, within an equilateral triangle, is intended to alert the user to the RISK OF ELECTRIC SHOCK presence of uninsulated "dangerous voltage" within the product's enclosure that may be of sufficient magnitude to constitute a risk of electric shock to persons. CAUTION TO REDUCE THE RISK OF ELECTRIC SHOCK, DO NOT OPEN COVER. -
Page 3: Part Description & Dimension
Part Description & Dimension 83.5 Unit: mm SUN SHIELD FRONT FIXED RING REAR FIXED RING BASE WINDOW FRONT COVER FOCUS & ZOOM ADJUSTMENT SCREW REAR COVER AUXILIARY BASE... -
Page 4: Installation
Installation 1. First, take out the auxiliary base(FIG.1), and take power cable and video cable through auxiliary base. Then, fix the auxiliary base on any position you want(FIG.2&FIG.3). If you don't need to use the auxiliary base, please skip this step. FIG. - Page 5 1-2. It can adjust angle range on vertical(FIG.6&FIG.7) and horizontal(FIG.8&FIG.9) direction with auxiliary base. FIG. 6 FIG. 8 FIG. 7 FIG. 9 2. Take the camera body, and take out the green receptacle for backup(FIG.10). Then, take out two red receptacles, too. Right now, put the two red receptacles on the "Live" and "Neutral", and put the green receptacle on the "Earth"(FIG.11).
- Page 6 3. To plug in the red plug of brown(black) wire with the red receptacle of "Live". To plug in the red plug of blue (white) wire with the red receptacle of "Neutral". To plug in the green plug of yellow/green (green) wire with the green receptacle of "Earth". To plug in video output with video cable(FIG.12).
- Page 7 5. Using the screw driver to insert socket, and loosen the front and rear fix ring of the bracket. Also, move the camera body to the desired angle, and then tighten the front and rear fixed ring (FIG.16). Loosen Tighten Tighten Loosen FIG.
- Page 8 NOTES 1. The camera built-in the IRIS LEVEL VR and switch for indoor image(IN) / outdoor image (OUT). If want to adjust two functions as above, first please take out the sun shield, and then take out the screws of front cover and rear cover(FIG.18). Once it's done for adjustment, please tighten those screws again(FIG.19).
-
Page 9: Specifications
Specifications D/N STANDARD RESOLUTION VARI-FOCAL IR CAMERA Model No. CMR124X3.6 CMR128X3.6 CMR124X2.2 CMR128X2.2 Focal Length 3.3 ~ 12mm 4 ~ 9mm Iris F1.4 F1.6 Lens 89.8 ~ 23.9 ° ° 69 ~ 30.7 ° ° Angle of view 63.6 ~ 17.9 °... - Page 10 D/N SUPER HIGH RESOLUTION VARI-FOCAL IR CAMERA Model No. CMR154X3.6 CMR158X3.6 CMR154X2.2 CMR158X2.2 Focal Length 3.3 ~ 12mm 4 ~ 9mm Iris F1.4 F1.6 Lens 89.8 ~ 23.9 ° ° 69 ~ 30.7 ° ° Angle of view 63.6 ~ 17.9 °...
- Page 11 WATERPROOF VARI-FOCAL COLOR CAMERA Model No. CMW124X2.2 CMW128X2.2 CMW154X2.2 CMW158X2.2 Focal Length 4 ~ 9mm Iris F1.6 Lens 69 ~ 30.7 ° ° Angle of view 51 ~ 23 ° ° 86 ~ 38.5 ° ° Power Input Voltage AC24V ( 10%) ±...
- Page 12 MERIT LILIN ENT. CO., LTD http://www.meritlilin.com 66-CMR12CSE...


Need help?
Do you have a question about the CMW158X2.2 and is the answer not in the manual?
Questions and answers