
Related Manuals for Lilin CMD072 series


Summary of Contents for Lilin CMD072 series
- Page 1 WDR ULTRAHIGH RES. COLOR DOME CAMERA CMD072/076/172/176 Series D/N WDR ULTRAHIGH RES. VARI-FOCAL DOME CAMERA CMD072X/076X/172X/176X Series INSTRUCTION MANUAL...
-
Page 2: Important Safeguards
IMPORTANT SAFEGUARDS CAUTION RISK OF ELECTRIC SHOCK DO NOT OPEN CAUTION TO REDUCE THE RISK OF ELECTRIC SHOCK, DO NOT REMOVE COVER (OR BACK) NO USER SERVICEABLE PARTS INSIDE. REFER SERVICING TO QUALIFIED SERVICE PERSONNEL. GRAPHIC SYMBOL EXPLANATION The lightning flash with arrowhead symbol, within an equilateral triangle, is intended to alert the user to the presence of uninsulated "dangerous voltage"... - Page 3 CAUTION Do not drop or strike this equipment. Sensitive electronics inside are vulnerable to excessive shock. Do not install the equipment near any naked flames or heat sources. Excessive heat could damage this unit. Do not expose this unit to rain or excessive moisture, avoid smoke and dust.
- Page 4 CONGRATULATIONS Thank you for purchasing this Day/Night WDR Camera. You now own one of the many fine CCTV products we manufactured. This product has been carefully inspected under rigid quality control and should reach you in perfect condition. With reasonable care, it will provide years of reliable performance.
-
Page 5: Warranty Information
WARRANTY INFORMATION Please complete the following product purchase information. The factory will requests this information when contacted for technical support, or warranty repair. It is also valuable in case of loss or theft. Purchase Date Serial Number Model Number... -
Page 6: Table Of Contents
TABLE OF CONTENTS FEATURES PART DESCRIPTION & DIMENSION INSTALLATION CONFIGURATION OF THE MENU SETTING MENU AND FUNCTIONS CAMERA ID EXPOSURE WDR/BLC BRIGHTNESS AGC (Automatic Gain Control) SHUTTER (Shutter Speed) SENS-UP WHITE BAL (White Balance) DAY/NIGHT 3D-DNR (Digital Noise Reduction) PRIVACY SPECIAL D-ZOOM (Digital Zoom) D-EFFECT (Digital Effect) -
Page 7: Features
FEATURES ULTRAHIGH RESOLUTION By adopting a diagonal 6mm(1/3") 410,000(NTSC) pixel, 470,000(PAL) pixel CCD, the camera produces clear picture quality with a horizontal resolution of 600TV lines for color. WIDE DYNAMIC RANGE(WDR) For images with high contrast between bright and dark areas from difficult lighting conditions such as backlighting, this camera selectively illuminates darker areas while decreasing the light level for brighter areas to even out the overall brightness. - Page 8 HIGHLIGHT SUPPRESS BACK LIGHT COMPENSATION(HSBLC) The HSBLC function that effectively blocks strong light sources such as headlights. It provides optimum performance in recognizing vehicular license plates and objects at night. ON SCREEN DISPLAY CONTROL(OSD) This camera provides an on screen display(OSD) setup menu where all advanced functions can be selected and setup via OSD.
-
Page 9: Part Description & Dimension
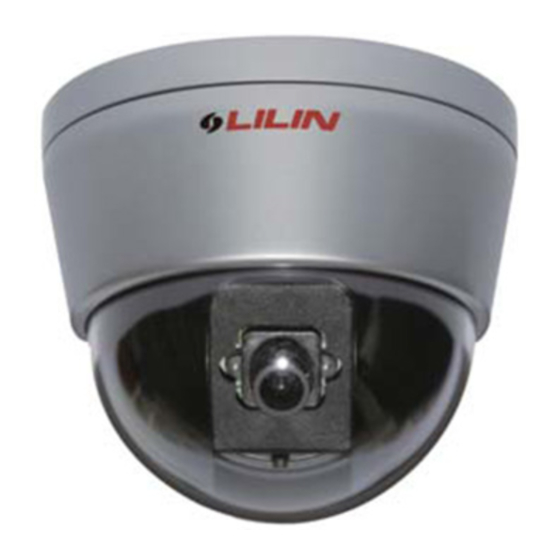
PART DESCRIPTION & DIMENSION [CMD072/076 Series] Unit : mm VIDEO OUTPUT JACK DC POWER INPUT (DC12V 10%) JACK DC12V (NON-POLARITY INPUT) OR AC24V POWER INPUT BASE FIX RING INSIDE COVER DOME COVER LENS... - Page 10 [CMD172/176 Series] Unit : mm VIDEO OUTPUT JACK DC POWER INPUT (DC12V 10%) JACK DC12V (NON-POLARITY INPUT) OR AC24V POWER INPUT BASE FIX RING INSIDE COVER DOME COVER LENS...
-
Page 11: Installation
INSTALLATION 1. Put the provided screws (M3.0 x 25, wooden screw) through the holes marked as "a", and fix the base in the desired area (FIG.1). 40mm FIG. 1 2. The direction of the lens is adjustable through the adjustable Pan/Tilt brackets and rotatable round bracket for Azimuth. - Page 12 OSD SETTING TILT BRACKET AZIMUTH ZOOM ADJUSTMENT FOCUS ADJUSTMENT FIG. 3 (CMD072X/076X/172X/176X) OSD SETTING (UP): Push up to move the cursor upwards or to select items. (LEFT): Push left to move the cursor to the left and to select or adjust the parameters of the selected item.
- Page 13 FIG. 4 4. Put on the inside cover first, and followed by put on the dome cover. Then tighten the fix ring(FIG.5). NOTE Point each "b" to each "c". FIG. 5...
-
Page 14: Configuration Of The Menu
CONFIGURATION OF THE MENU CAMERA CAMERA ID OFF/1~255 SETTING EXPOSURE WDR/BLC WDR LIMIT(1~7) BLC LIMIT(1~7) HSBLC AREA SETTING GRAY SCALE GRAY/D.GRAY/BLACK USER SCALE(0~5) MASK OFF/ON BRIGHTNESS(0~100) OFF/LOW/MIDDLE/HIGH SHUTTER OFF/A.FLK/(1/160~1/90000)/(X512~X2)/AUTO SENS-UP AUTO SENS-UP LIMIT(X2~X256) WHITE BAL PUSH MANUAL COLOR TEMP INDOOR/OUTDOOR RED(-100~100) BLUE(-100~100) DAY/NIGHT... - Page 15 SPECIAL D-ZOOM ZOOM(X1.1~X10) PAN(-100~100) TILT(-100~100) D-EFFECT OFF/V-FLIP/MIRROR/ROTATE SHARPNESS(0~68) STABILIZER OFF/ON COLOR OFF/ON SYNC PHASE(0~359) USER TITLE LANGUAGE RESET CAMERA REBOOT FACTORY RESET COMMUNICATION EXIT : Not used in the CMD072/076/172/176 Series.
-
Page 16: Setting Menu And Functions
SETTING MENU AND FUNCTIONS To Open and Exit the Menu screen CAMERA SETTING CAMERA ID EXPOSURE WHITE BAL DAY/NIGHT AUTO 3D-DNR MIDDLE PRIVACY SPECIAL RESET EXIT 1. Press "SET" button. The Menu screen appears on the monitor. Check the current settings on the menu. -
Page 17: Exposure
EXPOSURE You can set the exposure options using the EXPOSURE menu. Select [EXPOSURE] option on the [CAMERA SETTING] menu. Press "SET" button and the EXPOSURE menu appears. CAMERA SETTING EXPOSURE-ALC CAMERA ID WDR/BLC EXPOSURE BRIGHTNESS WHITE BAL MIDDLE DAY/NIGHT AUTO SHUTTER AUTO 3D-DNR... -
Page 18: Agc (Automatic Gain Control)
EXPOSURE-ALC WDR/BLC BRIGHTNESS MIDDLE SHUTTER AUTO SENS-UP EXIT AGC (Automatic Gain Control) If the image are too dark, change the maximum [AGC] value to make the images lighter. 1. Select [AGC] option. 2. Push button to select a mode. MIDDLE HIGH EXPOSURE-ALC WDR/BLC... -
Page 19: Sens-Up
EXPOSURE-ALC WDR/BLC BRIGHTNESS MIDDLE SHUTTER AUTO SENS-UP EXIT SENS-UP If pictures are not clear due to darkness, use for increase the sensitivity of picture. 1. Push button to select [SENS-UP] option. 2. Push button to selec t a [AUTO]. To setting the [AUTO] function, select the [AUTO] on the [SHUTTER]. 3. - Page 20 MANUAL CAMERA SETTING CAMERA ID EXPOSURE WHITE BAL DAY/NIGHT AUTO 3D-DNR MIDDLE PRIVACY SPECIAL RESET EXIT ATW (Auto Tracing White Balance): The color temperature range for the proper white balance is approximately 1,700K~11,000K. Proper white balance may not be obtained under the following conditions: A.
-
Page 21: Day/Night
DAY/NIGHT 1. Select [DAY/NIGHT] option on the [CAMERA SETTING] menu. 2. Push button to select mode for day/night function. NIGHT AUTO CAMERA SETTING CAMERA ID EXPOSURE WHITE BAL DAY/NIGHT AUTO 3D-DNR MIDDLE PRIVACY SPECIAL RESET EXIT DAY: Color mode enabled. NIGHT : Monochrome mode enabled. -
Page 22: Privacy
NOTES 1. If you set the AGC to [OFF] on the [EXPOSURE-ALC] menu or the [EXPOSURE- ELC] menu, the [3D-DNR] function is not available and [---] mark is displayed. 2. When you use this function, the afterimage may occur. PRIVACY This function is aiming at the protection of personal privacy, selecting a screen part black not to be displayed in the screen. -
Page 23: Special
SPECIAL This menu lets you adjust and setup D-ZOOM, D-EFFECT, SHARPNESS, COLOR, SYNC, USER TITLE, LANGUAGE function by yourself in the SPECIAL menu. 1. Select [SPECIAL] option on the [CAMERA SETTING] menu. 2. Press "SET" button and the SPECIAL menu appears. CAMERA SETTING SPECIAL CAMERA ID... -
Page 24: D-Effect (Digital Effect)
D-EFFECT (Digital Effect) You can select the digital effect. 1. Select [D-EFFECT] option on the [SPECIAL] menu. Push button to select a digital effect. V-FLIP MIRROR ROTATE SPECIAL D-ZOOM D-EFFECT SHARPNESS STABILIZER COLOR SYNC USER TITLE LANGUAGE EXIT V-FLIP: Flip the picture vertically. MIRROR: Turn on the mirror effect. -
Page 25: Color
SPECIAL D-ZOOM D-EFFECT SHARPNESS STABILIZER COLOR SYNC USER TITLE LANGUAGE EXIT OFF: Turn off the electronic image stabilizer effect. ON: Turn on the electronic image stabilizer effect. COLOR You can select the color effect. 1. Select [COLOR] option on the [SPECIAL] menu. 2. -
Page 26: User Title
USER TITLE You can use the camera identification to assign a number and character to the camera(0~9, A~Z, a~z). The USER TITLE is displayed on the center screen. To disappear the user title, select [OFF]. 1. Select [USER TITLE] option on the [SPECIAL] menu. 2. -
Page 27: Reset
RESET 1. Select [RESET] option on the [CAMERA SETTING] menu. 2. Press "SET" button and the RESET menu appears. 3. Push button to select option. CAMERA SETTING CAMERA ID EXPOSURE WHITE BAL DAY/NIGHT AUTO 3D-DNR MIDDLE PRIVACY SPECIAL RESET EXIT CAMERA REBOOT: To reboot the camera system. -
Page 28: Specifications
SPECIFICATIONS WDR ULTRAHIGH RESOLUTION COLOR DOME CAMERA CMD072 CMD076 CMD072 CMD072 Model No. CMD172 CMD176 CMD172 CMD172 Focal Length 3.6mm 6.0mm Iris F2.0 F1.8 Lens 44.5 Angle of View 54.5 33.1 DC12V 10% DC12V 10% Power Input Voltage DC12V 10% DC12V 10% AC24V 10% AC24V 10%... - Page 29 D/N WDR ULTRAHIGH RESOLUTION VARI-FOCAL DOME CAMERA CMD072X4.2 CMD076X4.2 Model No. CMD172X4.2 CMD176X4.2 Focal Length 2.8~12mm Iris F1.2 Lens 99.6 ~ 24.9 Angle of View 73.2 ~ 18.8 128.5 ~ 31.0 DC12V 10% Power Input Voltage DC12V 10% AC24V 10% System NTSC or PAL Pick Up Element...
- Page 30 MERIT LILIN ENT. CO., LTD http://www.meritlilin.com 66-CMD072CSE...
Need help?
Do you have a question about the CMD072 series and is the answer not in the manual?
Questions and answers