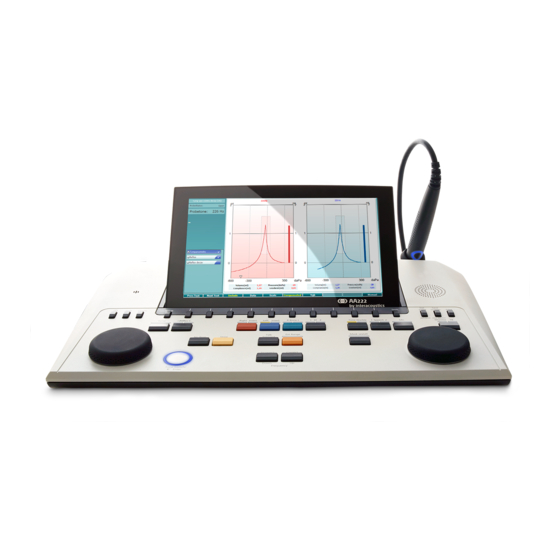
Interacoustics AA222 Additional Information
Impedance audiometer
Hide thumbs
Also See for AA222:
- Instructions for use manual (1061 pages) ,
- Instructions for use manual (93 pages)
Table of Contents
Advertisement
Quick Links
Advertisement
Table of Contents

Subscribe to Our Youtube Channel
Related Manuals for Interacoustics AA222


Summary of Contents for Interacoustics AA222
- Page 1 Additional Information AA222 Impedance Audiometer D-0115567-C – 2017/11...
-
Page 3: Table Of Contents
Table of contents About the AA222 ..........................1 General operation of the tympanometry module ............... 3 Preparing for the tympanometry test .................. 3 2.1.1 Tympanometry patient instruction ................3 2.1.2 Visual inspection of the ear canal ................3 2.1.3 Placement of the contralateral phone ..............4 2.1.4... - Page 4 7.1.3 Modify the custom logo printout witout PC connection ........47 7.1.4 Printing from a direct printer ................. 49 MPTIII (thermal printer) ..................... 49 7.2.1 Installing the Sanibel MPT-III thermal printer ............49 7.2.2 Modify the custom logo printout ................49 7.2.3 Printing from the MPT-III thermal printer..............
-
Page 5: About The Aa222
The AA222 is a device combining audiometry and tympanometry. The target population for the AA222 covers all ages. The AA222 is designed to be used only by skilled personnel such as audiologists, ENT surgeons, doctors, hearing healthcare professionals or personnel with a similar type and level of education. - Page 6 AA222 Additional Information Page 2...
-
Page 7: General Operation Of The Tympanometry Module
AA222 Additional Information Page 3 2 General operation of the tympanometry module 2.1 Preparing for the tympanometry test 2.1.1 Tympanometry patient instruction Place the patient on a comfortable chair or, if necessary, on an examination table. Younger children may feel more comfortable sitting on a parent's or nurse's lap. -
Page 8: Placement Of The Contralateral Phone
AA222 Additional Information Page 4 2.1.3 Placement of the contralateral phone If the contra headphone is used, place the headband over the patient's head. The audiometric headphone is placed over the non-test ear (or contralateral reflex ear). If the insert phone is used, mount the proper foam tip on the end of the tubing before inserting into the non- test ear. -
Page 9: Tympanometry
AA222 Additional Information Page 5 2.2 Tympanometry The default display of tympanometry tests shows graphs for both left and right ear. The following information is found in the display: The label above the graph indicates which probe tone frequency was used while measuring the recording that is plotted. - Page 10 AA222 Additional Information Page 6 Manual tympanometry testing The dot represents the measurement of the (non-compensated) acoustic admittance. It is only shown when not recording. During recording, the display will always be non-compensated. The empty triangle indicates actual pressure. The full triangle is the pressure cursor showing the current target pressure. It is moved by turning the...
-
Page 11: Reflex
AA222 Additional Information Page 7 2.3 Reflex Note that in cases where your protocol has no reflex test included, you can temporarily include a reflex test in your protocol by pressing the I Reflex C button. The default displays of reflex tests show a matrix of reflexes, which are measured in the order of appearance on the screen. - Page 12 AA222 Additional Information Page 8 In the second setup, the probe is placed in the left ear with the contra headphone placed on the right ear.
-
Page 13: Reflex Decay
AA222 Additional Information Page 9 2.4 Reflex decay Note that in cases where your protocol has no reflex decay test included, you can temporarily include a reflex decay test in your protocol by holding the Shift button while pressing the I Reflex C button. Pressing this combination also allows including and excluding a reflex decay test from running automatically. -
Page 14: Reflex Latency
AA222 Additional Information Page 10 2.5 Reflex latency The reflex latency test will be automatically performed with an activator intensity of 10 dB above the reflex threshold. The test will show a pop-up and ask for the intensity of the activator in case: •... -
Page 15: Eustachian Tube Function - Non-Perforated Eardrum
AA222 Additional Information Page 11 2.6 Eustachian tube function – non-perforated eardrum The display of the Eustachian tube function test for the non-perforated eardrum shows graphs for the selected ear in which the three tympanograms of the adapted Williams procedure are plotted. The Williams procedure keeps the pressure between the first and second tympanogram at the stop pressure, and between the second and third tympanogram at the start pressure. -
Page 16: Eustachian Tube Function - Perforated Eardrum
AA222 Additional Information Page 12 2.8 Eustachian tube function – perforated eardrum The default display of the Eustachian tube function test for a perforated eardrum shows a graph for the selected ear. The following information is available during testing: The pressure curve showing that the pressure drops each time the patient swallows. Notice that an exponential release of pressure means that the probe sealing might not be sufficient. -
Page 17: Eustachian Tube Function - Patulous Eustachian Tube
AA222 Additional Information Page 13 2.9 Eustachian tube function – patulous eustachian tube The patulous Eustachian tube test is an impedance baseline test. It monitors changes in impedance over time without applying pressure changes or acoustic stimuli. When a patulous Eustachian tube is present you would typically expect to identify the breathing of the patient in the tympanometric curve. - Page 18 AA222 Additional Information Page 14...
-
Page 19: General Operation Of The Audiometry Module
AA222 Additional Information Page 15 3 General operation of the Audiometry module 3.1 Pure tone audiometry Please refer to the quick guide ‘Tone Audiometry’ (D-0113813) 3.1.1 Masking Please refer to the quick guide ‘Audiometric masking’ (D-0113988) 3.2 Weber Please refer to the quick guide ‘Weber’ (D-0113814) 3.3 Stenger... - Page 20 AA222 Additional Information Page 16...
-
Page 21: Setup Menu
AA222 Additional Information Page 17 4 Setup menu 4.1 Instrument settings Instrument settings is shared by the audiometry and impedance modules and contains all the general settings including license, light, date and time, and printer settings. Hold the Setup button (4) and select Instrument settings by rotating the wheel (34/38). - Page 22 When the AA222 is connected to the Diagnostic suite, your PC automatically updates the date and time. Printer Under Printer type you can select which printer is connected to the USB port of your AA222. By default, the Sanibel MPT-III thermal printer is selected. The list below shows the currently supported printers: Under Printer color mode you can select your printer to print in black and white or 3 color (CMY) or 4 color (CMYK) mode.
- Page 23 Selects the startup screen for either the Aud or Imp module. In addition, the following buttons are available: Pressing Install allows you to install new firmware on the AA222. By pressing Install the instrument will look for a USB dongle. If there is one or more installation file available, the installation process will then commence.
-
Page 24: Tympanometry Setup Menu
AA222 Additional Information Page 20 4.2 Tympanometry setup menu When holding the Setup button a menu pops up where you can select one of the options by rotating the wheel and then releasing the Setup button. By default, Protocol settings is selected in which you can temporarily or permanently change the settings used during testing. - Page 25 AA222 Additional Information Page 21 The following buttons are available while in protocol settings. Note that all changes to the settings are stored immediately. Pressing Exit will therefore result in the settings being temporarily in use. After saving or clearing a session by the New session button, the original protocol settings are restored.
- Page 26 AA222 Additional Information Page 22 4.2.2.1 Tymp settings Select a tymp test in your Protocol settings. By rotating the wheel, the following settings can be selected and changed. Auto run. When enabled, the test will run automatically as part of the protocol.
- Page 27 AA222 Additional Information Page 23 Show normative box. Select to show a rectangle in which the compliance peak is that expected under normal conditions of the middle ear. K - N Normative box. Minimum and maximum pressure and compliance values are defined here.
- Page 28 Start level up to Stop level, also if the threshold criterion is attained before reaching Stop level. When Auto stop is chosen, the AA222 will detect the reflex threshold depending on the threshold criterion, and confirm the reflex at the same intensity.
- Page 29 AA222 Additional Information Page 25 Peak pressure offset defines how far from the peak pressure the reflex is measured. When multiple peaks are found, the measurement is taken from the highest peak. Note that the automated reflex can only use the peak pressure when a tympanogram measured at the same frequency precedes the reflex test.
- Page 30 AA222 Additional Information Page 26 Probe frequency 226 Hz 678 Hz 800 Hz 1000 Hz Ear side Ipsi Contra Contra Contra Contra 1000 1000 1000 1000 1000 2000 2000 2000 2000 2000 3000 3000 3000 3000 3000 4000 4000 4000...
- Page 31 Test duration sets the length of the probe tone to 10, 15, 20, 25 or 30 seconds. Show warning gives you the opportunity to set a level at which the AA222 will give a warning. Measure decay at ambient pressure allows you to measure reflex decay while the tympanic peak pressure is being disregarded.
- Page 32 Auto run. When enabled, the test will run automatically as part of the protocol. Show warning gives you the opportunity to set a level at which the AA222 gives a warning. Measure latency at ambient pressure allows you to measure reflex latencies while the tympanic peak pressure is being disregarded.
- Page 33 Connect a pc keyboard to the USB port of the AA222 for easy typing options, including the use of special characters.
- Page 34 Connect a pc keyboard to the USB port of the AA222 for easy typing options, including the use of special characters. Start pressure. You can set the start pressure here. This can vary between +400 and -600 daPa.
- Page 35 With the precision of the AA222, it is not uncommon to measure a patient’s heartbeat. By rotating the wheel, you can select and change the following settings.
- Page 36 Connect a pc keyboard to the USB port of the AA222 for easy typing options, including the use of special characters.
-
Page 37: Manage Protocol Settings
AA222 Additional Information Page 33 4.2.3 Manage protocol settings Hold the Setup button and rotate the wheel until you can select Manage protocols. A window pops up showing the currently available protocols on your instrument. By default, all custom made protocols are displayed at the top of the list and all factory default protocols are displayed at the bottom of the list. -
Page 38: Audiometry Setup Menu
AA222 Additional Information Page 34 4.3 Audiometry setup menu When holding the Setup button a menu pops up in which you can select one of the options by rotating the wheel and then releasing the Setup button. By default, the settings of the current test, Tone settings or Auto settings are selected. - Page 39 AA222 Additional Information Page 35 Weber Shown on tone audiogram will display the Weber results on the pure tone audiogram. Select Show on print to have your Weber results printed on the audiogram. Pulse Use the slider on Multi to adjust the pulse length (duty cycle 50%).
-
Page 40: Working With User-Defined Setups (Test Protocols)
AA222 Additional Information Page 36 4.3.2 Working with user-defined setups (test protocols) There are many different requirements regarding both the functionality and appearance of an audiometer, depending on the specific situation as well as factors such as national standards. When the device asks for settings at startup, the device will load the preferred protocol setup of a given clinician or clinic. - Page 41 AA222 Additional Information Page 37 Set the default presentation of channel 1 to Continuous, Single pulse, Multi Pulse. Set the default presentation to manual or reverse. Hearing loss on audiogram You can enable or disable the Show European CPT-AMA index. When enabled, the European CPT-AMA is then calculated and displayed on the tone test screen.
- Page 42 AA222 Additional Information Page 38 Control Select Jump to 1 kHz by output change if you want to default to 1000 Hz when changing ear side. At Jump Strategy you define how the system automatically changes frequency when storing thresholds.
-
Page 43: Speech Settings
AA222 Additional Information Page 39 Use Change +/- to change the frequency and intensity of the speech banana display. When the ‘Show PTA (Flecher) index is enabled, it is possible to set the intended frequencies used for the calculation of the PTA. - Page 44 AA222 Additional Information Page 40 Measurement type In order to use dedicated symbols for aided and binaural measurements, make sure you select the appropriate measurement type here. Representation Masking type allows you to toggle between SN (speech noise) or WN (white noise) as the default masking signal.
-
Page 45: Auto Settings
AA222 Additional Information Page 41 Use the wheel for channel 1 to change the output of the frequency or intensity. Use wheel 2 to move through the boxes. This a multifunctional key. Press Toggle to toggle between enable or disable for a selected setting. - Page 46 AA222 Additional Information Page 42 Frequencies Enable or disable the frequencies that should be part of the Békésy test. In addition the following buttons are available from the Auto settings: This a multifunctional key. Press Toggle to toggle between enable or disable for a selected setting.
-
Page 47: Diagnostic Suite
AA222 Additional Information Page 43 5 Diagnostic suite 5.1 Transferring a custom symbol scheme from the suite to the device 1. It is possible to transfer a customized symbol scheme from Diagnostic suite to the device. 2. Go to AUD – Menu – Setup – General Setup 3. - Page 48 AA222 Additional Information Page 44...
-
Page 49: Operating Through A Database
6 Operating through a database 6.1 OtoAccess It is possible to operate the AA222 through Diagnostic suite to a database. This makes it possible to save the obtained data directly to either one client in Otoaccess or multiple clients in Otoaccess 6.1.1... - Page 50 AA222 Additional Information Page 46...
-
Page 51: Print
A list of supported direct printers will appear from the Instrument setting – Default printers • Select the required printer from the list • The printer is now setup for printing. Press Print on the AA222 to obtain a printout of the audiometry and impedance data 7.1.2 Modify the custom logo printout •... - Page 52 AA222 Additional Information Page 48 Open the program Paint from the program accessories folder. Open Image Properties using the shortcut Ctrl + E Set width to 945 and height to 190 as illustrated above. Click OK. Edit the image and the company data to fit inside the set area.
-
Page 53: Printing From A Direct Printer
3. Connect the MPT-III printer to the AA222 via the USB. 4. Turn on the printer. 5. The printer is now setup for printing. Press Print on the AA222 to obtain a printout of the audiometry and impedance data. 7.2.2 Modify the custom logo printout 1. -
Page 54: Printing From The Mpt-Iii Thermal Printer
AA222 Additional Information Page 50 7.2.3 Printing from the MPT-III thermal printer It is possible to print the results of the different audiometry and impedance measurements on the MPT-III printer. Below are some examples of the audiometry and impedance elements. If the name of the client has... -
Page 55: Print Wizard (Diagnostic Suite Only)
AA222 Additional Information Page 51 7.3 Print Wizard (Diagnostic suite only) The Print Wizard is designed to make it easy to customise the print template, so that the data shared with others contains the information relevant to each individual clinic. The Print Wizard works with the Affinity suite, Callisto suite, Equinox suite, Diagnostic suite, Titan suite and VIOT suite. -
Page 56: Print Wizard Elements
AA222 Additional Information Page 52 7.3.2 Print Wizard elements Now the Print Wizard window opens and shows the following information and functionalities: 1. Underneath Categories you can select: • Templates to show all available templates • Factory defaults to show only standard templates •... -
Page 57: Designing A Customised Print Template
AA222 Additional Information Page 53 7.3.3 Designing a customised print template After clicking on the New Template (or Edit Template) button, the design window below is displayed. On the left of the screen, you will see the elements which you can add to the layout. These are ordered by their corresponding test module. -
Page 58: Taskbar
AA222 Additional Information Page 54 4. Press Save to save the print template and go back to the Print Wizard window. If you have created a new template you will be prompted to give it a name. Press Save As… if you have modified an existing template and want to save under a different name. -
Page 59: Design Elements
AA222 Additional Information Page 55 7.3.5 Design elements Add template elements to the template page by using the select, drag and drop function. Click on the desired element and drag it onto the template page. The element will appear as a small box in the upper left hand corner. - Page 60 AA222 Additional Information Page 56 7.3.5.1 General 1. Select Select, let you select a window already on the print template and makes it possible to modify it. 2. Client information a. By right clicking on an element you can see Select fields. In Select fields you can change the...
- Page 61 AA222 Additional Information Page 57 3. Clinic information a. Select fields displays the Select fields window where you can select which items are to be shown in the clinic information element. You can change the order of the items by selecting one and...
- Page 62 AA222 Additional Information Page 58 Selecting Rotate makes the element rotate 90 degrees clockwise. 4. Logo Select image opens a window where you can browse to find the image stored on your PC that you want to include in the template.
- Page 63 AA222 Additional Information Page 59 6. Date Time Date and time allows you to put in a stamp on the template showing date and/or time of printing. a. Enter setup…opens the Date Time setup window where you can choose the format in which the date and/or time appears in the template.You can also choose the font type, size and formatting.
- Page 64 Select modules gives the opportunity to define which modules’ protocol names will be shown. On the print out you can combine measurements from Titan suite and other Interacoustics suites (Callisto, Affinity, Equinox, Diagnostic). b. Toggle border allows you to disable or enable the border around the Session date element.
- Page 65 AA222 Additional Information Page 61 7.3.5.2 Using the different elements to create a template 1. Once drawn, you can move the element to your desired position on the template and also right click to define the parameters of the information displayed. For instance, in the example displayed above, right clicking on the object allows you to ‘select type’.
- Page 66 AA222 Additional Information Page 62 3. A reflex protocol can be set in two different ways which will affect the print setup of it. Seperate ipsi and contra reflex protocols Combined ipsi and contra protocols Ensure index is set for 1, it will by default Set the ipsi to index 1 and conra to index 2.
- Page 67 AA222 Additional Information Page 63 5. However, if you left-click on one element and then hold Control on your keyboard and left-click on another, you will then be able to activate the rest of this tool bar. This presents the sizing and alignment options.
- Page 68 AA222 Additional Information Page 64 Notice how the first element clicked adopts the settings (size) from the second element.
- Page 69 AA222 Additional Information Page 65 6. Continue to click and further customize your print template. Once completed you can add information on your clinic (via a blank Test box) and even a logo. You can do this via the General sub-tab on the left of the screen.
- Page 70 AA222 Additional Information Page 66 7. Finally, the screenshots below demonstrate the addition of a text box beneath the logo to show the site address and contact details.
- Page 71 AA222 Additional Information Page 67 In this section, you can also alter the font and formatting of the text and how it will appear on your print layout. This text box will then be common to this particular print template when it is printed in the future.
- Page 72 AA222 Additional Information Page 68...
-
Page 73: Saving Your Print Template
AA222 Additional Information Page 69 7.3.6 Saving your print template Now that you have completed your print template and have designed it in line with your preferences and requirements, you can click on Save or Save As… in the top left of the screen. -
Page 74: Editing A Print Template Prior To Printing
AA222 Additional Information Page 70 Once you have titled this layout and clicked Ok, it will appear in your Print Wizard as a new layout. 7.3.7 Editing a print template prior to printing If you want to use a template different from the template linked to the protocol, go to Menu – File – Print Wizard in any of the suites.
Need help?
Do you have a question about the AA222 and is the answer not in the manual?
Questions and answers