Table of Contents
Advertisement
Quick Links
Advertisement
Table of Contents

Related Manuals for ACME Eventx 100


Summary of Contents for ACME Eventx 100
-
Page 1: User Manual
User Manual Please read the instructions carefully before use English Version 1.0... -
Page 2: Table Of Contents
3.3 DMX 512 connection …………………………................5 3.4 DMX 512 controller ………………………….................. 6 3.5 IR remote control …………………………..................6 3.6 Wireless connection ……………………..................7 4. Description of EventX 100 …………………..……………………………………………………………………………… 9 4.1 Dimension ……………………....................... 9 4.2 Overview ……………………....................... 9 4.3 Control board ……………………....................10 5. -
Page 3: Introduction
Do install and operate by operator. 2 - Safety Instructions The EventX 100 is a multi-environmental fixture with an IP-rating 65, intented for professional use only. It is not suitable for household use. Operator must be qualified and follow carefully the instructions of this user manual. Do not allow children to operate the fixture. -
Page 4: Preventing Burns And Fire
So if these light source hits the front glass, sheild it or point the head in the opposite direction to the light source. 3.1 Connection to the main Warning If you use EventX 100 with his charger, ensure that the voltage and frequency of power supply match the power requirements of the charger. Input Charger: 100-240 Vac 50/60Hz Output Charger: DC 29.4 V... -
Page 5: Mounting The Fixture On A Truss
3.2 Mounting the fixture on a truss The unit should be mounted via its screw holes on the bracket. Always ensure that the unit is firmly fixed to avoid vibration and slipping while operating. Always ensure that the structure to which you are attaching the unit is secure and is able to support a weight of 10 times of the unit’s weight. -
Page 6: Dmx512 Connection
3.3 DMX512 connection - If you using a controller with 3 pins DMX output, you need to use a 3 to 5 pin adapter-cable. - At last unit, the DMX cable has to be terminated with a terminator. Solder a 120 ohm 1/4W resistor between pin 2(DMX-) and pin 3(DMX+) into a 5-pin XLR-plug and plug it in the DMX-output of the last unit. -
Page 7: Dmx 512 Controller
The DMX output and input connectors are pass-through to maintain the DMX circuit, when one of the units’ power is disconnected. - Each lighting unit needs to have an address set to receive the data sent by the controller. The address number is between 0-511 (usually 0 &... -
Page 8: Wireless Connection
3.6 Wireless connection To setup the WDMX you need a Wireless Transceiver as our XP-LR 512 RT. Press Menu button 2 seconds if the display is locked, else one impulsion on the Menu button is necessary to access to the main menu. The display will show “... - Page 9 The display will show “ Zoom Motor ”. Use the UP/DOWN button to select Radio Clear Code. Press the ENTER button to confirm. Use the UP/DOWN button to select Yes or No. Press the ENTER button to confirm. The display will show “ Press up and down key, Hold over 5s ”. Do not press now.
-
Page 10: Description Of Eventx 100
During this process the display will show '' Radio Code Clearing '' You can release Up and Down buttons when the display come back to the main menu. WF will appear. 4 - Description of EventX 100 4.1 Dimensions... -
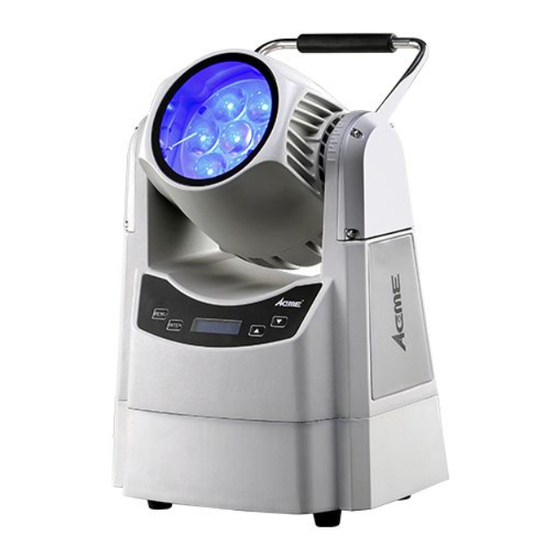
Page 11: Overview
4.2 Overview 1. MENU: Activate display or to back to the last menu 2. ENTER: To confirm the selected functions 3. Display: To show the menu and the selected functions UP: To go forward in the selected functions DOWN: To go backward in the selected functions 6. -
Page 12: Control Board
1. Channel Mode number: 5, 7 or 8 2. Master or Slave setting: M=Master; S1=Slave1; S2=Slave2; S3=Slave3 3. Address DMX setting: 001 to 512 4. EventX 100 connection: DMX or WiFi 5. Display statue: Lock 6. Charge level of the battery. -
Page 13: Menu
5 - Menu To unlock the display, press the MENU button 2 seconds. If the lock Icon is not display, one impulsion on the Menu button is necessary to access to the first Menu. Use the DOWN and UP button to change the mode. Once mode wished selected, press the ENTER button to setup. No action for one minute, it will automatically return to the main Menu and the display will be locked. -
Page 15: Dmx Address
DMX Settings Press Menu button 2 seconds if the display is locked, else one impulsion on the Menu button is necessary to access to the first menu. The display will show “ DMX Setting ” Use the UP/DOWN buttons to select DMX Address, RDM Device ID or Channel Mode. DMX Address With this function, users are able to set the DMX start address to the projector. -
Page 16: Fixture Settings
- Use the UP/DOWN button to select Calibration or Max. Calibration This function is a factory color setting. We reduce the power of LED to give you the best match color and white output across multiple EVENTX 100. Calibration selected: - Press the ENTER button to confirm. -
Page 17: Dimmer Speed
Autorun: If EventX 100 is in mode M/S in the menu DMX State, the program will start automatically when the unit is power on. Run: If EventX 100 is in mode M/S in the menu DMX State, the program can start only when the user selects Run and confirm. -
Page 18: Edit Program
- Use the UP/DOWN button to select Autorun or Run. - Press the ENTER button to confirm. - Press the MENU button back to the last menu or let the unit idle one minute to exit menu mode. Edit Program In this menu, users are able to edit program. - Page 19 - Press the ENTER button to confirm. - Use the UP/DOWN button to select between Scene 1 to Scene 20. - Press the ENTER button to confirm. Delete With this function, users are able to delete one Scene, between Scene 1 to Scene 20. Delete selected: - Press the ENTER button to confirm.
- Page 20 Fade Time With this function, users set the fade-in (transition) time to current scene in second. (0 to 255) Fade Time selected: - Press the ENTER button to confirm. - Use the UP/DOWN button to change the value. - Press the ENTER button to confirm. - Press the MENU button back to the last menu or let the unit idle one minute to exit menu mode.
-
Page 21: Auto Test
- Press the ENTER button to confirm. Auto Test In this menu, EventX 100 will run built-in programs to automatically test. Press Menu button 2 seconds if the display is locked, else one impulsion on the Menu button is necessary to access to the first menu. - Page 22 - Press the MENU button back to the last menu or let the unit idle one minute to exit menu mode. Display Warning With this function, users are informed if EventX 100 has problems. Display Warning selected: - Press the ENTER button to confirm.
-
Page 23: Firmware Version
- Press the MENU button back to the last menu or let the unit idle one minute to exit menu mode. Radio Clear Code With this function, users will associate EventX 100 to a Wireless Transceiver. Radio Clear Code selected: - Press the ENTER button to confirm. -
Page 24: Dmx Chart
6 - DMX chart 5 Channels Mode: Channel Value Function 000-255 Dimmer 0% – 100% 000-255 GREEN Dimmer 0% – 100% 000-255 BLUE Dimmer 0% – 100% 000-255 WHITE Dimmer 0% – 100% 000-255 ZOOM 0% – 100% 7 Channels Mode: Channel Value... - Page 25 8 Channels Mode: Channel Value Function 000-255 BEAM DIMMER 0% – 100% STROBE EFFECT 000-007 008-015 016-131 Strobe from slow to fast 132-139 140-181 Slow open fast close 182-189 190-231 Slow close fast open 232-239 240-247 Random strobe 248-255 COLOR 000-009 Open, RGBW color mixing enabled...
- Page 26 130-134 LEE 088 – Lime green 135-139 LEE 100 – Spring yellow 140-144 LEE 104 – Deep amber 145-149 LEE 179 – Chrome orange 150-154 LEE 105 – Orange 155-159 LEE 021 Gold amber 160-164 LEE 778 – Millennium gold 165-169 LEE 135 –...
-
Page 27: Lee Colors And Rgb Dmx Values
7 - LEE colors and RGB DMX values The values R, G, B are approximate. They were obtained by comparing the coordinates X, Y from Lee table with a base white to 6000K. These colors were obtained with EventX 100 is in calibration mode. -
Page 28: Technical Specifications
8 - Technical Specifications Source and Optics Light source: 7x10W RGBW LEDs Beam angle: 10° - 60° Control Control Modes: DMX, Wireless, Master/Slave, IR remote control DMX Channel: 5/ 7/ 8 Channel Modes Firmware upgrade: Update via DMX link 2.4G Built-in Wireless Housing &... -
Page 29: Troubleshooting
9 - Troubleshooting Following are a few common problems that may occur during operation. Here are some suggestions for easy troubleshooting: A. The unit does not work, no light 1. Check the power level battery 2. Check the power connection of the charger if pluged Measure the mains voltage on the main connector if charger pluged B. -
Page 31: Declaration Of Conformity
Declaration of Conformity We declare that our products (lighting equipments) comply with the following specification and bears CE mark in accordance with the provision of the Electromagnetic Compatibility (EMC) Directive 89/336/EEC. EN55103-1: 2009 ; EN55103-2: 2009; EN62471: 2008; EN61000-3-2: 2006 + A1:2009 + A2:2009; EN61000-3-3: 2008. &... - Page 32 Innovation, Quality, Performance...
Need help?
Do you have a question about the Eventx 100 and is the answer not in the manual?
Questions and answers