
Subscribe to Our Youtube Channel
Related Manuals for MICRO-EPSILON ILD1402-5


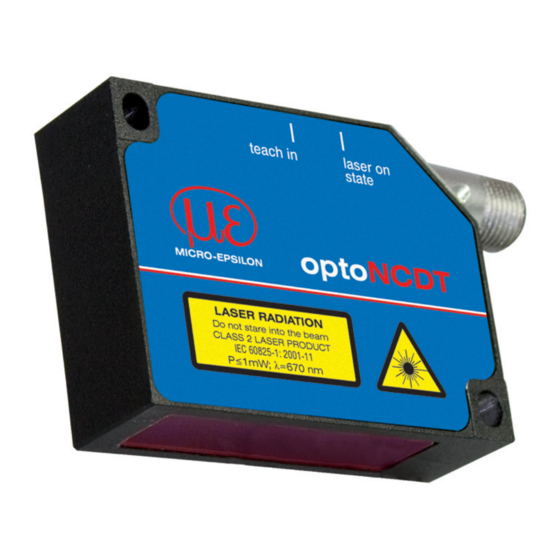
Summary of Contents for MICRO-EPSILON ILD1402-5
- Page 1 Instruction Manual optoNCDT 1402 ILD1402-5 ILD1402-250VT ILD1402-10 ILD1402-600 ILD1402-20 ILD1402-50 ILD1402-100 ILD1402-200...
- Page 2 Intelligent laser optical displacement measurement MICRO-EPSILON MESSTECHNIK GmbH & Co. KG Königbacher Strasse 15 D-94496 Ortenburg Tel. 08542/168-0 Fax 08542/168-90 e-mail info@micro-epsilon.de www.micro-epsilon.com Certified acc. to DIN EN ISO 9001: 2008 Software-V1.003...
-
Page 3: Table Of Contents
Contents Safety ............................7 Symbols Used ..............................7 Warnings ................................7 CE Compliance ..............................8 Proper Use ................................. 8 Proper Environment ............................8 Laser Class ..........................9 Functional Principle, Technical Data ..................11 Functional Principle ............................11 Functions ................................11 3.2.1 Fitting the Measurement Range ........................ - Page 4 Operation ..........................21 Getting Ready for Operation ........................... 21 Output Scaling ..............................22 6.2.1 Output Scaling via the “Select“ Key ........................ 24 6.2.2 Output Scaling via the Hardware Input ......................25 Average ................................26 6.3.1 Averaging Number N ............................26 6.3.2 Moving Average (Default Setting) ........................
- Page 5 8.3.4 Reading the Sensor Settings ........................... 47 8.3.5 Average Type and Average Number ....................... 50 8.3.6 Stopping the Measurement Value Output ....................... 51 8.3.7 Starting the Measurement Value Output ......................52 8.3.8 Digital or Analog Data Output ......................... 52 8.3.9 Characteristics for Digital or Analog Data Output ..................
- Page 6 Default Setting .......................... 72 ILD1402 Tool ..........................73 DLL MEDAQLib ......................... 74 Warranty ........................... 75 Service, Repair ........................75 Decommissioning, Disposal ....................75 Free Space for Optics ......................76 Available Cables ........................77 optoNCDT 1402...
-
Page 7: Safety
Safety Safety Knowledge of the operating instructions is a prerequisite for sensor operation. Symbols Used The following symbols are used in this instruction manual: Indicates a hazardous situation which, if not avoided, may result in minor or moder- ate injury. Indicates a situation which, if not avoided, may lead to property damage. -
Page 8: Ce Compliance
Products which carry the CE mark satisfy the requirements of the EMC regulation 2004/108/EC ‘Electromag- netic Compatibility’ and the European standards (EN) listed therein. The EC declaration of conformity is kept available according to EC regulation, article 10 by the authorities responsible at MICRO-EPSILON Messtechnik GmbH & Co. KG Königbacher Straße 15 D-94496 Ortenburg... -
Page 9: Laser Class
Safety Operating temperature: 0 to +50 °C (+32 to +122 °F) Storage temperature: -20 to +70 °C (-4 to +158 °F) Humidity: 5 - 95 % (no condensation) Pressure: atmospheric pressure EMC: acc. EN 61326-1:2006 / EN 55011 Class B Spurious emission EN 61326-1:2006 / EN 61000-6-2 Immunity to EMI... -
Page 10: Ild1402
Laser Class During operation of the sensor the pertinent regulations acc. to EN 60825-1 on „radiation safety of laser equipment“ must be fully observed at all times. The sensor complies with all applicable laws for the manufac- turer of laser devices. Do not look directly into teach in laser on... -
Page 11: Functional Principle, Technical Data
Functional Principle, Technical Data Functional Principle, Technical Data Functional Principle The sensor uses the principle of optical triangula- tion, i.e. a visible, modulated point of light is pro- teach in laser on state jected onto the target surface. The diffuse element of the reflection of the light spot optoNCDT is imaged by a receiver optical element positioned at a certain angle to the optical axis of the laser... -
Page 12: Exposure Control
Functional Principle, Technical Data 3.2.2 Exposure Control Dark or shining objects to be measured may require a longer exposure time. However, the controller is not capable of providing exposure which is any longer than permitted by the measurement rate. For a longer ex- posure time, therefore, the measurement rate of the sensor has to be reduced, see Chap. -
Page 13: Video Signal
Functional Principle, Technical Data 3.2.9 Video Signal The sensor can use different peaks in the CCD array for displacement measuring. This function is auxiliary, if the sensor measures against glass or transparent targets. See Chap. 8.3.15 also. CCD array Displacement 1 Displacement 2 Measuring range Fig. -
Page 14: Technical Data
Functional Principle, Technical Data Technical Data Model ILD 1402-5 1402-10 1402-20 1402-50 1402-100 1402-200 1402-250VT 1402-600 Measurement range Start of range Midrange 22.5 End of range µm 5 ... 9 5 ... 18 7 ... 36 12 ... 90 20 ...180 40 ... -
Page 15: Control And Indicator Elements
Functional Principle, Technical Data Supply 11 ... 30 VDC, typical 24 VDC / 50 mA Controller integral signal processor Electromagnetic EN 61326-1: 2006-10 / EN 55011: 2007-11 Class B (Interface emission) EN 61326-1: 2006-10 / EN 61000-6-2: 2006-03 (Interference resistance) compatibility (EMC) The specified data apply to a white, diffuse reflecting surface (Reference: Ceramic). -
Page 16: Delivery
Delivery Delivery Scope of Delivery 1 Sensor optoNCDT1402 1 Assembly instructions 5 sealing screws for connector Optional accessory, packed separately: 1 PC1402-x/I high flex interface und supply cable for current output, one end of the cable has a molded M12 female connector, the other end has free leads with ferrules. 1 PC1402-x/U high flex interface und supply cable for voltage output (250 Ohm load, U = 1 …... -
Page 17: Installation And Mounting
Installation and Mounting Installation and Mounting The sensor is an optical sensor for measurements with micrometer accuracy. Make sure it is handled carefully when installing and operating. 48 (1.89) Sensor Mounting (0.47) Mount the sensor via 2 screws M4. Mount the sensor in such a way that the laser beam is directed perpendic- ularly onto the surface of the target. -
Page 18: Pin Assignment
Installation and Mounting Pin Assignment Color code Description Specification PC1402-x/I RS422 Rx+ green Serial input Internally terminated with 120 Ohm RS422 Rx- yellow RS422 Tx+ grey Serial output Terminate externally with 120 Ohm RS422 Tx- pink 11 ... 30 VDC, typical 24 VDC / 50 mA Laser off black Laser is active, if pin 8 is connected with GND... -
Page 19: Switching Off The Laser
Installation and Mounting 5.2.1 Switching off the Laser Connect pin 8 with pin 12 to switch on the laser. If you open this connection the laser switches off, the error output switches on, the “State“ LED switches off. +3.3 V ILD1402 Laser off Pin 8... -
Page 20: Error Output
Installation and Mounting 5.2.3 Error Output The error message is generated by: no measuring object or measuring object beyond measuring range poor target (reflectivity to small, transparent or mirroring object) or laser off = 30 VDC +24 VDC CE max. No error: T locked 10 kOhm ILD1402... -
Page 21: Operation
Operation Operation Getting Ready for Operation Install and assemble the optoNCDT1402 in accordance with the instructions set out in Chapter 5.1, and connect it with the indicator or monitoring unit and the power supply, having full regard to the connec- tion instructions set out in Chapter 5.2. -
Page 22: Output Scaling
Operation Output 20 mA Scaling Default characteristic Analog The “teaching” scales output the analog output (4 to 20 mA) for a part of the 4 mA measuring range. This 3 mA allows you to optimize Measuring range the resolution for the Measuring object analog measurement range. - Page 23 Operation 20 mA User defined characteristic Analog output 4 mA 3 mA Teach 2 Teach 1 Measuring object Digital value 16372 16380 3883 11184 16382 16374 LED “state” Error Error Measuring object within range Error output Fig. 8: Reverse user defined characteristic optoNCDT 1402 Page 23...
-
Page 24: Output Scaling Via The "Select" Key
Operation 6.2.1 Output Scaling via the “Select“ Key Measuring Start Position the Teach-in 1 Position the Teach-in 2 Measuring teaching measuring measuring min. min. object to 4 mA object to 20 mA 30 ms 30 ms select Green, red, yellow, flashes red yellow flashes green... -
Page 25: Output Scaling Via The Hardware Input
Operation 6.2.2 Output Scaling via the Hardware Input Measuring Start Position the Teach-in 1 Positon the Teach-in 2 Measuring teaching measuring object measuring to 4 mA object to 20 mA Pin 9 min. min. min. 1 ms 30 ms 30 ms Green, red, yellow, flashes red yellow... -
Page 26: Average
Operation Average The optoNCDT1402 is supplied ex factory with the default setting „moving averaging, number of averaging N = 1“ (no averaging activated). Implemented averaging methods in the sensor: Moving average Median The purpose of averaging is to: Improve the resolution Eliminate signal spikes “Smooth out“... -
Page 27: Median
Operation Example: N = 4 Measurement values ... 0, 1, 2, 2, 1, 3 ... 1, 2, 2, 1, 3, 4 2, 2, 1, 3 2, 1, 3, 4 = M (n) = M (n+1) Output The moving average in the optoNCDT1402 can only be generated for up to a maximum of 128 values. 6.3.3 Median The median is generated from a pre-selected number of measurement values. - Page 28 Operation Recommendations: Use a high measurement rate for light colored and matt objects to be measured. Use a low measurement rate for dark or shiny objects to be measured (e.g. surfaces covered in black lacquer), for better measurement results. The sensor continues to measure internally but Output Maximum output rate holds back the output until the last measurement...
-
Page 29: Timing
Operation Timing The controller operates internally with real time cycles in a pipeline mode: 1. Exposure: Charging the image detector in the receiver (measurement). 2. Reading: Reading out of the imaging device and converting into digital data. 3. Computation: Measurement computation. 4. -
Page 30: Triggering
Operation Triggering The ILD1402 measurement output is controllable through an external signal on the trigger input. Therefore the external input “Teach in“ must be configured for triggering, see Chap. 8.3.14. This can be done with the “ILD1402 Tool“ (“Configuration“ > “General Settings“ > “Digital Input: trigger acquisition“) also. Basics, procedure: The sensor measures and calculates also, if no trigger pulses are pending. -
Page 31: Measurement Value Output
Measurement Value Output Measurement Value Output The optoNCDT1402 can issue the measurement values either via the analog output or the RS422 serial inter- face. The two different types of output cannot be used concurrently. Current Output Max. range 4 mA ... 20 mA Output amplification 16 mA = 100 % Measuring range Error value:... -
Page 32: Digital Value Output
Measurement Value Output Digital Value Output 7.2.1 Data Protocol ILD1401 The digital measurement values are issued as unsigned digital values (raw values). Digital value Used for 0 ... 39 SMR back-up 40 ... 4055 Measurement range 4056 ... 4095 EMR back-up Calculation of a measurement value in mm from digital output: Reference value Start of Measuring Range: Reference value Midrange... -
Page 33: Digital Error Codes
Measurement Value Output Calculation of a measurement value in mm from digital output: Reference value Start of Measuring Range: Reference value Midrange 1.02 1.02 x [mm] = (digital - 0.01) * MR [mm] x [mm] = (digital - 0.51) * MR [mm] 16368 16368 Example: MR =10 mm, digital value = 2048, measurement value = 5 mm or 0 mm... -
Page 34: Serial Interface Rs422
Serial Interface RS422 Serial Interface RS422 The optoNCDT1402 comes with a RS422 serial interface to enable the sensor to be operated from a standard computer and measurement values and error codes to be transferred. The sensor can operate with two different data protocols: Data protocol ILD1401 Data protocol ILD1402 Default settings... -
Page 35: Ascii Format
Serial Interface RS422 If the sensor operates with the ILD1401 data protocol, the measurement value is a 12 bit word, e.g. the bits D12 and D13 are 0. Replies with a length of 4 Bytes must be swapped according to the following rule: Reception: 0 1 2 3 4 5 6 7... -
Page 36: Data Protocol Ild1401
Serial Interface RS422 Data Protocol ILD1401 8.2.1 Setup of the Commands The commands for the sensor are transmitted in full duplex mode. Each instruction has a head, the ID, the command, the quantity and data if required (parameter, if quantity > 0). The head contains 4 bytes to identify a connection towards the sensor. -
Page 37: Overview Of Commands
Serial Interface RS422 Error code Description Bytes Value Command error Faulty number of parameters Time out 8.2.2 Overview of Commands Information commands 0x0900 VERSION Shows the software version 0x0C00 INFO Shows the sensor data Filter 0x1001 MEDIAN Median filter over 3 values, on/off Measurement value output 0x0E01 OUTPUTCHANNEL... -
Page 38: Reading The Sensor Parameters
Serial Interface RS422 8.2.3 Reading the Sensor Parameters Name: INFO Description: Supplies the info string. Format Byte 1 Byte 2 Byte 3 Byte 4 Byte 5 Byte 6 Byte 7 Byte 8 Byte 9 “+” “+” “+” 0x0D „I“ „L“ 0x0C 0x00 none... -
Page 39: Reading The Software Version
Serial Interface RS422 8.2.4 Reading the Software Version Name: VERSION Description: The sensor transmitts the software version. Format Byte 1 Byte 2 Byte 3 Byte 4 Byte 5 Byte 6 Byte 7 Byte 8 Byte 9 “+” “+” “+” 0x0D „I“... -
Page 40: Digital Or Analog Data Output
Serial Interface RS422 Format Byte 1 Byte 2 Byte 3 Byte 4 Byte 5 Byte 6 Byte 7 Byte 8 Byte 9 “+” “+” “+” 0x0D „I“ „L“ 0x10 0x01 Median ON/OFF Reply Byte 1 Byte 2 Byte 3 Byte 4 Byte 5 „I“... -
Page 41: Sensor Behavior In Error Case
Serial Interface RS422 8.2.7 Sensor Behavior in Error Case Name: SAVELASTMV Description: Switches between „Hold last value“ and „Error code“ of the analog output. Default setting: Format Byte 1 Byte 2 Byte 3 Byte 4 Byte 5 Byte 6 Byte 7 Byte 8 Byte 9 „Error code“, also... -
Page 42: Data Protocol Ild1402
Serial Interface RS422 Reply Byte 1 Byte 2 Byte 3 Byte 4 Byte 5 „I“ „L“ 0x81 0x00 none Command error-free Byte 1 Byte 2 Byte 3 Byte 4 Byte 5 “I“ “L“ 0xC1 0x01 Error code Faulty command 8.2.9 Data Protocol ILD1402 Name: SET_CIMODE_1402... -
Page 43: Data Protocol Ild1402
Serial Interface RS422 Data Protocol ILD1402 8.3.1 Setup of the Commands The commands for the sensors are comprised of command data which are transmitted in full duplex mode. Each command packet is comprised of a whole number multiple of 32 bit words (see Fig. 20). Contents Header Start word... -
Page 44: Overview
Serial Interface RS422 8.3.2 Overview Information command 0x20490002 GET_INFO Shows sensor data 0x204A0002 GET_SETTINGS Shows sensor settings Average 0x207F0004 SET_AV Sets average type and value Measurement value output 0x20760002 DAT_OUT_OFF Stops measurement value output 0x20770002 DAT_OUT_ON Permanent measurement value output 0x20F40003 SET_OUTPUTMODE Output mode... -
Page 45: Reading The Sensor Parameters
Serial Interface RS422 Memory mode 0x20F70003 SET_SAVE_SETTINGS_MODE Volatile / nonvolatile Scaling values 0x20F90004 SET_TEACH_VALUE Sets T1 + T2 0 ... 16368 0x20FA0002 RESET_TEACH_VALUE Sets T1 = 0 / T2 = 16368 Search algorithm 0x20FB0003 SET_PEAKSEARCHING First peak, last peak, global maximum Threshold Lower than standard, standard, higher than standard, 0x20FC0003... -
Page 46: Optoncdt
Serial Interface RS422 Reply: 24 23 16 15 „l“ „L“ „D“ „1“ 0x494C4431 0xA0 0x49 0x00 0xxx 0xA04900xx Info string is a readable ASCII character string: ILD 1402: Standard A/N: 4120154 O/N: 000 S/N: 1234570 MR: 50 SoftVer: 1.001.796 BootVer: 1.001.16 Date: 09/01/23 Out Channel: analog | digital Analog Error: last value | error value | error value after cycles xx //xx is 2 up to 99... -
Page 47: Reading The Sensor Settings
Serial Interface RS422 8.3.4 Reading the Sensor Settings Measurement rate 0 = 1500 Hz Name: Get_Settings 1 = 1000 Hz Description: Supplies the current sensor settings. 2 = 750 Hz Swap the received bytes according Chap. 8.1.1. 3 = 375 Hz These are as follows: 4 = 50 Hz Output channel... - Page 48 Serial Interface RS422 Save settings mode 0 = transmitted settings are stored in the RAM and are valid until power off 1 = transmitted settings are stored in the FLASH and are valid, even after power off/on External input type 0 = external input is used for scaling 1 = external input is used as trigger input (trigger controlled output) Peak searching...
- Page 49 Serial Interface RS422 Reply: 24 23 16 15 „l“ „L“ „D“ „1“ 0x494C4431 0xA0 0x4A 0x00 0x17 0xA04A0017 Output channel 0x00 0x00 0x00 0x0X 0x0000000X Teach value 1 0xXX 0xXX 0xXX 0xXX 0xXXXXXXXX Teach value 2 0xXX 0xXX 0xXX 0xXX 0xXXXXXXXX Analog error handler 0x00...
-
Page 50: Average Type And Average Number
Serial Interface RS422 Peak searching 0x00 0x00 0x00 0x0X 0x0000000X Threshold 0x00 0x00 0x00 0x0X 0x0000000X Measuring range 0x00 0x00 0xXX 0xXX 0x0000XXXX Reserved 1 0x00 0x00 0x00 0x0X 0x00000000 Reserved 2 0x00 0x00 0xXX 0xXX 0x00000000 Reserved 3 0x00 0x00 0x00 0x0X... -
Page 51: Stopping The Measurement Value Output
Serial Interface RS422 Format: 31 24 23 16 15 „+“ „+“ „+“ 0x0d („CR“) 0x2B2B2B0D „l“ „L“ „D“ „1“ 0x494C4431 0x20 0x7F 0x00 0x04 0x207F0004 0x00 0x00 0x00 0x0X 0x0000000X 0x00 0x00 0x00 0xXX 0x000000XX Reply: 24 23 16 15 „l“... -
Page 52: Starting The Measurement Value Output
Serial Interface RS422 8.3.7 Starting the Measurement Value Output Name: DAT_OUT_ON Description: Switches on the digital data output for the measurement values. The output channel (output type) must also be set to the digital output, otherwise the measurement data cannot be received from the sensor. -
Page 53: Characteristics For Digital Or Analog Data Output
Serial Interface RS422 Reply: 24 23 16 15 „l“ „L“ „D“ „1“ 0x494C4431 0xA0 0x90 0x00 0x02 0xA0900002 0x20 0x20 0x0D 0x0A 0x20200D0A 8.3.9 Characteristics for Digital or Analog Data Output Name: SET_OUTPUTMODE Description: Sets the output characteristics. Default setting: X = 0 -->... -
Page 54: Set Output Time
Serial Interface RS422 8.3.10 Set Output Time Name: SET_OUTPUTTIME_MS Beschreibung: Sets the output time for the analog or digital output value to be updated. Default setting: Parameter: 500 ms XXXX = 1 … 65535 [ms]. Format: 31 24 23 16 15 „+“... -
Page 55: Error Output (Analog Output)
Serial Interface RS422 8.3.11 Error Output (Analog output) Name: SET_ANALOG_ERROR_HANDLER Description: Hold or not hold last measurement value. Parameter: Default setting: X = 0 --> hold last measurement value error value X = 1 --> error value (3.75 mA) X = 2 … 99 --> hold last measurement value for 2 … 99 images respectively cycles This command only affects the analog output. -
Page 56: Set Baud Rate
Serial Interface RS422 8.3.12 Set Baud Rate Name: SET_BAUDRATE Description: Sets the transmission rate. Parameter: Default setting: X = 0 --> 115200 115200 Baud X = 1 --> 57600 X = 2 --> 38400 X = 3 --> 19200 X = 4 --> 9600 The sensor still sends the reply with the old baud rate and only switches to the new baud rate once the reply has been sent. -
Page 57: Set Measurement Rate
Serial Interface RS422 8.3.13 Set Measurement Rate Name: SET_SCANRATE Beschreibung: Sets the measurement rate [Hz]. Parameter: Default setting: X = 0 --> 1500 - X = 3 --> 375 1500 Hz X = 1 --> 1000 - X = 4 --> 50 X = 2 -->... -
Page 58: Input For Scaling And Trigger
Serial Interface RS422 8.3.14 Input for Scaling and Trigger Name: SET_EXT_INPUT_MODE Description: Defines the function of the switching input “Teach in“ (Pin 9 on the sensor connector). Parameter: Default setting: X = 0 --> external input operates as scaling input Scaling X = 1 -->... -
Page 59: Search Threshold
Serial Interface RS422 Format: 24 23 16 15 „+“ „+“ „+“ 0x0d („CR“) 0x2B2B2B0D „l“ „L“ „D“ „1“ 0x494C4431 0x20 0xFB 0x00 0x03 0x20FB0003 0x00 0x00 0x00 0x0X 0x0000000X Reply: 24 23 16 15 „l“ „L“ „D“ „1“ 0x494C4431 0xA0 0xFB 0x00 0x02... -
Page 60: Switching Off The Laser (External)
Serial Interface RS422 Format: 24 23 16 15 „+“ „+“ „+“ 0x0d („CR“) 0x2B2B2B0D „l“ „L“ „D“ „1“ 0x494C4431 0x20 0xFC 0x00 0x03 0x20FC0003 0x00 0x00 0x00 0x0X 0x0000000X Reply: 24 23 16 15 „l“ „L“ „D“ „1“ 0x494C4431 0xA0 0xFC 0x00 0x02... -
Page 61: Change Data Format
Serial Interface RS422 Name: LASER_ON Description: Switches on the laser Format: 24 23 16 15 „+“ „+“ „+“ 0x0d („CR“) 0x2B2B2B0D „l“ „L“ „D“ „1“ 0x494C4431 0x20 0x87 0x00 0x02 0x20870002 Reply: 24 23 16 15 „l“ „L“ „D“ „1“ 0x494C4431 0xA0 0x87... -
Page 62: Key Lock
Serial Interface RS422 Reply: 24 23 16 15 „l“ „L“ „D“ „1“ 0x494C4431 0xA0 0x88 0x00 0x02 0xA0880002 0x20 0x20 0x0D 0x0A 0x20200D0A 8.3.19 Key Lock Name: SET_KEYLOCK Description: Locks or enables the key “select“. The set status is not volatile. Parameter: Default setting: X = 0 -->... -
Page 63: Reset Sensor
Serial Interface RS422 8.3.20 Reset Sensor Name: RESET_BOOT Description: Starts the sensor’s initialization phase. Duration about 900 ms. Procedure: The sensor replies and then re-boots. The string of the boot message contains “CI140x“, “CR“ “LF“ and the answer of “GET_INFO“. Format: 31 24 23 16 15... -
Page 64: Set Default Setting
Serial Interface RS422 8.3.21 Set Default Setting Name: SET_DEFAULT Description: Resets the set parameters to the default settings (factory settings). This concerns: Data protocol ILD1401 Output channel: 0 --> analog output, Analog error handler: 1 --> in the case of an error: 3.75 mA on the analog output, Filter: 0 = Median off, Data protocol ILD1402 Output channel: 0 -->... -
Page 65: Save Settings In Ram Or Flash
Serial Interface RS422 Reply: 24 23 16 15 „l“ „L“ „D“ „1“ 0x494C4431 0xA0 0xF1 0x00 0x02 0xA0F10002 0x20 0x20 0x0D 0x0A 0x20200D0A 8.3.22 Save Settings in RAM or FLASH Name: SET_SAVE_SETTINGS_MODE Description: Saves the transmitted settings into the RAM or the FLASH. Parameter: Default setting: X = 0 -->... -
Page 66: Scaling Values For The Analog Output
Serial Interface RS422 8.3.23 Scaling Values for the Analog Output Name: SET_TEACH_VALUE Description: Sets the scaling values. Parameter: Default setting: Teach value 1, XXXXXXXX --> 0.0 up to 16368.0 Teach value 1: 0.0 Teach value 2, XXXXXXXX --> 0.0 up to 16368.0 Teach value 2: 16368.0 Format: 31 24 23... -
Page 67: Data Protocol Ild1401
Serial Interface RS422 Reply: 24 23 16 15 „l“ „L“ „D“ „1“ 0x494C4431 0xA0 0xFA 0x00 0x02 0xA0FA0002 0x20 0x20 0x0D 0x0A 0x20200D0A 8.3.25 Data Protocol ILD1401 Name: SET_CIMODE_1401 Description: Switches the sensor into the ILD1401 data protocol. The sensor replies with the ILD1402 data protocol, after sending the reply the sensor switches the data proto- col. -
Page 68: Request Data Protocol
Serial Interface RS422 Reply: 24 23 16 15 „l“ „L“ „D“ „1“ 0x494C4431 0xA0 0xF2 0x00 0x02 0xA0F20002 0x20 0x20 0x0D 0x0A 0x20200D0A 8.3.26 Request Data Protocol Name: GET_CI_MODE Description: Requests the state of the sensors command interpreter. Format: 31 24 23 16 15 „-“... -
Page 69: Instructions For Operating
Instructions for Operating Instructions for Operating Reflection Factor of the Target Surface In principle the sensor evaluates the diffuse part of the reflected laser light (see Fig. 21). Laser beam Laser beam Laser beam Ideal diffuse reflection Direct mirror Real reflecion reflecion Fig. -
Page 70: Color Differences
Instructions for Operating 9.2.2 Color Differences Because of intensity compensation, color difference of targets affect the measuring result only slightly. How- ever, such color differences are often combined with different penetration depths of the laser light into the material. Different penetration depths then result in apparent changes of the measuring spot size. Therefore color differences in combination with changes of penetration depth may lead to measuring errors. -
Page 71: Optimizing The Measuring Accuracy
Instructions for Operating Angle X-axis % Y-axis % teach in laser on state optoNCDT ±5 ° typ. 0.12 typ. 0.12 LASERSTRAHLUNG NICHT IN DEN STRAHL BLICKEN LASER KLASSE 2 nach DIN EN 60825-1: 2007 P 1 mW; = 670 nm ±15 °... -
Page 72: Cleaning The Protective Glasses
Default Setting In case of bore holes, blind holes, and edges in the surface of moving targets the sensor must teach in laser on state be arranged in such a way that the edges do not Correct obscure the laser spot (Fig. 24). optoNCDT Incorrect LASERSTRAHLUNG... -
Page 73: Ild1402 Tool
Install the PC based program. Use the corresponding setup.exe supplied from the attached CD. Follow the advices during the installation. You will find the actual drivers respectively program routines under: www.micro-epsilon.com/link/opto/1402 This program part is evidence of acquisition, calculation and data storage of ILD1402. You will find further details in the online help. -
Page 74: Dll Medaqlib
DLL MEDAQLib DLL MEDAQLib The Micro-Epsilon Data Acquisition Library offers you a high level interface library to access optoNCDT laser sensors from your Windows application in combination with RS422/USB converter (optional accessory) and a suitable PC1402-3/D-SUB/9pol cable or PC1402-3/USB cable or IF2008 PCI interface card and PC1402-3/IF2008 cable into an existing or a customized PC software. -
Page 75: Warranty
The warranty period lasts 12 months following the day of shipment. Defective parts, except wear parts, will be repaired or replaced free of charge within this period if you return the device free of cost to MICRO-EPSILON. This warranty does not apply to damage resulting from abuse of the equipment and devices, from forceful handling or installation of the devices or from repair or modifications performed by third parties. -
Page 76: Free Space For Optics
Free Space for Optics Free Space for Optics (2.24) (.16) Not to scale. Dimensions in mm (inches). .(63) ø6 ø4 (.24 dia) (.16 dia) (.39) 18.9 13.2 5 (0.20) 33.5 ° 35.5 ° 37.1 ° (0.79) (0.74) (0.52) 19.1 13.2 33.5 °... -
Page 77: Available Cables
Available Cables Available Cables All cables are high flex and can be used in cabel drag chains. Type Cable length Characteristics PC1402- 3/I, Interface und supply cable for current output, one end of the PC1402-6/I, cable has a molded M12 female connector, the other end has PC1402-8/I free leads with ferrules. - Page 78 X9751202-A051010HDR MICRO-EPSILON MESSTECHNIK GmbH & Co. KG Königbacher Str. 15 · 94496 Ortenburg / Deutschland Tel. +49 (0) 8542 / 168-0 · Fax +49 (0) 8542 / 168-90 info@micro-epsilon.de · www.micro-epsilon.com *X9751202-A05*...
Need help?
Do you have a question about the ILD1402-5 and is the answer not in the manual?
Questions and answers