Table of Contents
Advertisement
Quick Links
Advertisement
Table of Contents

Related Manuals for sauter FH-M 1 kN


Summary of Contents for sauter FH-M 1 kN
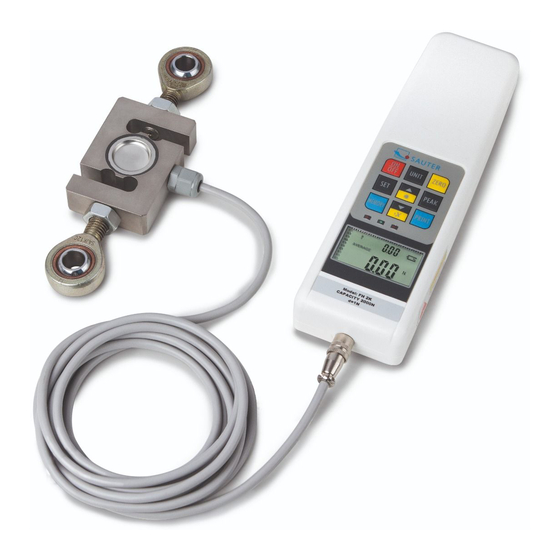
- Page 1 Sauter GmbH Ziegelei 1 Tel.: +49-[0]7433- 9933-0 D-72336 Balingen Fax: +49-[0]7433-9933-149 E-Mail: info@kern-sohn.com Internet: www.sauter.eu Instruction Manual Digital Force Gauge SAUTER FH-M Sensor Outside V. 1.8 06/2017 PROFESSIONAL MEASURING FH-M-BA-e-1718...
-
Page 2: Table Of Contents
V. 1.8 06/2017 Digital Force Gauge Thank you for buying a SAUTER force gauge with an internal load cell. We hope you are pleased with your high quality measuring instrument with its big functional range. If you have any queries, wishes or helpful suggestions, do not hesitate to call our service number. -
Page 3: Introduction
1 Introduction Annotation: Please read the remarks in this instruction manual carefully before the first use, even if you are already experienced with our SAUTER measuring devices. After receipt of your force gauge, please check the instrument, whether any transport damages have occurred. -
Page 4: Working Conditions
You will find the description of mounting all force gauges on SAUTER Test stands in the instruction manuals of the correspondent test stands. -
Page 5: Operation
Type: Ni 8.4V / 600 mAh Charging time: approx. 1 hour. As soon as the gauge is connected to the electric circuit by the charging cable, the integrated battery will be recharged. Battery operating time: about 15 hours. 6 Operation Display (1) Measurement result (2) Unit of measurement result... - Page 6 SET: 1 x Press: Upper Limit value [HidT / Hi Lt]. To change, press: ▲ or ▼ (see section High/Low Limit function) Hi Lt 1 x Press: Lower Limit value [LodT]. To change press ▲ or ▼ (see section High/Low Limit function) Lo dT 1 x Press: Minimum limit value to activate memory function at limit value measurements (PEAK).
- Page 7 BACK LIGHT: PEAK: (Peak value) Three functions available: Track mode (continuous measurement) Peak mode (capturing max. values) Auto-Peak mode, same as Peak-mode, but without the „Minimum limit value“ function MEMORY: (Memory function) Memorizes the Peak values to calculate the average value of the measurement results (see chapter “memorizing Peak values”) DELETE Function of memorized values (only active in „Memory“...
-
Page 8: Configuration Of Rs 232 Interface
Auto-Peak-Hold-Mode (Auto-Peak Mode) To change, please press: Minimum peak limit function to activate storage of measurements This function allows to eliminate unwanted „Pre-Peak values“ which are lower than the main peak value (Fp). The pre-setted limit value (Fo) takes care, that those “Pre- Peak values”... -
Page 9: Output Protocol
Signal Illustration Output signal Input signal Ground +1.6 to + >upper limit value +1.6 to + < lower limit value +1.6 to + 7.1 Output Protocol RS-232 Parameter Baudrate: 9600 Data-Bit: Parity: none Stop-bit: The measured value is requested by the PC by the ASCII Sign “9”. The measured value that comes from the instrument has this format: e.g. -
Page 10: Warnings
-The instrument may only be operated and maintained by trained staff. - The instrument may only be used in compliance with the described guidelines. - Varying ranges of application/ planned use must be approved by SAUTER in writing. FH-M-BA-e-1718... - Page 11 Please note the leads of the instruction manual: Please read all instructions carefully before first use of the instrument, even if you are already experienced with our SAUTER equipment. Annotation: To have a look at the CE Declaration of Conformity, please click onto the following link: https://www.kern-sohn.com/shop/de/DOWNLOADS/...
-
Page 12: Adjustment Procedure Fh
9 Adjustment Procedure FH 1. Switch on the Press ON/OFF button The green light will be on instrument 2. Enter the Directly after pressing ON/OFF, The lower red light will be adjustment procedure press PEAK and PRINT together for more times and very short intervals until the red light is on.
Need help?
Do you have a question about the FH-M 1 kN and is the answer not in the manual?
Questions and answers