Dexcom G6 User Manual
Continuons glucose monitoring system
Hide thumbs
Also See for G6:
- User manual (360 pages) ,
- Instructions for use manual (104 pages) ,
- Start here manual (20 pages)
Table of Contents
Advertisement
Quick Links
Advertisement
Table of Contents

Subscribe to Our Youtube Channel
Related Manuals for Dexcom G6


Summary of Contents for Dexcom G6
- Page 1 LBL014003 Rev 001 Dexcom G6 User Guide...
-
Page 2: Table Of Contents
9.5 Edit and Delete an Event in Your App 9.6 View Events 9.7 What's Covered and What's Coming Chapter 10: Alarm and Alerts 10.1 Introduction 10.2 Alarm and Alerts 10.3 Check in with Kelly LBL014003 Rev 001 Dexcom G6 User Guide... - Page 3 10.9 What was Covered and What's Coming Chapter 11: Treatment Decisions 11.1 Introduction 11.2 Your HCP Is Your Partner 11.3 Using your G6 for Treatment Decisions 11.4 Check In With Jake and Kelly 11.5 You Decide! 11.6 What's Covered and What's Coming Chapter 12: Share Information With Your Support Team 12.1 Introduction...
- Page 4 Index LBL014003 Rev 001 Dexcom G6 User Guide...
- Page 5 LBL014003 Rev 001 Dexcom G6 User Guide...
-
Page 6: Part 1: Get Started
1.1 Introduction Welcome to the G6 continuous glucose monitoring (CGM) family! This User Guide supports you in getting to know your G6. We also have numerous other resources available to help you to get the most out of your G6. -
Page 7: Your Dexcom Account
All chapters in the G6 User Guide are laid out the same way: The beginning of each chapter lists what you’ll be able to do after you’ve finished, followed by the chapter’s content. At the end, there’s a recap of what was covered and what’s in the next chapter. -
Page 8: Chapter 2: Indications For Use And Safety Statements
• Indications: Show who should use the system as well as when, why, and how they should use it • Contraindications: Let you know when not to use the G6. If used in these situations, you may hurt yourself or the system 2.3 How to Read Safety Statements... - Page 9 When in doubt, get your meter out. • No Number, No Arrow, No CGM Treatment Decision If your G6 doesn’t show a number or arrow, or your readings don’t match your symptoms, use your meter to make diabetes treatment decisions.
- Page 10 Follow system instructions. If you don’t, you could have a severe low or high glucose event. Precautions • Be Accurate, Be Quick Enter the exact BG value displayed on your meter within 5 minutes of using your meter. Don’t enter the G6 reading as a calibration. • Don’t Calibrate When Glucose Rate Is Changing Fast Don’t calibrate when your trend arrow is up, double-up, down, or double-down because your BG is...
- Page 11 • Where to Insert: Things to Check Keep the safety guard on until you put the G6 applicator against your skin. If you remove the safety guard first, you may hurt yourself by accidentally pushing the button that inserts the sensor before you mean to.
- Page 12 ▪ No Readings Alert o System Alerts: ▪ Calibration Required (after 2-hour sensor warmup) ▪ Calibration Error ▪ Sensor Expired ▪ Replace Sensor ▪ Transmitter (not working) ▪ No Storage Error ▪ App Stopped LBL014003 Rev 001 Dexcom G6 User Guide...
- Page 13 Follow system instructions. If you don’t, you could have a severe low or high glucose event. Caution • Requires HCP Prescription U.S. law restricts the sale of the G6 Mobile to sale by, or on the order of, a physician. LBL014003 Rev 001 Dexcom G6 User Guide...
- Page 14 Share won’t work. • Check Your Smart Device App on: Whenever you power on your smart device, tap the G6 app to open it. If the app isn’t open, Share won’t work. • Check Followers’ Smart Devices o Sounds on: Followers must keep their smart device volume on, or at least the keep vibration on, so they can hear and/or feel alarm/alerts.
-
Page 15: What's Covered And What's Coming
• Can explain how safety statements keep you safe • Can explain how to interpret safety statements • Have an overview of safety statements What’s Next? In the next chapter, you’ll learn the risks and benefits of using the G6. LBL014003 Rev 001 Dexcom G6 User Guide... -
Page 16: Chapter 3: Risks And Benefits
Otherwise use your meter until you calibrate your G6. • When in doubt, get your meter out: If you feel like your glucose is low or high but your G6 number is within your target range, verify with your meter. -
Page 17: Benefits
Making Treatment Decisions Using G6 You can use your G6 reading and trend arrow to make treatment decisions — like treating for a low or dosing for a high. See Chapter 11 for more information on treatment decisions. With G6, there’s no need to confirm your reading with a fingerstick. -
Page 18: What's Covered And What's Coming
DIAMOND randomized clinical trial.” Diabetes Care. 40(6):736-741 doi: 10.2337/dc17- 0133. 3.3 What’s Covered and What’s Coming Now You Can: • List the risks and benefits of using the G6 What’s Next: Now let’s take a look at the G6! LBL014003 Rev 001 Dexcom G6 User Guide... - Page 19 LBL014003 Rev 001 Dexcom G6 User Guide...
-
Page 20: Part 2: Let's G6! The Basics
4.2 G6 CGM System The G6 is a medical device you use on yourself. It allows you to continually see your readings, updated every 5 minutes for up to 10 days, without the bother of taking constant fingerstick measurement. You’ll see: •... - Page 21 The transmitter snaps into the transmitter holder and wirelessly sends your glucose information to your display device(s). The transmitter is reuseable. If you have a new transmitter, open the package when you’re ready to use it. Display Device Overview LBL014003 Rev 001 Dexcom G6 User Guide...
-
Page 22: What's Covered And What's Coming
You can choose which display device(s) to use: the Dexcom Receiver (receiver), the Dexcom G6 App (app) downloaded on your smart device, or both. They both show your readings, graphs, and trend arrows and alert you when there’s something you should be aware of. -
Page 23: Chapter 5: Set Up Your Display Devices
You can use the receiver, the app, or both. Choose the device that’s best for you. The main difference between them is the app has Dexcom Share (Share). It lets you send your glucose information to others in real time so they can support you in your care. You can also schedule long-acting insulin dose reminders in the app. - Page 24 Is this your first Dexcom CGM app? If so, the app will walk you through setting it up. You’ll even set up your High and Low Alerts. If you’ve used the app before, the app will import your existing settings for your convenience.
- Page 25 Tap Let’s Get Started. App: Setup The next screens go over legal and safety information, including a video on using your G6 to make treatment decisions. To see the video another time, go to Settings > Help > Videos. After reading each, tap the appropriate answer to get more information or move forward.
- Page 26 If you’re new to the Dexcom app, these screens go over your alarm/alerts. After reading each screen, tap Next to move forward. App: Setup New users only: Set your Low Alert. You’ll get an alert if your glucose dips below the number you set. Default is 80 mg/dL.
- Page 27 Get your transmitter box. Tap Take Photo. b. Turn transmitter box upside down on a flat surface with barcodes facing up. Center longest barcode in green brackets. c. Checkmark confirms you entered the SN. LBL014003 Rev 001 Dexcom G6 User Guide...
-
Page 28: Receiver
After completing your initial app setup, set up the receiver if you’d like to use that too. If not, go to Chapter 6 start your initial sensor. If you have issues setting up the G6 Mobile app, contact Technical Support (available 24/7) at: • Email: TechSupport@dexcom.com • Toll free: 1.888.738.3646 •... - Page 29 Press and hold power button for 2 seconds to turn receiver on. Wait for loading screen to appear. Receiver: Setup Wait. Receiver: Setup Welcome! Tap Next. Receiver: Setup Enter the date and time: LBL014003 Rev 001 Dexcom G6 User Guide...
- Page 30 Set your Low and High alerts using levels you’ve discussed with your HCP. The Low Alert default is 80 mg/dL; High is 200 mg/dL. Tap the up/down arrows to change the level. Tap Save. LBL014003 Rev 001 Dexcom G6 User Guide...
- Page 31 Enter your transmitter SN by tapping the up/down arrows. Tap Save. Receiver: Setup Chapter 6, you’ll see how to insert your sensor and attach your transmitter as well as how to pair and start LBL014003 Rev 001 Dexcom G6 User Guide...
-
Page 32: What's Covered And What's Coming
• Download the G6 Mobile app • Set up the app with the recommended settings • Set up your receiver What’s Next? No matter which display device you use, next, you’ll insert your sensor. LBL014003 Rev 001 Dexcom G6 User Guide... -
Page 33: Chapter 6: Start Your Sensor
Don’t: Don’t use expired sensors. Check the package label for the expiration date. It’s in YYYY-MM-DD format. Why: Expired sensors may give incorrect results. Consequences: You could have a severe low or high glucose event. LBL014003 Rev 001 Dexcom G6 User Guide... -
Page 34: Choose Sensor Site
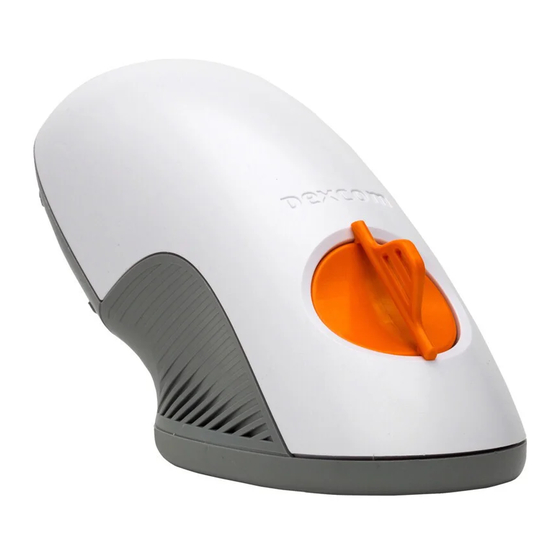
Contact your HCP for specific questions regarding the use of medical tape, barrier wipes, or other adhesives. 6.4 Insert Sensor Overview Before you insert your sensor, get to know the applicator using the picture below. LBL014003 Rev 001 Dexcom G6 User Guide... -
Page 35: Insert Sensor
Insert Sensor Insert Sensor Wash and dry your hands. Insert Sensor Clean insertion site with alcohol wipe. Let dry. Insert Sensor LBL014003 Rev 001 Dexcom G6 User Guide... - Page 36 Check sensor for damage. Insert Sensor Pull off both tabs that cover the adhesive. Don’t touch adhesive. Insert Sensor Place applicator horizontally, not vertically, on skin. Firmly press down, sticking adhesive to your skin. LBL014003 Rev 001 Dexcom G6 User Guide...
- Page 37 Throw out applicator following local guidelines for disposal of blood-contacting components. Insert Sensor What’s left on you? The adhesive patch with these attached: • Sensor wire underneath • Transmitter holder on top You have successfully inserted the sensor! Having problems? LBL014003 Rev 001 Dexcom G6 User Guide...
-
Page 38: Attach Transmitter
Wipe back of transmitter with alcohol wipe. Let dry. Be careful with the back of the transmitter. Don’t: • Touch it or the metal dots on it • Scratch it — it may harm the waterproof seal LBL014003 Rev 001 Dexcom G6 User Guide... - Page 39 (brand names include Blenderm , Tegaderm , Smith & Nephew IV3000 , 3M tape) for extra support. Order ™ ™ ® ™ LBL014003 Rev 001 Dexcom G6 User Guide...
-
Page 40: Pair And Start Your Sensor
The range is reduced because doesn’t work as well through water. Consequences: You could have a severe low or high glucose event. We’ll review pairing and starting a sensor for the app, then for the receiver. LBL014003 Rev 001 Dexcom G6 User Guide... - Page 41 Screen provides countdown to sensor warmup. The ring darkens as the countdown moves forward. Keep smart device within 20 feet of transmitter during the sensor warmup period. App: Pair and Start Sensor Calibration Required means sensor warmup is complete. Open app. LBL014003 Rev 001 Dexcom G6 User Guide...
- Page 42 Press power button briefly to wake up receiver. Receiver: Pair and Start Sensor Wait. Receiver: Pair and Start Sensor Your transmitter and receiver can communicate now! You may need to unlock your screen. If so, tap 1, then LBL014003 Rev 001 Dexcom G6 User Guide...
- Page 43 You won’t get alarm/alerts or readings during sensor warmup. Use your meter when making a treatment decision during warmup. After sensor starts, Start Sensor option disappears from Menu, and Stop Sensor appears. Receiver: Pair and Start Sensor Sensor warmup is complete You’re ready to calibrate! See Chapter 7. LBL014003 Rev 001 Dexcom G6 User Guide...
-
Page 44: Pairing Tips
6.8 What’s Covered and What’s Coming Now You Can: • Prepare for sensor insertion • Insert your sensor • Attach transmitter to sensor • Identify when transmitter and display device pair • Start sensor warmup LBL014003 Rev 001 Dexcom G6 User Guide... - Page 45 What’s Next? The next chapter guides you through calibration. LBL014003 Rev 001 Dexcom G6 User Guide...
-
Page 46: Chapter 7: Calibrate
Although these body fluids are very similar, G6 readings can be different from meter values. Calibration evens them up. By calibrating when the system notifies you, the G6 uses your meter value to make sure the G6 readings remain accurate throughout your session. -
Page 47: Prepare To Calibrate
• Trend arrow(s) straight up or down: Don’t calibrate when your trend arrow(s) points straight up or down; this means your reading is changing more than 2 mg/dL per minute. Why? Because by the time you take a meter value and enter it into your G6, your BG will have changed. - Page 48 Don’t Don’t calibrate when your trend arrow is up, double-up, down, or double-down Why: Calibrating when your BG is changing quickly may make your G6 inaccurate. Consequences: You could have a severe low or high glucose event. 7.4 Let’s Calibrate Calibration Schedule Below is a sample calibration schedule.
- Page 49 Wash and dry your hands with soap and water, not gel cleaners. App: Calibration Use meter to measure the BG from your fingertip. App: Calibration Tap Calibrate. The red circle shows when the G6 needs you to calibrate. What it means: • Sensor warmup is complete • Ready for first calibration App: Calibration Enter meter value using number pad.
- Page 50 Tap Calibrate to enter your second BG reading. Follow steps 1-5 and enter second reading. What it means: • Sensor accepted first calibration • Ready for second meter reading App: Calibration Calibration accepted: Calibrate icon has no red circle. LBL014003 Rev 001 Dexcom G6 User Guide...
- Page 51 App: Calibration Your G6 readings begin about 5 minutes after the device accepts your calibrations. Look for the number in the circle above the graph and dots on your trend graph. Each dot represents a single reading taken every 5 minutes.
- Page 52 Press power button briefly to wake up receiver screen. You won’t see calibration notifications when screen is black. Tap OK. What it means: • Sensor warmup is done • Ready for first calibration LBL014003 Rev 001 Dexcom G6 User Guide...
- Page 53 Verify BG value is correct. If correct, tap Yes. If you don’t tap Yes, the BG level isn’t saved. If incorrect, tap No and reenter. Receiver: Calibration Wait while BG value is accepted. LBL014003 Rev 001 Dexcom G6 User Guide...
- Page 54 The calibrate icon doesn’t have a red circle, so your calibration was accepted and no more are needed for now. Receiver: Calibration Your G6 readings begin about 5 minutes after the device accepts your first two calibrations. Look for the dots on your home screen. Each dot represents a single reading taken every 5 minutes.
-
Page 55: Calibrate Only When Prompted (And Exceptions)
For example, if your meter reading is 180 mg/dL, your G6 reading should be between144 and 216 mg/dL. So if your G6 reading is 150, it’s within the 20/20 rule and you should not calibrate until notified. If your G6 reading is 220, it’s not within the 20/20 rule and you should... -
Page 56: Check In With Jake And Kelly
First, a little background information: Jake is an adult. He manages his diabetes on his own, using his G6 and pens. Kelly, on the other hand, is a child. She and her parents work together to manage her diabetes using her G6 and a pump. Do either of these situations sound like yours? Let’s check in with Jake and Kelly to see what they do when their symptoms don’t match their CGM information. -
Page 57: What's Covered And What's Coming
• Recognize how to get accurate meter values • List when you shouldn’t calibrate • Enter calibrations into the G6 What’s Next? Part 3: Next Steps will show you how to get the most out of your G6. LBL014003 Rev 001 Dexcom G6 User Guide... - Page 58 LBL014003 Rev 001 Dexcom G6 User Guide...
-
Page 59: Part 3: Next Steps
The home screen below is from the Apple app. The Android app and receiver look similar. The only difference is where the Calibrate Icon, Settings Menu, and Event History/Add Event are. 8.3 Glucose Information This section shows you how to interpret your glucose reading, trend arrow, and graph. LBL014003 Rev 001 Dexcom G6 User Guide... - Page 60 High when your dots are in the yellow area of the graph o In your target range (between your high and low alert settings) when in the gray area o Low when in the red area LBL014003 Rev 001 Dexcom G6 User Guide...
-
Page 61: Navigation And Status Bar
The Apple app, Android app, and receiver home screens have slightly different ways to navigate to other screens. This section details those differences. Apple App LBL014003 Rev 001 Dexcom G6 User Guide... - Page 62 Trend arrows show the speed and direction of your glucose trends based on the last three readings. Use the arrows to know when to take action before you’re too high or too low. Trend Arrow: Steady Changing: • Less than 1 mg/dL each minute • Up to 15 mg/dL in 15 minutes LBL014003 Rev 001 Dexcom G6 User Guide...
- Page 63 Trend Arrow: Rapidly Rising or Falling Changing: • More than 3 mg/dL each minute • More than 45 mg/dL in 15 minutes Trend Arrow: None System can’t calculate the speed and direction of your glucose change. LBL014003 Rev 001 Dexcom G6 User Guide...
-
Page 64: What's Covered And What's Coming
• Explain differences between trend arrows What’s Next? Next you’ll learn how to enter events that affect your glucose levels. Track events so you and your HCP can reflect on patterns in your glucose levels. LBL014003 Rev 001 Dexcom G6 User Guide... -
Page 65: Chapter 9: Events
An event is an action or situation that affects your glucose levels. With the G6, you can track your daily events so you can reflect on their effect on your glucose trends. Once entered into the app, or once you upload your receiver data, events can be viewed in Dexcom reports. - Page 66 You can have the app send you daily long-acting dose reminders. Let’s say you want to create a reminder to take 15 U of long-acting insulin every day at 10 am. The steps below show you how. App: Set Dose Reminder LBL014003 Rev 001 Dexcom G6 User Guide...
- Page 67 Tap Long-Acting Dose Reminders. App: Set Dose Reminder There are two reminders you can customize to fit your needs. Tap either reminder. App: Set Dose Reminder Tap Reminder switch to turn it on. LBL014003 Rev 001 Dexcom G6 User Guide...
- Page 68 Scroll to the time you want to be reminded. In this example, it’s 10 am. Android: Selecting a time looks different. App: Set Dose Reminder Type in the dose amount. It can be anything from 0.1 to 100.0 units. It’s 15 U in this example. LBL014003 Rev 001 Dexcom G6 User Guide...
- Page 69 The steps below show how to enter insulin on the receiver. Unlike the app, you can only log one kind of insulin and you can’t set up reminders. Receiver: Enter Insulin Tap Add event. Receiver: Enter Insulin Tap Insulin. LBL014003 Rev 001 Dexcom G6 User Guide...
- Page 70 Tap arrows to enter Units, up to 250. When you tap the arrow, number starts at last number entered. This example uses 10.35 Units. Receiver: Enter Insulin Tap Edit Date/Time Receiver: Enter Insulin LBL014003 Rev 001 Dexcom G6 User Guide...
-
Page 71: Other Events
Oops! Entered an event incorrectly? Maybe you entered the wrong number of insulin units, or forgot to change the time before you saved it. Use the Events screen to delete and re-enter incorrect events you entered on your app. You cannot edit or delete events entered on your receiver. LBL014003 Rev 001 Dexcom G6 User Guide... - Page 72 Events you added have a red icon, which shows they can be deleted. Apple (shown below): Red icon is a circle on the left. Android: Red icon is a trash can on the right. Apple LBL014003 Rev 001 Dexcom G6 User Guide...
-
Page 73: View Events
Turn your smart device to landscape to view your events — carbs, exercise, and health. At the bottom of the screen are the insulin doses you recorded. Touch and hold a spot on the screen to see detailed information for that time. Landscape shows event details. Insulin is at the bottom. LBL014003 Rev 001 Dexcom G6 User Guide... -
Page 74: What's Covered And What's Coming
Followers to access your trend graph, they too will be able to view your Events. See Chapter 12 for more information. Events entered into your receiver can only be viewed on a Dexcom report. There are no markers on your receiver screen and they do not transfer to your app. -
Page 75: Chapter 10: Alarm And Alerts
• Signal Loss When making treatment decisions using your G6, it’s best to keep your alerts turned on. Your Urgent Low Soon, Low, High, and Signal Loss Alerts are on when you set up your display device. The Rise and Fall Rate Alerts are off. Later in this chapter, you’ll learn how to customize them. - Page 76 The alarm lets you know when your reading drops to or below 55 mg/dL. Think of it as a safety net: Your glucose level is dangerously low — take action now! What you hear, feel, and see • Initial alarm: Vibrates 4 times • Until confirmed: Vibrates and beeps 4 times every 5 minutes. App Notification LBL014003 Rev 001 Dexcom G6 User Guide...
- Page 77 • Until confirmed: Vibrates and beeps 6 times every 5 minutes. • Updates: 15 minutes later, you get another Urgent Low Soon Alert if you’re still falling so quickly you’ll be at or below 55 mg/dL within 20 minutes App Notification LBL014003 Rev 001 Dexcom G6 User Guide...
- Page 78 During initial setup, you set your Low Alert level. What you hear, feel, and see • Initial alert: Vibrates 3 times • Until confirmed: Vibrates and beeps 3 times every 5 minutes. App Notification Receiver LBL014003 Rev 001 Dexcom G6 User Guide...
- Page 79 During initial setup, you set your High Alert level. What you hear, feel, and see • Initial alert: Vibrates 2 times • Until confirmed: Vibrates and beeps 2 times every 5 minutes App Notification LBL014003 Rev 001 Dexcom G6 User Guide...
- Page 80 • Until confirmed: Vibrates and beeps 2 times every 5 minutes Fall Rate Alert • Initial alert: Vibrates 3 times • Until confirmed: Vibrates and beeps 3 times every 5 minutes App Notification LBL014003 Rev 001 Dexcom G6 User Guide...
- Page 81 What you hear, feel, and see • Initial alert: Vibrates once • Until confirmed: Vibrates and beeps once every 5 minutes • All other system alerts also vibrate and beep once App Notification LBL014003 Rev 001 Dexcom G6 User Guide...
-
Page 82: Check In With Kelly
I love the Urgent Low Soon! With it, I can prevent lows instead of just react to them. It’s so much healthier for Kelly and so much less stressful for all of us. LBL014003 Rev 001 Dexcom G6 User Guide... -
Page 83: Confirming Alarm/Alerts
If you want to get repeated alerts when you stay in the alert range, use Repeat, explained below. Your Urgent Low Alarm will always repeat even after confirming if your glucose levels do not return to your target range. You can’t change your Urgent Low Alarm. App Notification Receiver Notification LBL014003 Rev 001 Dexcom G6 User Guide... -
Page 84: Customizing Your Alerts Overview
Alert repeats to let you know you’re still high and might want to take more insulin. On the other hand, if the 2 hours pass and you’re back in your target range, your High Alert won’t repeat. We’ll also change your sound to Door Bell in the app and Normal in the receiver. App: Customizing Alerts App: Customize Alerts LBL014003 Rev 001 Dexcom G6 User Guide... - Page 85 Your high alert level shows. If your high alert was off, it would show Off instead. Tap High to see its settings. App: Customize Alerts This screen shows your current High alert settings. Alerts have: • On/off switch • Notify me options • Sound options App: Customize Alerts LBL014003 Rev 001 Dexcom G6 User Guide...
- Page 86 • Apple (shown below): Tap Back. • Android: Tap Save. App: Customize Alerts Tap Repeat to change how often your High Alert repeats after confirming. Repeats only if you stay above your high glucose level. LBL014003 Rev 001 Dexcom G6 User Guide...
- Page 87 Repeat shows how often you’ll get notified. App: Customize Alerts Tap Sound to customize alert sound. App: Customize Alerts Tap option you want — in this example, Door Bell — to change and hear sample of sound setting. LBL014003 Rev 001 Dexcom G6 User Guide...
- Page 88 Follow these steps to change your receiver alerts. In this example, we’ll be changing the High Alert setting to 190 mg/dL, repeating every 2 hours. Later, we’ll change the sound, too. Receiver: Customize Alerts Tap Menu. Receiver: Customize Alerts Tap Settings. LBL014003 Rev 001 Dexcom G6 User Guide...
- Page 89 Receiver: Customize Alerts Tap High. Receiver: Customize Alerts Check High Alert is on. Description This screen shows your current High Alert settings. Receiver: Customize Alerts Tap Level to set the High Alert level. LBL014003 Rev 001 Dexcom G6 User Guide...
- Page 90 Tap Repeat to change how often your High Alert repeats after initial alert and confirm. Receiver: Customize Alerts Tap arrows — in this example, the up arrow to 120 minutes, or 2 hours. Repeat range is 15 minutes to 4 hours. LBL014003 Rev 001 Dexcom G6 User Guide...
- Page 91 This list shows the different alarm/alert sounds available on the receiver, starting with the quietest. Receiver Sound: Vibrate Vibration only. No sound (except your receiver vibrating). Exceptions: Urgent Low Glucose Alarm and Urgent Low Soon Alert always beep and vibrate. LBL014003 Rev 001 Dexcom G6 User Guide...
- Page 92 Repeats Urgent Low Alarm and Urgent Low Soon Alert every 5 seconds until confirmed or reading improves. Medium volume beeps. Receiver: Test Sound Sample sound setting before selecting. This does not select your sound; it just lets you hear it. To select sound, see below. LBL014003 Rev 001 Dexcom G6 User Guide...
- Page 93 This list shows how to change your sound and try it out. Receiver: Customize Sounds Tap Menu. Receiver: Customize Sounds Tap Settings. Receiver: Customize Sounds Tap Sounds. Receiver: Customize Sounds Selected sound has checkmark. Default is Normal. Tap your choice. LBL014003 Rev 001 Dexcom G6 User Guide...
-
Page 94: Why Customize Alerts
Are you concerned because you go high too often? Or do you want to know when you go low but don’t feel it? Maybe you want to bring your A1C down? Talk to your HCP about using your G6 to optimize your health. - Page 95 Low Alert setting to get Kelly’s attention while she can still think clearly enough to act on it and while there’s time for her to eat something to avoid a low. LBL014003 Rev 001 Dexcom G6 User Guide...
-
Page 96: App: Alert Schedule
We’ll set up your High and Low levels first, then change the scheduled High Alert to vibrate. App: Setting Up Alert Schedule App: Set Up Alert Schedule Tap Settings. App: Set Up Alert Schedule Tap Alerts. App: Set Up Alert Schedule LBL014003 Rev 001 Dexcom G6 User Guide... - Page 97 Tap Next. Android: Selecting a time looks different. App: Set Up Alert Schedule Scroll to 5 pm, when your workday ends. Tap Next. Android: Selecting a time looks different. App: Set Up Alert Schedule LBL014003 Rev 001 Dexcom G6 User Guide...
- Page 98 During the days and times this schedule is in effect, you’ll get your High Alert when your glucose reading reaches 200 mg/dL. Tap Next. App: Set Up Alert Schedule Review the settings for your Alert Schedule. LBL014003 Rev 001 Dexcom G6 User Guide...
- Page 99 When Alert Schedule is on, there are two groups of settings in the Alerts menu: General and Scheduled. • General shows your settings during the days and times that aren’t in a schedule • Schedule shows settings for days and times that are scheduled In the Scheduled section, tap High. LBL014003 Rev 001 Dexcom G6 User Guide...
-
Page 100: What Was Covered And What's Coming
10.9 What’s Covered and What’s Coming Now You Can: • Define alarm and alerts • Recognize different alarm/alerts • Turn alerts on and off • Describe what to do when you get a Signal Loss Alert LBL014003 Rev 001 Dexcom G6 User Guide... - Page 101 • Customize your alerts on your app and receiver • Adjust your alert sounds • Use Repeat to avoid insulin stacking What’s Next? Next we’ll talk about how to use your G6 to make treatment decisions. LBL014003 Rev 001 Dexcom G6 User Guide...
-
Page 102: Chapter 11: Treatment Decisions
Working with your HCP, define your target glucose range and your alert settings. Discuss how to stay within your target using the G6. Let your HCP guide you through the system features, including adjusting your alert settings to match your needs and goals, working with readings and trend arrows for treatment decisions, and managing your diabetes with the system. - Page 103 • How can you improve? 11.4 When to Use Your Meter There are times when you need to rely on your meter instead of your G6. When in Doubt, Get Your Meter Out Anytime you look at your home screen and think, “Oh! That’s not the number I thought I would see,”...
-
Page 104: Using Your G6 For Treatment Decisions
You may have a number but not an arrow or vice versa. If that happens, use your meter. WARNING Do: Only make treatment decisions when your G6 shows both an arrow and a number. Why: No number, no arrow, no G6 treatment decisions. Consequences: You could have a severe low or high glucose event. - Page 105 Actions to consider when you are: • Low: Eat. Did you have too much insulin or exercise? • High: Watch and wait. Did you have too much insulin or exercise? • In target range: Eat LBL014003 Rev 001 Dexcom G6 User Guide...
-
Page 106: Check In With Jake And Kelly
Treatment Decisions: No Arrow No arrow means you can’t use your G6 to make a treatment decision. Use your meter. 11.7 Check In With Jake and Kelly How do you use the trend arrow? Let’s check in with Jake and Kelly to see how they use it to fine-tune their treatment decisions. -
Page 107: You Decide
An hour ago, you drank orange juice to treat a low glucose reading. Although you’re within your target range, as you sit down for dinner, you look at your G6 and see your trend arrow pointing down. Using the number and arrow below, what treatment decision would you make? -
Page 108: What's Covered And What's Coming
• Identify when you can use your G6 in treatment decisions • Describe the importance of alarm/alerts in treatment decisions • Tell when you shouldn’t make a treatment decision using the G6 • Recognize when you should watch and wait before treating What’s Next? -
Page 109: Chapter 12: Share Information With Your Support Team
To use Share, you and your Followers must have smart devices connected to the Internet. Followers also need the Dexcom Follow app installed. Share is not available on the receiver. LBL014003 Rev 001 Dexcom G6 User Guide... - Page 110 (simultaneous voice and data)? If not, during phone calls, you may not be able to share information; likewise, your Followers may not be able to get your information if they are on their phones. Dexcom Share and Follow will exchange any information missed after the phone call has ended •...
- Page 111 App: Set Up Share Tap Next. App: Set Up Share Android: The next two screens let you give permission for the app to run in the background. Tap I Understand, then Yes. LBL014003 Rev 001 Dexcom G6 User Guide...
- Page 112 App: Set Up Share Tap Next. App: Set Up Share Tap Let’s Get Started. LBL014003 Rev 001 Dexcom G6 User Guide...
- Page 113 App: Set Up Share Now invite people to Follow you. In the next steps, you’ll have Share send your Follower an invitation email. Your Follower needs to install the Dexcom Follow app on a display device that receives email. Tap Invite Followers App: Set Up Share Enter the Follower’s nickname and email address.
- Page 114 But your Follower can change it to notify when your reading goes below 75 mg/dL for 45 minutes. If the Follower isn’t getting data, they get notified after an hour. Tap the No More Data switch or the For More Than to customize these settings. LBL014003 Rev 001 Dexcom G6 User Guide...
- Page 115 Tap Next. App: Set Up Share Review Follower’s settings. Tap Send Invitation. LBL014003 Rev 001 Dexcom G6 User Guide...
- Page 116 The Followers List shows the status of each of your Followers and lets you invite new ones. Followers List Icons Invite New Follower Follower Didn’t Accept Invitation Yet Follower Didn’t Accept Invitation Within 7 Days. To re-invite, tap Add Follower. Follower Gets Notification(s) Follower Sees Trend Graph LBL014003 Rev 001 Dexcom G6 User Guide...
- Page 117 Dexcom Follow Follow Description Your Followers must download and install the Dexcom Follow App. They get a link to it in their invitation email or they can find it in their app store. Followers then have a window into your CGM information.
- Page 118 (simultaneous voice and data)? If not, during phone calls, you may not be able to share information. Likewise, your Follower may not be able to get your information if they are on a call. Dexcom Share and Follow will exchange any information missed after the phone call has ended.
- Page 119 Your Follower can use the screen below to customize notifications. For example, this Follower wants to know if you go below 70 mg/dL for more than 30 minutes. He also wants to be re-notified every 2 hours if you stay under 70. LBL014003 Rev 001 Dexcom G6 User Guide...
-
Page 120: Check In With Jake And Kelly
I checked and they were right—Oops. My bad. I’d dropped. I popped a couple of glucose tabs, excused myself from my friend and the blackjack table, went straight to the casino’s store, and texted everyone back once I’d bought a snack. LBL014003 Rev 001 Dexcom G6 User Guide... -
Page 121: Clarity Overview
Identify Share’s status by icon color o Set up Share o Invite Followers o Determine which CGM information to share o Change Follower settings o Tell Followers how to set up Follow • Describe CLARITY reports LBL014003 Rev 001 Dexcom G6 User Guide... - Page 122 What’s Next? In the next chapter, you’ll learn how to end a typical 10-day sensor session, along with removing the sensor and transmitter. LBL014003 Rev 001 Dexcom G6 User Guide...
-
Page 123: Chapter 13: End Sensor And Transmitter Sessions
6 hours before (shown below), 2 hours before, and 30 minutes before • Clock counts down until session ends • Continue to get alarm/alerts and readings • You can end session early or wait App Notification LBL014003 Rev 001 Dexcom G6 User Guide... - Page 124 Sensor Session Over App: Open app to confirm. Receiver: Tap OK to confirm. What it means: • Sensor session is over • You won’t get alarm/alerts or readings until you replace sensor App Notification LBL014003 Rev 001 Dexcom G6 User Guide...
-
Page 125: Remove Sensor
You’ll receive notifications as it nears the end of its battery life. PRECAUTION Don’t When ending a session, don’t throw away the transmitter Why: Transmitter is reusable and can be used until the system notifies you the transmitter battery is about to expire. LBL014003 Rev 001 Dexcom G6 User Guide... - Page 126 Grasp the wide rounded edge of the holder. Bend holder edge down to break it and release the transmitter. Remove Sensor and Transmitter Pull transmitter straight out. Remove Sensor and Transmitter Keep transmitter to use with next sensor. LBL014003 Rev 001 Dexcom G6 User Guide...
-
Page 127: End Of Transmitter Battery
Just put the transmitter in the transmitter holder and start a new sensor. The steps below show you how. App: Pair New Transmitter App: Pair New Transmitter LBL014003 Rev 001 Dexcom G6 User Guide... - Page 128 Turn transmitter box upside down on a flat surface with barcodes facing up. Center longest barcode in green brackets. c. Checkmark confirms you entered the SN. Manual instructions: a. Tap Manually Enter. LBL014003 Rev 001 Dexcom G6 User Guide...
- Page 129 Insert sensor and attach transmitter. See Chapter 6 for more information. Receiver: Pairing New Transmitter Receiver: Pair New Transmitter Tap Menu. Receiver: Pair New Transmitter Tap Settings. Receiver: Pair New Transmitter Tap Transmitter. LBL014003 Rev 001 Dexcom G6 User Guide...
- Page 130 Receiver: Pair New Transmitter Tap Pair New. Receiver: Pair New Transmitter Find transmitter SN on back of box or transmitter. Receiver: Setup Enter your transmitter SN. Tap Save. LBL014003 Rev 001 Dexcom G6 User Guide...
-
Page 131: What's Covered And What's Coming
• Identify Replace Sensor notifications at the end of your sensor session • Remove your sensor and save your transmitter if needed • Replace and pair transmitter What’s Next? In the next chapter, we’ll talk about solutions to common issues. LBL014003 Rev 001 Dexcom G6 User Guide... -
Page 132: Chapter 14: Troubleshooting
• If you get one of these alerts, you won’t get the other alert for 30 minutes. • See Chapter 10. No Alarm/Alerts: Display Device Off Problem • Not getting alarm/alerts Solution • Make sure display device is on. LBL014003 Rev 001 Dexcom G6 User Guide... - Page 133 • Make sure display device battery is charged. o App: See your smart device instructions for more information. o Receiver: See below for charging instructions. • App: Make sure your app is running. Tap Dexcom icon to restart. No Alarm/Alerts: Notifications Off Problem •...
- Page 134 • Tap alert to get more information. • Wait up to 30 minutes while the system fixes itself. If not corrected after 30 minutes, you’ll see Sensor Failed. Contact Technical Support (see beginning of chapter). LBL014003 Rev 001 Dexcom G6 User Guide...
- Page 135 • Not getting readings Solution • No glucose alarm/alerts or readings. Use meter. • Tap alert to get more information. • Your sensor does not work. Contact Technical Support (see beginning of chapter). App notification Receiver LBL014003 Rev 001 Dexcom G6 User Guide...
- Page 136 • Open device Bluetooth settings. • Delete all Dexcom entries from My Devices. • Pair transmitter. • Wait up to 30 minutes. System may correct problem itself and continue to show readings. More than 30 minutes? Contact Technical Support (see beginning of chapter).
- Page 137 • No alarm/alerts or readings until warmup is done and you’ve entered two calibrations. Use meter. • See Chapter 6. • Have you been on this screen for more than 2 hours? Contact Technical Support (see beginning of chapter). LBL014003 Rev 001 Dexcom G6 User Guide...
-
Page 138: Applicator
Receiver 14.3 Applicator Orange Button Stuck Problem • Can’t push the applicator orange button in Solution • Fold and break off safety guard before pushing orange button • See Chapter 6 Inserting Hurts LBL014003 Rev 001 Dexcom G6 User Guide... - Page 139 • Backing won’t come off the patch Solution • Lift the backing by the tab Adhesive Patch Won’t Stick Problem • The adhesive patch won’t stay on your skin for the entire sensor session Solution LBL014003 Rev 001 Dexcom G6 User Guide...
- Page 140 • Don’t panic! • Remove applicator and adhesive patch: 1. Gently pull applicator up until you see adhesive patch 2. Using your finger or thumb, hold front edge of patch and peel from skin LBL014003 Rev 001 Dexcom G6 User Guide...
-
Page 141: App
• You can’t download the app from the app store on your smart device. Did you get a new smart device? Make sure it’s compatible with the app. Solution • Check dexcom.com/compatibility for a list of smart devices that work with the G6 app. • Stop your sensor session on your current smart device. See Chapter 13. - Page 142 • Connect receiver to charger — this turns it on Can’t See Screen — Change Brightness Problem • The receiver screen is too dim or bright Solution • Go to Menu>Brightness and change it. LBL014003 Rev 001 Dexcom G6 User Guide...
- Page 143 • Contact Technical Support (see beginning of chapter). 1. Plug receiver into wall to charge. The light shows the receiver is charging. 2. Tap Test Now quickly before screen disappears. If screen disappears too quickly, go to first step. LBL014003 Rev 001 Dexcom G6 User Guide...
- Page 144 You’re done. Don’t go on to the next step. 6. Uh-oh. You tested your speaker and vibrations and determined that they don’t work. You won’t hear alarm/alerts. Contact Technical Support (available 24/7) at: LBL014003 Rev 001 Dexcom G6 User Guide...
-
Page 145: Low Battery
• When the receiver and transmitter reconnect after a temporary shutdown, Signal Loss, or similar issue, up to 3 hours of missed readings can fill in on the graph. • Shutting down the receiver does not extend your sensor session past the 10 days. LBL014003 Rev 001 Dexcom G6 User Guide... - Page 146 Problem • Dexcom stripe screen displays for no reason Solution • Wait a few seconds • If Dexcom stripe screen (see below) displays for more than 3 minutes, contact Technical Support (see beginning of chapter) System Check Passed Screen Problem •...
-
Page 147: Calibration
• If same code displays again, write it down and contact Technical Support (see beginning of chapter). 14.6 Calibration G6 Reading ≠ Meter Value Problem G6 reading and meter value don’t match Solution • Different body fluids give different numbers: o Meter measures glucose from blood. o Sensor measures glucose from interstitial fluid. - Page 148 If you calibrate again and still get this error, enter one more meter value. o Wait 15 minutes. o If no readings appear on the display, the sensor needs to be replaced. Contact Technical Support to report error (see beginning of chapter). App notification Receiver LBL014003 Rev 001 Dexcom G6 User Guide...
-
Page 149: Transmitter
• No readings, alarm/alerts until transmitter is replaced Solution • No alarm/alerts or readings until fixed. Use meter. • After confirming alert, it won’t re-alert. • Contact Technical Support (see beginning of chapter). App notification LBL014003 Rev 001 Dexcom G6 User Guide... - Page 150 • App: For more information, tap Help. • If these solutions don’t fix the issue, sensor may not be inserted correctly. Contact Technical Support (see beginning of chapter) for replacement. App notification Receiver LBL014003 Rev 001 Dexcom G6 User Guide...
- Page 151 Receiver Transmitter Battery Low Alert: Critically Low Problem • Your transmitter battery may expire before the end of this sensor session Solution • Order new transmitter using your normal process. See Appendix B. LBL014003 Rev 001 Dexcom G6 User Guide...
-
Page 152: Sensor
• To end the sensor session early in the app, go to Stop Sensor in the Settings menu. To end the sensor session early in the receiver, go to Stop Sensor in the Menu. Menu items change: During sensor session, menu includes Stop Sensor. Between LBL014003 Rev 001 Dexcom G6 User Guide... -
Page 153: Share
Troubleshooting Share Status Issues The Share status bar is a useful tool. It can help identify if there’s a problem and Dexcom Share is not working. See below for troubleshooting tips for the Share status bar. Whether or not Dexcom Share is working and your Followers are getting glucose alarm/alerts, always use your G6 display device for your readings and alerts. - Page 154 Problem • Share isn’t sharing because Dexcom server is offline Solution • Wait. Dexcom will fix the issue as soon as possible. For more information, contact Technical Support (see beginning of chapter). Share App LBL014003 Rev 001 Dexcom G6 User Guide...
- Page 155 Congratulations! Great job working your way through this guide! Make sure to check out the appendices for additional information that may be useful to you. And remember, you can always refer back to this guide as you get used to your G6 or if you have any questions in the future.
-
Page 156: Appendix A: Glossary
Using a blood sample from non-fingertip (alternate) sites such as the palm, Testing forearm, or upper arm for meter values. Don’t use alternative site testing to calibrate the G6. Only use fingerstick measurements. Android Operating system used for smart devices. - Page 157 It’s important to treat hypoglycemia. If left untreated, hypoglycemia can lead to serious complications. The default Low Alert in the G6 is set to 80 mg/dL. Consult your HCP to determine the appropriate hypoglycemia setting for you. Indications How, for what purposes, and under what circumstances you should use the Operating system used for Apple smart devices.
- Page 158 Rooted on a smart device. The removal poses a security risk and data may become vulnerable. Do not install the G6 app on a jailbroken or rooted smart device. It may not work correctly. mg/dL Milligrams per deciliter. The standard unit of measure for BG readings in the United States.
-
Page 159: Appendix B: Need Help? You're Not Alone
Toll: 1.858.200.0200 B.2 Dexcom Patient Care Team The Dexcom Patient Care Team is a group of Certified Diabetes Educators (CDE) and Registered Nurses (RNs) offering you customer care and individualized education services around Dexcom CGM, including: • Product training — both initial and ongoing (for example, how to use a specific feature) •... -
Page 160: Corporate
• Phone: o Toll Free: 1.888.738.3646 o Toll: 1.858.200.0200 o Fax: 1.877.633.9266 B.4 Corporate • Internet: dexcom.com • Address: 6340 Sequence Drive San Diego, CA 92121 LBL014003 Rev 001 Dexcom G6 User Guide... -
Page 161: Going Through Security
Going through security often means you and your belongings go through a metal detector, x-ray machine, or even a body scanner. In this section, you’ll find out which are OK for your G6 components and which haven’t been tested and should be avoided. -
Page 162: Appendix D: Extend Your App
If you don’t see readings while using these features, open your G6 app. D.1 Today View (Apple) You can check your G6 in your Apple Today view, even when your smart device is locked. Open Today View by swiping right from the left edge of the Home or Lock screens. -
Page 163: Smart Watches
Quick Glance is on by default. Turn it off in the app: Settings > Quick Glance. D.3 Smart Watches Check your G6 on your Apple or Android smart watch. Suggested Use Using a smart watch with your system may change how you get alarm/alerts. -
Page 164: Appendix E: Take Care Of Your G6
Apple Watch Android Wear Setup Check your G6 on your Android Wear watch with the Dexcom G6 watch face. See your watch instructions for details about changing the watch face. Android Wear Appendix E: Take Care of Your G6 E.1 G6 Maintenance Applicator/Sensor •... - Page 165 Don’t use aerosol sprays, solvents, alcohol wipes, or abrasives. o Turn off and unplug from USB cable before wiping. All G6 Components • To keep your G6 working safely, do not change any G6 component. WARNING Don’t: Don’t use a transmitter that is damaged or cracked.
- Page 166 When you plug in the receiver to charge, the Speaker Test screen displays. See Chapter 14 for more information. Tap Skip Test to return to the Home screen. Keep charging until home screen displays battery icon filled in. LBL014003 Rev 001 Dexcom G6 User Guide...
-
Page 167: Storage
• Charging: Charge battery before each new sensor session. o Battery can only be charged using the Dexcom adapter/wall charger — don’t use a computer port or an external USB hub. o Don’t block access to the charger. - Page 168 You can update and/or check: • CGM information: Insertion date and time, last calibration, transmitter SN • Software versions: Transmitter and receiver • Insulin: Reminders for long-acting insulin doses • Support: Online help, account, and contact information LBL014003 Rev 001 Dexcom G6 User Guide...
- Page 169 Receiver: Check CGM Settings Receiver: Check CGM Settings Tap Menu. Receiver: Check CGM Settings Tap Settings. Receiver: Check CGM Settings You can update and/or check: • Alerts and sounds: Customize how and when you get alerts LBL014003 Rev 001 Dexcom G6 User Guide...
-
Page 170: System Disposal
Different places have different requirements for disposing of electronics (receiver and transmitter) and parts that have come in contact with blood or other bodily fluids (sensor). Follow your area’s local waste management requirements. LBL014003 Rev 001 Dexcom G6 User Guide... -
Page 171: Appendix F: Warranty
• Installation, maintenance, and service of products or services other than the CGM system (which may be subject to a separate limited warranty), whether provided by Dexcom or any other party; this includes your cell phone or smart device and your connection to the Internet. - Page 172 Dexcom shall not be liable for any special, incidental, consequential, or indirect damages, however caused, and on any theory of liability, arising in any way out of the sale, use, misuse, or inability to use, any Dexcom G6 or any feature or service provided by Dexcom for use with the Dexcom G6.
- Page 173 Dexcom shall not be liable for any special, incidental, consequential, or indirect damages, however caused, and on any theory of liability, arising in any way out of the sale, use, misuse, or inability to use, any Dexcom G6 or any feature or service provided by Dexcom for use with the Dexcom G6.
-
Page 174: Appendix G: Technical Information
IP28: Protection against insertion of large objects and immersion in water for up to 8 feet for 24 hours Moisture Protection Protection against submersion in water Protection Against Type BF applied part Electrical Shock LBL014003 Rev 001 Dexcom G6 User Guide... - Page 175 Data Communication Range 20 feet The G6 is an M-PED (Medical-Portable Electronic Device), which meets the FAA RTCA /DO-160 edition G Section 20 Category T and Section 21, Category M. It can be used on aircraft according to the directions provided by the operator of the aircraft.
- Page 176 Power Supply Input typical commercial or hospital Lines environment. (30% dip in ) for (30% dip in ) for 25 cycles 25 cycles IEC 61000-4-11 for 250 cycles for 250 cycles IEC 60601-1-11 LBL014003 Rev 001 Dexcom G6 User Guide...
- Page 177 Guidance and Manufacturer’s Declaration — Electromagnetic Immunity The G6 is intended for use in the electromagnetic environment specified in the next table. The customer or the user of the G6 should ensure that it is used in such an environment.
- Page 178 Immunity Test Compliance Electromagnetic Environment Guidance The G6 is suitable for use in all establishments including RF Emissions domestic and those directly connected to the public low- Class B voltage power supply network that supplies buildings used for CISPR 11 domestic purposes.
-
Page 179: Fcc Requirements
• Connect the equipment into an outlet on a circuit different from that to which the receiver is connected • Consult the dealer or an experienced radio/TV technician for help This portable transmitter with its antenna complies with FCC/IC RF exposure limits for general population/uncontrolled exposure. LBL014003 Rev 001 Dexcom G6 User Guide... -
Page 180: Appendix H: Label Symbols
The following symbols may be found on the sensor, transmitter, and receiver package labels. These symbols tell you about the proper and safe use of the Dexcom G6. Some of these symbols may not have meaning in your region and are listed for informational purposes only. - Page 181 Immersion in Water Keep Dry Manufacturer Marking Certifies Device Meets European Council Directive 93/42/EEC MR Unsafe Non-Ionizing Radiation Part/Catalog Number Prescription Required Refer to Instruction Manual/Booklet Serial Number Ship-By Date Sterile by Radiation STERILE R LBL014003 Rev 001 Dexcom G6 User Guide...
- Page 182 Temperature Limitation Type BF Applied Part Use By Date LBL014003 Rev 001 Dexcom G6 User Guide...
-
Page 183: Appendix I: Alarm/Alerts Vibrations And Sounds
Sensor Expiring Your session will end in less Silent than 2 hours. Alert You will not receive alerts, alarms, or sensor glucose readings after this time unless you replace your sensor. LBL014003 Rev 001 Dexcom G6 User Guide... - Page 184 To ensure your Dexcom CGM app functions correctly please follow these steps to free up storage: Exit this app Go to Settings > General > Usage > Manage Storage Free unnecessary storage LBL014003 Rev 001 Dexcom G6 User Guide...
- Page 185 Override Mute Title Sound Vibration Urgent Low Your sensor glucose reading Urgent Notify Below (default Glucose is below <glucose reading>. is 55 mg/dL) Alarm Repeat (default is 30 minutes) Sound (default is Urgent Low) LBL014003 Rev 001 Dexcom G6 User Guide...
- Page 186 Sound (default is Apple NO readings. Alert Signal Loss Alert) You will not receive alerts, Signal Enable/Disable Readings alarms, or sensor glucose Loss (default is disabled) Alert readings. Alert Sound (default is Signal Loss Alert) LBL014003 Rev 001 Dexcom G6 User Guide...
- Page 187 1 - 1 second vibe 1 - 1 second Required glucose reading. medium tone beep Calibration Enter your 2nd blood 1 - 1 second vibe 1 - 1 second Required glucose reading. medium tone beep LBL014003 Rev 001 Dexcom G6 User Guide...
- Page 188 Your sensor session 1 - 1 second vibe 1 - 1 second Sensor Shutoff Expired has ended. medium tone beep Alert Replace your sensor. You will not receive alerts, alarms, or sensor glucose readings. LBL014003 Rev 001 Dexcom G6 User Guide...
- Page 189 Pair a new transmitter. System Code: <error code> Silent Silent Recoverable error Check Enter 1 - 1 second vibe 1 - 1 second Set time alarm Date/Time medium tone beep LBL014003 Rev 001 Dexcom G6 User Guide...
- Page 190 Fall Rate Falling 3 - 1/3 second vibes, 3 - 1/3 second low Can be turned on/off by Alert 1/3 seconds apart tone beeps, 1/3 the user seconds apart LBL014003 Rev 001 Dexcom G6 User Guide...
- Page 191 Alert sensor glucose readings. Please wait… Urgent Low <EGV value> 4 – 200 ms vibes 4 - 1/4 second low EGV <= 55 mg/dL Glucose tone beeps, 1/4 Alarm seconds apart LBL014003 Rev 001 Dexcom G6 User Guide...
- Page 192 Alerts, 190 Glucose Information Rate of change arrows, 144 Trend screen, 135 Rate of change arrows, 144 Receiver Initial setup, 62 Overview, 61 Trend screen, 139 Safety statement Contraindications, 21 Indications, 20 Warning, 22 LBL014003 Rev 001 Dexcom G6 User Guide...
- Page 193 Preventing sensor failures, 120 Receiver: starting a Session, 82 Starting a, 80 Starting with app, 80 Warmup, 87 Share Followers, 36 Settings, 54 Setup, 58 Troubleshooting, 119 What is, 34 Signal Loss Alert, 218 LBL014003 Rev 001 Dexcom G6 User Guide...
- Page 194 © 2017 Dexcom, Inc. All rights reserved. Covered by patents www.dexcom.com/patents. Dexcom, Dexcom Follow, Dexcom G4 PLATINUM, Dexcom G5, Dexcom G6, Dexcom Share, G6, are either Bluetooth registered trademarks or trademarks of Dexcom, Inc. in the United States and/or other countries.
Need help?
Do you have a question about the G6 and is the answer not in the manual?
Questions and answers
package for g6 sensor has unclear symbols what does each mean?