Dexcom G7 Getting Started
Hide thumbs
Also See for G7:
- User manual ,
- Instructions manual (127 pages) ,
- Start here manual (16 pages)
Table of Contents
Advertisement
Getting Started
This is abbreviated instruction. For detailed, step-by-
step instructions on how to use the Dexcom G7 Continuous Glucose
Monitoring (CGM) System, please refer to the instructions for use.
Screens are representational only. Your product may look different.
LBL021582 Rev 001
LBL021582 Rev 001
Advertisement
Table of Contents

Subscribe to Our Youtube Channel
Related Manuals for Dexcom G7


Summary of Contents for Dexcom G7
- Page 1 Getting Started This is abbreviated instruction. For detailed, step-by- step instructions on how to use the Dexcom G7 Continuous Glucose Monitoring (CGM) System, please refer to the instructions for use. Screens are representational only. Your product may look different. LBL021582 Rev 001...
- Page 2 Welcome! Today we will cover: • Setting expectations • Setting up your receiver • Inserting your sensor • Receiver features • Alerts • Removing your sensor • Treatment decisions • And more LBL021582 Rev 001...
- Page 3 • No fingersticks needed to make diabetes treatment decisions* *If your glucose alerts and readings from the G7 do not match symptoms or expectations, use a blood glucose meter to make diabetes treatment decisions. LBL021582 Rev 001...
- Page 4 Setting Expectations Two different types of body fluids: interstitial fluid (Dexcom G7) and blood (meter). Readings can be different and still be considered accurate. LBL021582 Rev 001...
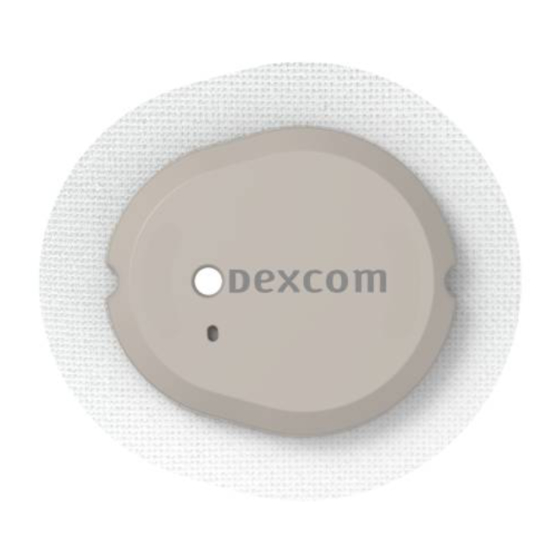
- Page 5 Dexcom G7 Receiver • Shows glucose information • Rechargeable using supplied USB cable Applicator with built-in Sensor • Applicator inserts the sensor under your skin • Sensor gets glucose information • Wear sensor for up to 10 days • Sensor sends glucose information to the...
- Page 6 Receiver Navigation The receiver screen tells you which button to use. To scroll faster hold down the Scroll button. Scroll Up To move to next field, use the Select button. Select Go Back Scroll Down LBL021582 Rev 001...
- Page 7 Turn Receiver On To turn the receiver on press and hold the Select button for 3-5 seconds. Select LBL021582 Rev 001...
-
Page 8: Time And Date
Time and Date LBL021582 Rev 001... -
Page 9: Information Screens
Information Screens The receiver will walk you through a series of screens on: • Safety • Treatment decisions • Trend arrows • Alerts • Reading the home screen • Urgent Low • Urgent Low Soon LBL021582 Rev 001... -
Page 10: Insert Sensor
Insert Sensor When prompted, insert the sensor. LBL021582 Rev 001... - Page 11 Sensor Insertion Sites Age 7 years and older: Use back of Age 24 months - 6 years: Use back of upper arm, upper arm or abdomen abdomen, or upper buttocks Avoid areas: With loose skin or without enough fat to avoid muscles and bones That get bumped, pushed, or you lie on while sleeping Within 8 centimeters of infusion or injection site Near waistband or with irritations, scarring, tattoos, or lots of hair...
- Page 12 Insert Sensor Rub site with an alcohol Wash hands with soap Press and hold applicator firmly Unscrew cap. Don’t touch wipe. Wait until dry. and water. Dry. against skin and then push inside applicator. button. Remove applicator. Rub firmly around patch Gently press on top of 3 times.
- Page 13 Overpatch The overpatch helps keep the sensor on. Find the overpatch bundled with the instructions in the sensor box. Carefully pull off both Use colored tab to Rub around overpatch. Use tab to peel off Rub around overpatch. clear liners, one at a place overpatch colored liner.
- Page 14 Confirm Sensor Insertion Back on the receiver select Sensor is Inserted. LBL021582 Rev 001...
- Page 15 Enter Pairing Code When prompted, enter the pairing code. The 4 digit code is found on the applicator. LBL021582 Rev 001...
- Page 16 Pairing Then wait for the sensor to pair. LBL021582 Rev 001...
-
Page 17: Sensor Warmup
Sensor Warmup Once communication is confirmed, the warmup will start. Warmup starts at sensor insertion, so you may see a less than 30 minute warmup. The sensor warmup timer tells you when you will start getting readings and alerts. Keep smart device within 6 meters during this time. - Page 18 Beginning of Trend Graph After the warmup, the beginning of the trend graph will appear. First Reading The receiver must be within 6 meters to receive glucose information. LBL021582 Rev 001...
- Page 19 Viewing the Receiver Trend Screen Bluetooth Battery Current Glucose Trend Arrow High Glucose Alert Level Trend Graph Current Glucose Low Glucose Alert Level LBL021582 Rev 001...
-
Page 20: Trend Arrows
Trend Arrows Trend arrows show the speed and direction glucose is heading. Steady Slowly rising or falling Rising or falling Rapidly rising or falling Changing less Changing Changing Changing more than 0.8 mmol/L 0.8-1.7 mmol/L 1.7-2.5 mmol/L than 2.5 mmol/L in 15 minutes in 15 minutes in 15 minutes... - Page 21 Urgent Low Alert Alerts when sensor reading is 3.1 mmol/L or below. This alert can’t be changed or turned off (unless the Silence All feature is used). LBL021582 Rev 001...
- Page 22 Urgent Low Soon Alert Alerts when sensor reading will be 3.1 mmol/L or below in less than 20 minutes. Turn on or off under Menu > Settings > Alerts > Urgent Low Soon. LBL021582 Rev 001...
- Page 23 Low Alert Alerts when sensor reading is at or below the set level. Default: 3.9 mmol/L Range: 3.3-8.3 mmol/L Customise or turn on/off under Menu > Settings > Alerts > Low. LBL021582 Rev 001...
- Page 24 High Alert Alerts when sensor reading is at or above the set level. Default: 14.0 mmol/L Range: 5.5-22.2 mmol/L Customise (level, delay 1st alert, snooze) or turn on/off under Menu > Settings > Alerts > High. The delay 1 alert feature allows you to delay your first high alert until your sensor reading is high for a while.
- Page 25 Events An Event is an action or situation that affects glucose levels. Once entered, events can be viewed in Dexcom Clarity reports. LBL021582 Rev 001...
- Page 26 Sounds Choose alert sounds or silence all alerts. Go to Menu > Settings > Alert Sounds. LBL021582 Rev 001...
- Page 27 Glucose Summary Reports The receiver shows summary reports of glucose information (over the last 3, 7, 14, 30, and 90 days). The reports can be used to spot trends and opportunities. Go to Menu > Reports. LBL021582 Rev 001...
- Page 28 Ending Sensor Session: Automatically When the grace period ends, the sensor ends automatically. LBL021582 Rev 001...
- Page 29 Ending Sensor Session: Manually You must end the sensor session or grace period before you start a new sensor. You can end it manually, before the grace period ends by going to Menu > Replace Sensor. LBL021582 Rev 001...
-
Page 30: Removing Sensor
Removing Sensor After the sensor session ends, peel off the patch like a bandage. To make it easier and avoid irritating skin: • Loosen edge and soak patch in body oil, like baby oil or an adhesive remover for skin •... -
Page 31: Power Off
Power Off To turn the receiver off go to Menu > Power Off LBL021582 Rev 001... - Page 32 Dexcom Clarity Use Dexcom Clarity to track your progress and share data with your clinic. Log in at Clarity.dexcom.eu. Use your current Dexcom login and provided USB cable to upload data. Free to use. LBL021582 Rev 001...
- Page 33 Diabetes Treatment Decisions No number or arrow? Always use your meter. Symptoms don’t match readings? Use your meter. LBL021582 Rev 001...
- Page 34 MRI/CT/ Diathermy Don't wear any G7 component during magnetic resonance imaging (MRI) or high-frequency electrical heat (diathermy) treatment. However, it's safe to have a CT scan if you keep the sensor out of the scanned area and cover the sensor with a lead apron during the scan.
- Page 35 Technology (AIT) body scanner. You can also ask for hand-wanding or full- body pat-down and visual inspection instead of going through any walk through body scanners or putting any part of the G7 in the baggage scanning machine. LBL021582 Rev 001...
- Page 36 Sunscreen and Insect Repellent Before insertion and during your sensor session, don’t apply insect repellent, sunscreen, perfume, or lotion on your insertion site or sensor. This may cause the sensor to not stick well or could damage your G7. LBL021582 Rev 001...
-
Page 37: Any Questions
Any Questions? Additional support Visit dexcom.com/learn to take advantage of training tutorials and resources where you can learn at your own pace and enhance your knowledge. Technical Support Enquiries Fill out a technical support request here No access to the internet? Call 0800 031 5763 (UK) 1800 827 603 (Ireland) - Page 38 Dexcom and Dexcom Clarity are registered trademarks of Dexcom, Inc. in the United States and/or other countries. ©2021 Dexcom, Inc. All rights reserved. LBL021582 Rev 001...
Need help?
Do you have a question about the G7 and is the answer not in the manual?
Questions and answers