Advertisement
Quick Links
Advertisement

Related Manuals for Axminster AWSS-18 Flex


Summary of Contents for Axminster AWSS-18 Flex
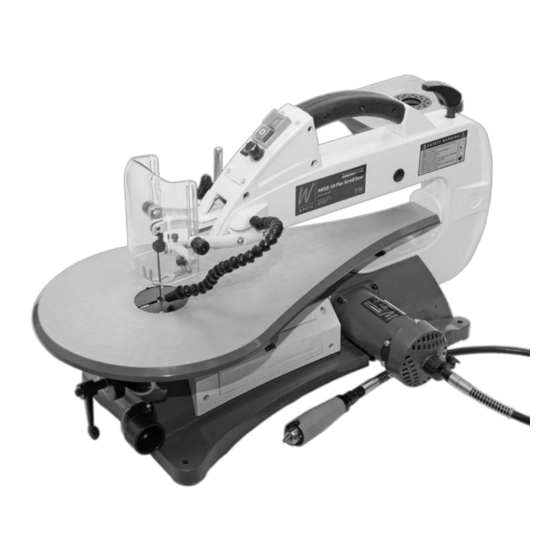
- Page 1 AWSS-18 Flex Scroll Saw Axminster Reference No: AWSS-18 www.axminster.co. uk...
- Page 4 7. Use safety equipment. Eye protection should be worn at all times when operating this machine. Use ANSI approved safety glasses. Everyday eyeglasses only have impact resistance lenses. They are NOT safety glasses. A dust mask, respirator, non-skid safety shoes, a hard hat, or hearing protection must be used in appropriate conditions.
-
Page 5: Electrical Safety
20. Guard against electric shock. Prevent body contact with grounded surfaces such as pipes, radiators, ranges, and refrigerators. Hold your tool by the insulated, non-metal grasping surfaces. Use a Ground Fault Circuit Interrupter (GFCI) to reduce shock hazards. 21. Avoid accidental starting. Be sure your tool is turned off before plugging it in. - Page 6 the plug in any way. Do not use any adapter plugs. Check with a qualified electrician if you are in doubt as to whether the outlet is properly grounded. • Double insulated tools are equipped with a polarized plug (one blade is wider than the other). This plug will fit in a polarized outlet only one way.
-
Page 7: Specific Safety Rules For The Scroll Saw
• Do not expose power tools to rain or wet conditions. Water entering a power tool will increase the risk of electric shock. • Do not let your fingers touch the terminals of plug when installing to or removing from the outlet. •... - Page 8 • Do not reach under the scroll saw table when the motor is running. • Do not wear loose clothing or jewelry. Roll long sleeves above the elbow. Tie back long hair. 7. To avoid injury from accidental starting of the scroll saw: •...
- Page 9 • Install the blade with the teeth pointing downward. • Do not start the saw with the workpiece pressing against the blade. Slowly feed the workpiece into the moving blade. • Use caution when cutting round or irregularly shaped work pieces.
- Page 12 Align the bevel indicator (Fig. 3-5) The bevel indicator has been factory adjusted. It should be rechecked prior to use best operation. 1. Remove the blade guard foot (1) using a hex key to loosen the Fig. 3 screw (2). Loosen the table bevel lock handle (3) and turn the table adjustment knob (4) to move the table until it...
- Page 13 Blade guard foot adjustment When cutting at angles, the blade guard foot should be adjusted so it is parallel to the table and rests flat above the workpiece. 1. To adjust, loosen the screw (2) , tilt Fig. 6 the foot (1) so it is parallel to the table, and tighten the screw.
- Page 17 2. The blade teeth cut material ONLY on the down stroke. 3. Guide the wood into the blade slowly because the teeth of the blade are very small and remove wood only on the down stroke. 4. There is a learning curve for each person using this saw. During that period of time it is expected that some blades will break until you learn how to use the saw.
- Page 18 ON/OFF switches and speed control knob (Fig. 20) Always wait for the saw or rotary tool to come to a complete stop before restarting. 1. To turn the saw or rotary Fig. 20 tool on, press the switch (1) to the ON (I) position. 2.
- Page 19 CAUTION: In order to avoid uncontrollable lifting of the workpiece and to reduce blade breakage, do not turn the switch on while the workpiece is against the blade. 6. Slowly feed the workpiece into the blade by guiding and pressing the workpiece down against the table. CAUTION: Do not force the leading edge of the workpiece into the blade.
- Page 20 3. Place the workpiece on the saw table with the hole in the workpiece over the access hole in the table. 4. Install a blade through the Fig. 23 hole in the workpiece. 5. Follow steps 3-7, under Freehand cutting. 6.
-
Page 21: Maintenance
8. Position the workpiece against the straight edge prior to touching the leading edge of the workpiece against the blade. 9. Slowly feed the workpiece into the blade, guiding the workpiece against the straight edge and pressing the workpiece down against the table. CAUTION: Do not force the leading edge of the workpiece into the blade. - Page 22 1. Turn the saw on its side and remove the rubber bearing cover. 2. Squirt a generous amount of SAE 20 oil (lightweight motor oil) around the shaft and bearing. 3. Let the oil soak in overnight. 4. Repeat the above procedure for the opposite side of the saw.
- Page 23 DIAGRAM...
-
Page 24: Parts List
PARTS LIST Screw (ST4.2X12) 43. Sleeve 93. Adjustable knob PC board cover 44. Washer 94. Handle Screw (M4X12) 45. Big flat washer 95. Spring Flat Washer 46. Knob A 96. Screw Screw (ST2.9X8) 47. Spring pin 97. Bolt PC board (M3X20) 98. - Page 26 Axminster Reference No: AWSS-18 Axminster Devon EX13 5PH UK FREEPHONE 0800 371822 www.axminster.co.uk...
Need help?
Do you have a question about the AWSS-18 Flex and is the answer not in the manual?
Questions and answers