
Related Manuals for Axminster AWHBS250N


Summary of Contents for Axminster AWHBS250N
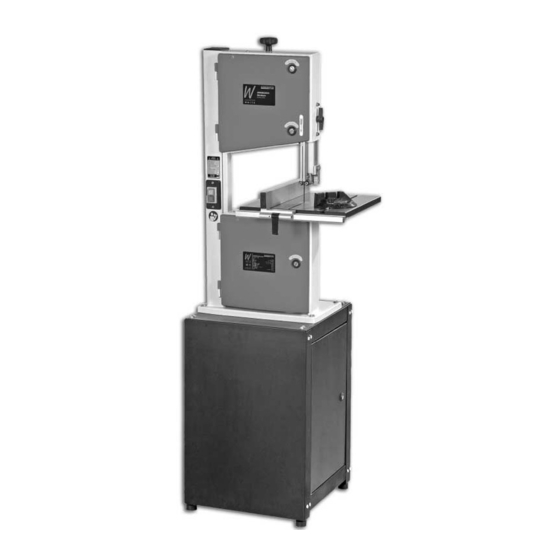
- Page 1 AWHBS250N Bandsaw A X M I N S T E R W H I T E Axminster Reference No: AWHBS250N w w w. a x m i n s t e r. c o . u k...
-
Page 2: Table Of Contents
Index of Contents... Page No. Index of Contents........................02 Declaration of Conformity………….………..……..…………........... 03 What’s in the Box………….………..……..…………..............04 General Instructions for 240v Machines...............05-06 Initial Assembly....................06-07-08-09 Assembling the Saw....................10-11 Specifications….………..……..…………..............11-12 Identification and Parts Description..............12-14-16 Illustration and Parts Description ............13-15-17-18-19-20 Setting Up the saw......................21 Setting the Fence......................22 Setting the Blade Guides.................. -
Page 3: Declaration Of Conformity
Declaration of Conformity... A X M I N S T E R W H I T E Copied from CE Certificate The undersigned, authorised by Laizhou Chunlin Machinery Co., Ltd. NO. 1 Fuqian East Road 261400 Laizhou, Shandong PEOPLE’S REPUBLIC OF CHINA declares that this product: Bandsaw with manual un-/loading MJ3425... -
Page 4: What's In The Box
M6 x 12 Hex Bolt 36 No. M6 Hex Nut 72 No. M6 Washer 1 No. Instruction Manual 1 No. Guarantee Card Having unpacked your saw (see below) and its accessories please dispose of any unwanted packaging properly. The cardboard packaging is biodegradable. www.axminster.co.uk... -
Page 5: General Instructions For 240V Machines
General Instructions for 240v Machine... A X M I N S T E R W H I T E Good Working Practices/Safety The following suggestions will enable you to observe good working practices, keep yourself and fellow workers safe and maintain your tools and equipment in good working order. -
Page 6: General Instructions For 240V Machines
“wriggle” the saw off the cardboard. (The best method of moving the saw is with a ‘hug’ lift through the neck of the saw, holding the saw back against your body and lifting by straightening your legs). www.axminster.co.uk... - Page 7 Initial Assembly... A X M I N S T E R W H I T E Cabinet Step 1 M6 x 12 bolts and washers Rubber foot Base Support plate Step 2 Both side support plates assembled 0800 371822 FREEPHONE...
- Page 8 Initial Assembly... A X M I N S T E R W H I T E Connecting plate Door Step 3 Lower hinge pin www.axminster.co.uk...
- Page 9 Initial Assembly... A X M I N S T E R W H I T E Step 3 Side plate M6 x 12 Bolts Fit the remaining side and connecting plate using M6 x 12 nuts bolts and washers 0800 371822 FREEPHONE...
-
Page 10: Assembling The Saw
Assembling the Saw... A X M I N S T E R W H I T E Step 4 Two Man lift Lift the saw on to the completed cabinet, and secure using the 4 No. M8x40 bolts. (Insert the bolts through the base of the saw, through the floor stand and fit the washers and nuts on the underside). -
Page 11: Assembling The Saw
Assembling the Saw... A X M I N S T E R W H I T E Fitting the saw table :- 1.Remove the table insert, the table fence, the table stabilising bolt and butterfly nut & washer (if fitted). (See figs 1 & 10) 2.Manoeuvre the table carefully around the blade (if still fitted). -
Page 12: Specifications
Specification... A X M I N S T E R W H I T E Axminster No. AWHBS250N (211532) Motor 240V a.c. 50Hz, 1400 rpm. 370W Wheel Diameter 254mm Blade Speed (double speed) 660/960 M/min Max Cutting Depth: 120mm Max Cutting Width:... -
Page 13: Illustration And Parts Description
Illustration and Parts Description... A X M I N S T E R W H I T E (Front View) Fig 1 Blade tensioning knob Upper cover door latches Upper blade guide height clamp Upper cover door Upper blade guide & guard Main saw frame Saw table On/Off button... - Page 14 Identification and Parts Description... A X M I N S T E R W H I T E Upper saw (The yoke is driven up or down allowing increasing or decreasing of the wheel blade tension). The saw wheel is fitted with a rubber tyre to give better (Continued) grip to the saw blade, and smoother running.
- Page 15 Illustration and Parts Description... A X M I N S T E R W H I T E (Back View) Fig 2 Blade tensioning knob Tracking control knob and tracking control lock Upper blade guide height clamp Main saw frame Power cable Upper blade guard Saw table...
- Page 16 An 80mm diameter dust extraction outlet (See Fig 2 Backview). outlet On/Off Button The On/Off buttons, controlling an NVR switch. The green ‘I’ is the ‘on’ and switch button, the red ‘O’ is the off button (See Fig 1 Front view). shroud www.axminster.co.uk...
- Page 17 Illustration and Parts Description... A X M I N S T E R W H I T E Blade tensioning wheel Fig 3 Upper blade guide height assembly Micro switch Saw guard clamp Upper saw wheel Micro switch Lower saw wheel Saw wheel brush Drive pulley...
- Page 18 A X M I N S T E R W H I T E Tilt quadrant Fig 4a Tilt scale and pointer Fig 4 Tilt mechanism clamp Quadrant housing Tilt mechanism clamp Guide fence Measuring scale Mitre fence Fig 5 Fig 6 Fence clamping lever www.axminster.co.uk...
- Page 19 Illustration and Parts Description..A X M I N S T E R W H I T E Fig 7 Saw guard Fore and aft adjusting clamp bolt Upper blade Saw blade guide assembly Guide bearing adjusting bolt Adjusting bolt for Fig 8 thrust bearing Lower blade guide...
- Page 20 Illustration and Parts Description... A X M I N S T E R W H I T E Fig 10 Guide fence clamp Table stabilising bolt Measuring scale and butterfly nut Fig 11 Upper cover door latch Upper blade guide height clamp www.axminster.co.uk...
-
Page 21: Setting Up The Saw
Setting Up the Saw... A X M I N S T E R W H I T E DISCONNECT THE SAW FROM THE MAINS SUPPLY Work Place/Environment Make sure both top and bottom blade guides are well clear of the blade. Open the front covers fully, giving good access to the top compartment of the saw and good visibility into the bottom compartment. -
Page 22: Setting The Fence
When all adjustments are complete replace the table insert. Re-connect the power, switch the saw on, allow to run for several minutes, check that the blade is still tracking correctly, there is no excessive vibration, etc. Switch off. The saw is ready to be used. www.axminster.co.uk... -
Page 23: Operating Instructions
Operating Instructions... A X M I N S T E R W H I T E 1. Make sure you have read and fully understood the general instructions and safety precautions that are printed in the preceding pages of this manual. 2. -
Page 24: Changing The Saw Blade
When you are sure that the blade is “ON” and stable, re-fit the table stabilising bolt and nut, re-fit the table insert and carry out the procedures as detailed in Setting up the Saw. www.axminster.co.uk... -
Page 25: Routine Maintenance
Routine Maintenance... A X M I N S T E R W H I T E Daily •Keep the machine clean. •Check the saw blade for missing teeth and cracks in the fabric. •Spray oil the bare metal surfaces. Weekly •Open the top &... -
Page 26: Parts Breakdown For The Bandsaw
Parts Breakdown for the Bandsaw... A X M I N S T E R W H I T E... -
Page 27: Parts List For The Bandsaw
Parts List for the Bandsaw... A X M I N S T E R W H I T E 0800 371822 FREEPHONE... -
Page 28: Parts List For The Bandsaw
Parts List for the Bandsaw... A X M I N S T E R W H I T E www.axminster.co.uk... -
Page 29: Parts List & Breakdown For The Fence
Parts List & Breakdown for the Fence... A X M I N S T E R W H I T E 0800 371822 FREEPHONE... -
Page 30: Parts List & Breakdown For The Cabinet
Parts List & Breakdown for the Cabinet... A X M I N S T E R W H I T E www.axminster.co.uk... -
Page 31: Notes
Notes... A X M I N S T E R W H I T E 0800 371822 FREEPHONE... - Page 32 Axminster Reference No: AWHBS250N A X M I N S T E R W H I T E Axminster Devon EX13 5PH UK FREEPHONE 0800 371822 www.axminster.co.uk...
Need help?
Do you have a question about the AWHBS250N and is the answer not in the manual?
Questions and answers