
Related Manuals for Axminster AWSMS102


Summary of Contents for Axminster AWSMS102
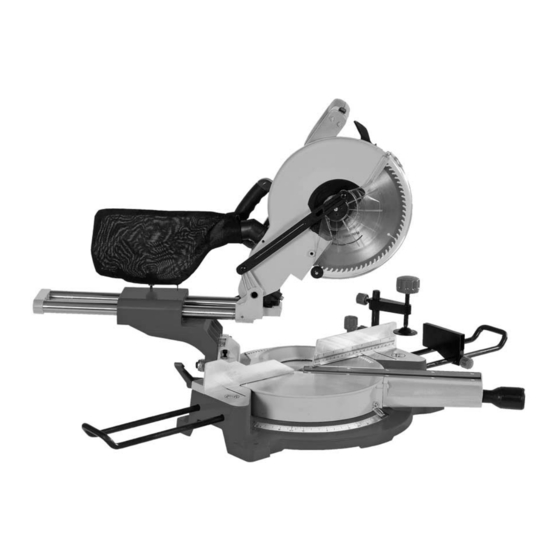
- Page 1 Code: 501243 AWSMS102 250mm Mitre Saw Axminster Tool Centre, Unit 10 Weycroft Avenue, Axminster, Devon EX13 5PH axminster.co.uk...
-
Page 2: Declaration Of Conformity
Index of Contents Page No. Index of Contents Declaration of Conformity What’s in the Box Specification Table of Capacities General Instructions for 230V Machines 06-07 General Safety Precautions for Mitre Saws 07-08-09 Initial Setup Identification and Parts Description 11-12-13-14-15 Adjusting the Saw 15-16-17 Operation of the Laser Setting the Laser... -
Page 3: What's In The Box
What’s in the Box Model Number: MJ2625IIIA 1 No: 250mm Sliding Arm Compound Mitre Saw 1 No: 250 Saw Blade (fitted) 1 No: Arbor bolt spanner 5 No: Rubber Feet 1 No: Holding Clamp Assembly 2 No: Extension/Support frames 1 No: Cut length stop 1 No: Saw Dust collection bag... -
Page 4: Specification
Specification Model AWSMS102 Product Code 501243 Rating Hobby Power 1,500W Electric Brake Spindle Lock Blade Dia/Bore 250mm/30mm Bevel Angle Range 0 - 45° Mitre Angle Range 45°-0-45° Max Mitre Cut @45˚ 90 x 215mm Max Bevel Cut @ 45˚ 42 x 305mm Max Compound Cut @ 45˚... -
Page 5: Table Of Capacities
Table of Capacities Always use (250mm) saw blades with a rated speed in excess of 4,500 r.p.m. The machine is supplied with a 250mm GP (40 tooth) Saw blade, with a 30mm bore for cutting TIMBER. For precision trimming e.g. fine cut finish of bead, frame, dado etc., an 80 tooth saw blade is recommended and for cutting non-ferrous metals, an 80 tooth negative rake saw blade. -
Page 6: General Instructions For 230V Machines
General Instructions for 230V Machines Good Working Practices/Safety The following suggestions will enable you to observe good working practices, keep yourself and fellow workers safe and maintain your tools and equipment in good working order. KEEP TOOLS AND EQUIPMENT OUT WARNING!! OF THE REACH OF YOUNG CHILDREN General Advice... - Page 7 General Instructions for 230V Machines UNDER NO CIRCUMSTANCES SHOULD WARNING!! CHILDREN BE ALLOWED IN WORK AREAS Once the saw is mounted, carry out any setting operations, (mitre, tilt..?), and remove all tools used in the setting operations (if any) and place safely out of the way. If you are using long lengths of material arrange for extra support beyond the boundary of the machine.
- Page 8 General Safety Precautions for Mitre Saw DO NOT change blades with power connected. Always use the correct accessories; especially the correctly sized spanner on the arbor bolt, DO NOT risk damaging the saw by using incorrectly fitting accessories. If the saw does not have a specific device to lock the saw shaft, DO NOT jam/wedge the motor fan, it is better to wedge the saw blade with a piece of scrap timber.
- Page 9 General Safety Precautions for Mitre Saw DO NOT allow the saw to 'stall'; if unfortunate circumstances cause the machine to stall, switch off immediately, disconnect the machine and clear the 'jam' by hand. DO NOT attempt to re-start the machine until the 'jam' is cleared. If it was a severe 'jam' that required much heaving and knocking to clear, check the basic parameters of the machine before reconnecting the supply and re-commencing operations.
-
Page 10: Initial Setup
Initial Set Up Rubber foot Lift the saw clear of the box using the two hand grips moulded into the sides of the chassis, and set on a clear flat surface, taking care not to trap or pinch the power cable under the chassis. Remove the other items from the box. -
Page 11: Identification And Parts Description
Identification and Parts Description Saw arbor lock button Guard latch Laser switch Tilt preset stop Upper guard Dust bag Motor brush inspection port Hold down clamp Fence Main Saw Chassis Extension/ support frames Turntable Mitre Scale Pointer Laser... - Page 12 Identification and Parts Description Your 250mm sliding arm compound mitre saw will have been shipped to you in the ‘housed’ position, i.e. with the saw body locked down. Please take some time to identify the various parts of your machine so that you are familiar with the terminology we will use to enable you to set up and operate your machine safely and correctly.
- Page 13 Identification and Parts Description Adjustable depth stop Fig A Operating handle Trigger switch Handle Lower guard Lock down pin Motor/vents Sliding arm Saw body frame locking clamp Turn table locking clamp Tilt housing Tilt preset stop Cut length stop mounting Tilt clamping lever Tilt pointer Tilt scale...
- Page 14 Identification and Parts Description Turntable Mounted into a circular recess in the main saw chassis, the turntable also mounts the extrusion that contains the kerf plate (the plate with the slot that allows the saw to enter the table) The locking clamp for the turntable is mounted on the right hand side of the chassis behind the fence.
-
Page 15: Adjusting The Saw
Identification and Parts Description Fence This is an aluminium casting bolted to the rear of the saw table. It has various cut-outs and shapes machined and moulded into it to allow the mitre, tilt or compound cuts to be made. To all intents and purposes it is not adjustable, except during main setup procedures. - Page 16 Adjusting the Saw Perpendicular (Square) Adjustment Mitre Scale Pointer Fig Ea 0˚ degrees Fig E Engineers square Locate and loosen the 4 bolts that hold the fence to the chassis. Adjust as necessary until the fence is square to the blade. Tighten the bolts, recheck that the blade and the fence are still perpendicular by moving the turntable away from zero and then re-engaging the preset.
- Page 17 Adjusting the Saw Fig G Fig H Tilt preset stop Tilt clamping lever Engineers square Fig I Tilt pointer 0˚ degrees Fig J 45˚degrees Mitre Saw at 45˚ degrees...
-
Page 18: Operation Of The Laser
Under no circumstances should you tamper with or modify the laser to try to increase its power output. The laser fitted to the AWSMS102 Sliding Mitre Saw provides a convenient visual guide for lining up the saw blade with a line marked on the timber. - Page 19 Setting the Laser Laser toggle switch Fig K Fig P Fig O To adjust the laser, loosen the To adjust the mounting bracket caphead screw on the holder loosen the caphead bolt...
-
Page 20: Changing The Saw Blade
Changing the Saw Blade DISCONNECT THE SAW FROM THE MAINS SUPPLY 1. Locate the two screws as indecated holding the front of the saw guard bracket, and loosen and remove them to allow the saw guard bracket to pivot on the rear screw. (See fig Q) Swing the saw guard bracket and the guard fully out of the way, to enable access to the saw arbor bolt. - Page 21 Changing the Saw Blade Fig S Fig Sa Saw arbor 13mm lock button Spanner Engage the saw arbor lock and fit the spanner onto the bolt, keeping the lock depressed, loosen the saw arbor bolt by turning clockwise, (left hand thread).
-
Page 22: Parts Breakdown/List
Parts Breakdown/List... - Page 23 Identification and Parts Description...
- Page 24 Identification and Parts Description...
- Page 25 Identification and Parts Description...
- Page 26 Identification and Parts Description...
- Page 27 Notes...
- Page 28 Please dispose of packaging for the product in a responsible manner. It is suitable for recycling. Help to protect the environment, take the packaging to the local recycling centre and place into the appropriate recycling bin. Only for EU countries Do not dispose of electric tools together with household waste material.
Need help?
Do you have a question about the AWSMS102 and is the answer not in the manual?
Questions and answers