Table of Contents
Advertisement
Quick Links
Advertisement
Table of Contents

Related Manuals for Fujitsu FI-718PR


Summary of Contents for Fujitsu FI-718PR
- Page 1 P3PC-6232-01ENZ0 fi-718PR Imprinter Operator's Guide...
-
Page 2: Table Of Contents
Contents Introduction ..............................1 1. Preparations ............................3 1.1. Checking the Package Contents ......................... 3 1.2. Names of Component Parts ......................... 3 2. Installation ............................... 4 2.1. Installing the Imprinter ..........................4 2.2. Loading the Print Cartridge ......................... 5 2.3. Test Print ............................... 6 3. -
Page 3: Introduction
Introduction Thank you for purchasing the fi-718PR Imprinter option Abbreviations Used in This Manual (hereinafter referred to as the “Imprinter”) for the The operating systems and products in this manual are fi-7160/fi-7180 Image Scanner. indicated as follows. This guide explains how to install, connect, operate, and... - Page 4 Arrow Symbols in This Manual Right-arrow symbols ( ) are used to separate icons or → menu options you should select in succession. Example: Click the [Start] menu [Control Panel]. → Screen Examples in This Manual Microsoft product screenshots are reprinted with permission from Microsoft Corporation.
-
Page 5: Preparations
● LCD (feeder) If any of the components are missing, contact your ● [Menu] button FUJITSU scanner dealer or an authorized FUJITSU scanner ● [] button/[] button ● [Scan/Enter] button service provider. ● [Stop/Clear] button ●... -
Page 6: Installation
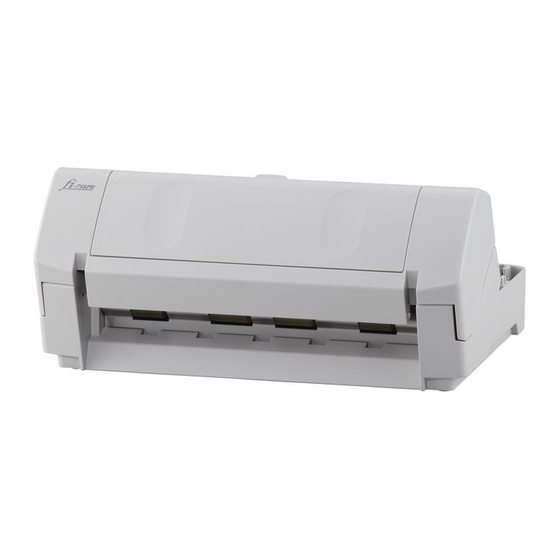
2. Installation 2.1. Installing the Imprinter Install the scanner onto the imprinter. Install the imprinter in the following procedure. Turn off the scanner, and disconnect the power cable. Remove the stacker from the scanner as shown below. 1) Hold the left side of the stacker with your left hand. About 80 degrees Lock Holding the scanner above the rear side of the imprinter,... -
Page 7: Loading The Print Cartridge
Lift the print cartridge holder by pinching the lever with your fingers as shown below. ① Insert one arm. Take out a new print cartridge. ② Gently slide in the other arm. Connect the power cable to the scanner. fi-718PR Imprinter Operator’s Guide | 5... -
Page 8: Test Print
Remove the protective tape from the print 10. Close the print cartridge cover. cartridge. ATTENTION Do not touch the metal part of the cartridge nor put the protective tape back on. 2.3. Test Print Place the print cartridge into the holder as shown below with its tab pointing to the right. - Page 9 Test Pattern 3 (Horizontal): !”#$%&'()*+,-./0123456789:;<=>?@00000000 Test Pattern 4 (Vertical): ABCDEFGHIJKLMNOPQRSTUVWXYZ[¥]^_`00000000 Test Pattern 5 (Vertical): abcdefghijklmnopqrstuvwxyz{|}‾ 00000000 Test Pattern 6 (Vertical): !”#$%&'()*+,-./0123456789:;<=>?@00000000 The numbering section "00000000" increases in increments of one, starting from 0 (zero). fi-718PR Imprinter Operator’s Guide | 7...
-
Page 10: Basic Operation
3. Basic Operation 3.1. Setting the Print Position 3.2. How to Use the Paper Guides To position the print cartridge for printing: Use the paper guides to prevent paper jams due to curling of the edges, as shown below. Open the print cartridge cover. Hold the print cartridge holder, as below, and slide it to the left or right within the document width to set it at a suitable print starting position. -
Page 11: Print Setup
Pressing and holding together with your fingers, as below, standard mode. lift up and pull away the guide. Paper guide <To Attach the Paper Guides> Put the paper guides in place as in the picture on the left. Paper guide fi-718PR Imprinter Operator’s Guide | 9... -
Page 12: Replacing The Print Cartridge
Lift the print cartridge holder by pinching the lever HINT with your fingers as shown below. The following items can be specified. For details, refer to PaperStream IP Driver Help. ● Imprinter status (On or Off) ● Whether the PaperStream IP driver is synchronized with the Digital Endorser ●... - Page 13 The counter is set to “100”. Click the [OK] button on the [Software Operation Panel] dialog box. A message appears. Click the [OK] button. 10. Turn on the scanner. The settings are saved. fi-718PR Imprinter Operator’s Guide | 11...
-
Page 14: Removing Jammed Documents
Close the print section. 3.5. Removing Jammed Documents When a paper jam occurs, remove the document in the following procedure. ATTENTION Do not use force to pull out the jammed document. Remove all documents from the ADF paper chute (feeder). Place your hand on the right side of the print section to open it, as shown below. -
Page 15: Daily Care
“3.4. Replacing the Print Cartridge”) close the print section. ATTENTION Reinstall the print cartridge and close the print When installing the print cartridge, install it properly. cartridge cover. “3.4. Replacing the Print Cartridge”) (Refer to fi-718PR Imprinter Operator’s Guide | 13... -
Page 16: Cleaning The Rollers
When cleaning, be careful not to touch the metal wheels *1: For information about the cleaning materials, contact your located behind the upper rollers in the Print section. FUJITSU scanner dealer or an authorized FUJITSU scanner service provider. *2: Pre-moistened with Cleaner F1. It can be used instead of moistening a cloth with Cleaner F1. -
Page 17: Error Messages
Check if the print cartridge is installed correctly. If the problem persists, write down the displayed U6:B4 Print cartridge not installed error code and contact your FUJITSU scanner dealer or an authorized FUJITSU scanner service provider. A0:B2 Imprinter error (RAM) An error occurred in the imprinter. -
Page 18: Specifications
6. Specifications Item Specification Printing Method Thermal inkjet printing Print Timing Post printing Printing Characters Alphabet : A to Z, a to z Numeric characters : 0, 1 to 9 Symbols : ! ” $ # % & ’ ( ) * + , - . / : ; < = > ? @ [ ¥ ] ^ _‘ { | }¯ Maximum number of Maximum 43 characters characters per line...
Need help?
Do you have a question about the FI-718PR and is the answer not in the manual?
Questions and answers