Table of Contents
Advertisement
Advertisement
Table of Contents

Related Manuals for Kimo DB 200


Summary of Contents for Kimo DB 200
- Page 1 Sound level meter DB 200...
-
Page 2: Table Of Contents
Table des matières 1 Introduction............................4 2 Vocabulary............................5 3 Presentation of the sound level meter....................6 3.1 Overview............................6 3.2 Presentation of the screen-keyboard group.................7 4 Settings..............................8 4.1 Configuration..........................8 4.2 I/O..............................8 4.3 Contrast - backlight........................9 4.4 Autonomy............................9 4.5 Instrument.............................9 4.6 About.............................9 5 Make some measurements........................10 5.1 Conventional sound level meter function..................10 5.1.1 Adjustment prior to measurement..................10 5.1.2 Launch the measurement....................10... - Page 3 9 Directions for use and sound level meter maintenance..............26 9.1 Use warnings..........................26 9.2 Directions for use........................26 9.3 Calibration...........................26 9.4 Maintenance..........................27 9.5 Regular checking........................27 9.6 Change batteries.........................27 9.7 Replace the batteries with a battery pack...................27 9.8 Load the battery..........................28 9.9 AC adapter..........................28 10 Running informations........................29 10.1 Over-range..........................29 10.2 Power............................29...
-
Page 4: Introduction
DB200 sound level meter is an acoustic measurement instrument with main features of a conventional and integrating-averaging sound level meter. With its memory, DB200 sound level meter stores measurement datasets. Then they are transferred to a computer and processed through LDB200 software. According to international standards, sound level meter calculates and displays on its graphical backlight LCD-screen values used for a fast and complete study of the noise environment. -
Page 5: Vocabulary
The terms and abbreviations listed below will be used throughout this user manual. L : represents the measurement mode: conventional sound level meter L-St : represents the measurement mode : conventional sound level meter with storage function. The sound pressure level is stored into the memory at a sampling rate which is defined and planned. -
Page 6: Presentation Of The Sound Level Meter
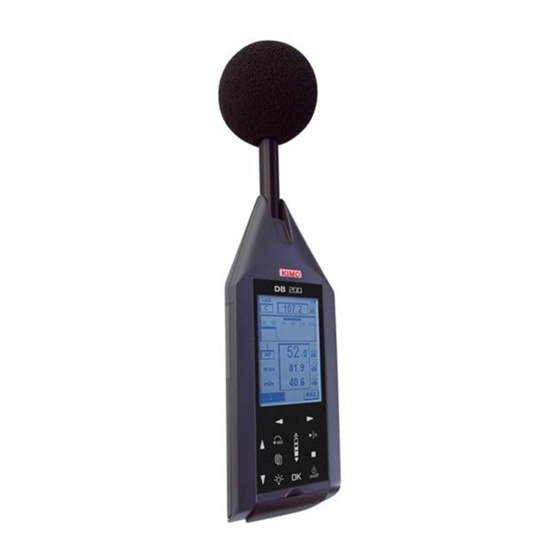
3.1 Overview Windscreen : essential to reduce the noise induced by air Electret microphone currents. Severable from the preamplifier (inside the windscreen). Preamplifier Graphical backlighted LCD- screen : 240 x 160 pixels. It displays both reserved areas setting measurement and areas for results presentation. -
Page 7: Presentation Of The Screen-Keyboard Group
3.2 Presentation of the screen-keyboard group The screen/keyboard group gives to the instrument a modern ergonomy. It mainly participates to the quick familiarization of the sound level meter. A press, a touch or a very light finger slipped on keyboard icon is enough to trigger the corresponding action of the sensitive key. -
Page 8: Settings
From the key a screen lists the different settings or informations about the instrument. To have access to one of those screens, scroll with the scrolling knob key and validate with OK key. To quit each screen and back to main menu, use key. -
Page 9: Contrast - Backlight
Programming with scrolling knob key the desired level of detection by 1 dB steps. • Set a timer for maintaining the continuous signal detection after sub-overshoot sound level (from 1s to 10s by 1s pitch). • I/O 2 : DC continuous analogue output : 0-10V for connection to a recorder or industrial controller. Menu I/O features 4.3 Contrast - backlight... -
Page 10: Make Some Measurements
5.1 Conventional sound level meter function The sound level meter processes the signal and displays sound pressure and at the same time following informations : Temporally weighted sound pressure level. • Maximum and minimum values of levels on the measurement time. •... -
Page 11: Conventional Sound Level Meter With Storage Function
5.2 Conventional sound level meter with storage function The sound level meter processes the sound pressure signal and stores with a sampling rate results in a saved memory. Data measured and stored at a sampling rate : Temporally weighted sound pressure level •... -
Page 12: Stop The Measurement
E3 : this screen reminds the general format of the session of measurement: Screen 3 Start : date of measurement start • End : date of measurement end (here, not entered because measurement is still ongoing). • Time : measurement time (here, not entered because measurement is still ongoing). •... -
Page 13: Classical Sound Level Meter And Averager Integrator Function
5.3 Classical sound level meter and averager integrator function The sound level meter processes the signal sound pressure and simultaneously provides the following information : LXY : the sound pressure level weighted temporally. • LXYmax and LXYmin : maximum and minimum values of the levels on measurement time. •... -
Page 14: Stop The Measurement
Screen 3 E3 : this screen reminds the general format of the session of measurement: Date of measurement start • Date of measurement end : not entered because measurement is still ongoing. • Measurement time : not entered because measurement is still ongoing. •... -
Page 15: Sound Level Meter And Averager Integrator With Storage Function
5.4 Sound level meter and averager integrator with storage function The sound level meter processes the acoustic signal for each elementary integration time and stores results in a saved memory. Measured and stored data for each integration time: LXeq, DI : equivalent continuous sound level of acoustic pressure on the logging time and frequency weighted. •... -
Page 16: Stop The Measurement
E2 : This screen contains results of values that will be stored in memory at the end of measurement : Screen 2 LUpk : level of maximum peak of sound pressure on the measurement time. • LXeqM : maximum value of equivalent continuous sound pressure level of all elementary •... -
Page 17: Calculate Two Sound Sources
the phase of data deletion. Ongoing Results RST active measurement Deletion 5.5 Calculate two sound sources The sound level meter processes the acoustic signal of several sound sources over a time left to the free initiative of the operator. The measured value here is the equivalent continuous level over this time. -
Page 18: Store Data
The measure will stop by itself after time T previously chosen for the measurement of the S1 source. The equivalent continuous level calculated from the two combined sources is displayed in front of 'S1 + S2'. 5.5.3 Store data At the end of the measurement a screen of all results is displayed. It is then possible to : ➢... -
Page 19: Adjustment Prior To Measurement
5.6.1 Adjustment prior to measurement 1 – Choose the S1 + S2 mode : place the cursor with the arrow keys to 1 and select 'S1 + S2' with the scrolling knob key. 2 – Select the frequency weighting. Procédure Possible choices are : A frequency weighting - C frequency weighting - Z frequency weighting (LIN). -
Page 20: Sound Level Meter In I/O Mode
➢ Reject measurements and not store them : move the cursor on RST and press twice on OK key to confirm. A banner displays the phase of data deletion. Results S2 measurement and S1+S2 S1 calculation measurement 5.7 Sound level meter in I/O mode The sound level meter can be part of a monitoring chain which is controlled by an industrial controller. -
Page 21: Read The Stored Files
After a controlled stopping of the measurement and a data storage, it's possible to see on the screen measurement dataset results. 6.1 Access to files ➢ Press Menu key then select Read then OK. The first stored file is displayed. ➢... -
Page 22: L-Leq Mode File
Press Esc key to quit this file and back to file selection main screen. ➢ Stored file E1 screen E2 screen Stored file 6.2.2 L-Leq mode file When the file has been identified by its identification number: ➢ Press OK key to access to E1 main screen results. LUpk : level of maximum peak of sound pressure •... -
Page 23: S1+S2 Mode File
➢ Press OK key to access to E1 main screen results. LUpk : level of maximum peak of sound pressure on the measurement time. • LXeqM : maximum value of equivalent continuous sound pressure level of all elementary integration times. •... -
Page 24: Transfer Files To A Pc
This function allows to transfer data towards a computer through a USB cable. LDB200 software has been previously installed on the computer. ➢ Connect the instrument to the PC through the USB cable. ➢ Go to « PC » screen of the sound level meter : from the menu icon, select PC then OK. ➢... -
Page 25: Reset Memory
After datasets storing thanks to the transfer to computer, it's possible to erase sound level meter memory. There are two methods : Through sound level meter (see below) • Through computer (see LDB200 software user manual) • Through the sound level meter : ➢... -
Page 26: Directions For Use And Sound Level Meter Maintenance
9.1 Use warnings The sound level meter is a measuring instrument using the latest technologies. To maintain accuracy and required reliability, avoid any chock of the housing and the microphone and keep them away from humidity and corrosive steams. 9.2 Directions for use For each application you should check measurement technique and conditions in order to get valid and coherent results. -
Page 27: Maintenance
A new screen is displayed : ➢ Check that the reference value Ref : corresponds to that of the used calibrator and the value Calibration free-field correction C.Cl (0,0 dB for the sound level meter). ➢ Place the running calibrator on the microphone. ➢... -
Page 28: Load The Battery
➢ Slide the battery into the housing. ➢ Close the back hatch 9.8 Load the battery Use a USB power adaptor which serves as a charger. It's also possible to connect the sound level meter to USB port of a running computer. Battery will load according available current at the USB output, about 500 mA. -
Page 29: Running Informations
10.1 Over-range Under conditions of measuring range excess, defined at 133,5 dB, Z peak, an over-range icon appears. Its displaying differs with the measuring mode selected: L and L-St modes : • - LXY : it comes fleetingly for each passing. It stays visible at least 1s for a better readability. - LXpk : warning light appears during the first overload of the input stage, it stays visible during all the measurement. -
Page 30: Technical Features
The instrument is equipped with an electret microphone with an integrated preamplifier of standardized diameter of ½ inch. Fixed at the top of the sound level meter, it gives to the group (microphone and housing) free field features compatible with standards. 11.1.1 Sheet Marque : KIMO • Type : Prepolarized free-field ½'' •... -
Page 31: Measured And Displayed Values
11.3 Measured and displayed values A, C or Z- weighted frequency acoustic pressure level and temporally weighted according time weightings : Slow, Fast or • Impulse. E.g. : LAF. A, C or Z- weighted frequency maximum acoustic pressure level and temporally weighted according time weightings : Slow, •... -
Page 32: Metrology
11.5 Metrology 11.5.1 Main features DB200 sound level meter Classical mode Integrator – averager mode Electromagnetical compatibility – CE mark As per 89/336/CEE directive and product standards Standards NF EN 61672-1 (2003)- NF EN 60651 NF EN 61672-1 (2003)- NF EN 60804 (1994) (2000) Accuracy class... -
Page 33: I/O Interface
Access to micro SD card Warning light of the state of battery charge I/O 1 : Input : allows Mini USB connector for data transfer – measurement launching load battery – mains voltage adaptor I/O 1 : Output : levels detection Not used I/O 2 : Input : not used I/O 2 Output - 0-10V... -
Page 34: Power And Storage Autonomy
Integration time or sampling rate Maximum measurement time (in hours) Maximum measurement time (in days) 1440 In the event of a reset of the memory by the sound level meter or through the software LDB200, all the memory is erased. 11.8 Power and storage autonomy Measurement autonomies linked to power are given for a running at 20°C and backlight off. -
Page 35: Packaging And Accessories
12.1 Supplied with The sound level meter is supplied in a transport case with a batteries pack (3 x LR6/AA), a windscreen, a USB cable for transferring data, a CD-ROM with LDB200 software and user manuals. A calibration certificate is also supplied. 12.2 Optional Acoustic calibrator class 2 type : CAL200 •... -
Page 36: Ldb200 Software
Supplied with the sound level meter, LDB200 software allows the configuration, data recovery and exploitation stored in the memory of the instrument. Easy to use, it requires a smaller learning and allows immediate management of data. Main functions : Visualization and results of the different measurement mode •...
Need help?
Do you have a question about the DB 200 and is the answer not in the manual?
Questions and answers