Table of Contents
Advertisement
Quick Links
Advertisement
Table of Contents

Related Manuals for Kimo DB300/1


Summary of Contents for Kimo DB300/1
-
Page 1: Sound Level Meter
Sound level meter Class 1: DB300/1 Class 2: DB300/2... -
Page 3: Table Of Contents
Table of contents 1 Introduction..............................6 2 Vocabulary............................... 8 3 Presentation of the sound level meter......................9 3.1 Overview..............................9 3.2 Presentation of the screen-keyboard group....................10 3.3 Screens overview........................... 11 4 Setting................................12 4.1 Configuration............................12 4.2 Set time..............................12 4.3 Measurement programming........................ - Page 4 7.4.5 Store data............................34 7.5 Calculate two sound sources......................... 35 7.5.1 Settings to perform before measurement..................35 7.5.2 Make calculation of two sound sources..................35 7.6 Determine a sound source among two....................35 7.6.1 Perform the measurement......................35 7.6.2 Store data............................36 8 Modes of measurement launching.........................37 8.1 Generalities............................
- Page 5 15.6 Filters by octave bands: from 16 Hz to 16 kHz (class 1) and from 31.5 Hz to 8 kHz (class 2)....61 15.7 Measured and displayed values......................61 15.8 Metrology of the class 1 DB300......................62 15.9 Metrology of the class 2 DB300......................63 15.10 Plugs and connections........................
-
Page 6: Introduction
DB300 sound level meter is an acoustic measurement instrument with main features of a conventional and integrating-averaging sound level meter and analyzer with storage. With its memory, DB300 sound level meter stores measurement datasets. Then they are transferred to a computer and processed through LDB23 software. - Page 7 0-10 V DC analog output • Control bit activated as per pre-programmed threshold • Threshold detection for external alarm • Introduction...
-
Page 8: Vocabulary
L-Leq: represents the measurement mode: conventional and integrating-averaging. Values are measured simultaneously. Leq-St: represents the measurement mode: integrating-averaging sound level meter with storage function. The equivalent continuous sound level on the logging time (DI) is stored into the memory. 1/1 oct: analyser integrating-averaging sound level meter with storage function and with filter by octave bands 1/3 oct: analyser integrating-averaging sound level meter with storage function and with filter by third octave bands NR: mode to measure noise level of machines or installations according to NR curves. -
Page 9: Presentation Of The Sound Level Meter
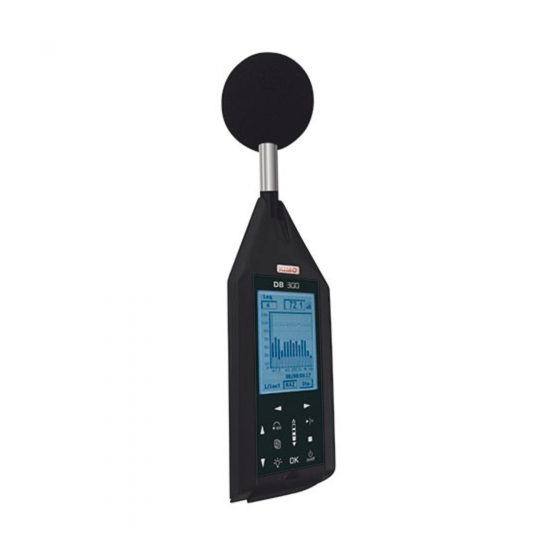
3.1 Overview Windscreen : essential to reduce the noise induced by air Electret microphone currents. Severable from the preamplifier (inside the windscreen). Removable preamplifier for the measurement at the end of an extension It displays both reserved areas for the setting of the measurement and areas for results presentation. -
Page 10: Presentation Of The Screen-Keyboard Group
3.2 Presentation of the screen-keyboard group The screen/keyboard group gives to the instrument a modern ergonomy. It mainly participates to the quick familiarization of the sound level meter. A press, a touch or a very light finger slipped on keyboard icon is enough to trigger the corresponding action of the sensitive key. -
Page 11: Screens Overview
3.3 Screens overview Press OK on the DB300 pictogram in 3D : Press On-Off key the main screen appears. DB300 ➢ Move the cursor on the icon corresponding to the required menu that becomes reversed-video, then press OK. 078.4 Information DB300 S1 + S2 N°... -
Page 12: Setting
From the key a screen lists the different settings or information about the instrument. To have access to one of those screens, scroll with the scrolling knob key and validate with OK key. To quit each screen and back to main menu, use key. -
Page 13: Measurement Programming
at the beginning of the minute when the seconds display 00 of the reference clock. Proceed as follows: ➢ Move the cursor from date to hour, a 3D OK appears. ➢ Adjust hours then minutes and validate with OK key when the reference clock is at 00 second. -
Page 14: I/O
4.5 I/O The I/O input/output allows to connect 2.5 mm jacks. It is located at the bottom of the unit behind the rubber breastplate. I/O 2 DC : 0-10V CONFIGURATION PROG. MESURE I/O 1 COMMENTAIRE I/O 1 L/LeqA Menu LECTURE 100 dB AUTONOMIE INSTRUMENT... -
Page 15: Contrast - Backlight
4.9 Contrast - backlight ➢ From starting screen, select icon and press OK to validate. To optimize reading of the display, from this screen: ➢ Position the cursor on Cont. and adjust the contrast by choosing with scrolling knob key a level from 1 to 7. ➢... -
Page 16: Time Evolution
5.1 Principle and use The drawing of the evolution of the short equivalent continuous levels is displayed according to a weighting or a filter following a time- related adjustment suitable for the measurement. It is linked with the screen of the spectral representation by frequency band, before and during the data storage. -
Page 17: Configuration Before The Measurement
The table below lists every possibilities linking integration duration of the short Leq and displaying duration on the screen in sliding mode. Possible = X / inpossible = KO Example : for a short Leq of 1 second, the time evolution in sliding mode on the screen can be from 10 s to 62 days! The sound level meter controls automatically these durations when configuring and does not allow the “KO”... - Page 18 Synoptic: Consultation without storage: - Free configuration - Sequential viewing of the weighted and filtered drawings Measurement launched: - Inhibited configuration - Possible sequential viewing of the weighted and filtered drawings Time evolution...
-
Page 19: Events Coding
6.1 Principle In a great majority of acoustic investigations, it is desirable to perform a tracking of specific events in direct connection with the noise environment. It can be performed a posteriori when reading the file on a computer, but also during the measurement by pressing directly the keypad of the sound level meter. -
Page 20: Be - Back-Erase
6.3 BE – Back-Erase 6.3.1 Principle This function is active only during a measurement, it allows to remove in real time acoustic values produced from events that have just happened. Typically, a door slamming, conversations, an unexpected event or falling objects that change the measurement. When you perform a measurement in storage mode, it is easy to remove or modify a posteriori these areas with the software. -
Page 21: Coding Principle
6.4.1 Coding principle When an events appears, expected or not, you code by pressing on the keypad at the pace of appearances and disappearances. So each measurement of the short Leq is noted with a code specific to the event. The more detailed study is performed further with the LDB300 software. -
Page 22: Identification Of The Sources To Code
uncoding… and so on. Several cases or events are juxtaposing. For example: Factory + plane. So we can code up to 5 sources simultaneously. Note: the access to the field to select the weighting or filter on the top left of the screen remains possible, as well as the switching between spectrum and time evolution. -
Page 23: Linked Particular Marking And Events Coding
The marking is performed from: Spectrum screen if you have to detect and mark frequency • a type information (very particular spectrum, etc.) Evolution screen in case of remarkable modification of the • drawing (level, exceeding, etc.) the 1 screen for the 3 measurement mode •... -
Page 24: Perform Some Measurements
7.1 Conventional and averaging integrator sound level meter with storage function Select L-Leq mode: move the cursor with arrow keys on icon then press OK. 7.1.1 Conventional or classical mode The measurement is immediate, yet it is interrupted and reset with each change. The sound level meter processes the sound pressure signal and displays simultaneously the following information on S1and S2 screens. -
Page 25: Screens During Measurements
7.1.3 Screens during measurements 1- From S1 screen, press the scrolling knob key to display S2 screen. 103.6 88.7 61.4 78.6 88.7 61.4 78.6 Inst. 2- Move the cursor with the arrows on the item 1 and select with the scrolling knob key among: Inst. -
Page 26: Screens During Measurements
7.1.5 Screens during measurements During measurement, three screens inform the current measurement. They are accessible through the scrolling knob key S1: it is the main screen that displays the instantaneous measurements: LXY: sound pressure level temporally weighted according to the selection •... -
Page 27: Store Data
7.1.7 Store data At the end of the measurement, a screen of all results is displayed. It is then possible to: ➢ Accept measurements and store them: move the cursor on Sto. and press once on OK key to confirm. A banner displays the storage phase. -
Page 28: Launch The Measurement
7.2.2 Launch the measurement In manual mode: press key, the timer starts and indicates the measurement duration. Timer and I/O modes: see page 37) 7.2.3 During measurement During measurement, three screens give information about the current measurement. They are accessible with the scrolling knob key. S1: it is the main screen that displays the instantaneous measurements: 89,1 LAeq, DI: equivalent continuous level of sound pressure on the elementary integration time. -
Page 29: Stop The Measurement
7.2.4 Stop the measurement ➢ Stop the measurement pressing ➢ Press OK. Note: When STOP? is displayed, it is possible to press key to back to measurement screens and keep going. Note: It is not possible to stop the measurement as long as the first logging time (ex: DI=60) is not completed. Pressing key will be inoperative. -
Page 30: Settings To Perform Before The Measurement
Integration time: The data storage is made according to an integration time DI to select: 1/16 s, 1/8 s, 1/4 s, 1/2 s, 1 s, 2 s, 3 s, 5 s, 10 s, 15 s, 30 s, 60 s. Read values: In order to have permanent control of the sound pressure level before the launch of measurement, the sound level meter calculates and displays the equivalent continuous level of acoustic pressure on a logging time of 1/8 s. - Page 31 The different bars stand for: LAeq - LCeq - LZeq: equivalent continuous levels of sound pressure A, C and Z-weighted • LXeq: equivalent continuous levels of sound pressure filtered by octave bands from 16 Hz to 16kHz (class 1) or from 31.5 Hz •...
-
Page 32: Stop The Measurement
7.3.4 Stop the measurement ➢ Press to stop the measurement. STOP ➢ Validate with OK. S11 ? Note: When STOP ? is displayed, it is possible to press key to back to measurement screens and keep going. Note: It is not possible to stop the measurement as long as the first logging time (ex: DI=60) is not completed. Pressing key will be inoperative. -
Page 33: Settings To Perform Before A Measurement
Measurement duration: T left to the initiative of the user according to the manual start/stop mode (with the keyboard) Predefined T to select between the durations: 3 s, 5 s, 10 s, 15 s, 30 s, 60 s. Note: In order to have permanent control of the sound pressure level before the launch of measurement, the sound level meter calculates and displays the equivalent continuous level of acoustic pressure on a logging time of 1/8 s. -
Page 34: Stop The Measurement
S3: this screen reminds the general format of the measurement session Date of measurement start • Date of measurement end: not entered because measurement is still ongoing. • Measurement time: not entered because measurement is still ongoing. • LCpkmax 99,5 dB LAeq 98,7 dB NR measurement mode: Mode... -
Page 35: Calculate Two Sound Sources
7.5 Calculate two sound sources The sound level meter processes the acoustic signal of several sound sources over a time left to the free initiative of the operator. The measured value here is the equivalent continuous level over this time. 7.5.1 Settings to perform before measurement 1 –... -
Page 36: Store Data
7.6.2 Store data At the end of the measurement, the screen of all results is displayed (example: adding of two sound sources). It is then possible to: ➢ Accept measurements and store them: move the cursor on Sto. and press once on OK key to confirm. A banner displays the storage phase. -
Page 37: Modes Of Measurement Launching
8.1 Generalities DB300 instrument has four modes of measurement launching: Immediate mode: manual launching with the keypad. • Delayed mode - Tim.: programmable launching and stop on a free duration • Repetitive delayed mode – Tim.: launching from 2 to maximum 10 times of a daily programming limited to 24H59M00S. •... -
Page 38: Repetitive Delayed Mode - Tim
The screen of measurement programming is displayed: ➢ Move the cursor on the different items and set date and time with the scrolling DIFF.-JOUR.-REPET. DIFF.-JOUR.-REPET. knob key. Début Début Beginning: date and time of the measurement beginning • End: date and time of the measurement end •... -
Page 39: Delayed Mode: Tim. - Waiting For Measurement
In case of incompatibility: DIFF.-JOUR.-REPET. KO is displayed instead of OK: in this case, empty the memory of the instrument. • Début If the power adapter logo blinks, it is imperative to use a power adapter. • When the logo stops blinking, it means that the power adapter is connected. •... -
Page 40: Delayed Mode: Tim. - Data Storage And Audio Files
8.4.3 Delayed mode: Tim. – Data storage and audio files At the end of each measurement, files of metrological data and audio files (if the function is activated) are stored on the SD card. This is how it works: Simple delayed mode (01 repetition): storage is made at the end of the measurement. The instrument stays active and the storage time depends on the importance of metrological data and of the number and size of audio files. -
Page 41: Read The Stored Files
After a controlled stopping of the measurement and a data storage, it's possible to see on the screen measurement dataset results. 9.1 Access to files ➢ Press menu key then go to Read then press OK. Information of the last stored file is displayed. In order to make easier its identification, the screen displays the entire configuration of the measurement: The mode: L-Leq, Leq-St, 1/1 oct, NR, S1 + S2. -
Page 42: Leq-St Mode File
LAE: A-weighted sound exposure • LCE: C-weighted sound exposure • T: measurement duration in DD/HH:MM:SS • %: percentage of saturation of the input stage • LAF - LAS – LAI: max or min levels of sound pressure A-weighted according to the time constants: Fast (F) – Slow (S) – •... -
Page 43: 1/1 Oct File Mode
15/05 15/05 13:15:45 13:15:45 15/05 13:15:45 LpkC 99,5 dB LpkC 99,5 dB 15/05 15/05 13:15:45 13:15:45 98,7 dB 98,7 dB LAeqmax LAeqmax 31,4 dB 31,4 dB LAeqmin LAeqmin Départ Départ 15/05 15/05 09:15 09:15 Départ 15/05 09:15 Départ Départ 15/05 15/05 09:15 09:15... - Page 44 S3: this screen displays the results of current values that will be stored at the end of the measurement LCpkmax LCpkmax 99,5 dB 99,5 dB ➢ Move the cursor in 1 with the arrow keys and select with the scrolling knob key between global – LAeq LAeq 98,7 dB...
-
Page 45: Nr Noise Equipment File
9.2.4 NR noise equipment file When the file has been identified by its identification number: ➢ Press OK to go to S1 screen which remains the measurement configuration. Date of measurement start • Date of measurement end • Measurement duration •... -
Page 46: Transfer Files To A Pc
10.1 Transfer This function allows to transfer data towards a computer through a USB cable. The operating software must be installed on the computer. ➢ Connect the instrument to the PC through the USB cable. ➢ Go to “PC” screen of the sound level meter: from the menu icon, select PC then press OK. ➢... -
Page 47: Reset Memory
After datasets storing thanks to the transfer to computer, it's possible to erase sound level meter memory. There are two methods: Through sound level meter (see below) • Through computer (see LDB23 software user manual) • Through the sound level meter: ➢... -
Page 48: Audio Recording Function
When studying a measurement and after the visualization of the temporal evolution with the software, some results can be surprising and can raise questions: What is the sound source of the this level? In order to help you, DB300 instrument has an “Audio Recording” function that is automatically activated when a previously set threshold is exceeded. -
Page 49: Temporal Synoptic
12.1 Temporal synoptic Area of exceeding of sound level on threshold : ex : 87 dB Tgl : pre and post recording set at 4 seconds for supervision of audio exceeding on threshold Final recording : pre and post exceeding + exceeding VERY IMPORTANT : when audio function is activated, the DI duration of elementary integration for calculation of the LAeq, LCeq and LXeq equivalent continuous level is automatically set at 1 second. -
Page 50: Use Of Audio Recording
Sound sources higher to this level are recorded without distortion if and only if the maximum peak level does not exceed: 105+30 = 135dB peak. Generally, sound sources have some high peak factors, pretty much from 20 to 30dB. That's why it is not PROG. -
Page 51: Measurement In Progress - Data Reading
Memory space: Available memory on micro SD card is divided into 2 areas: the 1 one contains the metrological files and the 2 one contains audio files for re-listening. Before starting a new measurement, it is advisable to check the remaining measurement capacity expressed in number of event timers and battery capacity. -
Page 52: Direction For Use And Maintenance Of The Sound Level Meter
13.1 Use warnings The sound level meter is a measuring instrument using the latest technologies. To maintain accuracy and required reliability, avoid any chock of the housing and the microphone and keep them away from humidity and corrosive steams. 13.2 Direction for use For each application, you should check measurement technique and conditions in order to get valid and coherent results. -
Page 53: Maintenance
The instrument displays a new screen: ➢ Check that the reference value Ref: is equivalent to the value of the used CALIBRATION CALIBRATION calibrator and to the value of free-field correction (C.Cl) (0.0 dB for the sound 94.0 Ref : 94.0 Ref : level meter). -
Page 54: Replace The Batteries (If Equipped)
13.7 Replace the batteries (if equipped) ➢ Turn off the sound level meter. ➢ Return the instrument. ➢ Open the back hatch. ➢ Remove the 3 batteries and replace them respecting the meaning. ➢ Put the back hatch. 13.8 Load the battery Use a USB power adapter which serves as a charger. -
Page 55: Running Information
14.1 Over-range Under conditions of measuring range excess, defined at 140.2 dB, Z peak, an over-range icon appears. Its displaying differs with the measuring mode selected: L-Leq mode: • - LXY: it comes fleetingly for each exceeding. It stays visible at least 1s for a better readability. - LXpk and Leq: warning light appears during the first overload of the input stage, it stays visible during all the measurement. -
Page 56: I/O 1 Out
When the instrument is used in analyzer mode for the measurement noise equipment in correspondence with NR curves (as per NF S 30-010 standard): Measurement beginning in Tim mode works only for a programming of free duration T and does not work for preset durations (3 - 5 - 10 - 15 - 30 - 60 s). -
Page 57: I/O 2 Out
14.3.3 I/O 2 Out It is the analog output 0-10VDC of the selected value L/Leq only, no peak pressure and concerns the measurement modes below. Conventional sound level meter and averaging-integrating with storage 89,1 For L/leq storage: DC output is for the level of •... -
Page 58: Technical Features
15.1 Microphone and windscreen of the class 1 DB300 sound level meter The instrument is equipped with an electret microphone with an integrated preamplifier of standardized diameter of ½ inch. Fixed at the top of the sound level meter, it gives to the group (microphone and housing) free field features compatible with standards. 15.1.1 Sheet Brand: PCB - 377B02 Type: condenser with electret... -
Page 59: Microphone And Windscreen Of The Class 2 Db300 Sound Level Meter
15.2 Microphone and windscreen of the class 2 DB300 sound level meter 15.2.1 Sheet Brand: KIMO - AME23 • Type: condenser with electret • External diameter of the grid: 13.2 mm (½ inch) • Nominal sensitivity for preamplifier output: 20mV/Pa •... -
Page 60: Preamplifier Pr23
15.3 Preamplifier PR23 The preamplifier is an essential system to adapt the microphonic sensor to the input electronic of the sound level meter. It is directly connected on the housing or through a cable of variable length (from 3 to 10 m in standard up to 100 m on request) Features Preamplifier PR23 Unit... -
Page 61: Filters By Octave Bands: From 16 Hz To 16 Khz (Class 1) And From 31.5 Hz To 8 Khz (Class 2)
15.6 Filters by octave bands: from 16 Hz to 16 kHz (class 1) and from 31.5 Hz to 8 kHz (class 2) The sound level meter has filters to perform spectral analysis. These filters are in accordance with standards in a given template according to the accuracy class of the instrument: CEI 61260 / class 1 and class 2. -
Page 62: Metrology Of The Class 1 Db300
15.8 Metrology of the class 1 DB300 Main features DB300/1 sound level meter Conventional mode Integrating-averaging mode Electromagnetic compatibility – CE As per 2004/108/CEE guideline and product standards marking Standards NF EN 61672-1 (2003)- NF EN NF EN 61672-1 (2003)- NF EN 60804 60651 (1994) (1995) (2000) –... -
Page 63: Metrology Of The Class 2 Db300
15.9 Metrology of the class 2 DB300 Main features DB300/2 sound level meter Conventional mode Integrating-averaging mode Electromagnetic compatibility – CE As per 2004/108/CEE guideline and product standards marking Standards NF EN 61672-1 (2003)- NF EN NF EN 61672-1 (2003)- NF EN 60804 (2000) 60651 (1994) (1995) –... -
Page 64: Plugs And Connections
15.10Plugs and connections 15.10.1 Removable preamplifier PR23 It is often indispensable to remove the preamplifier from the sound level meter to connect it on an extension. The preamplifier is fixed on the sound level meter with a Push-pull mechanism. This mechanical protection avoids any unexpected removal of the preamplifier or of the extension. To remove the preamplifier, proceed as follows: Do not turn or pull the body of the amplifier. -
Page 65: I/O Interface
15.10.3 I/O interface I/O 1 In - input : start-stop control for measurement : TTL level maximal 5V – input impedance > 15 kΩ– jack : 2,5 mm diameter measurement Measurement Measurement start stop Ground GND : masse I/O 1 Out- output :to activate alarm - maintains high state after detecting a LX or planned LXeq level . -
Page 66: Audio Recording Capacity
15.12Audio recording capacity The audio recording brings information to identify sources and the correspondence with the measured sound levels. It is characterized by a frequency sampling and an accuracy expressed in number of bits. The result is a certain recording capacity. Sampling Pre and post recording Accuracy... -
Page 67: Packaging And Accessories
16.1 Supplied with The sound level meter is supplied in its transport case with its microphone and preamplifier, a battery and a batteries pack (3 x LR6/AA), a USB charger, a windscreen, a USB cable, a CD-ROM with LDB23 software and user manuals. A calibration certificate is also supplied. -
Page 68: Ldb23 Software
Supplied with the sound level meter, LDB200 software allows the configuration, data recovery and exploitation stored in the memory of the instrument. Easy to use, it requires a smaller learning and allows immediate management of data. Main functions: Visualization and results of the different measurement mode •... -
Page 69: Options
In complement of the five measurement modes in the device, DB300 proposes optional modes and processing software which enlarge the user investigation domain. F-13: Analyzer – integrating averaging with storage sound level meter function – filters by third octave bands from 12,5 Hz to 20 kHz (class 1) or from 25 Hz to 10 kHz (class 2) The spectral analysis by filters of third octave bands enables a specific description of sound ambiance in industry, building and environment, in matter of marked tonalities. -
Page 70: Analyzer - Integrating Averaging With Storage Sound Level Meter Function - Filters By Third Octave Bands: 1/3 Octave
18.1 Analyzer – integrating averaging with storage sound level meter function – filters by third octave bands: 1/3 octave ➢ Choose the 1/3 oct mode: move the cursor with the arrows on the icon then press OK. The sound level meter works like a frequency analyzer, it treats the acoustic signal according to the temporal mode: on a T(D) measurement duration with data storage for each DI elementary integration time. -
Page 71: Settings Before Measurement
18.1.1 Settings before measurement 1 – Choose the DI elementary integration time: ➢ Put the cursor on box 1 and choose with the scrolling knob key among: 1/16 s,1/8 s,1/4 s/1/2 s,1 s, 65.4 2 s, 3 s, 5 s, 10 s, 15 s, 30 s, 60 s. 2 –... -
Page 72: Stop The Measurement
S2 / S3 / S4: these screens regroup the current magnitude results which will be stored in the memory at the end of the measurement. The filters by third octave from12.5 Hz to 20 kHz (class 1) or from 25 Hz to 10kHz (class 2) are listed on the three successive screens. Note: The A,C, Z weighted values and LCpk peak pressure are kept at the top of each screen. -
Page 73: Store Data
18.1.5 Store data Same as the 1/1 octave mode operating: please see the chapter Store data page 29. 18.1.6 Read the file data in 1/3 octave mode When the file is found by its identification number: Press OK to access the S1 general screen which displays the measurement configuration: ➢... - Page 74 S3 / S4 / S5: these screens regroup the current magnitude results which will be stored in the memory at the end of the measurement. The filters by third octave from12.5 Hz to 20 kHz (class 1) or from 25 Hz to 10kHz (class 2) are listed on the three successive screens. Note: The A,C, Z weighted values and LCpk peak pressure are kept at the top of each screen.
- Page 75 General synoptic: from 12.5 Hz to 20 kHz (class 1) or from 25 Hz to 10 kHz (class 2) 17/05 13:15:45 15/05 09:15 Départ 16/05 08:30 00/23:15:00 Durée Mode 1/3 oct. 12.5Hz -20kHz Audio S008 S008_1605.L23 LCpkmax 101,3 dB LCpkmax 101,3 dB 17/05 13:15:45...
Need help?
Do you have a question about the DB300/1 and is the answer not in the manual?
Questions and answers