Sign In
Upload
Download
Table of Contents
Contents
Add to my manuals
Delete from my manuals
Share
URL of this page:
HTML Link:
Bookmark this page
Add
Manual will be automatically added to "My Manuals"
Print this page
×
Bookmark added
×
Added to my manuals
Manuals
Brands
LifeSpan Manuals
Treadmill
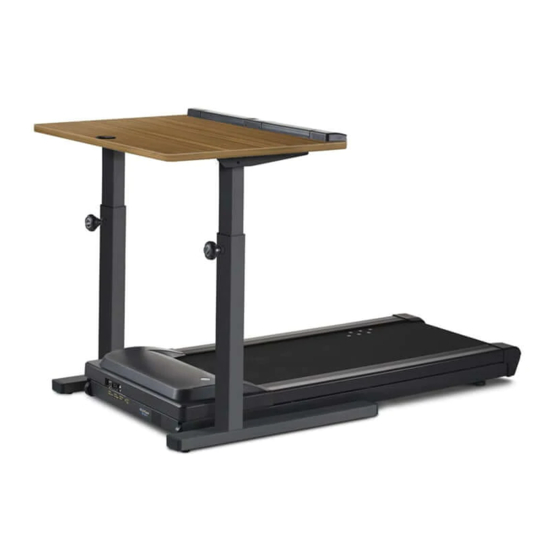
TR800-DT5
Owner's manual
LifeSpan TR800-DT5 Owner's Manual
Treadmill desk
Hide thumbs
Also See for TR800-DT5
:
Specifications
(2 pages)
1
2
Table Of Contents
3
4
5
6
7
8
9
10
11
12
13
14
15
16
17
18
19
20
21
22
23
24
25
26
27
28
29
30
31
32
33
34
35
36
37
38
39
40
41
42
43
page
of
43
Go
/
43
Contents
Table of Contents
Troubleshooting
Bookmarks
Table of Contents
Table of Contents
Getting Started
Warranty
Registration
Safety First
Children & Pets
Safety Tips While in Use
Treadmill Base
About Your Treadmill Base
Specifications
Proper Grounding
Power Cord Options
Treadmill Base
Maintenance and Tips
Daily Cleaning
Monthly Cleaning
Safety and Integrity
Belt Lubrication
Belt Tensioning
Belt Alignment
Maintenance and Tips
Moving the Treadmill
DT5 Desk
Desk Assembly
Console Assembly
Final Connection
Treadmill to DT5 Desk Assembly
Leveling and Height Adjustment
Treadmill Desk Operations
Specifications
Setting the Clock
Starting the Treadmill Desk
Console Buttons
Preset Speed Button
Bluetooth Operation
Innovative Features
Troubleshooting
Personal Settings
Display Details
Advertisement
Quick Links
1
Specifications
2
Desk Assembly
3
Console Assembly
4
Specifications
5
Troubleshooting
6
Personal Settings
Download this manual
Treadmill Desk
Owner's Manual for models:
TR800-DT5
TR1200-DT5
TR5000-DT5
1
Table of
Contents
Previous
Page
Next
Page
1
2
3
4
5
Advertisement
Table of Contents
Need help?
Do you have a question about the TR800-DT5 and is the answer not in the manual?
Ask a question
Questions and answers
Related Manuals for LifeSpan TR800-DT5
Fitness Equipment LifeSpan TR800-DT5 Specifications
Treadmill desk (2 pages)
Treadmill LifeSpan TR800 Owner's Manual
Folding treadmill (40 pages)
Treadmill LifeSpan TR800 Owner's Manual
Folding treadmill (48 pages)
Treadmill LifeSpan TR800 Owner's Manual
Folding treadmill (40 pages)
Treadmill LifeSpan TR800DT Owner's Manual
Desktop treadmill (16 pages)
Treadmill LifeSpan TR7000i Owner's Manual
(33 pages)
Treadmill LifeSpan TR8000i Owner's Manual
(34 pages)
Treadmill LifeSpan TR800B Owner's Manual
Treadmill base (14 pages)
Treadmill LifeSpan Workplace TR1200B Owner's Manual
Console and treadmill base (23 pages)
Treadmill LifeSpan TR1000B Owner's Manual
Treadmill base (12 pages)
Treadmill LifeSpan TR3000i Owner's Manual
Folding (40 pages)
Treadmill LifeSpan TR1200i Owner's Manual
Folding treadmill (52 pages)
Treadmill LifeSpan TR-1000SL Owner's Manual
(23 pages)
Treadmill LifeSpan Treadmill Owner's Manual
(34 pages)
Treadmill LifeSpan TR6000i Owner's Manual
Light commercial treadmills (50 pages)
Treadmill LifeSpan TR7000iM Owner's Manual
Commercial treadmill (76 pages)
This manual is also suitable for:
Tr1200-dt5
Tr5000-dt5
Table of Contents
Print
Rename the bookmark
Delete bookmark?
Delete from my manuals?
Login
Sign In
OR
Sign in with Facebook
Sign in with Google
Upload manual
Upload from disk
Upload from URL


Need help?
Do you have a question about the TR800-DT5 and is the answer not in the manual?
Questions and answers