
Related Manuals for LifeSpan Treadmill


Summary of Contents for LifeSpan Treadmill
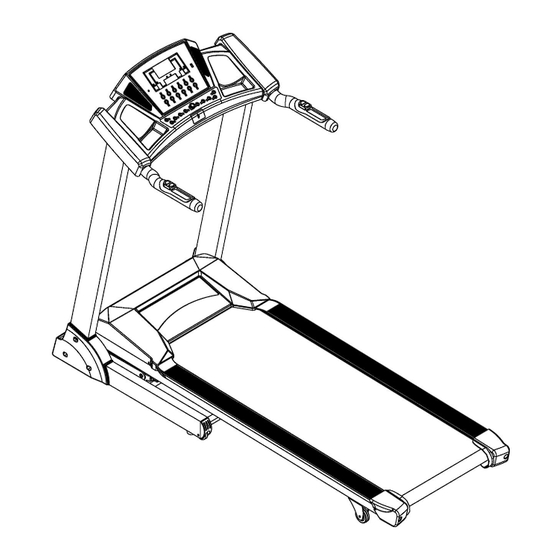
- Page 1 FLITE OWNER’S MANUAL Product may vary slightly from the item pictured due to model upgrades Read all instructions carefully before using this product. Retain this owner’s manual for future reference.
-
Page 2: Table Of Contents
TABLE OF CONTENTS IMPORTANT SAFETY INSTRUCTIONS IMPORTANT ELECTRICAL INFORMATION IMPORTANT OPERATING INSTRUCTIONS ASSEMBLY INSTRUCTIONS FOLDING INSTRUCTIONS GROUNDING METHODS OPERATION GUIDE EXERCISE GUIDE MAINTENANCE INSTRUCTIONS EXPLODED DIAGRAM PARTS LIST TROUBLE SHOOTING GUIDE WARRANTY REGISTRATION PROGRAM GUIDE FLITE... -
Page 3: Important Safety Instructions
Do not operate treadmill on deeply padded, plush or shag carpet. Damage to both carpet and treadmill may result. Do not block the rear of the treadmill. Provide a minimum of 1 metre clearance between the rear of the treadmill and any fixed object. ... -
Page 4: Important Electrical Information
Remove the safety key after use to prevent unauthorized treadmill operation. 2. IMPORTANT ELECTRICAL INFORMATION WARNING! NEVER use a ground fault circuit interrupt (GFCI) wall outlet with this treadmill. Route the power cord away from any moving part of the treadmill including the elevation mechanism and transport wheels. ... -
Page 5: Important Operating Instructions
In order to prevent losing balance and suffering unexpected injury, NEVER mount or dismount the treadmill while the belt is moving. This unit starts with at a very low speed. Simply standing on the belt during slow acceleration is proper after you have learned to operate this machine. -
Page 6: Assembly Instructions
4. ASSEMBLY INSTRUCTIONS PART LIST DES. Specification Nos. DES. Specification Nos. Main Frame Left Upright Tube Cover Lock Washer 29 Right Upright Tube Cover Bolt M10*12 5# Allen Wrench Bolt M5*8 6# Allen Wrench S=13、14、15 90 Wrench w/screw Driver Left Side Rail Right Side Rail Safety key FLITE... - Page 7 STEP 1: 1. Open the carton 2. Extract the parts listed above 3. Place the Main Frame (1) onto level ground STEP 2: 1. Raise the Computer and Upright tubes in the direction of the arrows . Note: Whilst erecting the uprights, make sure the upright does not press against and damage the wires inside the upright tubes.
-
Page 8: Left Upright Tube Cover
STEP 4: 1. Using the 6# Allen wrench, screw through the bolt (56) M10*15 to Lock washer (77), then lock the Right upright tube onto MAIN FRAME. Note: Support the Computer with your hands to prevent it falling down and causing injury. STEP 5: 1. - Page 9 STEP 6: 1. Press the Left Side Rail (22A) and Right Side Rail (22B) onto the Running Board along the inner side rail. Note: Before assembling the side rail, please check the back end cover (15 and 16), loosen the bolt (68) on the back end cover, and then pull back the cover.
-
Page 10: Folding Instructions
5. FOLDING INSTRUCTIONS Folding: Support position A with your hand, then pull up the running board following the arrow direction until you hear a clicking sound of the cylinder (10) locking into the round tube. Unfolding: Support position A with your hand, depress position B of the air pressure control bar, then the base frame will descend automatically... -
Page 11: Grounding Methods
6. GROUNDING METHODS This product must be grounded. In the event of malfunction or breakdown, grounding reduces the risk of electric shock. This product is equipped with a cord with an equipment-grounding conductor and a grounding plug. The plug must be plugged into an appropriate outlet that is properly installed and grounded in accordance with all local codes and ordinances. -
Page 12: Operation Guide
3. Time window: displays workout time, the range is 0:00-99:59. When time reaches 99:59, the treadmill will slow down until stop and show “End”. 0.5 seconds after “End” the treadmill will enter standby. The Countdown setting is from the setting time until the timer reaches zero. Upon reaching “0”, the computer will display “End”... -
Page 13: Safety Key
The range is from 50-200 beats per minute (Heart rate data is for reference ONLY.) 3. BUTTON FUNCTIONS 1. “PROG”: when the treadmill is in standby mode, this button cycles through: “0:00”, “P1-P99”, “U1- U3”, “FAT”. a. “0:00” is the manual mode and default running mode. - Page 14 3. MAIN FUNCTIONS 3.1. Quick Start-up (Manual): Attach the safety key. After a 3 second countdown, the treadmill will starting and running from the lowest speed, add and subtract to the speed using the SPEED button. 3.2. Countdown mode: Press the MODE button to cycle options: time countdown, distance countdown, calories countdown. The default value corresponds to the window and flashing display.
- Page 15 3.4. User-defined program 1. Setting Press “program” continually until you reach U1, U2 or U3. The “time” window will glitter and display “15:00” in the time window. Press “incline+”, “incline-”, “speed+”, “speed-” to adjust the running time Press “mode” to set program data, set the first interval time Press “speed+”, “speed-”...
-
Page 16: Heart Rate
Height 100----200 Weight 20-----150 ≤19 Under weight =(20---25) Normal weight =(25---29) Over weight ≥30 Obese 7. SLEEP FUNCTION: The treadmill automatically enters sleep mode after 10 minutes of inactivity. Press any key on the display to wake the treadmill. FLITE... -
Page 17: Exercise Guide
8. EXERCISE GUIDE PLEASE NOTE: Before beginning any exercise program, consult your physician. This is important especially if you are over the age of 45 or individuals with pre-existing health problems. The pulse sensors are not medical devices. Various factors, including the user’s movement, may affect the accuracy of heart rate readings. -
Page 18: Workout Guidelines
Training Zone Exercise After warming up, increase the intensity to your desired exercise program. Be sure to maintain your intensity for maximum performance. Breathe regularly and deeply as you exercise-never hold your breath. Cool Down Finish each workout with a light jog or walk for at least 1 minute. Then complete 5 to 10 minutes of stretching to cool down. -
Page 19: Maintenance Instructions
This task should be done once a month. Allow to dry before using. On a monthly basis, vacuum underneath your treadmill to prevent dust build up. Once a year, you should remove the black motor shield and vacuum out dirt that may accumulate. -
Page 20: How To Check The Running Mat For Proper Lubrication
/ lubricated and could leak. Belt/Deck/Roller Lubrication The mat/deck friction may play a major role in the function and life of your treadmill and that is why we recommend you constantly lubricate this friction point to prolong the useful life of your treadmill. Lubrication is provided with this unit. -
Page 21: Belt Tension Adjustment
Belt Tension Adjustment It is very important for joggers and runners in order to provide a smooth, steady running surface. Adjustment must be made from the right and left rear roller in order to adjust tension with the Allen Key provided in the parts package. -
Page 22: Belt Tracking Adjustment
6. Belt Tracking Adjustment: This treadmill is designed to keep the belt reasonably centred while in use. It is normal for some belts to drift near one side while the belt is running with no one on it. After a few minutes of use, the belt should have a tendency to centre itself. -
Page 23: Exploded Diagram
10. EXPLODED DIAGRAM FLITE... -
Page 24: Parts List
11. PARTS LIST DESCRIPTION REMARK DESCRIPTION REMARK Base Frame Baffle Main Frame Flat foot pad Incline Bracket Wheel casing plug Computer Bracket Safety Key Motor Bracket Adjustable Wheel Transport Wheel Left Upright Tube Foot pad Right Upright Tube Amplifier Board Front Roller Computer Board Rear Roller... - Page 25 Screw Handle Bar Plug ST4.2*12 Hand Pulse with Screw Incline Button M8*60 Hand Pulse with Screw Speed Button ST4.2*12 Lock Washer GB861.2-87 6 Lock Washer GB861.2-87 8 Lock Washer GB861.2-87 10 Spring Washer GB/T 93-1987 8 Flat Washer GB/ T 95-2002 8 Flat Washer GB/T 95-2002 10 Incline Motor...
-
Page 26: Trouble Shooting Guide
12. TROUBLE SHOOTING GUIDE Error/Code Description Possible Solutions Computer not a. Please check if the overload protect jump, if it has, please press functioning after it, let it continue operation. connecting power b. Ensure the wires of the power switch, overload protection, control board and the transformer are connected correctly. - Page 27 Overload protection 1. Upon overload, the system will restart to prevent damage. If the treadmill gets stuck and the motor cannot move it will lead to an overload. Please locate the cause of this. A possible reason is a lack of lubricant in a particular component. Then restart the machine.
-
Page 28: Warranty Registration
Motor not functioning 1. the motor wire is broken; the safety pipe is broken or has fallen after pressing START off; button 2. motor wire is not properly connected 3. IGBT on bottom control board is burnt out. Test the above reasons and change the relevant part. -
Page 29: Program Guide
14. PROGRAM GUIDE SECTION SPEED INCLINE SPEED INCLINE SPEED INCLINE SPEED INCLINE SPEED INCLINE SPEED INCLINE SPEED INCLINE SPEED INCLINE SPEED INCLINE SPEED INCLINE SPEED INCLINE SPEED INCLINE SPEED INCLINE SPEED INCLINE SPEED INCLINE SPEED INCLINE SPEED INCLINE SPEED INCLINE FLITE... - Page 30 SPEED INCLINE SPEED INCLINE SPEED INCLINE SPEED INCLINE SPEED INCLINE SPEED INCLINE SPEED INCLINE SPEED INCLINE SPEED INCLINE SPEED INCLINE SPEED INCLINE SPEED INCLINE SPEED INCLINE SPEED INCLINE SPEED INCLINE SPEED INCLINE SPEED INCLINE SPEED INCLINE SPEED INCLINE SPEED INCLINE FLITE...
- Page 31 SPEED INCLINE SPEED INCLINE SPEED INCLINE SPEED INCLINE SPEED INCLINE SPEED INCLINE SPEED INCLINE SPEED INCLINE SPEED INCLINE SPEED INCLINE SPEED INCLINE SPEED INCLINE SPEED INCLINE SPEED INCLINE SPEED INCLINE SPEED INCLINE SPEED INCLINE SPEED INCLINE SPEED INCLINE SPEED INCLINE FLITE...
- Page 32 SPEED INCLINE SPEED INCLINE SPEED INCLINE SPEED INCLINE SPEED INCLINE SPEED INCLINE SPEED INCLINE SPEED INCLINE SPEED INCLINE SPEED INCLINE SPEED INCLINE SPEED INCLINE SPEED INCLINE SPEED INCLINE SPEED INCLINE SPEED INCLINE SPEED INCLINE SPEED INCLINE SPEED INCLINE SPEED INCLINE FLITE...
- Page 33 SPEED INCLINE SPEED INCLINE SPEED INCLINE SPEED INCLINE SPEED INCLINE SPEED INCLINE SPEED INCLINE SPEED INCLINE SPEED INCLINE SPEED INCLINE SPEED INCLINE SPEED INCLINE SPEED INCLINE SPEED INCLINE SPEED INCLINE SPEED INCLINE SPEED INCLINE SPEED INCLINE SPEED INCLINE FLITE...
- Page 34 SPEED INCLINE SPEED INCLINE FLITE...
Need help?
Do you have a question about the Treadmill and is the answer not in the manual?
Questions and answers