Table of Contents
Advertisement
Quick Links
Advertisement
Table of Contents

Related Manuals for Rear view safety RVS-97QUAD


Summary of Contents for Rear view safety RVS-97QUAD
-
Page 1: Instruction Manual
Instruction Manual 9” TFT LCD Digital Quad View Color Monitor RVS-97QUAD Please read this manual before using this monitor. The product may be different from how it is described in the manual depending on what software version you are using. -
Page 2: Table Of Contents
Warranty....... . . 27 Disclaimer....... . . 28 Rear View Safety... -
Page 3: Introduction
NOTE! Please read all of the installation instructions carefully before installing the product. Improper installation will void manufacturer’s warranty. Congratulations on purchasing a Rear View Backup Camera System! With this manual you will be able to properly install and operate the unit. The Backup Camera System is intended to be installed as a supplement aid to your standard rear view mirror that already exists in your vehicle. -
Page 4: Safety Information
Rear View Camera System. If you back up while looking only at the monitor, you may cause Rear View Safety... - Page 5 INSTALLATION: • Electric shock or product or disconnected wire may cause a malfunction may occur if this fire. product is installed incorrectly. • While installing the Rear View System be careful with the wire • Use this product within positioning in order to avoid wire the voltage range specified.
- Page 6 If you have questions about this product, contact: Rear View Safety 1797 Atlantic Avenue Brooklyn, NY 11233 Tel: 1.800.764.1028 IN NO EVENT SHALL SELLER OR MANUFACTURER BE LIABLE FOR ANY DIRECT OR CONSEQUENTIAL DAMAGES OF ANY NATURE, OR LOSSES OR EXPENSES RESULTING FROM ANY DEFECTIVE PRODUCT OR THE USE OF ANY PRODUCT.
-
Page 7: Before Beginning Installation
Before drilling please check that no cable or wiring is on the other side of the wall. Please clamp all wires securely to reduce the possibility of them being damaged while vehicle is in use. Keep all cables away from hot or moving parts and electrical noisy components. We recommend doing a benchmark test before installation to insure that all components are working properly. -
Page 8: Precautions
7. Do not place cables where they may be pinched or stepped on. 8. Leave at least a 2” space between the monitor and walls, cabinets or other objects to allow adequate air circulation around the device. 9. The monitor is not designed to be waterproof. Rear View Safety... -
Page 9: Precautions
Operating Precautions 1. The device may be powered by a 12 or 24 volt battery, as well as the vehicle's electrical system. 2. Make sure all cables are connected properly. Improper cable con- nections may damage the monitor. Remove the power cable connections when not using the device. -
Page 10: Maintenance
This symbol reminds the user not to waste electronic equipment. CAUTION Any changes or modifications not expressly approved in this manual could void your warranty and lead to expensive repairs. Rear View Safety... -
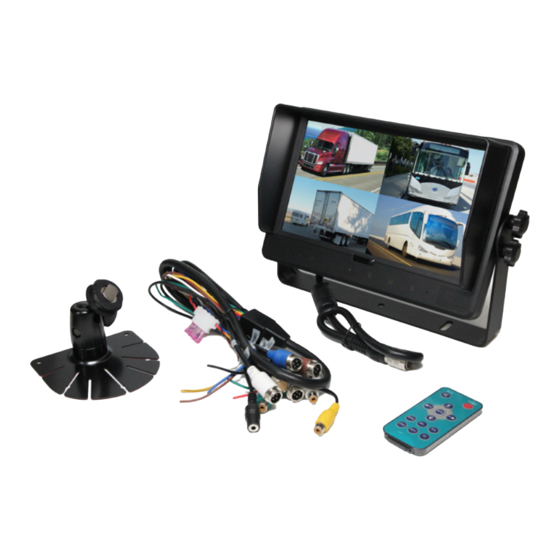
Page 11: Accessories
Accessories Special Notice: Accessories may vary on certain devices. Reverse With Confidence ™... -
Page 12: Monitor Installation
Monitor Installation Rear View Safety... -
Page 13: Connections
Connections 5P White 5P Blue 5P Brown 5P Green Reverse With Confidence ™... -
Page 14: Controls
Controls Rear View Safety... - Page 15 Reverse With Confidence ™...
-
Page 16: Menu And Touch Screen Operations
• BOUNDARY: To set color of the separation line between camera inputs. White, gray, black and uncolored are available. LANGUAGE: To set OSD language. English, French, Dutch, Spanish, German and Italian are available. • SOFTWARE VERSION: To be updated at all times. Rear View Safety... - Page 17 Trigger Setting • TURN IMAGE: To set the camera input(s) to be displayed when left-side cam- era (camera 1) / right-side camera (camera 2) is activated.When set as SINGLE, correspond camera input will be displayed when either camera is activated. When set as SPLIT,split image of left-side and rear view camera will be dis- played when left-side camera is activated;...
- Page 18 Jump Key Setting Rear View Safety...
- Page 19 • REC-V OUT: To set the camera input(s) to be recorded when connected to DVR via the green RCA wire. Left-side, right-side, front view, rear view camera and quad view image can be selected. • AUTOSCAN: To set the auto scanning function. When AUTOSCAN is set as ON, monitor will automatically switch between connected camera inputs and quad image.
- Page 20 TOUCH-SCREEN OPERATIONS Switch to full screen by touching any channel in multi-viewing mode Rear View Safety...
- Page 21 Buttons function of touch menu (not available in DVD/VGA/aux channel or when auto scan is on) Reverse With Confidence ™...
- Page 22 Exchange picture locations of any two cameras displayed in multi-viewing mode Rear View Safety...
- Page 23 Exchange picture locations of two cameras in dual / triple- viewing mode (1 displayed, 1 hidden) Switch to the next display mode Switch to the previous display mode Reverse With Confidence ™...
- Page 24 Decrease the volume Increase the volume Rear View Safety...
-
Page 25: Specification
Specifications Reverse With Confidence ™... -
Page 26: Troubleshooting
Troubleshooting The symptoms described below do not necessarily mean a failure within the display. Please check the following items before you initiate request for repair. Rear View Safety... -
Page 27: Warranty
OTHERS OR THE UNAUTHORIZED USE OF NONCONFORMING PARTS; THE DAMAGE IS DUE TO NORMAL WEAR AND TEAR, THIS DAMAGE IS DUE TO ABUSE, IMPROPER MAINTENANCE, NEGLECT OR ACCIDENT; OR THE DAMAGE IS DUE TO USE OF THE REAR VIEW SAFETY, INC. SYSTEM AFTER PARTIAL FAILURE OR USE WITH IMPROPER ACCESSORIES. -
Page 28: Disclaimer
FOR ANY INJURY, LOSS OR DAMAGE, INCIDENTAL OR CONSEQUENTIAL, ARISING OUT OF THE USE OR INTENDED USE OF THE PRODUCT. IN NO EVENT SHALL REAR VIEW SAFETY AND/OR ITS AFFILIATES HAVE ANY LIABILITY FOR ANY LOSSES (WHETHER DIRECT OR INDIRECT, IN... - Page 29 NOTES Reverse With Confidence ™...
- Page 30 If you have any questions about this product, contact: Rear View Safety, Inc. 1797 Atlantic Avenue Brooklyn, NY 11233 800.764.1028 Better Cameras. Better Service. IT’S OUR GUARANTEE. Rear View Safety...
Need help?
Do you have a question about the RVS-97QUAD and is the answer not in the manual?
Questions and answers