
Related Manuals for Psion Teklogix Workabout PRO G2


Summary of Contents for Psion Teklogix Workabout PRO G2
-
Page 1: User Manual
WORKABOUT PRO G2 Hand-Held Computer With Windows Embedded CE 5.0 User Manual March 5, 2007 Part No. 8000140.A ISO 9001 Certified Quality Management System... - Page 2 © Copyright 2007 by Psion Teklogix Inc., Mississauga, Ontario This document and the information it contains is the property of Psion Teklogix Inc., is issued in strict confidence, and is not to be reproduced or copied, in whole or in part, except for the sole purpose of promoting the sale of Psion Teklogix manufac- tured goods and services.
-
Page 3: Table Of Contents
Text Conventions ......4 WORKABOUT PRO G2 Features ....4 About The WORKABOUT PRO G2 Hand-Held. - Page 4 3.5.2 Calibrating The Touchscreen....45 WORKABOUT PRO G2 Indicators....46 3.6.1 LED.
- Page 5 5.7.2 The Servers Tab ......115 WORKABOUT PRO G2 Hand-Held With Windows Embedded CE 5.0 User Manual...
- Page 6 6.3.1 Installation–Chargers And Docking Stations ..221 6.3.2 Power Consumption Considerations ....221 WORKABOUT PRO G2 Hand-Held With Windows Embedded CE 5.0 User Manual...
- Page 7 6.4.6 Desktop Docking Station Ports ....226 6.4.7 Linking A WORKABOUT PRO G2 To A PC ..226 6.4.8 Linking A WORKABOUT PRO G2 To An Ethernet Network.
- Page 8 Chapter 7: Specifications WORKABOUT PRO G2 ......243 Radio Specifications ......244 Scanner Specifications .
- Page 9 1.2 Text Conventions ....... . 4 1.3 WORKABOUT PRO G2 Features..... . . 4 1.4 About The WORKABOUT PRO G2 Hand-Held .
-
Page 11: Chapter 1: Introduction
WORKABOUT PRO G2 hand-held. Chapter 2: Basic Checkout describes the steps required to get the WORKABOUT PRO G2 ready for oper- ation, including setting up your RA2041 802.11b/g radio. Chapter 3: Getting To Know Your WORKABOUT PRO G2 describes the WORKABOUT PRO G2 features and outlines how to charge and maintain the battery. -
Page 12: Text Conventions
• One SD expansion slot (accessible via the battery compartment) • Display: • 480 x 640, 3.6 in., Full VGA TFT Colour LCD • Easily replaceable and customizable bezel WORKABOUT PRO G2 Hand-Held With Windows Embedded CE 5.0 User Manual... - Page 13 Class II Compliant / Range 5 to 10 metres • Support for 802.11b/g CF radio with non-integrated antenna • GSM Support: • Support for RA3030-G2 GPRS radio (connecting via the 100-pin Expansion Connector) WORKABOUT PRO G2 Hand-Held With Windows Embedded CE 5.0 User Manual...
- Page 14 System backup during battery swap (more than 10 minutes) • One week real-time clock backup • Network Management: • SNMP MIB 2 support • Remote software download • Remote WLAN management WORKABOUT PRO G2 Hand-Held With Windows Embedded CE 5.0 User Manual...
-
Page 15: About The Workabout Pro G2 Hand-Held
1.4.1 The WORKABOUT PRO C G2 Hand-Helds Figure 1.1 WORKABOUT PRO C G2 With 52-Key Keyboard WORKABOUT PRO G2 Hand-Held With Windows Embedded CE 5.0 User Manual... -
Page 16: The Workabout Pro C G2 Hand-Held Computer
Chapter 1: Introduction The WORKABOUT PRO S G2 Hand-Held 1.4.2 The WORKABOUT PRO S G2 Hand-Held Figure 1.2 WORKABOUT PRO S G2 With 25-Key Keyboard WORKABOUT PRO G2 Hand-Held With Windows Embedded CE 5.0 User Manual... - Page 17 2.1.2 The Backup Battery......12 2.2 Turning The WORKABOUT PRO G2 On And Off ... . 12 2.2.1 Installing The Battery And Switching The Unit On .
-
Page 19: Chapter 2: Basic Checkout
Batteries can be charged using a variety of chargers and docking stations along with a WORKABOUT PRO G2 internal charger. When using the internal charger, a suitable power source is required. All chargers and docking stations are described in Chapter 6: Peripheral Devices &... -
Page 20: The Backup Battery
WORKABOUT PRO G2 is switched on or off, in a docking station or in a cradle. Even when the main battery reaches its Suspend Threshold (refer to “Suspend Threshold”... -
Page 21: Switching The Unit Off (Suspend)
RA2041. It is a Direct Sequence Spread Spectrum radio. If your WORKABOUT PRO G2 is equipped with an RA2041 CF radio, follow the steps under “Summit Client Utility (SCU) For Model RA2041” below to set up this type of radio for communication with a wireless LAN. - Page 22 LAN Settings window. In Figure 2.1, this icon is labelled SDCCF10G1. Figure 2.1 Summit WLAN Adapter Icon The Summit WLAN Adapter Settings menu is displayed (In this screen shown as the SDCCF10G1 menu). WORKABOUT PRO G2 Hand-Held With Windows Embedded CE 5.0 User Manual...
- Page 23 3. Tap on the IP Information tab. Figure 2.2 IP Information Tab Note: Choosing the Renew button forces the WORKABOUT PRO G2 to renew or find a new IP address. This is useful if, for example, you are out of communication range for a longer period of time and your WORK- ABOUT PRO G2 is dropped from the network.
-
Page 24: Name Servers Tab
In the SDCCF10G1 window, display the IP Information tab. • In the Summit WLAN Adapter Settings>IP Information tab, tap on the Configure button. • Display the Name Servers tab. Figure 2.4 Name Servers Tab WORKABOUT PRO G2 Hand-Held With Windows Embedded CE 5.0 User Manual... -
Page 25: Using The Scu To Connect To The Wlan
“config”). Detailed information about each of the SCU tabs—Main, Config, Status, Diags and Global Settings—is provided under “SCU Tabs” on page 19. To launch the SCU so that your WORKABOUT PRO G2 can connect to a wireless LAN: 1. Tap on Start>Programs>Summit, and then tap on the SCU icon. -
Page 26: Ssid
If you choose Manual WEP, WPA PSK or WPA PSK: • Tap on the WEP/PSK Keys button. For Manual WEP, choose up to four static WEP keys. For PSK, type an ASCII passphrase or hex PSK. WORKABOUT PRO G2 Hand-Held With Windows Embedded CE 5.0 User Manual... -
Page 27: Scu Tabs
This section provides a detailed description of each of the tabs available in the SCU—Main (below), Config (page 20), Global Settings (page 26), Status (page 29), and Diags (page 30). WORKABOUT PRO G2 Hand-Held With Windows Embedded CE 5.0 User Manual... -
Page 28: Main Tab
About Box: This box provides information about the SCU. 2.5.2 Config Tab The Config tab allows you to define radio and security settings that are stored in the registry as part of the configuration profile or config. WORKABOUT PRO G2 Hand-Held With Windows Embedded CE 5.0 User Manual... - Page 29 Figure 2.8 SCU Config Tab • Config: Used to choose the config to be viewed or edited. If ThirdParty- Config is chosen, after the WORKABOUT PRO G2 goes through a power cycle, WZC is used for configuration of the radio. •...
- Page 30 Radio interacting with access BG rates full: All B and G opti- Mode point. rates. mized BG rates optimized: 1, 2, 5.5, 6, 11, 24, 36 & 54 Mbps. WORKABOUT PRO G2 Hand-Held With Windows Embedded CE 5.0 User Manual...
-
Page 31: Scu Security Capabilities
2.5.2.1 SCU Security Capabilities The SCU provides integrated security to protect transmitted data as well as the hand- held and wireless WAN infrastructure that transmit and receive data. WORKABOUT PRO G2 Hand-Held With Windows Embedded CE 5.0 User Manual... - Page 32 Windows Active Directory and domains. Note: PEAP and EAP-TLS require the use of Windows facilities for the configu- ration of digital certificates. WORKABOUT PRO G2 Hand-Held With Windows Embedded CE 5.0 User Manual...
-
Page 33: Eap Credentials
(while the config is the active config): • Cause the WORKABOUT PRO G2 to go through a power cycle or sus- pend/resume. •... -
Page 34: Global Settings Tab
Figure 2.9 SCU Global Settings Tab The Global Settings tab allows you to define radio and security settings that apply to all configs (profiles), along with settings that apply specifically to the SCU. WORKABOUT PRO G2 Hand-Held With Windows Embedded CE 5.0 User Manual... - Page 35 256, 512 & 1024 Amount of time in millisec- Ping Timeout onds that passes without a Integer from 0 to 5000 response before ping request 30000. is considered a failure. WORKABOUT PRO G2 Hand-Held With Windows Embedded CE 5.0 User Manual...
- Page 36 On startup, use On-Start RX Diversity antenna diversity when auxiliary antenna. on Main receiving data from AP. -Main only: Use main antenna only. -Aux only: Use auxiliary antenna only. WORKABOUT PRO G2 Hand-Held With Windows Embedded CE 5.0 User Manual...
-
Page 37: Status Tab
The Status tab provides status information including IP address and MAC address for the client radio, IP address and MAC address for the AP, signal strength, channel, transmit power and data rate. WORKABOUT PRO G2 Hand-Held With Windows Embedded CE 5.0 User Manual... -
Page 38: Diags Tab
(Re)connect. The dump includes the radio state, config settings, global settings and BSSID list of APs. The SCU is saved to a file called _sdc_diag.txt in the Windows directory. WORKABOUT PRO G2 Hand-Held With Windows Embedded CE 5.0 User Manual... -
Page 39: Checking The Scanner
Checking The Scanner 2.6 Checking The Scanner If your WORKABOUT PRO G2 is equipped with an internal scanner, you can test it to ensure that it is operating properly. Point the scanner window at a bar code that your scanner was designed to decode—for example, a 1D UPC bar code or 2D bar code. -
Page 40: Performing A Cold Reset - Accessing The Boost Menu
Chapter 2: Basic Checkout Performing A Cold Reset – Accessing The BooSt Menu Note: You do not need to reset your WORKABOUT PRO G2 after configuring the radio. 2.8.2 Performing A Cold Reset – Accessing The BooSt Menu • Press and hold down the centre [SCAN] key and then press the [BLUE] and [ENTER] keys simultaneously for a minimum of six seconds. - Page 41 3.5.2 Calibrating The Touchscreen ..... 45 3.6 WORKABOUT PRO G2 Indicators ..... . 46 3.6.1 LED .
- Page 42 3.11.1 Caring For The Touchscreen ..... 52 3.11.2 Cleaning The WORKABOUT PRO G2 ....52...
-
Page 43: Chapter 3: Getting To Know Your Workabout Pro G2
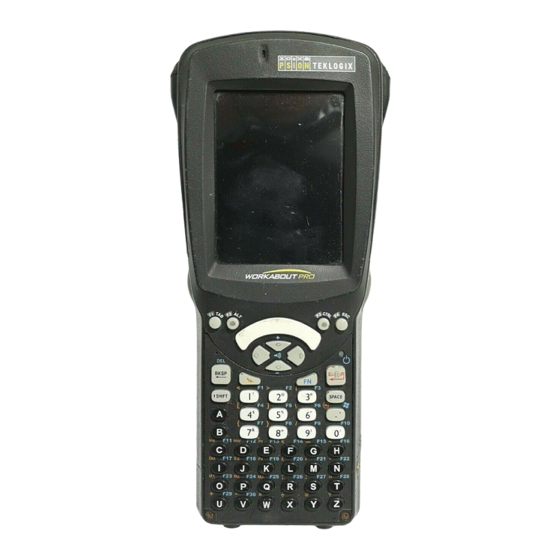
Chapter 3: Getting To Know Your WORKABOUT PRO G2 Features Of The WORKABOUT PRO G2 3.1 Features Of The WORKABOUT PRO G2 Speaker Stylus (Light Emitting Diode) Microphone Port Figure 3.1 Front Of WORKABOUT PRO G2 WORKABOUT PRO G2 Hand-Held With Windows Embedded CE 5.0 User Manual... -
Page 44: The Battery
Before attempting to install, use or charge the battery pack, it is critical that you review and follow the important safety guidelines in the guide entitled ‘WORKABOUT PRO Hand-Held Computer Regulatory & Warranty Guide’, PN 8000126. WORKABOUT PRO G2 Hand-Held With Windows Embedded CE 5.0 User Manual... -
Page 45: Removing The Battery Pack
To recharge the backup battery, you must fully charge the WORKABOUT PRO with the main battery installed in the unit. An overnight charge is recommended. WORKABOUT PRO G2 Hand-Held With Windows Embedded CE 5.0 User Manual... -
Page 46: Switching The Hand-Held On And Off
The battery cover must be installed before the unit can be switched • Press and hold down the [ENTER/ON] key for at least one second. • When the LED flashes green, release the [ENTER/ON] button. WORKABOUT PRO G2 Hand-Held With Windows Embedded CE 5.0 User Manual... -
Page 47: The Keyboard
Press the [BLUE] key, and then press the [ENTER/ON] key. 3.4 The Keyboard The WORKABOUT PRO G2 is available in two models, each with it’s own keyboard layout. The WORKABOUT PRO C G2 model is equipped with a 52-key, alphanumeric keyboard; the WORKABOUT PRO S G2 model is equipped with a 25-key numeric keyboard. -
Page 48: The Keys
The Arrow keys move the cursor around the screen in the direction of the arrow: up, down, left and right. The cursor is the flashing box or underline character that indicates where the next character you type will appear. WORKABOUT PRO G2 Hand-Held With Windows Embedded CE 5.0 User Manual... -
Page 49: Function Keys And Macro Keys
All units are equipped with three yellow [SCAN] keys – one on the left side and one on the right side of the unit along with a curved, yellow scan bar just below the WORKABOUT PRO G2 display. For units that do not have internal scanners, this key can be re-mapped to another function. -
Page 50: 52-Key Keyboard - Accessing Alpha Keys
3.4.3.1 Function Keys The WORKABOUT PRO G2 keyboard is equipped with a total of 14 function keys. Function keys [F1] to [F4] are located across the top of the keyboard next to the [TAB], [ALT], [CTRL] and [ESC] keys and are directly accessible – a key combination is not required. - Page 51 [2] key three times. With the [FN/ORANGE] key locked ‘on’, if you press [2] twice and then pause between key presses for 1 second, the letter ‘b’ will be selected automatically. Creating Uppercase Letters To display a capital letter: WORKABOUT PRO G2 Hand-Held With Windows Embedded CE 5.0 User Manual...
-
Page 52: The Keypad Backlight
The Display Properties dialog box in the Control Panel allows you to determine the behaviour of the display backlight and its intensity Note: Refer to “Display Backlight” on page 87 for details about the Display Properties dialog box. WORKABOUT PRO G2 Hand-Held With Windows Embedded CE 5.0 User Manual... -
Page 53: Calibrating The Touchscreen
Calibrating The Touchscreen 3.5.2 Calibrating The Touchscreen If your WORKABOUT PRO G2 touchscreen has never been calibrated, or if you find that the stylus pointer is not accurate when you tap on an item, use the Stylus Properties dialog box in the Control Panel to recalibrate the screen. -
Page 54: Workabout Pro G2 Indicators
The LED table following outlines the behaviour of the LED while the unit is docked in a charger. Keep in mind that the application running on the WORKABOUT PRO G2 can dictate how the LED operates. Review the documentation provided with your application to determine LED behaviour. -
Page 55: Onscreen Indicators
Figure 3.5 Taskbar The taskbar changes dynamically, and only those icons that are applicable are displayed. For example, if a radio is not installed in your WORKABOUT PRO G2, the radio signal icon is not displayed in the taskbar. Windows® Start Button If you are using the touchscreen, you can either tap the Windows icon at the bottom left of the screen, or press [FN/BLUE] [.] (period) to display the Start Menu, and... - Page 56 When the battery power is completely depleted, a final warning window indicates that the WORKABOUT PRO G2 will be powered down. If the WORKABOUT PRO G2 is using external AC power, an AC icon is displayed in the taskbar.
-
Page 57: Monitoring The Battery And Maximizing Run Time
Security levels can be set to limit user access. In addition, applications can be restricted to prevent inadvertent changes. Wireless WAN These icons provide access to and information about the WORKABOUT PRO G2 GSM/GPRS wide area networking status. Refer to Appendix B: “Wireless WAN” for details about each of these taskbar icons. -
Page 58: Storing Batteries
• To minimize storage degradation, recharge stored batteries to 40 to 60% every 4 or 6 months to prevent over-discharge damage. WORKABOUT PRO G2 Hand-Held With Windows Embedded CE 5.0 User Manual... -
Page 59: Uploading Data In A Docking Station
To add additional non-volatile memory to your hand-held, you can insert a Secure Digital/Multi-Media Card (SD/MMC) through the battery compartment. 3.10.1 Inserting The Card • Switch off the WORKABOUT PRO. WORKABOUT PRO G2 Hand-Held With Windows Embedded CE 5.0 User Manual... -
Page 60: General Maintenance
Do not immerse the unit in water. Dampen a soft cloth with mild detergent to wipe the unit clean. • Use only mild detergent or soapy water to clean the hand-held unit. WORKABOUT PRO G2 Hand-Held With Windows Embedded CE 5.0 User Manual... - Page 61 The plastic is partially soluble in oils, mineral spirits and gasoline. The plastic slowly decomposes in strong alkaline solutions. • To clean ink marks from the keypad and touchscreen, use isopropyl alcohol. WORKABOUT PRO G2 Hand-Held With Windows Embedded CE 5.0 User Manual...
-
Page 63: Chapter 4: Working With Windows Embedded Ce
4.5 Using A Dialog Box ......72 WORKABOUT PRO G2 Hand-Held With Windows Embedded CE 5.0 User Manual... -
Page 65: Navigating In Windows Embedded Ce 5.0
Refer to “Calibrating The Touch- screen” on page 45. Each WORKABOUT PRO G2 is equipped with a stylus—a pointing tool that looks like a pen—stored in a slot at the top of the unit. The stylus is used to select objects on the touchscreen. -
Page 66: Working With Files, Folders And Programs
[BLUE][0] Table 4.1 Keyboard Navigation Keep in mind that unlike a desktop computer, the WORKABOUT PRO G2 does not support key chording (pressing two keys at the same time). You must press one key followed by the next in sequence. Refer to “Working With Files, Folders And Programs”... -
Page 67: The Startup Desktop
• Press [ENTER]. 4.3 The Startup Desktop When the WORKABOUT PRO G2 boots up, the startup desktop (shell) is displayed. Any applications stored in the Startup folder start up immediately. Note: The startup folder is located in \Windows\StartUp and \Flash Disk\StartUp. -
Page 68: The Desktop Icons
Internet Options and the Network and Dial-up Connections icons in the Control Panel. Remote Desktop Connection This option allows your WORKABOUT PRO G2 to communicate with a remote desktop PC. “Remote Connect” on page 81 provides a website with step-by-step instructions. -
Page 69: The Taskbar
4.3.2 The Taskbar Figure 4.3 The Taskbar The WORKABOUT PRO G2 is equipped with a taskbar at the bottom of the screen. It displays icons through which you can view the battery capacity and radio signal quality of your unit. If the hand-held is attached to a charger, cradle, docking station or PDM, an associated icon is displayed. -
Page 70: Customizing The Taskbar
If you’re using the keyboard: • Highlight the options you want to activate, and press the [SPACE] key to select them. A check mark indicates active items. WORKABOUT PRO G2 Hand-Held With Windows Embedded CE 5.0 User Manual... -
Page 71: The Start Menu
Use the arrow keys to highlight a menu item, and press [ENTER], or If the menu item has an underlined character: • Type the underlined alpha character. For example, to display the Security dialog box, type the letter ‘s’. WORKABOUT PRO G2 Hand-Held With Windows Embedded CE 5.0 User Manual... -
Page 72: The Desktop
Figure 4.6 WORKABOUT PRO G2 Desktop 4.4.2 Security Settings Choosing the Security option from the Start Menu displays a dialog box in which you can define the access level for the WORKABOUT PRO G2: Supervisor or User. Figure 4.7 Security Levels... - Page 73 A dialog box labelled Password Properties is displayed. • Type the new password in the Password: text box (all keyboard characters are valid). • In the Confirm Password: text box, retype the new password. WORKABOUT PRO G2 Hand-Held With Windows Embedded CE 5.0 User Manual...
-
Page 74: Programs
Note: It is recommended that you enable ‘Allow Teklogix Security Level’ so that authorized Psion Teklogix service personnel can access your unit should it require maintenance. 4.4.3 Programs • Choose Programs to display a sub-menu of options. Figure 4.9 Program Sub-Menu WORKABOUT PRO G2 Hand-Held With Windows Embedded CE 5.0 User Manual... - Page 75 Internet Explorer icon. Remote Connect Remote Connect is a WORKABOUT PRO G2 application used to connect to a Windows Terminal Server so that you can run a “session” on the Server machine using the WORKABOUT PRO G2 (Windows Embedded CE 5.0 device). “Remote Connect”...
-
Page 76: Shortcuts
When Cycle Tasks is selected (and the Task Manager is not open), you can cycle through active applications. To cycle through your active applications: • Choose Shortcuts>Cycle Tasks, or Press [ALT] [TAB]. WORKABOUT PRO G2 Hand-Held With Windows Embedded CE 5.0 User Manual... -
Page 77: Settings
Press [ALT] [ESC]. Figure 4.11 Task Manager 4.4.5 Settings The Settings sub-menu includes the following settings: Control Panel, Network and Dial-up Connections and Taskbar and Start Menu. Figure 4.12 Settings Sub-Menu WORKABOUT PRO G2 Hand-Held With Windows Embedded CE 5.0 User Manual... -
Page 78: Run
Control Panel The Control Panel contains applets used to configure hardware, the operating system and the shell. If your WORKABOUT PRO G2 is running with the Psion Teklogix TekTerm application or another application, additional configuration applets may appear in the Control Panel. -
Page 79: Shutdown
(registry) settings intact. Any unsaved data is lost. Cold Reset The Cold Reset option resets the WORKABOUT PRO G2 (see page 31). Any files not stored in permanent memory are lost; however, the registry settings are saved. WORKABOUT PRO G2 Hand-Held With Windows Embedded CE 5.0 User Manual... -
Page 80: Using A Dialog Box
Press the [TAB] key to highlight the menu, and use the arrow keys on your keyboard to cycle through the options. WORKABOUT PRO G2 Hand-Held With Windows Embedded CE 5.0 User Manual... - Page 81 Saving Your Choices: Once you’ve made all your changes, press the [ENTER] key to save your changes and exit the window. Note: A dialog box item that is displayed in grey text indicates that it is not currently available. WORKABOUT PRO G2 Hand-Held With Windows Embedded CE 5.0 User Manual...
- Page 83 5.7 Bluetooth Setup ....... 111 WORKABOUT PRO G2 Hand-Held With Windows Embedded CE 5.0 User Manual...
- Page 84 5.11.2.19 PDF-417 ......153 5.11.2.20 Micro PDF-417 ..... 153 WORKABOUT PRO G2 Hand-Held With Windows Embedded CE 5.0 User Manual...
- Page 85 5.11.3.36 Postal: Canadian..... .173 5.11.3.37 Postal: China ..... . .173 WORKABOUT PRO G2 Hand-Held With Windows Embedded CE 5.0 User Manual...
- Page 86 5.11.5.10 Codabar ......196 5.11.5.11 Interleaved 2 of 5 ....197 WORKABOUT PRO G2 Hand-Held With Windows Embedded CE 5.0 User Manual...
- Page 87 5.12.4.1 Adding A Host ..... . .211 5.12.4.2 Changing A Host ..... .211 WORKABOUT PRO G2 Hand-Held With Windows Embedded CE 5.0 User Manual...
-
Page 89: Remote Connect
Remote Connect 5.1 Remote Connect Remote Connect is a WORKABOUT PRO G2 application used to connect to a Windows Terminal Server so that you can run a “session” on the Server machine, using the WORKABOUT PRO G2 (Windows Embedded CE 5.0 device). - Page 90 Note: If you are uncertain how to move around a dialog box and make selec- tions, review “Using A Dialog Box” on page 72. When the WORKABOUT PRO G2 boots up, the startup desktop (shell) is displayed, and any applications stored in the Startup folder start up immediately.
-
Page 91: Control Panel Icons
Changes the appearance (window colour scheme) on the unit desktop. Input Panel Provides the framework for a Soft Input Panel (SIP) should you need to design your own SIP, or change some soft keyboard options. WORKABOUT PRO G2 Hand-Held With Windows Embedded CE 5.0 User Manual... - Page 92 Once assigned, password access cannot be circumvented so it is important that you write down your password and keep it in a safe place. Refer to “Security Settings” on page 64 for details. WORKABOUT PRO G2 Hand-Held With Windows Embedded CE 5.0 User Manual...
- Page 93 Remove button. SNMP SNMP (Simple Network Management Protocol) is the protocol used to monitor and manage devices attached to a TCP/IP network. WORKABOUT PRO G2 Hand-Held With Windows Embedded CE 5.0 User Manual...
- Page 94 Wireless WAN Provides access to technology like GSM/GPRS, which allows wide area networking capability such as internet browsing via GSM/GPRS. For detailed information, see Appendix B: “Wireless WAN”. WORKABOUT PRO G2 Hand-Held With Windows Embedded CE 5.0 User Manual...
-
Page 95: Basic Setup
The backlight is activated for a configurable amount of time when the WORKABOUT PRO G2 is in use (key press, scanner trigger or data received from the host). The Display Properties dialog box in the Control Panel allows you to specify the intensity of the backlight along with how long the display will maintain the specified intensity. - Page 96 Intensity This parameter is used to adjust the light intensity of the WORKABOUT PRO G2 backlight. Sliding the bar to the left lowers the light intensity, and sliding it to the right raises the intensity.
-
Page 97: Display Appearance
ON at the configured intensity when the WORKABOUT PRO G2 is operating with external power (not battery power). If the WORKABOUT PRO G2 is drawing power from its battery, this option is ignored and the other parameters defined in Display Properties dialog box are used. -
Page 98: Keyboard Properties
Figure 5.3 Choosing The Keyboard Icon 5.6.2.1 Key Repeat Note: These settings apply when a key is held down continuously. • In the Keyboard Properties dialog box, open the Repeat tab. WORKABOUT PRO G2 Hand-Held With Windows Embedded CE 5.0 User Manual... -
Page 99: Keyboard Backlight
• In the Keyboard Properties dialog box, open the Backlight tab. This parameter is used to adjust the light intensity of the WORKABOUT PRO G2 keyboard backlight. Sliding the bar to the left darkens the keyboard backlight intensity, and sliding it to the right lightens the intensity. -
Page 100: Keyboard One Shot Modes
If you choose Lock from the drop-down menu, pressing a modifier key once locks it ‘on’ until you press the modifier key a second time to unlock or turn it off. WORKABOUT PRO G2 Hand-Held With Windows Embedded CE 5.0 User Manual... -
Page 101: Keyboard Macro Keys
Recording And Saving A Macro You can program up to 12 macro keys on a 58-key WORKABOUT PRO G2. On a 36-key WORKABOUT PRO G2, you can program a maximum of 6 macro keys. •... - Page 102 1, press [M1] to execute the macro. Deleting A Macro To delete a macro: • In the Macros tab, highlight the macro number you want to delete. • Choose the Delete button. WORKABOUT PRO G2 Hand-Held With Windows Embedded CE 5.0 User Manual...
-
Page 103: Unicode Mapping
If a Unicode mapping is not listed, the Unicode mapping is mapped to the default Unicode value. WORKABOUT PRO G2 Hand-Held With Windows Embedded CE 5.0 User Manual... - Page 104 Pressed’. Press [SPACE] to select the shift state you want to assign. Removing Unicode Values • In the Unicode Mapping tab, highlight the item you want to delete, and choose the Remove button. WORKABOUT PRO G2 Hand-Held With Windows Embedded CE 5.0 User Manual...
-
Page 105: Scancode Remapping
If the scancode is remapped to a function or a macro, the first and second columns remain blank while the third column contains the function name or macro key number (e.g., Macro 2). WORKABOUT PRO G2 Hand-Held With Windows Embedded CE 5.0 User Manual... - Page 106 When Macro is selected, the macro keys available on your unit are listed in the dialog box. • Choose Virtual Key, Function or Macro • Choose a function from the Function list in the dialog box, and tap on OK. WORKABOUT PRO G2 Hand-Held With Windows Embedded CE 5.0 User Manual...
-
Page 107: Volume And Sound Properties
Remove button. • Tap on OK. 5.6.3 Volume And Sound Properties • In the Control Panel, choose the Volume & Sounds icon. Figure 5.5 Choosing The Volume Icon WORKABOUT PRO G2 Hand-Held With Windows Embedded CE 5.0 User Manual... -
Page 108: Power Management Properties
This icon displays a Power Properties dialog box that indicates the unit’s battery capacity and allows you to manage battery use. • In the Control Panel, choose the Power icon. WORKABOUT PRO G2 Hand-Held With Windows Embedded CE 5.0 User Manual... -
Page 109: Battery Capacity
In the Power Properties dialog box, open the Suspend tab. • Power Source This drop-down menu allows you to specify whether the unit is using AC Power or Battery Power. WORKABOUT PRO G2 Hand-Held With Windows Embedded CE 5.0 User Manual... -
Page 110: Suspend Threshold
‘on’ (see “Display Backlight” on page 87). When the WORKABOUT PRO G2 is idle—not receiving any user input (a key touch, a scan, and so on) or system activity (serial data, an activity initiated by an application, and so on)—the hand-held uses the value assigned in the Suspend... -
Page 111: Advanced
This tab allows you to specify whether or not your unit will enter Suspend state while it is operating with an active PPP connection, network interface or active TCP/IP connection. WORKABOUT PRO G2 Hand-Held With Windows Embedded CE 5.0 User Manual... -
Page 112: Stylus Properties
Note: Touchscreen calibration may not be enabled on your unit. If your screen appears to require recalibration, contact your supervisor. • In the Control Panel, choose the Stylus icon. WORKABOUT PRO G2 Hand-Held With Windows Embedded CE 5.0 User Manual... -
Page 113: Double-Tap
5.6.5.3 Touch This tab allows you to disable the touchscreen. Disable the touch panel • Choose the Touch tab. Select the checkbox next to WORKABOUT PRO G2 Hand-Held With Windows Embedded CE 5.0 User Manual... -
Page 114: Manage Triggers
• In the Control Panel, choose the Manage Triggers icon. Figure 5.6 Manage Triggers Icon • In the Manage Triggers screen you’ll see a list of trigger mappings. WORKABOUT PRO G2 Hand-Held With Windows Embedded CE 5.0 User Manual... -
Page 115: Trigger Mappings
Edit Tapping this button brings up the Edit mapping dialog (see page 108), so that you can edit existing trigger mappings. Remove Tapping this button removes an existing mapping. WORKABOUT PRO G2 Hand-Held With Windows Embedded CE 5.0 User Manual... -
Page 116: Add And Edit Trigger Mapping
Imagers or RFID Readers. It is also possible to map different sources to the same module (trigger consumer)—for example, two different trigger keys can be mapped to the RFID File System. WORKABOUT PRO G2 Hand-Held With Windows Embedded CE 5.0 User Manual... - Page 117 This identifies the driver or application receiving the trigger presses. Show All Modules By default, inactive owners are not shown. By checking this checkbox, all owners, both active and inactive, are displayed. WORKABOUT PRO G2 Hand-Held With Windows Embedded CE 5.0 User Manual...
-
Page 118: Certificate Assignment
(WORKABOUT PRO G2s), refer to the following website: http://www.microsoft.com/windowsserver2003/techinfo/overview/security.mspx Note: When importing certificates, the WORKABOUT PRO G2 only recognizes .cer files. WORKABOUT PRO G2 Hand-Held With Windows Embedded CE 5.0 User Manual... -
Page 119: Bluetooth Setup
In the Control Panel, choose the Bluetooth Device Properties icon to Bluetooth Control display the screen. Figure 5.8 Bluetooth Icon Bluetooth Control dialog box is used to display the other Bluetooth devices with which you can communicate. WORKABOUT PRO G2 Hand-Held With Windows Embedded CE 5.0 User Manual... -
Page 120: The Devices Tab
• Click on the Scan button to list available devices. Figure 5.9 Available Bluetooth Devices Wait for the WORKABOUT PRO G2 to complete its scan (approximately 20 — seconds). When scanning starts, the Scan button will change to Stop if necessary, you can tap on this button to stop the process. - Page 121 Bluetooth manager will try to find and use a free port between COM7 and COM9. When using BSP as the port name, BSP2 to BSP9 are available for use. The port is available as soon as it is activated. WORKABOUT PRO G2 Hand-Held With Windows Embedded CE 5.0 User Manual...
- Page 122 To remove the PIN: • Choose Set PIN and press [ENTER]. If the WORKABOUT PRO G2 attempts to connect to a remote device that has Authentication enabled and does not have a required PIN set, an Authentication Request dialog box appears.
-
Page 123: The Servers Tab
The Servers Tab 5.7.2 The Servers Tab The Bluetooth connection is initiated from your WORKABOUT PRO G2 to the remote device. Therefore the WORKABOUT PRO G2 is called the ‘client’ and the Servers tab displays the server profiles that can be remote is called the ‘server’. -
Page 124: Outgoing Tab
Note: To add a service to the Outgoing port, an active service must first be deactivated. Then you can choose the ‘Outgoing’ option from the Activa- tion menu (highlight a service, right-click or press the [SPACE] bar to display the Activation menu). WORKABOUT PRO G2 Hand-Held With Windows Embedded CE 5.0 User Manual... -
Page 125: Active Conn. Tab
Although the name will have changed in the Properties menu in Bluetooth Controls, the radio only reads it on boot-up. For the changes to take effect, you must cold reset the WORKABOUT PRO G2 (for cold reset instructions, see “Resetting The Hand-Held” on page 31). -
Page 126: The Properties Tab
WORKABOUT PRO G2, and provides some port options. The Device Name field shows the device name of your WORKABOUT PRO G2. This name can be changed (see the Note on the previous page for details). - Page 127 1. To set up the internet parameters, choose the Network And Dial-up Connections icon from the Control Panel Figure 5.10 Network And Dial-up Connection Icon 2. Choose the Make New Connection icon. Figure 5.11 Creating A GPRS Connection WORKABOUT PRO G2 Hand-Held With Windows Embedded CE 5.0 User Manual...
- Page 128 5. In the drop-down menu labelled Select a modem, choose the name of the modem with which you want to connect, and then choose the Device Properties Configure button to display the dialog box. WORKABOUT PRO G2 Hand-Held With Windows Embedded CE 5.0 User Manual...
- Page 129 Device Properties dialog box. The WORKABOUT PRO G2 then discon- nects. 6. Under the Call Options tab, turn off Cancel the call if not connected within, and press [ENTER] to save your changes. WORKABOUT PRO G2 Hand-Held With Windows Embedded CE 5.0 User Manual...
- Page 130 Finish button. 8. In the Control Panel, choose the Dialing icon. 9. The values in the Dialing Properties dialog box need to be edited according to your network carrier specifications. WORKABOUT PRO G2 Hand-Held With Windows Embedded CE 5.0 User Manual...
- Page 131 GPRS Network is displayed. Tap on the new icon. When you tap on your new connection, an onscreen message indicates the status of your connection: connected, disconnected, error messages, and so WORKABOUT PRO G2 Hand-Held With Windows Embedded CE 5.0 User Manual...
-
Page 132: Total Recall
SD/MMC card or exter- nally to the device on a USB memory stick or on a PC. • In the Control Panel, choose the Total Recall icon Figure 5.12 Total Recall Icon WORKABOUT PRO G2 Hand-Held With Windows Embedded CE 5.0 User Manual... -
Page 133: Creating A Backup Profile
This dialog box lists the possible storage destinations for the profile file. To begin, type a name for the profile in the field labelled Profile Name. • • Next, choose the Profile Type you want to create: WORKABOUT PRO G2 Hand-Held With Windows Embedded CE 5.0 User Manual... - Page 134 Registry will be saved. You can, however, limit the backup to databases, and/or the registry only. By tapping the checkbox next to these items, you can add or remove a check mark to enable or disable the option. WORKABOUT PRO G2 Hand-Held With Windows Embedded CE 5.0 User Manual...
- Page 135 Figure 5.15 Add Files To add a file to your backup list: • Choose Add Files. Browse to and choose the files you want to add to your list. WORKABOUT PRO G2 Hand-Held With Windows Embedded CE 5.0 User Manual...
- Page 136 Depending on what you have selected for inclusion in your profile, you can view a list of the selected files, databases and/or registry. • Choose the Next button to perform the operation. WORKABOUT PRO G2 Hand-Held With Windows Embedded CE 5.0 User Manual...
-
Page 137: Restoring A Profile
5.9 The Storage Manager The Storage Manager allows the user to view information about the storage devices that are present in the WORKABOUT PRO G2, such as SD-MMC flash cards and Compact Flash cards. 5.9.1 Formatting A Memory Card Formatting a memory card bulk-erases it. -
Page 138: Creating Partitions
Each partition appears as a separate folder in Windows Explorer. To create new partitions: WORKABOUT PRO G2 Hand-Held With Windows Embedded CE 5.0 User Manual... - Page 139 The new partition is automatically mounted. This is indicated by an asterisk (*) next to its name in the partition list. Any unallocated space on the card is indicated at the left, and additional partitions can be created in it. WORKABOUT PRO G2 Hand-Held With Windows Embedded CE 5.0 User Manual...
-
Page 140: Partition Management
2. Press the Properties button. The Partition Properties dialog appears. 3. Press the Dismount button. The partition is dismounted. The asterisk disappears next to its name in the partitions list. WORKABOUT PRO G2 Hand-Held With Windows Embedded CE 5.0 User Manual... - Page 141 6. Press Start. The partition is formatted. To mount a partition: 1. Select the desired partition. 2. Press the Properties button. The Partition Properties dialog appears. WORKABOUT PRO G2 Hand-Held With Windows Embedded CE 5.0 User Manual...
-
Page 142: Ipv6 Support
Figure 5.18 IPv6 Support Icon • Choose the IPv6 Support icon to display the associated dialog box. • Choose the checkbox next to Enable IPv6 Network Support to enable this internet protocol. WORKABOUT PRO G2 Hand-Held With Windows Embedded CE 5.0 User Manual... -
Page 143: Scanner Settings
This option cannot be accessed without a touchscreen. For a listing of available scanners and their specifications, please refer to Chapter 7: “Specifications”. Figure 5.19 Teklogix Scanners Icon WORKABOUT PRO G2 Hand-Held With Windows Embedded CE 5.0 User Manual... -
Page 144: Bar Codes
Keep in mind that some bar code types are only available when an internal imaging scanner is installed. All internal scanners can be configured using the Barcode dialog boxes. WORKABOUT PRO G2 Hand-Held With Windows Embedded CE 5.0 User Manual... -
Page 145: Decoded (Internal) Scanners
When you double-tap on this parameter, a dialog box is displayed in which you can enter a value from 0 to 30 (0 to 3 sec.). A value of 0 (zero) disables the aiming-dot. WORKABOUT PRO G2 Hand-Held With Windows Embedded CE 5.0 User Manual... -
Page 146: Decoded (Internal) Advanced Options
There are four levels of decode security for linear code types (e.g., Code 39, Interleaved 2 of 5). Higher security levels should be selected for decreasing levels of bar code quality. As security levels increase, the scanner’s decode speed decreases. WORKABOUT PRO G2 Hand-Held With Windows Embedded CE 5.0 User Manual... -
Page 147: Decoded (Internal) 2D Scanning Options
When you double-tap on this parameter, a dialog box is displayed in which you can choose one of the following scanning modes: Smart Raster, Always Raster, Programmable Raster, Slab Pattern, Cyclone Pattern or Semi-Omni Pattern. WORKABOUT PRO G2 Hand-Held With Windows Embedded CE 5.0 User Manual... -
Page 148: Decoded (Internal) 2D Scanning Options
Setting this parameter to on enables the scanner to delete any escape sequences representing Character Set ECIs – Extended Channel Interpretations (also known as GLIs) from its buffer before transmission. WORKABOUT PRO G2 Hand-Held With Windows Embedded CE 5.0 User Manual... -
Page 149: Code 39
Note: “Convert to Code 32” must be enabled in order for this parameter to function. When this parameter is enabled, the prefix character “A” is added to all “Code 32” bar codes. WORKABOUT PRO G2 Hand-Held With Windows Embedded CE 5.0 User Manual... - Page 150 The combination of an escape character and the next character is converted to an equivalent ASCII character. Decode Performance If this parameter is enabled, one of three decode levels can be chosen in the “Decode Performance Level” parameter. WORKABOUT PRO G2 Hand-Held With Windows Embedded CE 5.0 User Manual...
- Page 151 Strip Trailing The value entered in this parameter determines the number of characters that will be removed from the end of the bar code before the suffix character is added. WORKABOUT PRO G2 Hand-Held With Windows Embedded CE 5.0 User Manual...
-
Page 152: Code 128
This character, if non-zero, is added before a successfully decoded bar code. Press the key you want to insert in the dialog box attached to this parameter. The ASCII/Unicode key value of the keypress is displayed. WORKABOUT PRO G2 Hand-Held With Windows Embedded CE 5.0 User Manual... -
Page 153: Ean 8
Enabled Set this parameter to ON to enable “UPC A”. UPC-A, Check Digit If you enable this parameter, the check digit is included with the decoded bar code data. WORKABOUT PRO G2 Hand-Held With Windows Embedded CE 5.0 User Manual... -
Page 154: Upc E
Country code and System Char – both the country code (“0” for USA) and system character are transmitted with the data, or None – no preamble is transmitted. The lead-in characters are considered part of the symbol. WORKABOUT PRO G2 Hand-Held With Windows Embedded CE 5.0 User Manual... -
Page 155: Upc/Ean Shared Settings
2 and 20. A value of 5 or above is recommended when Autodiscriminate is selected and you are decoding a mix of UPC/EAN symbols with and without supplementals. WORKABOUT PRO G2 Hand-Held With Windows Embedded CE 5.0 User Manual... -
Page 156: Code 93
Length within a range allows you to decode a code type within a specified range from 4 to 55. Field Size/Char Refer to page 143 for details. WORKABOUT PRO G2 Hand-Held With Windows Embedded CE 5.0 User Manual... -
Page 157: Codabar
Lengths for “MSI Plessey” can be set for Any length, Length within a range, One discrete length or Two discrete lengths. The length of a code refers to the number of characters (i.e., human readable characters), including check digit(s). WORKABOUT PRO G2 Hand-Held With Windows Embedded CE 5.0 User Manual... -
Page 158: Interleaved 2 Of 5
Lengths for “Interleaved 2 of 5” can be set for Any length, Length within a range, One discrete length or Two discrete lengths. The length of a code refers to the number of characters (i.e., human readable characters), including check digit(s). WORKABOUT PRO G2 Hand-Held With Windows Embedded CE 5.0 User Manual... -
Page 159: Discrete 2 Of 5
Choosing Two discrete lengths allows you to decode only those codes containing two selected lengths. Length within a range allows you to decode a code type within a specified range from 1 to 12. WORKABOUT PRO G2 Hand-Held With Windows Embedded CE 5.0 User Manual... -
Page 160: Rss Code
A composite symbol includes multi-row 2D components making it compatible with linear and area CCD scanners along with linear and rastering laser scanners. The options available for this parameter represent multi-level components of a composite symbol. WORKABOUT PRO G2 Hand-Held With Windows Embedded CE 5.0 User Manual... -
Page 161: 153
]L3if the first codeword is 903-907, 912, 914, 915 ]L4if the first codeword is 908 or 909 ]L5if the first codeword is 910 or 911 WORKABOUT PRO G2 Hand-Held With Windows Embedded CE 5.0 User Manual... -
Page 162: Decoded (Hhp)
This gives the scanner a minimum amount of time to complete its current decode before the scan is cancelled when the user quickly triggers on/off. WORKABOUT PRO G2 Hand-Held With Windows Embedded CE 5.0 User Manual... -
Page 163: Code 39
Minimum and Maximum lengths for the bar code can be set from 0 to 48. The length of a code refers to the number of characters (i.e., human readable characters), including check digit(s). WORKABOUT PRO G2 Hand-Held With Windows Embedded CE 5.0 User Manual... -
Page 164: Trioptic Code
Setting this parameter to on enables “Code 128”. ISBT Concatenation These codes are not concatenated by default. You need to set this parameter to on to send concatenated code. WORKABOUT PRO G2 Hand-Held With Windows Embedded CE 5.0 User Manual... -
Page 165: Ean 13 Settings
ISBN Translate When this parameter (International Standard Book Number) is enabled, the first 3 characters (‘978’) are ignored and the checksum (0.9, ‘X’) is calculated on the remaining characters. WORKABOUT PRO G2 Hand-Held With Windows Embedded CE 5.0 User Manual... -
Page 166: Ean 8
Set this parameter to on to enable “UPC A” bar code scanning recognition. Check Digit If you enable this parameter, a check digit is included with the decoded bar code data. WORKABOUT PRO G2 Hand-Held With Windows Embedded CE 5.0 User Manual... -
Page 167: Upc E Settings
This parameter expands the UPC E code to a 12 digit UPC-A format. Check Digit If you enable this parameter, a check digit is included with the decoded bar code data. WORKABOUT PRO G2 Hand-Held With Windows Embedded CE 5.0 User Manual... -
Page 168: Upc/Ean Shared Settings
Note: The 2 or 5 digit addenda must be turned on/off, depending on the desired behavior. 5.11.3.11 Code 93 Enabled Set this parameter to on to enable “Code 93”. WORKABOUT PRO G2 Hand-Held With Windows Embedded CE 5.0 User Manual... -
Page 169: Codabar
If “Check Char” is set to Validate and Transmit, the check character is validated and transmitted with the data. Setting this parameter to None disables this function. WORKABOUT PRO G2 Hand-Held With Windows Embedded CE 5.0 User Manual... -
Page 170: Msi Plessey
(i.e., human readable characters), including check digit(s). Double-tapping on these parameters displays a screen in which you can set the minimum and maximum allowable code lengths – 4 to 48. WORKABOUT PRO G2 Hand-Held With Windows Embedded CE 5.0 User Manual... -
Page 171: Code 11
– 1 to 80. Field Size/Char Refer to page 143 for details. 5.11.3.15 Interleaved 2 of 5 Enabled Set this parameter to on to enable “Interleaved 2 of 5”. WORKABOUT PRO G2 Hand-Held With Windows Embedded CE 5.0 User Manual... -
Page 172: Matrix 2 Of 5
– 1 to 80. Field Size/Char Refer to page 143 for details. 5.11.3.17 IATA 2 of 5 Enabled Set this parameter to on to enable “IATA 2 of 5”. WORKABOUT PRO G2 Hand-Held With Windows Embedded CE 5.0 User Manual... -
Page 173: Discrete 2 Of 5
ASCII (start/stop pattern 1). If you choose Original Output, the imager reads symbols with start/stop pattern 1 and decodes them as compressed numeric with optional full ASCII (start/stop pattern 2). WORKABOUT PRO G2 Hand-Held With Windows Embedded CE 5.0 User Manual... -
Page 174: Rss Code (Reduced Space Symbology)
Double-tapping on these parameters displays a screen in which you can set the minimum and maximum allowable code lengths – 1 to 74. Field Size/Char Refer to page 143 for details. WORKABOUT PRO G2 Hand-Held With Windows Embedded CE 5.0 User Manual... -
Page 175: Posicode (Reduced Space Symbology)
The options available for this parameter represent multi-level components of a composite symbol. GS1 128 “GS1 128” is the GS1 implementation of the Code 128 barcode specification. The former correct name was UCC/EAN-128. WORKABOUT PRO G2 Hand-Held With Windows Embedded CE 5.0 User Manual... -
Page 176: 168
Double-tapping on these parameters displays a screen in which you can set the minimum and maximum allowable code lengths – 1 to 2750. Field Size/Char Refer to page 143 for details. WORKABOUT PRO G2 Hand-Held With Windows Embedded CE 5.0 User Manual... -
Page 177: Micro Pdf-417
Double-tapping on these parameters displays a screen in which you can set the minimum and maximum allowable code lengths – 1 to 160. Field Size/Char Refer to page 143 for details. WORKABOUT PRO G2 Hand-Held With Windows Embedded CE 5.0 User Manual... -
Page 178: Code 49
– 1 to 2048. Field Size/Char Refer to page 143 for details. 5.11.3.29 2D Data Matrix Enable Set this parameter to on to enable “2D Data Matrix”. WORKABOUT PRO G2 Hand-Held With Windows Embedded CE 5.0 User Manual... -
Page 179: Qr Code
Double-tapping on these parameters displays a screen in which you can set the minimum and maximum allowable code lengths – 1 to 150. Field Size/Char Refer to page 143 for details. WORKABOUT PRO G2 Hand-Held With Windows Embedded CE 5.0 User Manual... -
Page 180: Aztec
5.11.3.34 Postal: PostNET Enabled Set this parameter to on to enable “Postal: PostNET”. Check Digit If enabled, the check digit will be transmitted at the end of the scanned data. WORKABOUT PRO G2 Hand-Held With Windows Embedded CE 5.0 User Manual... -
Page 181: Postal: Australian
– 2 to 80. Field Size/Char Refer to page 143 for details. 5.11.3.38 Postal: Japanese Enabled Set this parameter to on to enable “Postal: Japanese”. WORKABOUT PRO G2 Hand-Held With Windows Embedded CE 5.0 User Manual... -
Page 182: Postal: Kix
Field Size/Char Refer to page 143 for details. 5.11.3.41 Postal: Royal Enabled Set this parameter to on to enable “Postal: Royal”. Field Size/Char Refer to page 143 for details. WORKABOUT PRO G2 Hand-Held With Windows Embedded CE 5.0 User Manual... -
Page 183: Decoded (Intermec Iscp)
This gives the scanner a minimum amount of time to complete its current decode before the scan is cancelled when the user quickly triggers on/off. WORKABOUT PRO G2 Hand-Held With Windows Embedded CE 5.0 User Manual... -
Page 184: Code 39
If this parameter is enabled, the characters +, %, and / are used as escape characters. The combination of an escape character and the next character is converted to an equivalent ASCII character. WORKABOUT PRO G2 Hand-Held With Windows Embedded CE 5.0 User Manual... - Page 185 Minimum lengths for the bar code can be set from 0 to 255. The length of a code refers to the number of characters (i.e., human readable characters), including check digit(s). Field Size/Char Refer to page 143 for details. WORKABOUT PRO G2 Hand-Held With Windows Embedded CE 5.0 User Manual...
-
Page 186: Code 128
The codes are not concatenated by default. You need to choose one of the options provided for this parameter to send concatenated code. Choosing Only Concatenated Codes transmits only concatenated codes—single codes will not be WORKABOUT PRO G2 Hand-Held With Windows Embedded CE 5.0 User Manual... -
Page 187: Ean 13 Settings
(i.e., human readable characters), including check digit(s). Field Size/Char Refer to page 143 for details. 5.11.4.5 EAN 13 Settings Enabled Set this parameter to on to enable “EAN 13”. WORKABOUT PRO G2 Hand-Held With Windows Embedded CE 5.0 User Manual... -
Page 188: Ean 8
If the check digit is to be transmitted with the data, this parameter must be enabled. Transmit Number System If this parameter is enabled, the number system digit is transmitted with the decoded bar code data. WORKABOUT PRO G2 Hand-Held With Windows Embedded CE 5.0 User Manual... -
Page 189: Upc E Settings
Refer to “Prefix/Suffix” beginning on page 144. 5.11.4.9 UPC/EAN Shared Settings The setting assigned to the “Addendum” parameter associated with this option is shared across all UPC and EAN bar codes. WORKABOUT PRO G2 Hand-Held With Windows Embedded CE 5.0 User Manual... -
Page 190: Code 93
This parameter determines the reading distance from which a bar code can be successfully scanned. The default setting, Extended, allows for increased reading distance. 5.11.4.10 Code 93 Enabled Set this parameter to on to enable “Code 93”. WORKABOUT PRO G2 Hand-Held With Windows Embedded CE 5.0 User Manual... -
Page 191: Codabar
– either USS (Uniform Symbology Specification) or OPCC (Optical Product Code Council). Transmit Check Digit If the check digit is to be transmitted with the data, this parameter must be enabled. WORKABOUT PRO G2 Hand-Held With Windows Embedded CE 5.0 User Manual... -
Page 192: Msi Plessey
Minimum lengths for the bar code can be set from 0 to 255. The length of a code refers to the number of characters (i.e., human readable characters), including check digit(s). WORKABOUT PRO G2 Hand-Held With Windows Embedded CE 5.0 User Manual... -
Page 193: Code 11
(i.e., human readable characters), including check digit(s). Field Size/Char Refer to page 143 for details. 5.11.4.14 Interleaved 2 of 5 Enabled Set this parameter to on to enable “Interleaved 2 of 5”. WORKABOUT PRO G2 Hand-Held With Windows Embedded CE 5.0 User Manual... -
Page 194: Matrix 2 Of 5
You can chose to set L1 as Minimum Length or L1,L2,L3 as Fixed Length. Field Size/Char Refer to page 143 for details. 5.11.4.15 Matrix 2 of 5 Enabled Set this parameter to on to enable “Matrix 2 of 5”. WORKABOUT PRO G2 Hand-Held With Windows Embedded CE 5.0 User Manual... -
Page 195: Discrete 2 Of 5
Length Mode You can chose to set L1 as Minimum Length or L1,L2,L3 as Fixed Length. Field Size/Char Refer to page 143 for details. WORKABOUT PRO G2 Hand-Held With Windows Embedded CE 5.0 User Manual... -
Page 196: Telepen
“RSS Expanded” code can be omni-directionally scanned WORKABOUT PRO G2 Hand-Held With Windows Embedded CE 5.0 User Manual... -
Page 197: 189
]L3if the first codeword is 903-907, 912, 914, 915 ]L4if the first codeword is 908 or 909 ]L5if the first codeword is 910 or 911 Field Size/Char Refer to page 143 for details. WORKABOUT PRO G2 Hand-Held With Windows Embedded CE 5.0 User Manual... -
Page 198: Imager
Setting this parameter to on keeps image capture active and continuously decoding as long as the scanner button is pressed and held down. Center Bar Code Only Note: This parameter must be disabled when reading Composite bar codes. WORKABOUT PRO G2 Hand-Held With Windows Embedded CE 5.0 User Manual... - Page 199 0 and 3000. A value of 0 disables the target dot. WORKABOUT PRO G2 Hand-Held With Windows Embedded CE 5.0 User Manual...
-
Page 200: Imager Advanced Options
“Captures Per HW Trigger”. Auto Exposure Important: This parameter value should only be changed by qualified Psion Teklogix personnel. It should be left at the default value – ‘on’. WORKABOUT PRO G2 Hand-Held With Windows Embedded CE 5.0 User Manual... - Page 201 Note: When decoding multiple bar codes in one image, the value assigned to ‘Decoder Timeout’ should be increased to 200ms/extra bar code after the WORKABOUT PRO G2 Hand-Held With Windows Embedded CE 5.0 User Manual...
-
Page 202: Code 39 Settings
Field Size/Char Refer to page 143 for details. 5.11.5.4 Code 128 Settings Enabled Set this parameter to on to enable “Code 128”. Field Size/Char Refer to page 143 for details. WORKABOUT PRO G2 Hand-Held With Windows Embedded CE 5.0 User Manual... -
Page 203: Ean 13
Refer to “Prefix/Suffix” beginning on page 144. 5.11.5.6 EAN 8 Enabled Set this parameter to on to enable “EAN 8”. Addendum Refer to “Addendum” on page 195. Prefix/Suffix Refer to “Prefix/Suffix” beginning on page 144. WORKABOUT PRO G2 Hand-Held With Windows Embedded CE 5.0 User Manual... -
Page 204: Upc A
Set this parameter to on to enable “Code 93”. Field Size/Char Refer to page 143 for details. 5.11.5.10 Codabar Enabled Set this parameter to on to enable “Codabar”. Field Size/Char Refer to page 143 for details. WORKABOUT PRO G2 Hand-Held With Windows Embedded CE 5.0 User Manual... -
Page 205: Interleaved 2 Of 5
Set this parameter to on to enable “Composite” bar codes. 5.11.5.14 PDF-417 Enable Setting this parameter to on enables PDF-417 two dimensional (2D) coding. Field Size/Char Refer to page 143 for details. WORKABOUT PRO G2 Hand-Held With Windows Embedded CE 5.0 User Manual... -
Page 206: Micro Pdf-417
Set this parameter to on to enable “2D Maxicode”. Field Size/Char Refer to page 143 for details. 5.11.5.19 2D Aztec Enabled Set this parameter to on to enable “Aztec”. WORKABOUT PRO G2 Hand-Held With Windows Embedded CE 5.0 User Manual... -
Page 207: Postal: Planet
Field Size/Char Refer to page 143 for details. 5.11.5.23 Postal: Japanese Enabled Set this parameter to on to enable “Postal: Japanese”. Field Size/Char Refer to page 143 for details. WORKABOUT PRO G2 Hand-Held With Windows Embedded CE 5.0 User Manual... -
Page 208: Options
Set this parameter to on to enable “Postal: Royal”. Field Size/Char Refer to page 143 for details. 5.11.6 Options This tab allows you to tailor the double-click parameters and the display options associated with your scanner. WORKABOUT PRO G2 Hand-Held With Windows Embedded CE 5.0 User Manual... -
Page 209: Double Click Parameters
Time is measured in seconds, and a value of “0” (zero) disables the parameter. When you choose this option, a dialog box appears where you can enter a value. WORKABOUT PRO G2 Hand-Held With Windows Embedded CE 5.0 User Manual... - Page 210 \Flash Disk\ScanLog.txt. Keep in mind that if the “Scan Log File” is enabled, there is a slight performance effect when performing multiple scans since the log file is written to persistent storage. WORKABOUT PRO G2 Hand-Held With Windows Embedded CE 5.0 User Manual...
-
Page 211: Translations Tab
– if a rule within a case fails, the entire case fails. • In the Translation tab, tap on the Case # to create rules. WORKABOUT PRO G2 Hand-Held With Windows Embedded CE 5.0 User Manual... - Page 212 • Tap on the No rule dropdown menu to display the rules. When you choose a rule, an associated screen is displayed in which you can define the rule. WORKABOUT PRO G2 Hand-Held With Windows Embedded CE 5.0 User Manual...
-
Page 213: Snmp (Simple Network Management Protocol) Setup
MIBs that determine how SNMP operates, the type of access allowed and so on. All Psion Teklogix products support the TEKLOGIX-GENERIC-MIB—a MIB that defines some common features across Psion Teklogix products. WORKABOUT PRO G2 Hand-Held With Windows Embedded CE 5.0 User Manual... -
Page 214: Contact Tab
This field identifies the contact person for this managed node along with information about how to get in touch with this person. The content of this parameter is accessible through MIB-II’s sysContact object. WORKABOUT PRO G2 Hand-Held With Windows Embedded CE 5.0 User Manual... -
Page 215: Communities Tab
To disable this feature, remove the check mark from the check box. 5.12.2.1 Adding A Community • Choose the Add button to add a new ‘community’. WORKABOUT PRO G2 Hand-Held With Windows Embedded CE 5.0 User Manual... -
Page 216: Modifying A Community Setting
Remove button. A Delete Confirmation screen is displayed. • To remove a community, choose the Yes button, or If you decide not to remove the community, choose the No button. WORKABOUT PRO G2 Hand-Held With Windows Embedded CE 5.0 User Manual... -
Page 217: Trap Destination Tab
5.12.3.3 Changing A Destination To change an existing trap destination: Highlight the destination you want to alter in the Trap Destination tab, and • then choose the Change button. WORKABOUT PRO G2 Hand-Held With Windows Embedded CE 5.0 User Manual... -
Page 218: Permitted Hosts Tab
SNMP Managers. This tab lists the IP addresses of all the SNMP Managers which are allowed to monitor and manage this device. If no entries are listed, the device will accept SNMP queries from any host. WORKABOUT PRO G2 Hand-Held With Windows Embedded CE 5.0 User Manual... -
Page 219: Adding A Host
Highlight the IP address you want to alter in the Permitted Hosts tab, and then choose the Change button. A dialog box like the one displayed when you add a host is displayed. • Make the necessary changes, and press [ENTER]. WORKABOUT PRO G2 Hand-Held With Windows Embedded CE 5.0 User Manual... - Page 221 6.4.6 Desktop Docking Station Ports ....226 6.4.7 Linking A WORKABOUT PRO G2 To A PC ... . 226 6.4.7.1 Using Microsoft ActiveSync To Work With Files .
-
Page 222: Chapter 6: Peripheral Devices & Accessories
Chapter 6: Peripheral Devices & Accessories 6.6 Quad Battery Charger–Model #WA3004-G1 ....229 6.6.1 Charging Batteries ......230 6.6.2 Battery Charge Duration . -
Page 223: Carrying Accessories
6.1.1 Attaching The Hand Strap The hand strap can be attached to the back of the WORKABOUT PRO G2 to provide a secure means for operators to carry the hand-held. The hand strap is attached to the back of unit using two Phillips head screws provided with this accessory. - Page 224 • Use a Phillips screwdriver to attach the strap to the two threaded inserts on the back of the WORKABOUT PRO G2, near the top of the unit • Stretch the hand strap toward the base of the WORKABOUT PRO G2, and hook the bottom of the strap into the slot near the base of the battery pack.
-
Page 225: Attaching The Pistol Grip
Position the pistol grip so that it fits snugly over the back of the unit and the holes in the pistol grip are aligned with the threaded inserts on the back of the WORKABOUT PRO G2. WORKABOUT PRO Hand-Held Computer With Windows Mobile 5.0 User Manual... - Page 226 Using The Swivel Belt Loop With The Carrying Case The WORKABOUT PRO G2 carrying case is equipped with two rings onto which you can attach a swivel belt loop so that you can hang the unit from your belt. If you prefer, you can also attach a belt clip to this accessory so that you can clamp the unit onto your waistband or belt.
- Page 227 Chapter 6: Peripheral Devices & Accessories Protective Carrying Case • Slide your belt through the belt loop. Figure 6.2 Attaching The Belt Loop Alternatively, you can attach a plastic clip to the swivel belt loop and clip it to your waistband or belt.
- Page 228 Soft Shell Holster 6.1.4 Soft Shell Holster A soft shell holster with removable belt and swivel holster pad can be used to hang a WORKABOUT PRO G2 with a pistol grip from you waist Figure 6.4 Soft Shell Holster •...
-
Page 229: The Batteries
Chapter 6: Peripheral Devices & Accessories The Batteries 6.2 The Batteries The WORKABOUT PRO G2 will operate with a High-Capacity Lithium Ion battery pack, a Super High-Capacity Lithium Ion battery pack. In addition to the main battery, the hand-held is equipped with a rechargable coin –... -
Page 230: Operator Controls
Quad docking station can consume up to 3A @ 120VAC or 1.5A @ 240VAC. 6.3.3 Operator Controls WORKABOUT PRO G2 docking stations and chargers have no operator controls or power switches. 6.3.4 Important Charger Safety Instructions – SAVE THESE INSTRUCTIONS •... -
Page 231: Desktop Docking Station
Do not use the charger if any of the batteries or the charger get more than luke- warm. The equipment should be inspected by qualified personnel. 6.4 Desktop Docking Station The WORKABOUT PRO G2 can be inserted in a desktop docking station, model number WA4003-G2. WORKABOUT PRO G2... -
Page 232: Charging A Battery Installed In The Workabout Pro G2
. This icon is only displayed when the unit is switched on. The LED on the WORKABOUT PRO G2 lights up indicating that the unit has external power and battery charging will begin. It is safe to leave the unit in the –... -
Page 233: Charging A Spare Battery
Chapter 6: Peripheral Devices & Accessories Charging A Spare Battery 6.4.2 Charging A Spare Battery • Insert the battery in the spare battery charge well at the back of the docking station, aligning the contacts on the battery with the contacts in the spare battery charge well. -
Page 234: Desktop Docking Station Ports
Client USB to connect the docking station to a PC. 6.4.7 Linking A WORKABOUT PRO G2 To A PC The desktop docking station can be connected to a PC so that you can exchange files in the same way that you would between PC drives. -
Page 235: Linking A Workabout Pro G2 To An Ethernet Network
• View WORKABOUT PRO G2 files from Windows Explorer. • Drag and drop files between the WORKABOUT PRO G2 and the PC in the same way that you would between PC drives. • Back up WORKABOUT PRO G2 files to the PC, then restore them from the PC to the hand-held again, if needed, and so on. -
Page 236: Troubleshooting The Docking Station Operations
Chapter 6: Peripheral Devices & Accessories Troubleshooting The Docking Station Operations If a link is established between a WORKABOUT PRO G2 and a host, the application on the host and on the hand-held must have a recovery mechanism in the event that the WORKABOUT PRO G2 is removed from the dock, interrupting the link. -
Page 237: Charge Indicators-The Led
Chapter 6: Peripheral Devices & Accessories Charge Indicators–The LED 6.5.3 Charge Indicators–The LED The LED on the top of the charger indicates battery charge progress. LED Behaviour Charge Status No battery detected in the charge well. Solid green Battery is fully charged. Fast flashing green Battery is charged to 75% of capacity. -
Page 238: Charging Batteries
Chapter 6: Peripheral Devices & Accessories Charging Batteries 6.6.1 Charging Batteries • Slide the battery into a charge well, aligning the contacts on the battery with the contacts in the charge well. 6.6.2 Battery Charge Duration A fully discharged battery can take up to 4 hours to charge. The quad battery charger –... -
Page 239: Power Led Does Not Light Up
Chapter 6: Peripheral Devices & Accessories Troubleshooting 6.6.4.3 Power LED Does Not Light Up • Remove all batteries, and unplug the charger. • Connect another device to the mains outlet to ensure there is power. • Remove the IEC mains power cable from the charger, and check it for damage. •... -
Page 240: Quad Docking Station-Model #Wa4004-G1
Chapter 6: Peripheral Devices & Accessories Quad Docking Station–Model #WA4004-G1 6.7 Quad Docking Station–Model #WA4004-G1 Figure 6.9 Quad Docking Station Note: The quad docking station is shipped with a docking manual. It is critical that this manual be reviewed for additional information and updates. The quad docking station permits each of four docked WORKABOUT PRO G2s to communicate with a 10/100 BaseT Ethernet network at greater than 2Mbps. -
Page 241: Quad Indicators
If a link is established between a WORKABOUT PRO G2 and a host, the application on the host and on the hand-held must have a recovery mechanism in the event that the WORKABOUT PRO G2 is removed from the dock and the link is interrupted. -
Page 242: Battery Charging-Led Behaviour
6.7.6.1 Network Link Unsuccessful If a network link fails, the WORKABOUT PRO G2 application alerts the operator that the link was unsuccessful. 6.7.6.2 Hand-Held LED Does Not Light When Docked –... -
Page 243: The Vehicle Cradle
6.8 The Vehicle Cradle The vehicle cradle is a highly ruggedized, single station dock. Although it provides quick insertion and removal, the cradle holds the WORKABOUT PRO G2 securely even when operated in high vibration environments. Depending on the type of hand-held unit you are use, you can choose from the following powered vehicle cradle models: •... -
Page 244: Wiring Guidelines
6.8.3 Using The Vehicle Cradle If your WORKABOUT PRO G2 is equipped with a shoulder strap or cover, these accessories need to be removed before installing the unit in a vehicle cradle. There is no need to remove handstraps, pistol grips or tethered devices from the unit. -
Page 245: Powered Cradle Installation In High Voltage Vehicles
6.8.6 Powered Vehicle Cradle Installation The powered cradle is designed to allow the WORKABOUT PRO G2 to be powered by a vehicle battery. The battery installed in the hand-held is also recharged by the vehicle battery. This option accepts DC power sources ranging from 10 to 55V, with optional pre-regulator. -
Page 246: The Port Replicator
Keep in mind that the WORKABOUT PRO G2 will continue to operate with or without vehicle power as long as its battery has sufficient charge. -
Page 247: Bluetooth Peripherals
Chapter 6: Peripheral Devices & Accessories Bluetooth Peripherals The functionality of the WORKABOUT PRO G2 tether port is replicated into RS- 232 serial interfaces by the port replicator. It provides the user with 3 DB9 serial interfaces as well as one Type B USB port (for connecting a Host device). - Page 249 PECIFICATIONS 7.1 WORKABOUT PRO G2......243 7.2 Radio Specifications ......244 7.3 Scanner Specifications .
-
Page 251: Chapter 7: Specifications
Safety: UL 60950-1, CSA C22.2 No. 60950-1-03, EN 60950-1, IEC 60825-1:1993+A1:1997+A2:2001 Class 2 CDRH 21 CFR 1040 Class II EMC: FCC Part 15 Class B, EMC Directive Class B WORKABOUT PRO G2 Hand-Held With Windows Embedded CE 5.0 User Manual... -
Page 252: Radio Specifications
Transmit Power -3dBm (0.5mW) minimum, +4dBm (2.5mW) max Frequency Range 2.400 - 2.4835 GHz RX Sensitivity -80dBm max (BER<=0.1%) Data Rate 732.2 kbps and 57.6 kbps asymmetric, 433.9 kbps symmetric WORKABOUT PRO G2 Hand-Held With Windows Embedded CE 5.0 User Manual... -
Page 253: Scanner Specifications
Discrete 2 of 5, Discrete 2 of 5, Codabar, MSI Codabar, MSI Codabar, MSI Codabar, MSI UCC/EAN 128, UCC/EAN 128, UCC/EAN 128, Plessey TriOptic Code 39 TriOptic Code 39 TriOptic Code 39 WORKABOUT PRO G2 Hand-Held With Windows Embedded CE 5.0 User Manual... - Page 254 4,844 Lux to 86,112 Lux Minimum Maximum Width of field Width of field range range Mil Size Inches Inches Inches Inches 70 reflective 100 reflective High quality symbols in normal room light. WORKABOUT PRO G2 Hand-Held With Windows Embedded CE 5.0 User Manual...
-
Page 255: Ev15 Imager Specifications
* dependent on width of bar code 7.3.1 EV15 Imager Specifications Parameter EV15 Light Source 617nm Highly Visible LED Scan Angle 40º Minimum Print Contrast Minimum 25% Min x. Dimension 0.1 mm (4 mils) WORKABOUT PRO G2 Hand-Held With Windows Embedded CE 5.0 User Manual... -
Page 256: Ev15 Imager Decode Zone
4 in. (10.2cm) per second Rotational Sensitivity 360° Viewing Angle ±40° Ambient Light Total darkness to 100,000 lux (full sunlight) Illumination LEDs 626nm ±30nm LEDs: 526nm ±30nm Aiming: Laser: 650nm ±10nm WORKABOUT PRO G2 Hand-Held With Windows Embedded CE 5.0 User Manual... - Page 257 (5.8 cm) (7.9 cm) (5.1 cm) 7.6 in. 9 in. 13.2 in. 10.2 in. 8.8 in. 13.0 in. (19.3cm) (22.9 cm) (33.5 cm) (25.9 cm) (22.4 cm) (33 cm) WORKABOUT PRO G2 Hand-Held With Windows Embedded CE 5.0 User Manual...
- Page 258 5% to 95% (non-condensing) Image engine 4.1 grams Weight Co-processor board 6.80 grams 15 drops, 5 ft to concrete at room temperature when integrated Shock correctly into end-user packaging WORKABOUT PRO G2 Hand-Held With Windows Embedded CE 5.0 User Manual...
- Page 259 Lux to 100,000 Lux Minimum range Maximum range Mil Size* Inches Inches 15** 20.8 11.7 *QR code **Data Matrix Code 39 Minimum range Maximum range Mil Size Inches Inches 10.9 WORKABOUT PRO G2 Hand-Held With Windows Embedded CE 5.0 User Manual...
-
Page 261: Appendix A: Port Pinouts
PPENDIX INOUTS A.1 LIF (Low Insertion Force) Port Pinout PIN # Signal Name Ground Ground USB Host Data Plus, For connecting USB devices USB Host Data Minus, For connecting USB Devices USB Host Power, for powering USB devices (5V, 100mA Max) DC Power in, for supplying power to WORKABOUT PRO / charging battery (5V, 3A) DC Power in, for supplying power to WORKABOUT PRO / charging... -
Page 262: Tether Port Pinout
Appendix A: Port Pinouts Tether Port Pinout A.2 Tether Port Pinout PIN # Signal Name Ground USB Host Data Plus, For connecting USB Devices USB Host Data Minus, For connecting USB Devices USB Host Power, for powering USB devices (5V, 100mA Max) TX Data } TX Data and RX Data are only available on terminals with no internal Bluetooth RX Data }... -
Page 263: Appendix B: Wireless Wide Area Network (Wwan)
IRELESS ETWORK B.1 Wireless WAN Psion Teklogix offers a quad band, GPRS radio – Model Number RA3030-G2; a WORK- ABOUT PRO G2 equipped with a GSM/GPRS radio has wide area networking capabilities. B.1.1 Taskbar Icons Wireless WAN icons in the taskbar indicate the status of your wide area network connection. -
Page 264: Establishing A Connection
• In the Control Panel, choose the Wireless WAN icon. Figure B.1 Wireless WAN Icon Wireless WAN The main dialog box is displayed. Figure B.2 Establishing A Connection WORKABOUT PRO G2 Hand-Held With Windows Embedded CE 5.0 User Manual... - Page 265 Note: Once you’ve shut down the user interface, you can only enable the radio by opening the Control Panel and tapping on the Wireless WAN icon to display the Wireless WAN dialog box. WORKABOUT PRO G2 Hand-Held With Windows Embedded CE 5.0 User Manual...
-
Page 266: Advanced Information
• Emergency calls only. The modem has found a network but is not allowed to register (e.g. no roaming agreement between networks). The modem keeps searching for another network. WORKABOUT PRO G2 Hand-Held With Windows Embedded CE 5.0 User Manual... -
Page 267: Tools Menu
An internal software error has occurred. If a warm boot does not clear this condition, Psion Teklogix technical support may need to investigate further. B.1.4 Tools Menu Tools Wireless WAN menu in the main dialog box offers some additional, advanced setup features. WORKABOUT PRO G2 Hand-Held With Windows Embedded CE 5.0 User Manual... - Page 268 LAN Disable Auto dialog box changes to . To close the currently active connection (if any) and disable the automatic connection mode: • Tap on Disable Auto. WORKABOUT PRO G2 Hand-Held With Windows Embedded CE 5.0 User Manual...
- Page 269 A very large site has their own APN. Such connections always have to be configured manually. • A customer has subscribed for a static IP address. By definition this must be configured manually. WORKABOUT PRO G2 Hand-Held With Windows Embedded CE 5.0 User Manual...
- Page 270 The selected profile is deleted. You cannot delete the profile. Activate When this button is chosen, the selected profile becomes the active profile. Activation is Enable automatic configuration: possible only if the checkbox is unchecked. WORKABOUT PRO G2 Hand-Held With Windows Embedded CE 5.0 User Manual...
- Page 271 Reset Reset New Profile Edit Profile button in the dialog boxes resets all entry fields to the values they had when the dialog box was opened. WORKABOUT PRO G2 Hand-Held With Windows Embedded CE 5.0 User Manual...
- Page 272 If unauthorized access to the device is a concern, the checkbox should be checked. In this case, the PIN is not stored; whenever a PIN is required, you will be prompted to enter an appropriate value. B-10 WORKABOUT PRO G2 Hand-Held With Windows Embedded CE 5.0 User Manual...
-
Page 273: Network Configuration
WWAN dialog box changes to ‘Emergency calls only’, ‘No net- work found’, ‘GPRS not available’ or ‘GPRS not allowed’. WORKABOUT PRO G2 Hand-Held With Windows Embedded CE 5.0 User Manual B-11... -
Page 274: Modem Information
If the network operator has not programmed a user’s phone number into his Phone: SIM, the field remains empty. If the main menu shows an error status, at least partial modem information may be available. B-12 WORKABOUT PRO G2 Hand-Held With Windows Embedded CE 5.0 User Manual... -
Page 275: Sms Menu
The Open button opens the selected message in a new window such that the entire message can be read including the original formatting (line breaks are replaced by spaces in the Inbox WORKABOUT PRO G2 Hand-Held With Windows Embedded CE 5.0 User Manual B-13... -
Page 276: Power Mode
Wireless WAN driver). If the checkbox is checked then power is applied to the modem and the drivers are loaded when the computer is turned on. Power is removed from the modem when the computer enters suspend mode. B-14 WORKABOUT PRO G2 Hand-Held With Windows Embedded CE 5.0 User Manual... - Page 277 UPC A 145, 158, 180, 196 moving the cursor 40 UPC E 146, 159, 181, 196 ASCII Translation tab 203 Full Ascii 176 Barcodes Must Decode 191 audio indicators batteries WORKABOUT PRO G2 Hand-Held With Windows Embedded CE 5.0 User Manual...
- Page 278 145 prefix 143, 144 Ethernet connection (quad dock) 232 stripping 143, 145 WORKABOUT to PC 226 suffix 143, 145 Communities 207 charger Composite 152, 167, 197 WORKABOUT PRO G2 Hand-Held With Windows Embedded CE 5.0 User Manual...
- Page 279 Discrete 2 of 5 151, 165, 187 features, WORKABOUT PRO G2 7 Discrete 2 of 5 151, 165 Field Size 143 dismounting partitions 132 Field Size/Chars (bar code scanning) 143 display WORKABOUT PRO G2 Hand-Held With Windows Embedded CE 5.0 User Manual...
- Page 280 ISBT Concat Transmit 178 executing a macro 94 ISBT 128 144, 178 Macros menu, accessing 93 ISM band, Bluetooth radio 111 recording and saving 93 maintenance (of hand-held) 52 WORKABOUT PRO G2 Hand-Held With Windows Embedded CE 5.0 User Manual...
- Page 281 Prefix Char 143, 144 Printer (serial service), Bluetooth 113 profile, creating backup 125 Parameter Scanning 138, 155, 157, 161, profile, restoring backup 129 162, 163, 164, 165, 166, 167, 168, 169, Programs WORKABOUT PRO G2 Hand-Held With Windows Embedded CE 5.0 User Manual...
- Page 282 Same Read Validate 176 Composite 152 Scan Data Format 140 Convert To Code 32 141 Convert To EAN 13 151 Scan Indicator 201 Decoded (HHP) 154 SCAN Key 41 WORKABOUT PRO G2 Hand-Held With Windows Embedded CE 5.0 User Manual...
- Page 283 UPC-EAN Shared Settings 160, 181 signal quality, 802.11 49 2D Maxicode 198 Simple Network Management (SNMP) 2D QR Code 198 See SNMP 205 Scanning Mode (2D) 139 single battery charger (WA3001) 228 WORKABOUT PRO G2 Hand-Held With Windows Embedded CE 5.0 User Manual...
- Page 284 UPC-EAN Shared Settings 160, 181 UPC-E Check Digit 146 UPC-E Preamble 146 TAB Key 41 UPC-E1 Check Digit 146 target dot, duration of 137 UPC-E1 Preamble 146 taskbar VIII WORKABOUT PRO G2 Hand-Held With Windows Embedded CE 5.0 User Manual...
- Page 285 2D QR Code 171, 198 2D Raster Expand Rate 140 2D UPC Half Block Stitching 148 36-key keyboard alpha keys, accessing 43 uppercase letters, creating 43 58-key keyboard 42 802.11g radio 244 WORKABOUT PRO G2 Hand-Held With Windows Embedded CE 5.0 User Manual...
- Page 287 WORKABOUT PRO Hand-Held Computer Regulatory & Warranty Guide February 21, 2007 PN 8000126.A ISO 9001 Certified Quality Management System...
- Page 288 Psion Teklogix manufactured goods and services. Furthermore, this docu- ment is not to be used as a basis for design, manufacture, or sub-contract, or in any manner detrimental to the interests of Psion Teklogix Inc. All trademarks are the property of their respective holders.
- Page 289 Return-To-Factory Warranty Psion Teklogix provides a return to factory warranty on this product for a period of twelve (12) months in accordance with the statement of Warranty and Product Support provided at: www.psionteklogix.com/warranty. The warranty on Psion Teklogix manufactured equipment does not extend to any product that has been tampered with, altered, or repaired by any person other than an employee of an authorized Psion Teklogix service organization.
- Page 290 (or on a related accessory such as the charger or docking station) signifies that the product is RoHS-compliant as per the EU directive. Other than as noted below, a Psion Teklogix product that does not have an accompanying RoHS logo signifies that it was placed on the EU market prior to July 1, 2006, and is thereby exempt from the directive.
- Page 291 4.3 Worldwide Offices........12 Psion Teklogix WORKABOUT PRO Regulatory & Warranty Guide...
-
Page 292: Declaration Of Conformity
Parlamento Europeu e do Conselho (Directiva RTT). (Declaração disponível no endereço: www.psionteklogix.com/DoC). Ο εξοπλισμός αυτός πληροί τις βασικές απαιτήσεις της κοινοτικής οδηγίας EU R&TTE 1999/5/EΚ. (Η δήλωση συμμόρφωσης διατίθεται στη διεύθυνση: www.psionteklogix.com/DoC) Psion Teklogix WORKABOUT PRO Regulatory & Warranty Guide... - Page 293 Tämä laite vastaa EU:n radio- ja telepäätelaitedirektiivin (EU R&TTE Directive 1999/5/EC) vaatimuksia. (Julkilausuma nähtävillä osoitteessa: www.psionteklogix.com/DoC). PSION TEKLOGIX tímto prohlašuje, že tohle mobilní zařízení je ve shodě se základními požadavky a dalšími příslušnými ustanoveními směrnice 1995/5/ES (NV č. 426/2000 Sb.) a Prohlášení...
- Page 294 Use of the 802.11 device in France: Owing to French Government restrictions, the 802.11 device are limited to indoor use. They may be used outdoors, on private property, only with prior authorization from the French Ministry of Defense. Psion Teklogix WORKABOUT PRO Regulatory & Warranty Guide...
- Page 295 This equipment complies with FCC radiation exposure limits set forth for an uncontrolled environment under 47 CFR 2.1093 paragraph (d)(2), for use in a PDA. End users must follow the specific operating instructions for satisfying RF exposure compliance. Psion Teklogix WORKABOUT PRO Regulatory & Warranty Guide...
- Page 296 1.5cm from the body. Note: To maintain compliance with the FCC RF exposure guidelines, if you wear the device on your body, use the Psion Teklogix approved carrying case. Use of non-approved accessories may violate FCC RF exposure guidelines.
- Page 297 The use of optical instruments with this product will increase eye hazard. Do Not Operate In An Explosive Atmosphere Operating Psion Teklogix equipment where explosive gas is present may result in an explosion. Do Not Remove Covers Or Open Enclosures To avoid injury, the equipment covers and enclosures should only be removed by qualified service personnel.
- Page 298 Before use, read all safety instructions for the Docking Station, the hand- held and the AC Wall Adaptor. Caution! To avoid the risk of fire or personal injury, use only the Psion Teklogix recommended AC adaptor. Caution! Use of an attachment not recommended or sold by Psion Teklogix may result in fire, electric shock, or personal injury.
-
Page 299: The Battery
Parc Club Du Golf-Bat 1. Mississauga, Ontario Suite 500 13856 Aix-En-Provence Canada Erlanger, Kentucky Cedex 3 L5N 7J9 USA 41018 France *The label of this device will be put under the battery compartment. Psion Teklogix WORKABOUT PRO Regulatory & Warranty Guide... - Page 300 • The battery may burst or ignite if the battery leaks. Always ensure that it is away from any exposed flames. • If leaking electrolyte sprays into your eyes, rinse them with clean running water, and immediately seek medical attention. Psion Teklogix WORKABOUT PRO Regulatory & Warranty Guide...
-
Page 301: Support Services & Worldwide Offices
• Keep batteries out of reach of children. 4. Support Services & Worldwide Offices Psion Teklogix provides a complete range of product support services to its cus- tomers worldwide. These services include technical support and product repairs. 4.1 Technical Support... -
Page 302: Product Repairs
Mississauga, Ontario Canada L5N 7J9 Tel: +1 800 387 8898 Option 2 - or - Direct: + 1 905 813 9900 Ext. 1999 Option 2 Fax: + 1 905 812 6304 Web: www.psionteklogix.com Psion Teklogix WORKABOUT PRO Regulatory & Warranty Guide... - Page 303 Psion Teklogix S.A. La Duranne 135 Rue Rene Descartes BP 421000 13591 Aix-En-Provence Cedex 3; France Tel: +33 4 42 90 88 09 Fax: +33 4 42 90 88 88 E-mail: tekeuro@psion.com Psion Teklogix WORKABOUT PRO Regulatory & Warranty Guide...
Need help?
Do you have a question about the Workabout PRO G2 and is the answer not in the manual?
Questions and answers