Table of Contents
Advertisement
Advertisement
Table of Contents
Troubleshooting

Related Manuals for Princeton Instruments PI-MAX 3 System


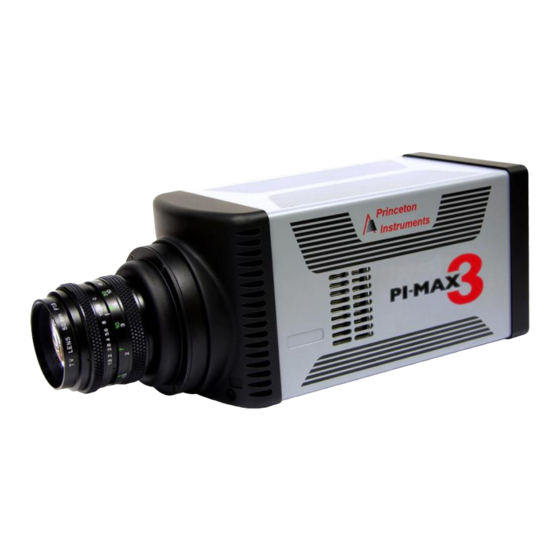
Summary of Contents for Princeton Instruments PI-MAX 3 System
- Page 1 4411-0129 Version 1.A September 8, 2010 *4411-0069*...
- Page 2 The information in this publication is believed to be accurate as of the publication release date. However, Princeton Instruments does not assume any responsibility for any consequences including any damages resulting from the use thereof. The information contained herein is subject to change without notice.
-
Page 3: Table Of Contents
Table of Contents Attention! ......................x Chapter 1 Introduction ..................11 PI-MAX3 System Components ..................11 Camera Head ......................11 Cable........................... 12 Summary of PI-MAX3 Data Acquisition ................. 12 Safety Information ......................14 Safety Related Symbols Used in This Manual ............14 Grounding and Safety .................... - Page 4 ® PI-MAX 3 System Manual Version 1.A Chapter 4 First Light ..................27 Introduction ........................27 Required Equipment and Cables ..................27 Cable Connections ......................27 Before Turning on the System ..................28 Turning on the System and Setting Up the Software ............28 Configuring the Software ....................
- Page 5 Table of Contents Alarm .......................... 54 Timing Mode ........................55 MCP Bracket Pulsing ......................55 Introduction ........................ 55 Bracket Pulsing in LIF Measurements ............... 56 Bracket Pulsing in Nanosecond Pump Probe Experiments ........56 Limitations of Bracket Pulse Gating ................57 Impact of Bracket Pulsing on Delay ................
- Page 6 ® PI-MAX 3 System Manual Version 1.A Inhibiting the Pulser during Readout ................87 Lens Performance ......................87 Throughput ......................... 87 Depth of Field ......................87 Baseline Signal ......................... 88 Temperature Lock ......................88 Intensifier Alarm ....................... 88 Chapter 10 System Component Descriptions ..........91 Introduction ........................
- Page 7 Table of Contents Appendix C Software ..................115 Introduction ........................115 Camera State ........................115 Main tab page (Experiment Setup on Acquisition menu) ..........116 Pulsers dialog box ......................117 SuperSYNCHRO dialog box ..................117 Appendix D Extender Bracket Kit ..............119 Appendix E Mounting and Focusing C-Mount and F-Mount Lenses ..
- Page 8 ® viii PI-MAX 3 System Manual Version 1.A Figures Figure 1. Typical PI-MAX3 System Components ............11 Figure 2. Major Components of the Intensifier-CCD ............12 Figure 3. PI-MAX3 System Diagram ................20 Figure 4. WinView Installation: Select Components dialog box ........24 Figure 5.
- Page 9 Table of Contents Figure 45. Trigger per Pulse .................... 73 Figure 46. Sequence with 3 Repetitions ................74 Figure 47. Timing Diagram: Sequence with 3 Repetitions and Trigger per Pulse ..74 Figure 48. System Diagram: DIF Operation ..............76 Figure 49.
-
Page 10: Attention
® PI-MAX 3 System Manual Version 1.A Attention! ® Intensified CCD detectors, such as the PI-MAX 3, when biased ON, can be irreparably WARNING damaged if continuously exposed to light levels higher than twice the A/D saturation level. Thus it is critical that you not establish conditions that could result in damage to the intensifier. -
Page 11: Chapter 1 Introduction
In operation, data acquired by the camera is routed to the computer for processing and display. The computer controls both the system configuration and data acquisition via software, of which Princeton Instruments WinView/32 is an example. PI-MAX3 System Components... -
Page 12: Cable
Manuals PI-MAX3 System manual and optional application software manual. Optional Application Software Princeton Instruments' WinView/32 or WinSpec/32. Summary of PI-MAX3 Data Acquisition Figure 2. Major Components of the Intensifier-CCD In the PI-MAX3 camera, the input image is focused onto the photocathode of an image intensifier tube. - Page 13 Chapter 1 Introduction the output of the image intensifier is translated to the input of the CCD at the same size. After being detected by the CCD, the image is read out to the Controller, where it is digitized and transferred to the computer for processing via a high-speed data link. The sequence below steps through the process by which photons are converted to data that can be displayed on a computer monitor.
-
Page 14: Safety Information
® PI-MAX 3 System Manual Version 1.A Safety Information Safety Related Symbols Used in This Manual Caution! The use of this symbol on equipment indicates that one or more nearby items should not be operated without first consulting the manual. The same symbol appears in the manual adjacent to the text that discusses the hardware item(s) in question. -
Page 15: Audible Alarm
Chapter 1 Introduction Audible Alarm To reduce the risk of camera damage, the PI-MAX3 camera is equipped with an audible alarm in the camera head, activated when the intensity of light falling on the image intensifier exceeds a preset threshold. While the alarm is sounding, the photocathode is disabled. -
Page 16: Cleaning And Maintenance
Repairs Save the original packing materials. Because the PI-MAX3 system contains no user- serviceable parts, repairs must be done by Princeton Instruments. Should your system need repair, contact Princeton Instruments customer support for instructions (telephone, e-mail, and address information are provided on page 146 of this manual). -
Page 17: Manual Organization
Chapter 1 Introduction Manual Organization This manual provides the user with all the information needed to install a PI-MAX3 Intensified CCD camera and place it in operation. Topics covered include a detailed description of the camera, installation and setup, first time data acquisition, tips and tricks, microscopy applications, temperature control and more. - Page 18 Appendix H, Glossary provides definitions of commonly used words and terms related to intensified camera characteristics and usage. Declarations of Conformity contains the Declarations of Conformity for PI-MAX3 systems. Warranty & Service details the warranties for Princeton Instruments equipment and software.
-
Page 19: Chapter 2 Installation Overview
Chapter 2 Installation Overview The list and diagrams below briefly describe the sequence of actions required to install your system and prepare to gather data. Refer to the indicated references for detailed information. Action Reference 1. If the system components have not already been unpacked, unpack Chapter 3 System Setup, them and inspect their carton(s) and the system components for in- page 21... -
Page 20: Figure 3. Pi-Max3 System Diagram
® PI-MAX 3 System Manual Version 1.A Action Reference 11. Verify the hardware setup information or change the parameters, as WinView/32 or appropriate. Enter the pulser information. Enter the experiment setup WinSpec/32 manual parameters. If using a spectrograph, enter that setup information 12. -
Page 21: Chapter 3 System Setup
During unpacking, check the system components for possible signs of shipping damage. If there are any, notify Princeton Instruments and file a claim with the carrier. Be sure to save the shipping carton for inspection by the carrier. If damage is not apparent but system specifications cannot be achieved, internal damage may have occurred in shipment. -
Page 22: System Requirements
(C-mount, F-mount, and spectroscopy mounts are supplied, one of which has been factory installed). Computer Interface: GiGE Computer: Can be purchased from Princeton Instruments or provided by user. WinView/WinSpec or Monarch CD-ROM User Manuals ... -
Page 23: Power
Chapter 3 System Setup Power Camera: The PI-MAX3 camera receives its power from the self-switching power supply which in turn plugs into a source of AC power. Power Supply: 100-240V AC, ~300W, 50-60 Hz, auto-switching. The plug on the power cord supplied with the system should be compatible with the line-voltage outlets in common use in the region to which the system is shipped. -
Page 24: Spectroscopy Applications
® PI-MAX 3 System Manual Version 1.A In the case of cameras equipped with F-mount, do not mount the camera in the nose-up operation where the lens mount would be required to hold the camera’s weight. The WARNING F-mount is not designed to sustain the weight of the camera in this orientation and the camera could pull free. -
Page 25: Making The Camera-Circulator Connections
Chapter 3 System Setup 3. Reboot the computer. 4. At bootup, Windows will detect the GigE card. Making the Camera-Circulator Connections For liquid-cooled cameras, the CoolCUBE circulator provides a vibration-free method of heat removal. 1. Make sure the camera and the circulator power switches are turned off. -
Page 26: Making The Camera To Dry Nitrogen Source Connections
ON. 2. Run the WinX application. The Camera Detection wizard will automatically run if this is the first time you have installed a Princeton Instruments WinX application (WinView/32, WinSpec/32, or WinXTest/32) and a supported camera. Otherwise, if you installing a new camera type, click on the Launch Camera Detection Wizard…... -
Page 27: Chapter 4 First Light
The equipment and cables listed below are required to set up and run the PI-MAX3 camera system in accordance with the procedure in this chapter. Princeton Instruments PI-MAX3 camera with C-mount adapter. User-supplied C-mount lens (with smallest aperture of f/16 or f/22). -
Page 28: Before Turning On The System
® PI-MAX 3 System Manual Version 1.A Before Turning on the System 1. Set the PI-MAX3 I.I.T. On/Off switch to OFF. 2. Confirm that only room light will be present. 3. If a C-mount adapter is not on the camera, refer to “Appendix F C-, F-, and Spectroscopy-Mount Adapters”, page 123, for changeover instructions. -
Page 29: Acquisition Menu
Chapter 4 First Light 4. On the Gating tab page, select Repetitive and then click on the Setup… button. 5. On the Repetitive Gating Setup dialog, enter the following settings: Gate Width: 50 ms Gate Delay: 10 ns Gates per Exposure: 1 Repeat Width/Delay: 1. -
Page 30: Initial Data Acquisition
® PI-MAX 3 System Manual Version 1.A 4. If you are running WinSpec, select Imaging Mode on the ROI Setup tab page. 5. Click on OK to execute the selections and close the dialog box. Initial Data Acquisition 1. Verify that room or ambient lighting is subdued. 2. -
Page 31: Focusing
Chapter 4 First Light 5. Now that you have confirmed that the PI-MAX3 can acquire an image, set the PI-MAX3 I.I.T. switch to OFF. 6. Close the WinX application. 7. If you do not want to use the PI-MAX3 with the lens, replace the C-mount lens with the screw-in dust cover provided with the C-mount adapter. - Page 32 ® PI-MAX 3 System Manual Version 1.A This page intentionally left blank.
-
Page 33: Chapter 5 General Operation Factors
Chapter 5 General Operation Factors Introduction The purpose of the First Light chapter was to help you get your system up and running so you could verify that it worked. The step-by-step procedures provided the appropriate settings but did not explain why those settings were selected. The information in this chapter covers general operation factors that apply to Gate Mode operation of the PI-MAX3 system. -
Page 34: System On/Off Sequences
® PI-MAX 3 System Manual Version 1.A System On/Off Sequences The following on/off sequences are specific to the Ethernet interface: 1. The PI-MAX3 power supply must be turned on before the WinX application software (WinView/32 or WinSpec/32) is opened to ensure communication between the controller and the computer. -
Page 35: Clean Cycles
If you observe a sudden change in the baseline signal you may have excessive humidity WARNING! in the camera's CCD enclosure. Immediately turn off the controller. Then, contact Princeton Instruments Customer Support for further instructions. See page 146 for contact information. Clean Cycles As stated before, dark charge integrates on the array whenever the camera is on, whether or not data acquisition is occurring. -
Page 36: Phosphor Decay Time
In addition, it will be possible to achieve temperature lock at lower temperatures, typically three or four degrees lower than would be possible with air- cooling alone. Use the Princeton Instruments CoolCUBE coolant circulator. It is a closed circulation system that depends on ambient air-cooling of the circulating coolant. -
Page 37: Setting The Temperature
Chapter 5 General Operation Factors Cooling performance can be enhanced by circulating water with a temperature below WARNING laboratory ambient but this approach will increase the risk of condensation inside the PI-MAX3. This condensation can cause catastrophic failure of the camera electronics. Any resulting damage would be considered to have resulted from improper operation and will not be covered by the Warranty. -
Page 38: Exposure With An Image Intensifier
® PI-MAX 3 System Manual Version 1.A Exposure with an Image Intensifier PI-MAX3 cameras use an image intensifier both to gate light on and off and to greatly increase the brightness of the image. In these cameras the image intensifier detects and amplifies the light, and the CCD is used for readout. -
Page 39: Readout Of The Array
Chapter 5 General Operation Factors Corrections tab. Then, acquire the image, save the raw image data to disk, and, via the Image (or Spectra) Math function (accessed from the Process menu), subtract the background file data from the raw image data. The subsequent data can then be saved to a separate file. -
Page 40: Figure 10. Non-Overlapped Mode Exposure And Readout
® PI-MAX 3 System Manual Version 1.A and from there to the output node and off of the array for further processing. The process continues until all charges have been completely transferred out of the array. The imaging cells are electronically switched off and do not accumulate any charge as the readout takes place. -
Page 41: Table 1. Readout Rates For Kodak 1024 × 1024 Array At 16 Mhz Dual Port
Chapter 5 General Operation Factors Readout Rate for Interline Below are the equations that determine the rate at which the CCD is read out. Tables of values for CCDs supported at the time of the printing of this manual also appear below. Assuming the shutter selection is None , the time needed to take an entire frame at full resolution in non-overlapped timing mode is: where... -
Page 42: Full Frame Ccd Readout
® PI-MAX 3 System Manual Version 1.A Full Frame CCD Readout The PI-MAX3:1024x256 camera uses a full frame CCD for data acquisition. The upper left drawing in Figure 11 represents a CCD after exposure but before the beginning of readout. The capital letters represent different amounts of charge, including both signal and dark charge. -
Page 43: Binned Readout (Hardware Binning)
Chapter 5 General Operation Factors where is the smaller dimension of the CCD is the larger dimension of the CCD is the time needed to shift one pixel out of the shift register is the time needed to digitize a pixel is the time needed to shift one line into the shift register A subsection of the CCD (number of horizontal pixels must be divisible by 4) can be read out at full resolution, sometimes dramatically increasing the readout rate while retaining... - Page 44 ® PI-MAX 3 System Manual Version 1.A Limitations of hardware binning include: Lowered resolution because charge from adjacent pixels is summed into a super pixel. Increased possibility to blooming. Because shift register pixels typically hold only twice as much charge as image pixels, the binning of large sections may result in saturation and spilling of charge back into the image area ...
-
Page 45: Figure 12. 2 × 2 Binning For Interline Ccd - Dual Port Readout
Chapter 5 General Operation Factors Figure 12. 2 × 2 Binning for Interline CCD - Dual Port Readout Figure 13. 2 × 2 Binning for Full Frame CCD - Single Port Readout... -
Page 46: Figure 14. Experiment Setup|Roi Setup Tab
® PI-MAX 3 System Manual Version 1.A Partial Frame ROI Binning When setting up a partial frame ROI (regardless of the array type – full frame or interline), keep in mind that for the PI-MAX3 the following constraint applies: the number of pixels in the serial (horizontal) direction must be evenly divisible by 4, even after binning. -
Page 47: Software Binning
Chapter 5 General Operation Factors Software Binning Software binning is a software-averaging post-acquisition process that can be performed on either unbinned or hardware-binned data. This type of binning can improve the S/N ratio by as much as the square root of the number of binned pixels. Unfortunately, with a high number of scans (i.e., above 100), camera 1/f noise may reduce the actual S/N ratio to slightly below this theoretical value. -
Page 48: Figure 17. Comparison Of Readout, Shutter, And Acquiring Logic Output Levels
® PI-MAX 3 System Manual Version 1.A is halted. If a specific number of frames have been programmed, it remains high until all have been taken and then returns low. Figure 17 assumes 3 frames have been programmed. Image Shift: This level is at a logic high while the image is being shifted under the mask. -
Page 49: Experiment Setup|Main
Chapter 5 General Operation Factors Experiment Setup|Main Typically, the first experiment setup parameters are selected/entered on the Experiment Setup|Main tab. These parameters determine such things as how long the signal of interest will be allowed to integrate on the CCD, the number of separate frames (denoted as images or spectra) that will be acquired, how much of the CCD will be used to acquired data, the intensifier gain, and... -
Page 50: Intensifier Mode
® PI-MAX 3 System Manual Version 1.A Note: The intensifier gain also affects the Equivalent Background Illumination (EBI) of the intensifier. One result of this is that, to properly perform background subtraction, a new background must be taken whenever the intensifier gain is changed. Intensifier Mode The Intensifier Mode selection determines whether the intensifier will be biased on or off by the defined pulser gate timing (Gate Mode) or it will be continuously biased off until... -
Page 51: Delay Time
Chapter 5 General Operation Factors priority, so the image on the screen may lag several images behind. A second drawback is that a data overrun may occur if the number of images collected exceeds the amount of allocated RAM or if the computer cannot keep up with the data rate. Safe Mode operation is primarily useful for experiment setup, including alignment and focusing, when it is necessary to have the most current image displayed on the screen. -
Page 52: Figure 20. Safe Mode And Fast Mode Operation
® PI-MAX 3 System Manual Version 1.A Figure 20. Safe Mode and Fast Mode Operation... -
Page 53: Chapter 6 Gated Operation
Chapter 6 Gated Operation Introduction This chapter discusses gated operation with the SuperSYNCHRO timing generator and aspects of operation of the PI-MAX3 not covered in Chapter 4, First Light. We additionally suggest that you review Chapter 8, Tips and Tricks, which contains information that should prove helpful in getting good results in more complex measurements. -
Page 54: Precautionary Measures
® PI-MAX 3 System Manual Version 1.A Precautionary Measures Intensified CCD detectors, such as the PI-MAX3, when biased ON, can be irreparably WARNING damaged if continuously exposed to light levels higher than twice the A/D saturation level. Thus it is critical that you not establish conditions that could result in damage to the intensifier. -
Page 55: Timing Mode
Chapter 6 Gated Operation Timing Mode When you are in Gate Mode , the internal timing generator will only operate using Internal Sync timing. This timing mode initiates a readout cycle after each internal timing generated pulse ensemble. The handshakes that prevent a readout from occurring while the timing generator is busy and that prevent the timing generator from pulsing the photocathode ON while a readout cycle is in progress are performed within the camera. -
Page 56: Bracket Pulsing In Lif Measurements
® PI-MAX 3 System Manual Version 1.A MCP bracket pulsing keeps the MCP biased OFF except for an interval that brackets the timing of the photocathode gate as shown in Figure 21. For emitted photoelectrons to be accelerated in the MCP, the MCP must be biased ON. In conventional intensified cameras, the MCP is biased ON continuously. -
Page 57: Limitations Of Bracket Pulse Gating
Chapter 6 Gated Operation values depends critically on the lack of stray light contamination, particularly at moderate to high optical density levels. Selecting a 5 ns time window out of a 10 µs pulse is already one part in 2,000. If UV leakage gives an on/off ratio of only 20,000:1, contamination could be 10% of higher. -
Page 58: Setup
® PI-MAX 3 System Manual Version 1.A Setup MCP Bracket pulse implementation is accomplished by selecting Bracket Pulsing ON from the host software. Figure 22, is a timing diagram for bracket pulsing. Insertion delay between trigger and T0 is ~ 12 ns. Insertion delay to photocathode gate is 35 ns (i.e., the minimum delay in bracket mode is 35 ns): this delay allows the MCP to be up to “full gain”... -
Page 59: Procedure For Setting Up And Performing A Swept Gate Experiment (Fixed Width, Variable Delay)
Chapter 6 Gated Operation Figure 23 illustrates the kinds of experiments that can be performed with a PI-MAX3 detector. Of the many gated measurements that can be performed with a PI-MAX3, most will fall in one of the following categories: ... -
Page 60: Figure 24. Experiment Is Master Clock: Hardware Setup And Timing Diagram
® PI-MAX 3 System Manual Version 1.A Figure 24. Experiment is Master Clock: Hardware Setup and Timing Diagram... -
Page 61: Figure 25. Hardware Setup: Controller/ Camera Tab Page
Chapter 6 Gated Operation Experiment as Master Clock The following procedure uses the experiment as the master clock and therefore refers to connections as shown in Figure 24. 1. Switch on the equipment and start the WinX application software (Ver. 2.5.25 or higher). -
Page 62: Figure 26. Define Spectrograph And Install/Remove Spectrographs Dialogs
® PI-MAX 3 System Manual Version 1.A Figure 26. Define Spectrograph and Install/Remove Spectrographs dialogs 4. After you have installed and defined the spectrograph, move the grating to the desired wavelength. Figure 27. Move Spectrograph dialog... -
Page 63: Figure 28. Experiment Setup: Main And Timing Tab Pages
Chapter 6 Gated Operation 5. At this point, it is a good practice to make sure that the camera is focused by running it in “Internal Trigger” mode. This requires that you set the experiment parameters on the Experiment Setup tab pages (refer to Figure 28 and Figure 29) and on the SuperSYNCHRO Trigger tab page (Figure 30). -
Page 64: Figure 30. Supersynchro: Trigger Tab Page
® PI-MAX 3 System Manual Version 1.A Figure 30. SuperSYNCHRO: Trigger tab page 6. After setting the parameters and making sure the ambient light level is low, click on Focus . 7. If the readout mode is currently set to “Use Region of Interest” on the Main tab page, the camera will start acquiring data immediately. -
Page 65: Figure 32. Sequential Gating Setup And Width/Delay Sequence Dialog Boxes
Chapter 6 Gated Operation c. Click on "Setup…" and define the pulse sequence on the Sequential Gating Setup dialog box. See Figure 32. Enter the number of spectra to be acquired (in this case, 41). Select "Fixed Increment". ... -
Page 66: Figure 33. Trigger Out Tab Page
® PI-MAX 3 System Manual Version 1.A Figure 33. Trigger Out tab page e. Click on OK to program the SuperSYNCHRO. 10. Set up the experiment parameters from the Experiment Setup dialog box. On the Timing tab page, change the timing as shown in Figure 34. On the Main tab page, enter the Gain value and switch to Gate Mode . -
Page 67: Figure 35. Experiment Results In 3-D
Chapter 6 Gated Operation 11. After verifying all connections and equipment readiness, click on Acquire to begin acquiring the spectra (or images). 12. Figure 35 displays the 3-D graph for a “Sequential-Repetitive" experiment with Fixed Width and Variable Delay (as set in Figure 31 and Figure 32). Figure 35. -
Page 68: Procedure For Setting Up And Performing A Single Shot Experiment
® PI-MAX 3 System Manual Version 1.A Figure 36. PI-MAX3 SyncMASTER is Master Clock: Hardware Setup and Timing Diagram Procedure for Setting up and Performing a Single Shot Experiment A single shot experiment offers only one chance to capture an event. As in any gated experiment, the "time budget"... -
Page 69: Figure 37. Single Shot: Hardware Setup
Chapter 6 Gated Operation Figure 37. Single Shot: Hardware Setup After setting up the appropriate hardware, as shown in Figure 37, default values for "Cleans and Skips" are loaded (Figure 38). If the CCD has to wait more than a few seconds for the external trigger, it is advisable to increase the number of cleans. -
Page 70: Figure 39. Experiment Setup: Gain Selected
® PI-MAX 3 System Manual Version 1.A Figure 39. Experiment Setup: Gain Selected Gate width and gate delay are set in such a way that the intensifier is gated ON during the entire event (in this case the event is a 60 ns fluorescence). Figure 40. -
Page 71: Procedure For Setting Up And Performing A Swept Gate Experiment (Variable Width, Variable Delay)
Chapter 6 Gated Operation Figure 42. Single Shot Result: Fluorescence Spot, 100 ns Width, 10 ns Delay, Binned Vertically Procedure for Setting up and Performing a Swept Gate Experiment (Variable Width, Variable Delay): The sequence of steps for a Swept Gate experiment with variable width and delay is similar to the Swept Gate experiment with fixed width and variable delay but with the following exception: ... - Page 72 ® PI-MAX 3 System Manual Version 1.A This page intentionally left blank.
-
Page 73: Chapter 7 Timing Generator Pulses And Sequences
Chapter 7 Timing Generator Pulses and Sequences Pulse Set Description A pulse set includes the following signals: MCP_GATE, START, STOP, AUX1, and SyncMASTER. START and STOP define the photocathode gate pulse. See Figure 44. Note: MCP GATE, START, and STOP are not visible to the user and are included for information purposes only. -
Page 74: Single Sequence
® PI-MAX 3 System Manual Version 1.A Single Sequence A sequence is the repetition of one pulse set “X” number of times. Figure 46 shows a sequence with the pulse set repeated three (3) times. Figure 46. Sequence with 3 Repetitions The EXPOSE signal remains high for the duration of the sequence and goes low approximately 15 ns after sequence completion. -
Page 75: Chapter 8 Dual Image Feature (Dif)
Chapter 8 Dual Image Feature (DIF) Introduction The purpose of PI-MAX3 DIF is to acquire a pair of gated images in rapid succession. The time between frames can be as short as 2 µs (limit imposed by P46 phosphor decay time) with exposure times as short as 5 ns. -
Page 76: Timing Modes
® PI-MAX 3 System Manual Version 1.A Timing Modes In WinView and WinSpec, the timing modes available in the Acquisition|Experiment Setup…|Timing tab are different from those in standard intensified systems. The available timing modes are: Single Trig. Mode: two shot, one trigger for both shots. Dual Trig. -
Page 77: Figure 49. Dif Operation: Single Trigger Timing Diagram
Chapter 8 Dual Image Feature (DIF) Single Trigger Mode Figure 49. DIF Operation: Single Trigger Timing Diagram 1. The first requirement is that the PI-MAX3 camera be aligned and focused on the area of interest in the experiment. This is best accomplished while the PI-MAX3 is operating in Interline mode (i.e., before switching to DIF mode). -
Page 78: Figure 51. Experiment Setup|Main And Timing Tab
® PI-MAX 3 System Manual Version 1.A 3. The PI-MAX3 must be set to Gate Mode for the intensifier to operate properly. Either click on the Gate mode button on the Custom Toolbar or select Gate Mode on the Acquisition|Experiment Setup…|Main tab. -
Page 79: Figure 55. Trigger In And Trigger Out Tabs
Chapter 8 Dual Image Feature (DIF) d. If required, on the Trigger Out tab, set up output triggers. e. At the bottom of the SuperSYNCHRO dialog, click OK to download the gating sequence to the SuperSYNCHRO. Figure 55. Trigger In and Trigger Out tabs 6. -
Page 80: Figure 56. Dif Operation: Dual Trigger Timing Diagram
® PI-MAX 3 System Manual Version 1.A Dual Trigger Mode Figure 56. DIF Operation: Dual Trigger Timing Diagram 1. The first requirement is that the PI-MAX3 camera be aligned and focused on the area of interest in the experiment. This is best accomplished while the PI-MAX3 is operating in Interline mode (i.e., before switching to DIF mode). -
Page 81: Figure 58. Experiment Setup|Main And Timing Tabs
Chapter 8 Dual Image Feature (DIF) 3. The PI-MAX3 must be set to Gate Mode for the intensifier to operate properly. Either click on the Gate mode button on the Custom Toolbar or select Gate Mode on the Acquisition|Experiment Setup…|Main tab. 4. -
Page 82: Tips And Tricks
® PI-MAX 3 System Manual Version 1.A Figure 62. Trigger In and Trigger Out tabs 6. When the experiment is ready, click on the ACQ button or select Acquire on the Acquisition menu to start the image acquisition. Tips and Tricks Experiments using the DIF feature of the PI-MAX3 can be complex, and timing of the events is usually rather exacting. -
Page 83: Chapter 9 Tips And Tricks
Overexposure Protection Image intensified detectors such as the PI-MAX3 can be destroyed if exposed to WARNING excessive light levels. Princeton Instruments cannot take responsibility for damage due to misuse. Intensified detectors must not be continuously exposed to high-level radiation ( 10 foot candles). -
Page 84: Time Budgets
® PI-MAX 3 System Manual Version 1.A Time Budgets A time budget is a listing of all the delays in the system that affect coincidence of the signal and gate at the camera. Given a system that, in addition to the PI-MAX3 and an internal timing generator, contained a low-jitter pulsed laser triggered from an external timer and an external trigger source that is also triggering the pulse generator, a time budget for this system might appear as follows. -
Page 85: Adjusting The Signal Delay
Chapter 9 Tips and Tricks beam at the sample position. Note that the indicated time would have to be corrected for the insertion delay of the path from the pellicle mirror to the oscilloscope, including the insertion time of the PIN diode, which might be on the order of the 10 ns. This correction would have to be compared with the delays that would normally exist between the sample position and the detector to determine the actual time the signal would arrive at the detector. -
Page 86: Lasers
® PI-MAX 3 System Manual Version 1.A 3. Reduce the delay until the signal reappears. 4. Then begin reducing the gate width (not the delay). As the gate is narrowed, the amount of EBI generated will decrease so the signal-to-noise ratio should improve. When the point is reached where the gate becomes narrower than the signal being measured, the observed signal data will degrade. -
Page 87: Jitter
Chapter 9 Tips and Tricks trigger the Timing Generator, it may not be necessary to use mirrors or fiber-optic cable to delay the laser pulse. If there is no Pre-Trigger, then taking steps to delay the arrival of the laser pulse at the sample would likely be necessary. The easiest solution would be to insert electrical delay between the external trigger source and the laser. -
Page 88: Baseline Signal
In addition, a small offset is built in to prevent noise or pattern from going below zero. Every device has been thoroughly tested to ensure its compliance with Princeton Instruments' demanding specifications. - Page 89 Chapter 9 Tips and Tricks illumination level has been lowered. If the alarm sounds repetitively even when the illumination level is adequately low, select Safe Mode in the WinX application or shut the system down and contact the factory for guidance.
- Page 90 ® PI-MAX 3 System Manual Version 1.A This page intentionally left blank.
-
Page 91: Chapter 10 System Component Descriptions
Chapter 10 System Component Descriptions Introduction PI-MAX3 is an advanced intensified CCD (ICCD) camera system used for low light and time resolved applications. It consists of an imaging (square) or spectroscopy (rectangular) format CCD coupled to Gen II (PI-MAX3 RB, SB, UV) or Filmless Gen III (PI-MAX3 HQ) intensifiers. - Page 92 Coolant ports: Two standard ¼ size barbed brass fittings for circulating coolant are located on the back panel. Either port may be used as the inlet. The coolant cannot be chilled. Use the Princeton Instruments CoolCUBE coolant circulator. See “Making the Camera-Circulator Connections,” page 25 and "Temperature Control,"...
-
Page 93: Interface Card
Chapter 10 System Component Descriptions Thermoelectric Cooler: The thermoelectric (TE) cooler is mounted to the heat removal block. With air-cooling alone, at an ambient temperature of 25C, temperature lock at -25 will generally occur within ten to fifteen minutes. Note that the exact cooling performance is a function of the CCD array installed. -
Page 94: Tubing
PI-MAX3. This tubing is for connecting the PI-MAX3 to a dry nitrogen source for cooling the photocathode. Application Software The Princeton Instruments WinView/32 or WinSpec/32 software package provides comprehensive image acquisition, display, processing, and archiving functions so you can perform complete data acquisition and analysis without having to rely upon third- party software. -
Page 95: Chapter 11 Troubleshooting
Chapter 11 Troubleshooting CAUTION! If you observe a sudden change in the baseline signal you may have excessive humidity in the CCD enclosure of the camera. Contact the factory for information on having the camera checked or repaired. WARNING! Do not attach or remove any cables while the camera system is powered on. Introduction The following issues have corresponding troubleshooting sections in this chapter. -
Page 96: Alarm Sounds Sporadically
An excess humidity condition should be corrected promptly or permanent damage not covered by the Warranty could occur. Have the unit serviced by Princeton Instruments or an authorized service facility of Princeton Instruments. Camera Is Not Responding If this message pops up when you click on OK after selecting the Interface Type during Hardware Setup (under the WinX Setup menu), the system has not been able to communicate with the camera. -
Page 97: Camera Stops Working
Chapter 11 Troubleshooting WinSpec/32 or WinView/32 with the GigE interface component selected.. Be sure to deselect the interface component that does not apply to your system. Camera Stops Working Problems with the host computer system or software may have side effects that appear to be hardware problems. -
Page 98: Gradual Deterioration Of Cooling Capability
In a few Ethernet Network is not accessible When the Princeton Instruments software is installed, all Intel Pro/1000 interface card drivers found on the host computer are updated with the Intel Pro/1000 Grabber Adapter (Vision High-Performance IP Device) driver provided by Pleora Technologies, Inc. -
Page 99: Excessive Readout Noise
300 ADU. If these types of spikes occur, especially after the camera has been in use for an extended period, turn off the system immediately. Have the unit serviced by Princeton Instruments or an authorized service facility of Princeton Instruments. - Page 100 ® PI-MAX 3 System Manual Version 1.A This page intentionally left blank.
-
Page 101: Appendix A Specifications
30 eˉrms @ 16 MHz digitization 15 eˉrms @ 1 MHz digitization 35 eˉrms @ 32 MHz digitization 22 eˉrms @ 2 MHz digitization *Contact Princeton Instruments for P46 and P47 phosphor availability. Table 5. CCD Specifications Gating: Jitter: ~35 ps RMS... - Page 102 ® PI-MAX 3 System Manual Version 1.A Digital Conversion: 16 bits Image Intensifier: 18 mm or 25 mm Method of Coupling: fiber optic Mounts: Three different interchangeable mounts/adapters are available so that C-mount lenses, F-mount lenses, and spectrograph can all be readily accommodated. Changeover from one mounting system to another can be accomplished in moments with no adjustments required.
- Page 103 Appendix A Specifications is low and the signal is built up over a large number of exposures or over a long exposure. Poor linearity is observed when one attempts to get large signal amplitude from a single short exposure. This is a general property of MCP image intensifiers, not just of PI ICCDs.
-
Page 104: Figure 65. Aux I/O Connector Pinout
® PI-MAX 3 System Manual Version 1.A LOGIC OUT: 0 to +3.3V programmable logic level output (TTL-compatible). The output can be programmed via software as ACQUIRING, IMAGE SHIFT, LOGIC 1, READ OUT, SHUTTER, or WAIT FOR TRIGGER signal. For detailed definition of each output, please see “Logic Out Control” (page 47). The output can also be inverted through software. -
Page 105: Table 7. Aux I/O Connector Pinout And Signal Description
Appendix A Specifications (Pin 2), SyncMASTER1 Output (Pin 7), General Purpose Input 0 (Pin 8), and SyncMASTER2 Output (Pin 23) is provided with the PI-MAX3 camera. PORT # PIN # SIGNAL Description T0 Output: LVCMOS FPGA output with limited ESD protection, goes high at T0. -
Page 106: Internal Pulser
® PI-MAX 3 System Manual Version 1.A PORT # PIN # SIGNAL Description GND: System chassis ground. Any external circuitry intended to interface with the trigger control signals must reference this ground connection. (NOT USED) GND: System chassis ground. Any external circuitry intended to interface with the trigger control signals must reference this ground connection. -
Page 107: Intensifier Quantum Efficiency
Appendix A Specifications Filmless Gen III 18 mm: < 5 ns FWHM Slow Gate 18 mm: ~50 ns FWHM. Contact factory or Princeton Instruments representative. Slow Gate 25 mm: ~100 ns FWHM. Contact factory or Princeton Instruments representative. Propagation Delay: ≤ 25 ns (35 ns with bracket). -
Page 108: Coolcube Ii Circulator
® PI-MAX 3 System Manual Version 1.A CoolCUBE Circulator Closed loop system Hoses: CoolCUBE and PI-MAX3Compatible 1/4" ID, with no-drip quick disconnects at the circulator ends and CPC quick disconnects at the camera ends. Requires PI kit. Coolant: 50:50 ethylene glycol and water at 23°C Dimensions: Refer to Appendix B, "Outline Drawings", page 113 Circulator Weight (Filled): 6.0 lbs (2.7 kg) Hose Weight (Filled): 3.0 lbs (1.4 kg) per hose... -
Page 109: Appendix B Outline Drawings
Appendix B Outline Drawings Note: Dimensions are in inches and [mm] unless otherwise noted. PI-MAX3 Figure 67. Outline Drawing: PI-MAX3 with C-mount Adapter... -
Page 110: Figure 68. Outline Drawing: Pi-Max3 With F-Mount Adapter
® PI-MAX 3 System Manual Version 1.A Figure 68. Outline Drawing: PI-MAX3 with F-mount Adapter... -
Page 111: Figure 69. Outline Drawing: Pi-Max3 With Spectroscopy-Mount Adapter
Appendix B Outline Drawings Figure 69. Outline Drawing: PI-MAX3 with Spectroscopy-mount Adapter... -
Page 112: Pi-Max3 Power Supply
® PI-MAX 3 System Manual Version 1.A PI-MAX3 Power Supply Figure 70. Outline Drawing: PI-MAX3 Power Supply... -
Page 113: Coolcube Ii Circulator
Appendix B Outline Drawings CoolCUBE Circulator Figure 71. Outline Drawing: CoolCUBE Circulator... - Page 114 ® PI-MAX 3 System Manual Version 1.A This page intentionally left blank.
-
Page 115: Appendix C Software
Introduction The PI-MAX3 camera requires software control and can be operated with either of two Princeton Instruments WinX application programs, WinView/32 or WinSpec/32, or by the Princeton Instruments Monarch application program. The software manuals discuss control of the PI-MAX3 camera and the internal timing generator (referred to as the SuperSYNCHRO) in detail. -
Page 116: Main Tab Page (Experiment Setup On Acquisition Menu)
® PI-MAX 3 System Manual Version 1.A Main tab page (Experiment Setup on Acquisition menu) Figure 73. Main tab page with PI-MAX3 camera The Experiment Setup Main tab page is used to specify the most essential parameters. These include the Exposure Time, Number of Images/Spectra, Number of Accumulations and choice of Full Chip or Region of Interest readout. -
Page 117: Pulsers Dialog Box
Appendix C Software Pulsers dialog box Figure 74. Pulsers dialog box The Pulsers dialog box, which opens when Pulsers is selected on the Setup menu, allows the user to choose whether or not the software is configured to run the SuperSYNCHRO Timing Generator. - Page 118 ® PI-MAX 3 System Manual Version 1.A When Internal Trigger is selected, the frequency of the SuperSYNCHRO signal can be entered in the Frequency field. This signal will be continuously output as long as the Enable SyncMASTER box is checked on the Trigger Out tab. The choices provided by the Trigger In , Gating , and Trigger Out tab pages are described in the WinX application software Help topics.
-
Page 119: Appendix D Extender Bracket Kit
Appendix D Extender Bracket Kit An Extender Bracket kit is shipped with each PI-MAX3.After securing the bracket at the rear of the PI-MAX3, you can mount the PI-MAX3 to any laboratory table with either 25 mm or 1 inch hole spacing. To secure the plate to the camera: 1. - Page 120 ® PI-MAX 3 System Manual Version 1.A This page intentionally left blank.
-
Page 121: Appendix E Mounting And Focusing C-Mount And F-Mount Lenses
Appendix E Mounting and Focusing C-Mount and F-Mount Lenses Mounting the Lens C-mount lenses simply screw clockwise into the threaded lens mount at the front of the camera. In mounting a C-mount lens, tighten it securely by hand (no tools). To mount an F-mount lens on the camera (Figure 77), locate the large indicator dot on the side of the lens. -
Page 122: Focusing
® PI-MAX 3 System Manual Version 1.A Should the camera be mounted in the nose-up position beneath a table, take care to protect the mounting components from lateral stresses, such as might occur should someone accidentally bump the camera with a knee while working at the table. One solution to this problem would be to install a barrier between the camera and operator to prevent any accidental contact. -
Page 123: Appendix F C-, F-, And Spectroscopy-Mount Adapters
Appendix F C-, F-, and Spectroscopy-Mount Adapters Among the items in the accessory kit shipped with the PI-MAX3 are two adapter kits (C-mount, F-mount, and spectroscopy mounts are supplied, one of which has been factory installed on the camera) and a double-ended screwdriver with magnet top. Part Number Contents C-Mount Adapter... - Page 124 ® PI-MAX 3 System Manual Version 1.A Note: Each adapter has a preset optical distance from the mounting face to the image plane. The distance varies from one adapter type to another and is explained on the PI-MAX3 outline drawings. For quick reference, the distances are given below. C-Mount: Mounting face to image plane is factory preset to an optical distance of 0.690”...
-
Page 125: Appendix G Spectrograph Adapters
Spectrograph Adapters Introduction Princeton Instruments offers a variety of spectrograph adapters for mounting a PI-MAX3 to a spectrograph: Acton (adapters are available for all Acton models), the ISA HR320, ISA HR640, Chromex 250IS, and most instruments that are 1 meter or longer. (If you are not sure of the depth of the exit focal plane, contact the spectrograph manufacturer.) -
Page 126: Table 8. Spectrograph Adapters
® PI-MAX 3 System Manual Version 1.A Hint: Overhead fluorescent lights produce a mercury spectrum. Use a white card tilted at 45 degrees in front of the entrance slit to reflect overhead light into the spectrograph. Select 435.833 as the spectral line. 3. -
Page 127: Acton (Sliding Tube)
Appendix G Spectroscopy-Mount and Spectrograph Adapters Acton (Sliding Tube) Description Screw, 10-32 1/2, Hex Head, Stainless Steel 2826-0120 Assembly Instructions 1. Make sure that the shipping cover has been removed from the detector port on the spectrograph. 2. Loosen the setscrews holding the sliding tube in the spectrograph and remove the tube. -
Page 128: Acton (C-Mount Adapter)
® PI-MAX 3 System Manual Version 1.A Acton (C-Mount Adapter) Description 1 8401-071-01 Adapter Plate 1 8401-071-02 Threaded C-Mount Adapter Screw, 10-32 1/4, Button Head Allen Hex, Stainless Steel 2826-0127 Assembly Instructions 1. Make sure that the shipping cover has been removed from the detector port on the spectrograph. -
Page 129: Chromex 250 Is
Appendix G Spectroscopy-Mount and Spectrograph Adapters Chromex 250 IS Description 2517-0901 Plate, Adapter-Female Screw, 10-32 3/4, Socket Head, Stainless Steel, Hex, Black 2826-0283 2518-0227 Adapter-Male, ICCD Diode Array Screw, 10-32 1/2, Hex Head, Stainless Steel 2826-0120 Set Screw, 10-32 1/4, Stainless Steel, Allen Hex, Nylon Tip 2826-0082 Assembly Instructions 1. -
Page 130: Isa Hr 320
® PI-MAX 3 System Manual Version 1.A ISA HR 320 Description 2518-0044 Flange-Female, Mechanical, ISA, HR320 Screw, 10-32 7/16, Socket Head Cap Hex, Stainless Steel 2826-0053 2518-0045 Flange-Male, Detector Mate Screw, 10-32 1/2, Hex Head, Stainless Steel 2826-0120 Set Screw, 10-32 ... -
Page 131: Isa Hr 640
Appendix G Spectroscopy-Mount and Spectrograph Adapters ISA HR 640 Description 2518-0203 Adapter-F, HR-640 2826-0144 Screw, M4x.7x14 mm, Socket Head, Hex, Stainless Steel 2518-0227 Adapter-Male, ICCD Diode Array Screw, 10-32 1/2, Hex Head, Stainless Steel 2826-0120 Set Screw, 10-32 1/4, Stainless Steel, Allen Hex, Nylon Tip 2826-0082 Assembly Instructions 1. -
Page 132: Spex 270M
® PI-MAX 3 System Manual Version 1.A SPEX 270M Description 2518-0691 Female Adapter Plate, 2.400 ID Screw, 6-32 3/8. Socket Head, Hex, Stainless Steel 2826-0068 2518-0690 Adapter Male, Focusing, Male, Spec 270 Screw, 10-32 1/2, Hex Head, Stainless Steel 2826-0120 Set Screw 8-32 ... -
Page 133: Spex 500M
Appendix G Spectroscopy-Mount and Spectrograph Adapters SPEX 500M Description 2517-0214 Adapter-Female, Spex 500M Screw, 1/4-20 0.5L, Low Socket Head Cap 2826-0170 2518-0291 Adapter Male, Spex 500M 2827-0010 10-32 Nut, Stainless Steel Screw, 10-32 1/2, Hex Head, Stainless Steel 2826-0120 Set Screw 8-32 ... -
Page 134: Spex Triplemate
® PI-MAX 3 System Manual Version 1.A SPEX TripleMate Description 2518-0183 Adapter-Male, ICCD/For Spex TripleMate Screw, 10-32 5/8, Socket Head Cap, Stainless Steel 2826-0128 2517-0163 Slit Mount, Spex Screw, 1/4-20 3/4, Socket Head Cap, Stainless Steel 2826-0129 Screw, 10-32 1/2, Hex Head, Stainless Steel 2826-0120 2518-0185 Adapter-Female, Flange Spex... -
Page 135: Appendix H Glossary
Appendix H Glossary Binning: A process that may occur in the readout register and the output node (on-chip or hardware binning) or is performed as a post-process (software binning). Binning combines charge from rectangular groups of adjacent pixels into super pixels. When done on-chip, this process reduces readout time and the burden on computer memory;... - Page 136 ® PI-MAX 3 System Manual Version 1.A be reduced by cooling the intensifier (or environment) and is usually negligible in gated applications. Exposure Time: The period during which the camera allows incoming signal to integrate on the CCD array. For signal to be detected and integrated on the CCD array, it must both fall in a valid gate width and in a valid exposure time.
- Page 137 Appendix H Glossary the exposure time. For signal to be detected, it must both fall in a valid gate width and in a valid exposure time. Input Windows: The intensifier and the CCD array both have input windows. : High vacuum UV transmission (between 100 nm and 200 nm). Quartz: Excellent transmission over 190 nm - 1100 nm.
- Page 138 ® PI-MAX 3 System Manual Version 1.A Super Gen II: Gen II devices that employ novel photocathodes with extended spectral range or high QE in a particular wavelength. Gen III: Gen II technology with GaAs added as the photocathode coating. Highly sensitive in the NIR region above 800 nm but relatively insensitive in the blue/green region.
- Page 139 Appendix H Glossary Photocathode Coatings: Coatings on the photocathode convert a portion of the incident photons into electrons. Any photons that are not captured by the photocathode are lost from the final signal produced by the intensifier. Therefore, the kind of coating and the resulting QE of the photocathode is very important.
- Page 140 ® PI-MAX 3 System Manual Version 1.A This page intentionally left blank.
-
Page 141: Declaration Of Conformity
Declaration of Conformity This section of the PI-MAX3 system manual contains the declaration of conformity for PI-MAX3 systems. A system includes the PI-MAX3 with a Gen II or Filmless Gen III intensifier and a PI-MAX3 power supply. - Page 142 ® PI-MAX 3 System Manual Version 1.A...
-
Page 143: Warranty & Service
(1) year after shipment. During this period, Princeton Instruments will repair the product or, at its sole option, repair or replace any defective part without charge to you. You must deliver the entire product to the Princeton Instruments factory or, at our option, to a factory-authorized service center. -
Page 144: Vacuum Integrity Limited 12 Month Warranty
/ or workmanship under normal use for a period of one (1) year from shipment. Princeton Instruments does not warrant that the function of the software will meet your requirements or that operation will be uninterrupted or error free. -
Page 145: Your Responsibility
(1) year limited warranty and/or any other warranty, expressed or implied. 3. All warranty service must be made by the Princeton Instruments factory or, at our option, an authorized service center. 4. Before products or parts can be returned for service you must contact the Princeton Instruments factory and receive a return authorization number (RMA). -
Page 146: Contact Information
In no event shall Princeton Instruments' liability exceed the cost of the repair or replacement of the defective product or part. -
Page 147: Index
Index Binning computer memory burden ........43 A/D converters hardware .............. 43 dual ..............47 interline CCD ..........44 standard ............. 103 restrictions due to well capacity ...... 44 AC power requirements ........... 23 readout time ............43 Accessories, alignment of ........126 resolution loss ............ - Page 148 ® PI-MAX 3 System Manual Version 1.A Chromex 250 IS adapter instructions ..... 129 Experiment types ............. 59 Circulator hoses ............25 Exposure and Readout ..........33 Circulator, closed ............. 92 Clean cycles .............. 35 Fan ..............22, 92 Cleaning ..............16 Fast mode Cleaning optical surfaces data acquisition ............
- Page 149 Index PRE-TRIG IN cable lead ........104 Pre-Trigger Input cable lead ........104 Lasers Pre-Trigger Input signal ......... 105 free-running ............86 Procedures jitter ..............87 adapter installation ..........125 overview .............. 86 Pulser triggered .............. 86 inhibiting during readout ........87 Lens internal ...............
- Page 150 ® PI-MAX 3 System Manual Version 1.A Spectrographs Unigen II coating ............x Acton ..............125 Unpacking and initial inspection ......21 adapter instructions ........... 125 Vacuum deterioration ..........98 adapters ............... 24 Ventilation fan ............92 Chromex 250IS ..........125 Ventilation requirements .........
Need help?
Do you have a question about the PI-MAX 3 System and is the answer not in the manual?
Questions and answers