Table of Contents
Advertisement
Quick Links
Advertisement
Table of Contents

Related Manuals for FOR-A FA-9500


Summary of Contents for FOR-A FA-9500
- Page 1 OPERATION MANUAL FA-9500 Frame Synchronizer FA-95PS FA-95DACBL FA-95RU FA-95CO FA-95D-D/DE-E FA-95AIO Edition – Rev. 2 SOFT Ver. 6.01 – higher The latest FA-9500 Operation Manual can be downloaded from FOR-A’s website: http://www.for-a.com/products/fa9500/fa9500.html...
- Page 2 Edition Revision History Edit. Rev. Date Description Where Preliminary 2010/08/03 Preliminary edition (V0010) 2010/09/13 First edition (V0100) Throughout 2011/01/20 Added FA-95DACBL option, color correction description. Other text amendments. 2011/03/23 Added 3G-SDI, Second Coverter, and Auto Video Throughout Optimizer features, and FA-95PS option. Other text amendments.
- Page 3 Supported Version Note Feature/Option FPGA1: 2.30 or higher Logo Generator Supports Logo Generator FPGA2: 4.10 or higher FA-95RU ver 4.00 or higher-compatible FPGA3: 1.02 or higher SOFT: 5.00 or higher FPGA1:3.14 or higher Added performance S2016/VI/WSS AFD support, FPGA2: 5.02 or higher features.
- Page 4 Precautions Important Safety Warnings [Power] Operate unit only on the specified supply voltage. Caution Disconnect power cord by connector only. Do not pull on cable portion. Do not place or drop heavy or sharp-edged objects on power cord. A damaged cord can cause fire or electrical shock hazards.
- Page 5 [Circuitry Access] Do not remove covers, panels, casing, or access circuitry with power applied to the unit! Turn power off and disconnect power cord prior to removal. Internal servicing / adjustment of unit should only be performed by qualified personnel. Do not touch any parts / circuitry with a high heat factor.
- Page 6 All other trademarks are trademarks or registered trademarks of their respective owners. Rack Mounting FA-9500/RPS can be mounted to EIA standard rack units. When rack mounting a unit, remove the rubber feet and use the accessory rack mount brackets (rack ears).
- Page 7 Installing the AC Cord Retaining Clip Secure the AC cord with the supplied ladder strap/retaining clip assembly to prevent accidental removal from the FA-9500. Installing the clip 1) Wrap the retaining clip around the AC cord. (with the anchor of the ladder strap toward the unit.)
-
Page 8: Table Of Contents
Table of Contents 1. Prior to Starting ........................... 1 1-1. Welcome ..........................1 1-2. Features ..........................1 1-3. FA-95LG GUI Download ...................... 1 2. Panel Descriptions ........................2 2-1. Front Panel ........................... 2 2-2. Rear Panel ........................... 3 2-3. Internal Settings ........................6 2-3-1. - Page 9 5-4. CONV2 (UP / DOWN / CROSS CONVERTER) ............... 30 5-4-1. CONV2 U/D MODE ....................31 5-4-2. CONV2 Conversion Table ..................32 5-4-3. CONV2 SIZE/POS ..................... 32 5-4-4. CONV2 CROPPING ....................33 5-4-5. CONV2 IMPROVE ..................... 34 5-4-6. CONV2 SIDE RGB ..................... 35 5-5.
- Page 10 5-9-1. Logo Generator ......................59 5-9-1-1. CONV1 LOGO SEL ..................... 59 5-9-1-2. CONV1 KEYER SET ................... 60 5-9-1-3. CONV2 LOGO SEL ..................... 61 5-9-1-4. CONV2 KEYER SET ................... 62 5-9-1-5. Logo Position Setting Range ................62 5-10. VIDEO SYSTEM (VIDEO SYS) ..................63 5-10-1.
- Page 11 5-14. ANC IN STATUS ......................91 5-15. ANC IN STATUS 1-2 ....................... 92 5-16. CONV1 ANC OUT ......................92 5-16-1. CONV1 S2016 OUT ....................92 5-16-2. CONV1 VI OUT ......................93 5-16-3. CONV1 WSS OUT ....................93 5-17. CONV1 ANC OUT1 ......................94 5-18.
- Page 12 6-9-3. Dolby DECODER REFERENCE ................117 6-9-4. Dolby DOWNMIX ...................... 117 6-9-5. Dolby DECODER GAIN .................... 117 6-9-6. Dolby ENCODER INPUT ..................118 6-9-7. Dolby ENCODER SETTING ..................119 6-9-8. METADATA INPUT ....................119 6-10. AUDIO SYSTEM Settings (AUDIO SYS) ............... 120 6-10-1.
- Page 13 9-2-7. Converter2 (Up/Down/Cross) ................... 154 9-2-8. Color Corrector ......................158 9-2-9. Video Test Signal ..................... 160 9-2-10. YPbPr/RGB Clip ..................... 161 9-2-11. Output Select ......................162 9-2-12. Composite Clip ....................... 164 9-3. AUDIO Settings ....................... 165 9-3-1. SDI Input Gain ......................166 9-3-2.
- Page 14 16-2. FA-95AIO Switch Settings ..................... 243 17. System Requirements ......................244 18. About SNMP (Simple Network Management Protocol) ............245 19. FA-9500 Ancillary Data Packet Name List ................256 20. About AFD (Active Format Description) ................258 20-1. AFD Codes ........................259 20-2.
- Page 15 25-2. External Dimensions ..................... 276 Index ............................277...
-
Page 17: Prior To Starting
FOR-A provides a wide range of products, from basic support units to complex system controllers, which have been increasingly joined by products for computer video based systems. Whatever your needs, talk to your FOR-A representative. We will do our best to be of continuing service to you. -
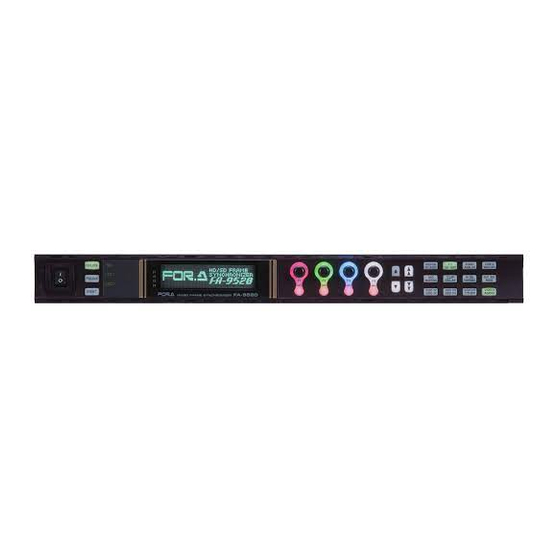
Page 18: Panel Descriptions
2. Panel Descriptions 2-1. Front Panel VIDEO IN FAN ALARM PROCESS CONV1 CONV2 POWER LOCK MASTER SDI AUDIO AES AUDIO ANALOG AUDIO IN DC POWER DISPLAY AREA A V O CLIP IN SEL OUT SEL BY-PASS MODE MAPPING DELAY DOWNMIX GENLOCK UNITY UNITY... -
Page 19: Rear Panel
OUT4 OUT1 OUT2 1 / 2 3 / 4 5 / 6 7 / 8 GENLOCK IN COMPOSITE DIGITAL AUDIO IN / OUT FA-9500 with the FA-95PS option installed ANALOG AUDIO REMOTE LAN1 LAN2 FAN1 FAN2 OUT1 OUT2 OUT3... - Page 20 The operation status can be viewed from the DC POWER AC IN1 1 menu as described in section 5-13-1 “UNIT ALARM”. (The menu is displayed if the optional FA-95PS is installed.) FA-9500 with the FA-95DACBL option installed ANALOG AUDIO REMOTE LAN1 LAN2...
- Page 21 FA-9500 with the FA-95D-D/DE-E options installed ANALOG AUDIO REMOTE Dolby E REF IN LAN1 LAN2 FAN1 FAN2 OUT1 OUT2 OUT3 OUT4 OUT1 OUT2 1 / 2 3 / 4 5 / 6 7 / 8 GENLOCK IN COMPOSITE DIGITAL AUDIO IN / OUT...
-
Page 22: Internal Settings
If the FA-95DACBL is installed in SLOT A: OFF If the FA-95DACBL is installed in SLOT B: ON If the FA-95DACBL is not installed: OFF Do not change. Standard FA-9500: OFF (without FA-95PS) If the FA-95PS is installed: ON Do not change. -
Page 23: Connections
3. Connections This section describes the connections and settings for specific usages. The descriptions on the settings are based on the factory default. If you are not sure of your current settings, you can reset the unit to the default setting by selecting DEFAULT in the EVENT LOAD menu described in the section 8-1 “EVENT LOAD”. -
Page 24: For Hd/Sd-Sdi Simultaneous Output
5-10-7 “SD PHASE SET”. (The SDI OUT3/4 output siganls will be adjusted.) To embed AFD data into the FA-9500 output video signal, set ANC MODE to DETAIL in the 5-10-9 CONV1 ANC SET, and 5-10-10 CONV2 ANC SET menus, then select the AFD data... -
Page 25: To Embed Aes Input Signals On Sdi Signals
3-3. To Embed AES Input Signals on SDI Signals The following describes how to embed 4 channel AES signals on SDI signals in SDI OUT1 – 4. Input an HD/ SD-SDI signal to SDI IN1. ANALOG AUDIO REMOTE LAN1 LAN2 FAN1 FAN2 OUT1... -
Page 26: To Embed Analog Audio Signals On Sdi Signals
3-4. To Embed Analog Audio Signals on SDI Signals The following describes how to embed a 4- channel analog audio signal on SDI OUT1 through 4 output signals. Input an audio signal to Input an HD/SD-SDI ANALOG AUDIO IN1 - 4 signal to SDI IN1. -
Page 27: Connecting A Computer
The FA-9500 control window appears on the web browser window. See section 9-8 “Network Settings” for details on changing the FA-9500’s IP address. See section 9 “Control via WEB Browser” for details on the FA-9500 web browser control window. -
Page 28: Connecting To The Remote (Gpi) Connector
3-6. Connecting to the REMOTE (GPI) Connector Easy control over the FA-9500 from an external device is also possible by connecting the device to the REMOTE connector. Seven ports are provided on the connector. Assign functions to the respective ports to control the FA-9500. -
Page 29: Front Panel Operations
4. Front Panel Operations 4-1. Powering ON Turn the power ON after all system connections are complete. The indicators on the front panel light up during startup. When startup is complete, the indicators will go off and the VIDEO STATUS menu showing the current input video and reference signal formats will be displayed. V I D E O S T A T U S 5 0 2... -
Page 30: Accessing Menus
S E T U P / B L A C K 0 . 0 % 0 . 0 ° H U E FA-9500 HD/SD FRAME SYNCHRONIZER Parameter Value In the example above, the PROCESS/SDI AUDIO button has been pressed, so that the... -
Page 31: Menu Buttons
4-2-2. Menu Buttons The VIDEO/AUDIO button at the bottom right switches between the video and audio-related menus. Pressing the button alternates the button to work as video menu buttons (lit green) and audio menu buttons (lit orange). The menus at the top of each button label are video menus (lit green), and the menus at the bottom are audio menus (lit orange). -
Page 32: Arrow Buttons
Menu Button VIDEO menus (lit green) AUDIO menus (lit orange) FS MODE SET FREEZE SET COMPOSITE SET VIDEO SUB TEST SIGNAL HD PHASE SET SD PHASE SET VIDEO POSITION CONV1 ANC SET FADE IN/OUT CONV2 ANC SET VIDEO SYS DIGITAL AUDIO CONV1 AUDIO GRP AUDIO SYS AUDIO ERR SENSE... -
Page 33: Consecutive Viewing Of Settings
4-2-4. Consecutive Viewing of Settings While a menu button is turned on, the menu display will be in consecutive display mode when both single (up and down) arrow buttons are pressed simultaneously. Both single arrow buttons blink when they are in consecutive display mode. To exit the mode, simultaneously press both arrow buttons again. -
Page 34: Changing Setting Values
1 0 0 . 0 % S E T U P / B L A C K : 0 . 0 % 0 . 0 ° H U E FA-9500 HD/SD FRAME SYNCHRONIZER Parameter Setting value Menu page number In the above example, the PROCESS/SDI AUDIO button has been pressed while the menu buttons are turned to video menus (lit green) by pressing the VIDEO/AUDIO, so that the VIDEO PROC AMP menu is displayed. -
Page 35: Video Menus
5. VIDEO Menus Make the menu buttons light up green using the VIDEO/AUDIO button. Menu button (Pressing the button while the buttons are lit orange turns the lights green.) VIDEO Then the menus displayed on the upper row on each menu button can be selected. AUDIO 5-1. -
Page 36: Black Level
5-2-2. BLACK LEVEL Menu button B L A C K L E V E L R E D 1 0 0 . 0 % G R E E N : 1 0 0 . 0 % AES AUDIO B L U E 1 0 0 . -
Page 37: Color Correct (C.c.)
5-2-4. COLOR CORRECT (C.C.) Menu button C O L O R C O R R E C T M O D E : B A L A N C E C U R V E : C E N T E R AES AUDIO Setting range Parameter... -
Page 38: Color Corrector And Avo Modes
5-2-5. Color Corrector and AVO Modes Auto Video Optimizer and Color Corrector use the same circuit. The color corrector settings are not fully changeable when AVO mode is set to Auto. (See section 5-5-1 “AVO SETTING”.) Changeable Color Corrector menus according to AVO modes AVO Modes Color Corrector Menus AUTO... -
Page 39: Conv1 (Up/Down/Cross Converter)
5-3. CONV1 (UP/DOWN/CROSS CONVERTER) Both converters, CONV1 and CONV2, can equally output video signals in formats specified for respective output connectors, and convert the aspect ratio according to the S2016, VI, or WSS AFD (Active Format Description) data. The video signal selected under IN SEL in the VIDEO INPUT SELECT (IN SEL) menu as shown in section 5-7 will be input to UP/DOWN CONVERTER1 (CONV1). -
Page 40: Conv1 U/D Mode
5-3-1. CONV1 U/D MODE Converts video signals according to the AFD (Active Format Description) data. Menu button C O N V 1 U / D M O D E C O N V 1 : S D CONV1 A S P E C T : A F D ( 4 : 3 ) ANALOG 1 0 8 0 / 5 9 i >... - Page 41 Enhanced CONV U/D MODE Settings The CONV 1 and 2 U/D MODE menu settings have been changed in software versions 6.00 and higher as shown in the table below. Menu settings Older than ver. 6.00 Newer than ver. 6.00 Input format SD INPUT CONV1...
-
Page 42: Conv1 Conversion Table
5-3-2. CONV1 Conversion Table Possible Conversions in CONV1 for Input Signal Formats and Mode Selections CONVERTER1 mode selection Input signal 1080i 720p 1080PsF 1080p(3G) 525/60 525/60 1080/59i 720/59p 1080/23PsF 1080/59p 1080/59i 1080/59i 525/60 1080/59i 720/59p 1080/59p (BY-PASS) NTSC 720/59p formats 720/59p 525/60 1080/59i... -
Page 43: Conv1 Cropping
5-3-4. CONV1 CROPPING Menu button C O N V 1 C R O P P I N G L E F T 0 P I X E L CONV1 R I G H T 0 P I X E L ANALOG T O P 0 L I N E... -
Page 44: Conv1 Improve
5-3-5. CONV1 IMPROVE C O N V 1 I M P R O V E Menu button M O T I O N : A D A P T I V E A N T I A L I A S H : N O R M A L CONV1 A N T I A L I A S... -
Page 45: Conv1 Side Rgb
5-3-6. CONV1 SIDE RGB Menu button C O N V 1 S I D E R G B R E D CONV1 G R E E N : B L U E ANALOG G R O U P A D J U S T Parameter Default Setting range... -
Page 46: Conv2 (Up / Down / Cross Converter)
5-4. CONV2 (UP / DOWN / CROSS CONVERTER) The video signal selected under IN SEL in the VIDEO INPUT SELECT (IN SEL) menu as shown in section 5-7 will be input to UP/DOWN CONVERTER2 (CONV2). The signal will be processed in CONV2 and output from the output connector for which CONV2 is selected under ASSIGN in the “VIDEO OUT SELECT (OUT SEL)”... -
Page 47: Conv2 U/D Mode
5-4-1. CONV2 U/D MODE Menu button C O N V 2 U / D M O D E C O N V 2 : S D CONV2 A S P E C T : A F D ( 4 : 3 ) MASTER 1 0 8 0 / 5 9 i >... -
Page 48: Conv2 Conversion Table
5-4-2. CONV2 Conversion Table Possible Conversions in CONV2 for Input Signal Formats and Mode Selections CONVERTER2 mode selection Input signal 1080i 720p 1080PsF 1080p(3G) 525/60 525/60 1080/59i 720/59p 1080/23PsF 1080/59p 1080/59i 1080/59i 525/60 1080/59i 720/59p 1080/59p (BY-PASS) NTSC 720/59p formats 720/59p 525/60 1080/59i... -
Page 49: Conv2 Cropping
5-4-4. CONV2 CROPPING Menu button C O N V 2 C R O P P I N G L E F T 0 P I X E L CONV2 R I G H T 0 P I X E L MASTER T O P 0 L I N E... -
Page 50: Conv2 Improve
5-4-5. CONV2 IMPROVE C O N V 2 I M P R O V E Menu button M O T I O N : A D A P T I V E A N T I A L I A S H : N O R M A L CONV2 A N T I A L I A S... -
Page 51: Conv2 Side Rgb
5-4-6. CONV2 SIDE RGB Menu button C O N V 2 S I D E R G B R E D CONV2 G R E E N : MASTER B L U E G R O U P A D J U S T Parameter Default Setting range... -
Page 52: Auto Video Optimizer (Avo)
5-5. Auto Video Optimizer (AVO) 5-5-1. AVO SETTING A V O S E T T I N G Menu button M O D E : O F F L E V E L : S T A N D A R D A R E A : F U L L S C R E E N... -
Page 53: Avo Setup
Sample Area (Fixed area) Eight available sample areas are as shown below. Data are continuously sampled within each area. (See section 5-5-4 “USER1, 2 AREA SET” for USERAREA 1, and 2.) Sample Sample area Sample area Sample area area FULL SCREEN PILLAR BOX CENTER... -
Page 54: About Scene Cut Detection And Frame Delay Settings
5-5-2-1. About Scene Cut Detection and Frame Delay Settings To properly perform AVO scene cut detection and adjustment, the FRAME DELAY must be set in the setting range according to the menu settings (5-10-1 “FS MODE SET” menu) as shown in the table below. FRAME DELAY Setting Range Chart Setting Rrange per Input Video Format 525/60i... -
Page 55: User1 - 5 Level Set
5-5-3. USER1 - 5 LEVEL SET Setting LEVEL of the AVO SETTING menu to one user settings from USER1 through 5 opens the USER1 - 5 LEVEL SET menu. This menu allows you to store five sets of level settings as USER1 –... - Page 56 The figures below are luminance histograms of input. (X-axis: Luminance level, Y-axis: Number of pixels) Maximum Minimum value of value of inputs inputs 100% 0% IN BLACK IN WHITE IN BLACK IN WHITE IN BLACK IN WHITE Narrow correction range setting Wide correction range setting TARGET WHITE and TARGET BLACK These two parameters determine the highest and lowest levels of luminance for target images...
- Page 57 The figures below compare the reference values (dotted line) for output and the actual values after correction (full line). 100% 100% TARGET BLACK TARGET BLACK Large TARGET BLACK setting Small TARGET BLACK setting 100% 100% TARGET WHITE TARGET WHITE Large TARGET WHITE setting Small TARGET WHITE setting Relationship between IN BLACK, IN WHITE and TARGET BLACK, TARGET WHITE levels Input image...
-
Page 58: User1, 2 Area Set
5-5-4. USER1, 2 AREA SET Selecting USER1 (or 2) AREA for AREA in the AVO SETTING menu opens the USER1, 2 AREA SET menus. Menu button U S E R 1 A R E A S E T S T A R T 0 P I X E L S T A R T 0 L I N E... -
Page 59: Manual Level Adjustment
5-5-4-1. Manual Level Adjustment The FA-9500 automatically adjusts the signal level if the MODE of the AVO SETTING menu is set to AUTO (see section 5-5-1). The signal level can also be manually adjusted if the MODE is set to HOLD or OFF. -
Page 60: Clip (Video Clip)
5-6. CLIP (VIDEO CLIP) 5-6-1. YPbPr/RGB CLIP Menu button Y P b P r / R G B C L I P C L I P M O D E : O F F CLIP DELAY Parameter Default Setting range Description OFF, Selects a mode whether to clip... -
Page 61: Composite Clip
5-6-2. COMPOSITE CLIP Menu button C O M P O S I T E C L I P CLIP M O D E : C O M P O S I T E C L I P W H I T E : 1 5 0 . - Page 62 ③ C White Clip Level Setting range 50 - 111% (Default: 111%) 111% (default) 100% SMPTE 100% color bar when color 700mVp-p. RGB CLIP To adjust the RGB clipping, select the RGB 300% CLIP under CLIP MODE, and then set RGB White Clip and RGB Black Clip.
-
Page 63: Video Input Select (In Sel)
*3 This parameter is displayed only if FA-95CO software option is installed. CHANGEOVER is always set to DISABLE at power-on. LOSS Operation If the signal input that is selected under IN SEL is lost, the FA-9500 operates in the selected LOSS mode as follows. ... -
Page 64: Sd Input Aspect
VIDEO INPUT SET (5-7-1) menu. If both SDI 1 and 2 inputs encounter the same problem and the problem is not signal loss, the FA-9500 will output the SDI 1 input signal. 5-7-3-2. Changeover and Input Switchover Using a Router An SDI 1 input signal switchover conducted via router will be detected as an error by the CRC ERROR TRG (5-7-7) and AUDIO ERR TRG (5-7-10) functions. -
Page 65: Chgov (Changeover) Mode Set
2) Resolve the issue(s). 3) Check that the issue(s) is/are resolved using a waveform monitor. 4) Disable Changeover. (The status menus will be reset.) 5) Set IN SEL to SDI 1 (input signal selection). 6) Enable Changeover again. IMPORTANT If SYNCHRO in section 5-10-1 FS MODE SET is set to LINE, AVDL, or INPUT, or SYNCHRO is set to FRAME with FRAME DELAY turned OFF, a changeover may produce video noise. -
Page 66: Sdi Error Trg
5-7-5. SDI ERROR TRG This menu is accessible only if the FA-95CO software option is installed. Menu button S D I E R R O R T R G T R I G G E R : D I S A B L E IN SEL D U R A T I O N : I M M E D I A T E DOWNMIX... -
Page 67: Crc Error Trg
5-7-7. CRC ERROR TRG This menu is accessible only if the FA-95CO software option is installed. Menu button C R C E R R O R T R G T R I G G E R : D I S A B L E IN SEL D U R A T I O N : I M M E D I A T E DOWNMIX... -
Page 68: Audio Loss Trg
5-7-9. AUDIO LOSS TRG This menu is accessible only if the FA-95CO software option is installed. Menu button A U D I O L O S S T R G G R O U P S E L : G R O U P 1 IN SEL T R I G G E R : D I S A B L E... -
Page 69: Silence Trg
5-7-11. SILENCE TRG This menu is accessible only if the FA-95CO software option is installed. Menu button S I L E N C E T R G S E L : C H 1 IN SEL T R I G G E R : D I S A B L E DOWNMIX C H G O V... -
Page 70: Chgov Vid Status
5-7-13. CHGOV VID STATUS This menu is accessible only if the FA-95CO software option is installed. Settings in this menu will reset themselves whenever CHANGEOVER in the VIDEO INPUT SET (5-7-1) menu has been set to DISABLE. Menu button C H G O V V I D S T A T U S S D I... -
Page 71: Aud Loss Status
5-7-15. AUD LOSS STATUS This menu is accessible only if the FA-95CO software option is installed. Settings in this menu will reset themselves whenever CHANGEOVER i in the VIDEO INPUT SET (5-7-1) menu has been set to DISABLE. Menu button A U D L O S S S T A T U S... -
Page 72: Video Out Select (Out Sel)
5-8. VIDEO OUT SELECT (OUT SEL) Allows you to select output modes and whether to output a signal from CONV1 or CONV2 for respective video output connectors. IMPORTANT If CONV DLY ADJ in section 5-10-4 “VIDEO SUB” is enabled, all outputs from SDI 1/2, SDI 3/4, Composite, and Component will be adjusted to be the same delay. -
Page 73: Composite Set
5-8-3. COMPOSITE SET Allows you to assign video signals to output from the COMPOSITE video output connector. Menu button C O M P O S I T E S E T A S S I G N : C O N V 1 OUT SEL MODE 5 2 5 / 6 0... -
Page 74: Component Set
5-8-4. COMPONENT SET Allows you to assign video signals to output from the FA-95AIO video output connectors. Effective only if the FA-95AIO option is installed. C O M P O N E N T S E T Menu button A S S I G N : C O N V 1 OUT SEL 5 2 5 / 6 0 >... -
Page 75: Video Option (Video Op)
The logo generator allows you to superimpose logos to FA-9500 outputs for each converter. Run the FA-95 LG GUI, which can be downloaded from FOR-A’s website, on a PC to register logos to the FA-9500 via Ethernet. See the FA-95LG GUI Operation Manual (downloaded with the software) for details on logo management. -
Page 76: Conv1 Keyer Set
5-9-1-2. CONV1 KEYER SET Allows you to set a keyer for CONVERTER 1. Menu button C O N V 1 K E Y E R S E T 4 0 2 K E Y E R : O F F VIDEO OP L E V E L : 1 0 0 % AUDIO OP... -
Page 77: Conv2 Logo Sel
5-9-1-3. CONV2 LOGO SEL Allows you to select a logo function mode for CONVERTER2. Menu button C O N V 2 L O G O S E L 4 0 3 L O G O I D : VIDEO OP N A M E : F O R AUDIO OP L O G O... -
Page 78: Conv2 Keyer Set
5-9-1-4. CONV2 KEYER SET Allows you to set a keyer for CONVERTER 2. Menu button C O N V 2 K E Y E R S E T 4 0 4 K E Y E R : O F F VIDEO OP L E V E L : 1 0 0 % AUDIO OP... -
Page 79: Video System (Video Sys)
(HD: 74MHz, SD: 27MHz) Does not use a genlock signal. AUTO DET 525/60 625/50 1080/59i Sets a system format for the FA-9500. 1080/50i SYNC FRMT AUTO AUTO DET: Detects and sets the detected input video 720/59p format to the system format. -
Page 80: Freeze Set
*7 Switching input signals with a phase difference using a router or such device may cause shock noise to occur on video or audio signals if the phase difference (compared to the genlock signal) exceeds the range shown in the following table. If the difference is within range, shock noise will not occur. -
Page 81: Composite Set
*2 If the input signal is a PsF signal, MODE is automatically set to FRAME and the setting cannot be changed. See the following FREEZE MODE table for details. FREEZE Mode Table Input signal SYS FRMT setting 525/60 625/50 1080/59i 1080/50i 720/59p 720/50p 1080/23PsF 1080/24PsF 1080/59p 1080/50p AUTO 525/60... -
Page 82: Video Sub
5-10-4. VIDEO SUB Black and white video and VITS signal settings. V I D E O S U B Menu button B L K / W H T : O F F : O F F V I T S VIDEO SYS C O N V D L Y... -
Page 83: Hd Phase Set
5-10-6. HD PHASE SET P H A S E S E T Menu button 1 0 8 0 : 0 C L K 1 0 8 0 : 0 L I N E VIDEO SYS 7 2 0 0 C L K AUDIO SYS 7 2 0 0 L I N E... -
Page 84: Sd Phase Set
5-10-7. SD PHASE SET P H A S E S E T Menu button P H A S E : 0 C L K P H A S E : 0 L I N E VIDEO SYS 0 . 0 ° P H A S E : AUDIO SYS Setting range... -
Page 85: Video Position
5-10-8. VIDEO POSITION V I D E O P O S I T I O N Menu button P O S : 0 P I X E L P O S : 0 L I N E VIDEO SYS AUDIO SYS Setting range Parameter Default... -
Page 86: Conv1 Anc Set
5-10-9. CONV1 ANC SET C O N V 1 A N C S E T Menu button A N C M O D E : H / V A N C A N C : O V E R W R I T E VIDEO SYS A N C : B L A N K AUDIO SYS... -
Page 87: Conv2 Anc Set
5-10-10. CONV2 ANC SET C O N V 2 A N C S E T 1 0 0 Menu button A N C M O D E : H / V A N C A N C : O V E R W R I T E VIDEO SYS A N C : B L A N K AUDIO SYS... -
Page 88: Conv1 Audio Group
5-10-11. CONV1 AUDIO GROUP Allows you to set whether or not to embed audio signals as a group. C O N V 1 A U D I O G R P 1 0 1 Menu button G R O U P 1 : E N A B L E G R O U P 2 : E N A B L E VIDEO SYS G R O U P 3 : E N A B L E... -
Page 89: Sd Line Mask
5-10-13. SD LINE MASK L I N E M A S K 1 0 3 Menu button L I N E S E L : L I N E 6 M A S K S E T : P A S S VIDEO SYS AUDIO SYS Parameter... -
Page 90: Anc Detect Sel
5-10-15. ANC DETECT SEL Menu button A N C D E T E C T S E L 1 0 5 C A P T I O N : C E A 6 0 8 VIDEO SYS A F D : S 2 0 1 6 - 3 A F D AUDIO SYS Parameter... -
Page 91: Anc Embed Line
Ancillary Data Types Data type Description CEA608 CC Closed caption data inserted as Y signals into line 21 of 525/60 analog and SDI signals. S334-1 CC Closed caption data inserted as data packets into the ancillary data space of 525/60 SDI signals. - Page 92 * The setting range varies according to the ancillary data type and video format. Ancillary data type FORMAT LINE Default ANC:CEA 608 CC 525/60 FIELD1: 21(284) fixed ANC:S334-1 CC SD 525/60 FIELD1:12(275) to 19(282) FIELD1:12(275) 1080i LINE 9 to 20 LINE 9 ANC:CEA708 CC HD 720p...
-
Page 93: Anc Loss Set
message. If the sign is displayed, ancillary data will not be properly embedded. The line settings must be properly set. Usually the default value will properly embed the ancillary data. Keep this in mind when changing the value to configure a system with other devices. Error message example: A N C E M B E D... -
Page 94: Wss Afd Error
5-10-19. WSS AFD ERROR Allows you to select the operation mode when the aspect ratio conversion result is not standarized by WSS, and embedding WSS AFD ancillary data to CONV1 and/or 2 is enabled. W S S A F D E R R O R 1 1 1 Menu button... -
Page 95: Ntsc Setup
5-11. NTSC SETUP This menu, which allows you to set the analog composite, Y/Pb/Pr, or Y/C NTSC input and output signal settings, is accessible only if the FA-95AIO option is installed. N T S C S E T U P 1 1 4 Menu button N T S C... -
Page 96: Various Signal Status Display (Status)
5-13. Various Signal Status Display (STATUS) 5-13-1. UNIT ALARM U N I T A L A R M 5 0 1 Menu button F A N 1 : N O R M A L F A N 2 : N O R M A L STATUS P O W E R 1 : N O R M A L OTHER... -
Page 97: Video In Status
5-13-2. VIDEO IN STATUS V I D E O S T A T U S 5 0 2 Menu button S D I 1 : 1 0 8 0 / 5 9 i S D I 2 : 5 2 5 / 6 0 STATUS C O M P O S I T E : 5 2 5 / 6 0 OTHER... -
Page 98: Component Input
5-13-3. COMPONENT INPUT This menu is accessible only if the FA-95AIO option is installed. C O M P O N E N T I N P U T 5 0 3 Menu button F O R M A T : 5 2 5 / 6 0 STATUS M O D E : Y P b P r... -
Page 99: Component Output
5-13-5. COMPONENT OUTPUT This menu is accessible only if the FA-95AIO option is installed. C O M P O N E N T O U T P T U T 5 1 2 Menu button F O R M A T : 5 2 5 / 6 0 STATUS M O D E : Y P b P r... -
Page 100: Source Audio
5-13-6. SOURCE AUDIO S O U R C E A U D I O 5 3 1 Menu button 1 : L O S S 2 : L O S S STATUS 3 : L O S S OTHER 4 : L O S S S O U R C E A U D I O 5 3 2... -
Page 101: Sdi 1 In Audio
5-13-7. SDI 1 IN AUDIO S D I 1 A U D I O 5 3 5 Menu button 1 : L O S S 2 : L O S S STATUS 3 : L O S S OTHER 4 : L O S S S D I 1 A U D I O 5 3 6... -
Page 102: Sdi 2 In Audio
5-13-8. SDI 2 IN AUDIO S D I 2 A U D I O 5 3 9 Menu button 1 : L O S S 2 : L O S S STATUS 3 : L O S S OTHER 4 : L O S S S D I 2 A U D I O 5 4 0... -
Page 103: Aes In Audio
5-13-9. AES IN AUDIO A E S A U D I O 5 4 3 Menu button 1 : L O S S 2 : L O S S STATUS 3 : L O S S OTHER 4 : L O S S A E S A U D I O 5 4 4... -
Page 104: Sdi 1/2 Out Audio
5-13-11. SDI 1/2 OUT AUDIO S D I 1 / 2 O U T A U D I O 5 6 1 Menu button 1 : P C M 2 : P C M STATUS 3 : P C M OTHER 4 : P C M S D I 1 / 2... -
Page 105: Sdi 3/4 Out Audio
5-13-12. SDI 3/4 OUT AUDIO S D I 3 / 4 O U T A U D I O 5 6 5 Menu button 1 : P C M 2 : P C M STATUS 3 : P C M OTHER 4 : P C M S D I 3 / 4... -
Page 106: Analog Out Audio
5-13-14. ANALOG OUT AUDIO A N A L O G O U T A U D I O 5 7 1 Menu button 1 : S I L E N C E 2 : S I L E N C E STATUS 3 : S I L E N C E OTHER... -
Page 107: Afd In Status
5-13-16. AFD IN STATUS When detecting AFD in input S2016-3 A F D S T A T U S 6 4 1 Menu button D E T E C T : S 2 0 1 6 - 3 A F D : 0 2 A R : 0 STATUS 4 : 3... -
Page 108: Anc In Status 1-2
Displays the ancillary data name, such as S334-1CDP(708), if the DID and SDID of the ancillary data match that of supported formats. See section 19. “FA-9500 Ancillary Data Packet Name List” for details on ancillary data names, and DID and SDID of formats. -
Page 109: Conv1 Vi Out
5-16-2. CONV1 VI OUT Displays whether the RP186 VI ancillary data is inserted into CONV 1 output video signal. When no RP186 VI is in the CONV1 output video signal C O N V 1 O U T 6 7 3 Menu button R P 1 8 6 V I : A B S E N T... -
Page 110: Conv1 Anc Out1
Displays the ancillary data packet name and line number for the inserted ancillary data in the CONV 1 output signal. The status of up to 4 ancillary data can be displayed. See section 19. “FA-9500 Ancillary Data Packet Name List” for details on ancillary data names. 5-18. CONV2 ANC OUT... -
Page 111: Conv2 Vi Out
5-18-2. CONV2 VI OUT Displays whether the RP186 VI ancillary data is inserted into CONV 2 output video signal. When no RP186 VI is in the CONV2 output video signal C O N V 2 O U T 6 8 3 Menu button R P 1 8 6 V I : A B S E N T... -
Page 112: Conv2 Anc Out1
Displays the ancillary data packet name and line number for the inserted ancillary data in the CONV 2 output signal. The status of up to 4 ancillary data can be displayed. See section 19. “FA-9500 Ancillary Data Packet Name List” for details on ancillary data names. -
Page 113: Audio Settings
6. AUDIO Settings Make the menu buttons light up orange using the VIDEO/AUDIO button. Menu button (Pressing the button while the buttons are lit green turns the lights orange.) VIDEO Afterwards, the audio menus displayed on the lower row on each menu button AUDIO can be selected. -
Page 114: Sdi Remapping
*7 Not shown if the FA-95DE-E option is not installed. Auto Channel Pairing for NON-PCM Audio Inputs The FA-9500 recognizes NON-PCM audio input signals in L/R channel pair units, and adjusts assignments according to the signal selected for the L channel. - Page 115 Auto channel pairing example (on NON-PCM inputs): Conditions: NON-PCM inputs in SOURCE 1 and 2 PCM inputs in SOURCE 3 through 16 Entered value Menu display Auto channel pairing CH1: SOURCE1 CH1: SOURCE1 CH1: SOURCE1 CH2: SOURCE2 CH2: SOURCE2 CH2: SOURCE2 Unchanged.
-
Page 116: Sdi Mono Sum
6-1-3. SDI MONO SUM S D I M O N O S U M 1 2 3 Menu button S E L : 1 / 2 S U M : D I S A B L E M O N O PROCESS SDI AUDIO Parameter... -
Page 117: Sdi In Audio
*1 Embedded audio signal groups are automatically phase-adjusted when they are input to the FA-9500. If there is an abnormal audio signal in an audio group, whether the audio group is in use or not, audio streams may be obstructed by the auto phase adjustment. In such cases, audio stream obstruction can be avoided using this Alignment enable/disable function. -
Page 118: Aes Audio Settings (Aes Audio)
6-2. AES AUDIO Settings (AES AUDIO) Allows you to set the DIGITAL AUDIO IN/OUT settings. 6-2-1. AES IN GAIN Menu button A E S G A I N 1 3 1 S E L : C H 1 G A I N S E T : 0 . -
Page 119: Aes Remapping
*7 Shown only if FA-95DE-E option is installed. Auto Channel Pairing for NON-PCM Audio Inputs The FA-9500 recognizes NON-PCM audio input signals in L/R channel pair units, and adjusts assignments according to the signal selected for the L channel. - Page 120 channel pairing example (on NON-PCM inputs): Conditions: NON-PCM inputs in SOURCE 1 and 2 PCM inputs in SOURCE 3 through 16 Entered value Menu display Auto channel pairing CH1: SOURCE1 CH1: SOURCE1 CH1: SOURCE1 CH2: SOURCE2 CH2: SOURCE2 CH2: SOURCE2 Unchanged.
-
Page 121: Aes Mono Sum
6-2-4. AES MONO SUM Menu button A E S M O N O S U M 1 3 4 S E L : C H 1 / 2 M O N O S U M : D I S A B L E AES AUDIO Parameter Default... -
Page 122: Analog Audio Settings (Analog)
6-3. ANALOG AUDIO Settings (ANALOG) 6-3-1. ANALOG IN LEVEL A N A L O G L E V E L 1 4 1 Menu button S E L : C H 1 L E V E L S E T : + 4 d B m CONV1 ANALOG... -
Page 123: Analog Out Gain
6-3-4. ANALOG OUT GAIN Menu button A N A L O G O U T G A I N 1 4 4 S E L : C H CONV1 G A I N S E T : 0 . 0 d B ANALOG M A S T E R : 0 . -
Page 124: Analog Mono Sum
6-3-6. ANALOG MONO SUM Menu button A N A L O G M O N O S U M 1 4 6 S E L : C H 1 / 2 CONV1 M O N O S U M : D I S A B L E ANALOG Parameter Default... -
Page 125: Master Out Gain Settings (Master)
6-4. MASTER OUT GAIN Settings (MASTER) M A S T E R O U T G A I N 1 5 1 Menu button S E L : C H G A I N S E T : 0 . 0 d B CONV2 M A S T E R : 0 . -
Page 126: Audio Mapping (Mapping)
6-5. AUDIO MAPPING (MAPPING) Allows you to route 16 audio channels. The SOURCE/SRC SET menu allows you to select 16-channel audio signals to process from among SDI embedded, AES and analog input audio signals. 6-5-1. SOURCE/SRC SEL S O U R C E / S R C S E L 1 5 5 Menu button... -
Page 127: Audio Delay Settings
IMPORTANT Changing the SOURCE SET settings may affect the phase alignment of the reference and other channel pairs. If the alignment is turned off, set MASTER MUTE (see section 6-4 “MASTER OUT GAIN Settings (MASTER)”) to on and off, or turn the unit power off and on to regain the alignment. -
Page 128: Down Mix Set
6-7. DOWN MIX SET Menu button D O W N M I X S E T 1 6 5 M O D E : S T E R E O IN SEL S U R R O U N D M I X : - 3 d B DOWN MIX... - Page 129 Downmix Block Diagram <<Surround Mix (Lt/Rt)> Ls/Rs surround channels are summed to produce a mono surround channel and mixed to right and left channels by the 180 degree phase difference. (LFE channel is discarded.) Gain Adjust Gain Adjust Gain Adjust Gain Adjust 1:...
-
Page 130: Down Mix Assign
6-7-1. DOWN MIX ASSIGN Menu button D O W N M I X A S S I G N 1 6 6 S E L : L E F T IN SEL S O U R C E : S O U R C E 1 DOWNMIX Setting range Parameter... -
Page 131: Audio Option (Audio Op)
6-9. AUDIO OPTION (AUDIO OP) 6-9-1. Dolby AUX OUTPUT * This menu is available only if the FA-95D-D option is installed. Menu button D o l b y A U X O U T 3 0 1 O U T P U T : D E C C H 1 / 2 VIDEO OP AUDIO OP... -
Page 132: Dolby Decoder Input
6-9-2. Dolby DECODER INPUT * This menu is available only if the FA-95D-D option is installed. D o l b y D E C I N P U T 3 0 2 Menu button I N P U T : A U X S T R E A M : L O S S VIDEO OP P R O G R A M : L O S S... -
Page 133: Dolby Decoder Reference
6-9-3. Dolby DECODER REFERENCE * This menu is available only if the FA-95D-D option is installed. D o l b y D E C R E F 3 0 3 Menu button I N P U T : A U X R E F VIDEO OP AUDIO OP... -
Page 134: Dolby Encoder Input
6-9-6. Dolby ENCODER INPUT * Menu is available only if the FA-95DE-E option is installed. D o l b y E N C I N P U T 3 0 6 Menu button I N P U T D I R E C T S E L S E L : C H 1 VIDEO OP... -
Page 135: Dolby Encoder Setting
6-9-7. Dolby ENCODER SETTING * Menu is available only if the FA-95DE-E option is installed. Menu button D o l b y E N C S E T 3 0 7 P R O G R A M 5 . 1 + 2 VIDEO OP B I T D E P T H : 2 0 b i t... -
Page 136: Audio System Settings (Audio Sys)
6-10. AUDIO SYSTEM Settings (AUDIO SYS) Allows you to set basic settings on the audio system. 6-10-1. FADE IN / OUT Menu button F A D E I N / O U T 1 8 1 F A D E M O D E : D I S A B L E VIDEO SYS F A D E... -
Page 137: Digital Audio
6-10-2. DIGITAL AUDIO D I G I T A L A U D I O 1 8 2 Menu button R E F L E V E L : - 2 0 d B F S VIDEO SYS G R A D E : P R O F E S S I O N A L R E S O L U T I O N : 2 4 b i t AUDIO SYS Parameter... - Page 138 *4 Fade function depends on the FADE MODE setting in the 6-10-1 FADE IN/OUT menu. CH STATUS The FA-9500 determins whether the input audio signal is PCM or not from the NON-PCM flag carried in the Audio Channel Status (ACS). If ACS is incorrect it may lead to improper processing.
-
Page 139: Digital Silence
6-10-4. DIGITAL SILENCE Menu button D I G I T A L S I L E N C E 1 8 4 S I L E N C E T I M E : 2 s e c VIDEO SYS S I L E N C E L V L : - 7 2 d B F S... -
Page 140: Other Settings & Information (Other)
7. Other Settings & Information (OTHER) Allows you to set other settings other than video and audio settings. Also, information on the various versions and installation states of FA-9500 option items can be viewed. 7-1. CONTROL SETTING Menu button C O N T R O L... -
Page 141: Gpi Setting
7-3. GPI SETTING G P I S E T T I N G 1 9 6 Menu button G P I 1 - 7 S E L : G P I 1 I N / O U T S E L : I N P U T STATUS A S S I G N : N O N E OTHER... - Page 142 ID: 1”. Logo ID can be assigned to any number 1 through 256. In the following cases, the logo will not be inserted to the converter output signals, although data will be loaded to the FA-9500. - No logo is registered under the selected Logo ID.
- Page 143 *2 When the FA-95CO is installed and Changeover is enabled the value will be displayed with an asterisk, as *SDI1, *SDI2, or *COMPOSITE indicating the input selection cannot be changed. See section 5-7-1 “VIDEO INPUT SET” for details. *3 Effective only if FA-95AIO option is installed. NOTE See section 14 “REMOTE”...
-
Page 144: Network Info
S U B : 2 5 5 . 2 5 5 . 2 5 5 . Parameter Default Description Displays the unit name. NAME FA-9500 To change the unit name, see Unit Name in section 9-6-1 “Event Control” 192.168.0.10 Displays the LAN PORT1 IP address. 255.255.255.0 Displays the LAN PORT1 subnet mask. -
Page 145: Option A Ver
7-6. OPTION A Ver. Menu button O P T I O N V e r . 1 9 9 N A M E : N O N E STATUS F P G A 1 : - - . - - OTHER F P G A 2 : - - . -
Page 146: Other Option
7-8. OTHER OPTION Menu button O T H E R O P T I O N 2 0 1 F A - 9 5 P S : I N S T A L L STATUS OTHER Setting range Parameter Default Description (Steps) INSTALL: FA-95PS option is installed. -
Page 147: Event Memory
8. Event Memory The FA-9500 can store 100 event memories, as well as sets of settings, each of which are stored for each format. Every press of the EVENT button alternates the menus: EVENT LOAD (lit green), EVENT SAVE (lit red),and EVENT SETUP(lit orange). -
Page 148: Event Save
Displays the signal format if NO. is set to VIDEO FORMAT. *1 VIDEO FORMAT saves settings to memory for the respective video formats the FA-9500 uses. The current video format is displayed on the third row. The EVENT SAVE menu is disabled and appears as shown below if AUTO LOAD is set to ENABLE in the EVENT SETUP menu (8-3). -
Page 149: Parameters That Are Not Stored In Event Memories
Do not power off the unit while saving an event. The event may not be properly stored. Also, the FA-9500 regularly updates the setting data. Do not turn off the unit for at least 5 seconds after changing settings. It is recommended to save important data into a backup file. -
Page 150: Control Via Web Browser
9. Control via WEB Browser This section describes how to control the FA-9500 from a computer via a web browser. See section 3-5 “Connecting a Computer” for details on connecting with a computer. Do not open pop-up setting dialogs at the same time. Doing so may disable operation. -
Page 151: Video Settings
9-2. VIDEO Settings Click Click the Video tab at the top of the page. The video block diagram will be displayed. Each block in the diagram lets you to go to the corresponding windows or dialog boxes that allow you to change various settings. Video Block Diagram (14) (15) -
Page 152: Input Select
9-2-1. Input Select Clicking block (1) on the Video block diagram opens the Video Input setting dialog box. Select setting values for parameters in the respective pull-down menus. After completing the settings, click Close to close the dialog box. Click Refresh to update the settings. ... - Page 153 No outputs from SDI OUT1/2, 3/4, or COMPOSITE OUT1/2. Clicking block (1) on the Video block diagram when the FA-95CO option is installed opens the Video Input Setting dialog box as shown below. After completing the settings, click Close to close the dialog box. Click Refresh to update the settings.
- Page 154 Video Trigger Click here The Video Trigger setting dialog box for detailed settings opens. After completing the settings, click Close to close the dialog box. Click Refresh to update the settings. SDI Error Trigger Parameter Default Setting range Description Enables or disables auto changeover Disable...
- Page 155 CRC Error Trigger Parameter Default Setting range Description Disable Enables or disables auto changeover Trigger Set Disable for SDI video CRC error. Enable Sets the detected video CRC error duration required to trigger a changeover. Immediate Duration Immediate * To avoid an unexpected changeover 1 to 100 Frames triggered by a switchover of input signals via router, set Duration to...
-
Page 156: About Changeover (Web)
After completing the settings, click Close to close the dialog box. Click Refresh to update the settings. Audio Loss Trigger Setting range Parameter Default Description (Steps) Disable Enables or disables auto changeover for signal Group1 to 4 Disable Enable loss of SDI embedded audio. -
Page 157: Changeover And Loss Operation (Web)
Changeover has priority over Loss operation conducted by Video Loss Mode. However, if neither a SDI 1 or SDI 2 input signal exists, the FA-9500 performs LOSS according to the selection made under LOSS in the 9-2-1 Input Select menu. If both SDI 1 and 2 inputs encounter the same problem and the problem is not signal loss, the FA-9500 will output the SDI 1 input signal. -
Page 158: Auto Video Optimizer (Avo)
9-2-2. Auto Video Optimizer (AVO) Clicking block (2) on the video block diagram opens the Auto Video Optimizer dialog box. After completing the settings, click Close to close the dialog box. Click Refresh to update the settings. AVO Control Parameter Default Setting range... - Page 159 Parameter Default Setting range Description Sets the sample area to calculate the adjustment. 10 options are available: Eight fixed areas and Full tow custom areas. Screen, Fixed areas Full Screen, Letter Box, Pillar Box, Center, Bottom Sample Area Full Screen Top-Left, Top-Right, Right Bottom Left, Bottom Right...
-
Page 160: About Scene Cut Detection And Frame Delay Settings
9-2-2-1. About Scene Cut Detection and Frame Delay Settings To properly perform AVO scene cut detection and adjustment, Frame Delay must be set in the setting range according to the menu settings (9-2-3 “Frame Delay” menu) as shown in the table below. FRAME DELAY Setting Range Chart Setting Rrange per Input Video Format 525/60i... -
Page 161: User 1 - 5 Level Set
9-2-2-2. User 1 - 5 LEVEL SET Clicking Set User on the Auto Video Optimizer dialog box opens the User1 - 5 setting dialog box. After completing the settings, click Close to close the dialog box. Click Refresh to update the settings. Click Unity to reset to the default settings. - Page 162 In White Level and In Black Level These two parameters determine the highest and lowest levels of luminance in the input signal. Setting range Parameter Description (step) The maximum value of luminance in the sample data is defined as 100%. Based on this reference value, this determines the highest level of luminance for level control.
-
Page 163: User Area 1, 2
9-2-2-3. User Area 1, 2 Clicking Set Area of Sample Area on the AVO setting dialog box opens the User Area 1, 2 Setting dialog box. After completing the settings, click Close to close the dialog box. Click Refresh to update the settings. Click Unity to reset to the default settings. -
Page 164: Frame Delay
9-2-3. Frame Delay Clicking block (3) in the Video block diagram opens the Frame Delay setting dialog box. After completing the settings, click Close to close the dialog box. Click Refresh to update the settings. Click Unity to reset to the default settings. Click to increase the value by the smallest steps. -
Page 165: Proc Amp
9-2-4. Proc Amp Clicking block (4) on the video block diagram opens the Proc Amp setting diagram. After completing the settings, click Close to close the dialog box. Click Refresh to update the settings. Click Unity to reset to the default settings. Click to increase the value by the smallest steps. -
Page 166: Converter1
9-2-6. Converter1 Clicking block (6) on the video block diagram opens the Converter1 setting dialog box. After completing the settings, click Close to close the dialog box. Click Refresh to update the settings. Converter1 Process Mode Paramet Setting range Default Description (Steps) - Page 167 Aspect Ratio Setting range Parameter Default Description (Steps) AFD(4:3) Selects the aspect ratio for the output from AFD-ALT(4:3) Converter1. AFD(16:9) Selectable aspect ratio settings when CONV1 is AFD-ALT(16:9) set to SD. 4:3 L 16:9 T AFD(4:3), AFD-ALT(4:3), AFD(16:9), 4:3 L 14:9 T AFD-ALT(16:9) automatically select an aspect 4:3 L>16:9 ratio according to the AFD data in the input...
- Page 168 Antialias Setting range Parameter Default Description (Steps) Performs horizontal anti-aliasing for the output video image. Weak 8-1 Weak 8 to Strong 8 (low to high) Horizontal Normal Normal This setting cannot be changed if the Strong1-8 conversion is set to the formats indicated as (BYPASS) in the CONV1 Conversion Table in section 5-3-2.
- Page 169 Converter1 Crop Parameter Default Setting range (Steps) Description Variable H Left 0 Pixel Crops the left side of the video. (2 Pixel) Variable H Right 0 Pixel Crops the right side of the video. (2 Pixel) Variable V Top 0 Line Crops the top of the video.
-
Page 170: Converter2 (Up/Down/Cross)
9-2-7. Converter2 (Up/Down/Cross) Clicking block (7) on the video block diagram opens the Converter2 setting dialog box. After completing the settings, click Close to close the dialog box. Click Refresh to update the settings. Click Unity to reset to the default settings. Click to increase the value by the smallest steps. - Page 171 Aspect Ratio Parameter Default Setting range Description AFD(4:3) Selects the aspect ratio for the output from AFD-ALT(4:3) Converter2. AFD(16:9) Selectable aspect ratio settings when AFD-ALT(16:9) Converter 2 is set to SD. 4:3 L 16:9 T AFD(4:3), AFD-ALT(4:3), AFD(16:9), 4:3 L 14:9 T AFD-ALT(16:9) automatically select an 4:3 L>16:9 aspect ratio according to the AFD data in the...
- Page 172 Antialias Parameter Default Setting range Description Performs horizontal anti-aliasing for the output video image. Weak 8-1 Weak 8 to Strong 8 (low to high) Horizontal Normal Normal This setting cannot be changed if the Strong 1-8 conversion is set to the formats indicated as (DOWN) in the CONV2 Conversion Table in section 5-4-2.
- Page 173 Converter2 Crop Setting range Parameter Default Description (Steps) Variable H Left 0 Pixel Crops the left side of the video. (2 Pixel) Variable H Right 0 Pixel Crops the right side of the video. (2 Pixel) Variable V Top 0 Line Crops the top of the video.
-
Page 174: Color Corrector
9-2-8. Color Corrector Clicking block (8) on the video block diagram opens the Color Corrector dialog box. See section 5-2-4 “COLOR CORRECTOR (C.C.)” for details. Auto Video Optimizer (AVO) and Color Corrector use the same circuit. The color corrector settings are not fully changeable when AVO mode (9-2-2 “Auto Video Optimizer (AVO)”) is set to Auto or Hold. - Page 175 Black Level Setting range Parameter Default Description (Steps) R, G, B 0.0 - 200.0% Adjusts the black level of R, G, and B 100.0% (RGB Black Level) (0.5%) components separately. Adjusts the black level of R, G, and B components separately, then turns this Group Adjust Group Adjust on.
-
Page 176: Video Test Signal
9-2-9. Video Test Signal Clicking block (9) on the video block diagram opens the Video Test Signal setting dialog box. After completing the settings, click Close to close the dialog box. Click Refresh to update the settings. Parameter Default Setting range Description Full Color Bar Outputs an internal video test... -
Page 177: Ypbpr/Rgb Clip
9-2-10. YPbPr/RGB Clip Clicking block (11) on the video block diagram opens the YPbPr/RGB setting dialog box. See section 5-6-3 “VIDEO CLIPSetting range” for details. YPbPr / RGB Clip Mode Parameter Default Setting range Description Selects a mode whether to clip Clip Mode YPbPr signals in the YPbPr or RGB color... -
Page 178: Output Select
9-2-11. Output Select Clicking block (12) on the video block diagram opens the Video Output Setting dialog box. Display of the Video Output Setting dialog varies depending on the Video Output Mode setting. SDI1/2 Output Setting Allows you to assign video signals to output from video output connectors SDI1 and 2. Setting range Parameter Default... - Page 179 Composite Output Setting Allows you to assign video signals to output from the Composite output connectors. Setting range Parameter Default Description (Steps) Selects whether to output a Converter1 Assign Converter1 Converter1 or 2 signal from Converter2 COMPOSITE OUT connectors. The input and output signal formats are displayed;...
-
Page 180: Composite Clip
9-2-12. Composite Clip Clicking block (13) on the video block diagram opens the Composite Clip dialog box. See section 5-6-3 “VIDEO CLIP Setting Ranges” for details. Setting range Parameter Default Description (Steps) Off, Composite Clip enables clipping Clip Mode Composite Clip on the composite output signals. -
Page 181: Audio Settings
9-3. AUDIO Settings Click Click the Audio tab at the top of the page. The audio block diagram will be displayed. Each block in the diagram lets you to go to the corresponding windows or dialog boxes that allows you to change various settings. Audio Block Diagram (10) (11) -
Page 182: Sdi Input Gain
9-3-1. SDI Input Gain Clicking block (1) on the audio block diagram opens the SDI Audio Input Gain dialog box. After completing the settings, click Close to close the dialog box. Click Refresh to update the settings. Click Unity to reset to the default settings. Click to increase the value by the smallest steps. -
Page 183: Aes Audio Input Settings
9-3-2. AES Audio Input Settings Clicking block (2) on the audio block diagram opens the AES Audio Input dialog box. After completing the settings, click Close to close the dialog box. Click Refresh to update the settings. Click Unity to reset to the default settings. Click to increase the value by the smallest steps. - Page 184 Setting Examples: When setting all channel pairs CH 1/2 to 7/8 to Group A CH 1/2 will be the reference. Other channel pairs will be synchronized to the word clock of CH1/2. When setting channels CH1/2 to 3/4 to Group A, and channels CH5/6 to 7/8 to Group CH 1/2 will be the reference pair for Group A, and CH 5/6 the reference pair for Group B.
-
Page 185: Analog Input Gain/Level
9-3-3. Analog Input Gain/Level Clicking block (3) on the audio block diagram opens the Analog Audio Input Gain/Level dialog box. After completing the settings, click Close to close the dialog box. Click Refresh to update the settings. Click Unity to reset to the default settings. Click to increase the value by the smallest steps. -
Page 186: Source Select
9-3-4. Source Select Clicking block (4) on the audio block diagram opens the Source Select dialog box. After completing the settings, click Close to close the dialog box. Click Refresh to update the settings. Source Set Setting range Parameter Default Description (Steps) -
Page 187: Audio Output Delay
9-3-5. Audio Output Delay Clicking block (5) on the audio block diagram opens the Audio Delay dialog box. After completing the settings, click Close to close the dialog box. Click Refresh to update the settings. Click Unity to reset to the default settings. Click to increase the value by the smallest steps. -
Page 188: Src Mode
9-3-6. SRC Mode Clicking block (6) on the audio block diagram opens the SRC Mode dialog box. After completing the settings, click Close to close the dialog box. Click Refresh to update the settings. SRC Mode Parameter Default Setting range Description Sets the SRC circuit to pass or by-pass audio signals per channel pair. -
Page 189: Audio Master Settings
9-3-7. Audio Master Settings Clicking block (7) on the audio block diagram opens the Audio Master Setting dialog box. After completing the settings, click Close to close the dialog box. Click Refresh to update the settings. Click Unity to reset to the default settings. Click to increase the value by the smallest steps. -
Page 190: Audio Test Signal
9-3-8. Audio Test Signal Clicking block (10) on the audio block diagram opens the Audio Test Signal dialog box. After completing the settings, click Close to close the dialog box. Click Refresh to update the settings. Parameter Default Setting range Description Audio Test Signal Outputs an internal audio test signal... -
Page 191: Ch Down Mix
9-3-9. 5.1Ch Down Mix Clicking block (9) on the audio block diagram opens the Audio Down Mix dialog box. See section 6-7 “DOWN MIX SET” for details. Down Mix Mode Setting range Parameter Default Description (Steps) Stereo Surround Mode Select Stereo Selects a mode to downmix audio signals. - Page 192 Down Mix Assign Parameter Default Setting range Description Selects audio signals that are selected for SOURCE channels Left Left: Source CH1 1 through 16 in the Source Right Right: Source CH2 Select menu (9-3-4) for the Source CH Center Center: Source CH3 channels to be downmixed.
-
Page 193: Audio Output Polarity
9-3-10. Audio Output Polarity Clicking block (8) on the audio block diagram opens the Audio Output Polarity setting dialog box. After completing the settings, click Close to close the dialog box. Click Refresh to update the settings. Setting Parameter Default Description range Sets the polarity for Source channels... -
Page 194: Sdi Audio Output Settings
*7 Shown only if the FA-95DE-E option is installed. Auto Channel Pairing for non-PCM Audio Inputs The FA-9500 recognizes non-PCM audio input signals in L/R channel pair units, and adjusts assignments according to the signal selected for the L channel. - Page 195 Auto channel pairing example (on non-PCM inputs): Conditions: non-PCM inputs in Source 1 and 2 PCM inputs in Source 3 through 16 Entered value in SDI Assigned Source display Auto channel pairing Audio Remapping CH1: Source1 CH1: Source1 CH1: Source1 CH2: Source2 Unchanged.
- Page 196 SDI Audio Mono Sum Parameter Default Setting range Description Disable Enable: Outputs the stereo pair CH1/2-CH15/16 Disable channels as a mono sum. Enable SDI Output Clock Select Parameter Default Setting range Description Selects an audio clock per group for SDI embedded audio output.
-
Page 197: Aes Audio Output Settings
*7 Shown only if FA-95DE-E option is installed. Auto Channel Pairing for non-PCM Audio Inputs The FA-9500 recognizes non-PCM audio input signals in L/R channel pair units, and adjusts assignments according to the signal selected for the L channel. - Page 198 Auto channel pairing example (on non-PCM inputs): Conditions: non-PCM inputs in Source 1 and 2 PCM inputs in Source 3 through 16 Entered value in AES Assigned Source display Auto channel pairing Audio Remapping CH1: Source1 CH1: Source1 CH1: Source1 CH2: Source2 CH2: Source2 CH2: Source2...
- Page 199 AES Audio Mono Sum Setting range Parameter Default Description (Steps) Disable Enable: Outputs the stereo pair CH 1/2-CH 7/8 Disable channels as a mono sum. Enable NOTE To change the Source signal assignments, see section 9-3-4 “Source Select”. For details on how to set downmix, see section 9-3-9 “5.1Ch Down Mix”.
-
Page 200: Analog Audio Output Settings
9-3-13. Analog Audio Output Settings Clicking block (13) on the audio block diagram opens the Analog Audio Output dialog box. After completing the settings, click Close to close the dialog box. Click Refresh to update the settings. Click Unity to reset to the default settings. Click to increase the value by the smallest steps. -
Page 201: Dolby E/Digital Decoder
Analog Audio Remapping Setting range Parameter Default Description (Steps) Selects source audio signals to assign to analog audio output Source CH 1-16 channels. 500Hz Source CH 1-16: Signals assigned to SOURCE channels 1kHz 500Hz/1kHz: Test signal Silence Silence: Mute signal CH 1-CH 4 Each Source Down Mix-L... - Page 202 After completing the settings, click Close to close the dialog box. Click Refresh to update the settings. Dolby Decoder Input Select Parameter Default Setting range Description Selects source audio signals to input to the Dolby decoder. AUX Input: Input signal in optional AUX Input Dolby Input AUX Input...
- Page 203 Dolby Decoder REF Input Select Parameter Default Setting range Description Selects a reference signal to be used in the Dolby decoder. PCM signal output from the Dolby decoder will be synchronized to the selected reference signal. Output Video Output Video: Uses the output video signal. REF Input AUX REF IN AUX REF In...
-
Page 204: Dolby Aux Output Select
9-3-15. Dolby AUX OUTPUT Select Clicking block (15) on the audio block diagram when FA-95D-D or FA-95DE-E option is installed opens the Dolby AUX Output Select dialog box. After completing the settings, click Close to close the dialog box. Click Refresh to update the settings. Parameter Default Setting range... -
Page 205: Dolby E Encoder
9-3-16. Dolby E Encoder Clicking block (16) on the audio block diagram when the FA-95DE-E option is installed opens the Dolby E Encoder dialog box. After completing the settings, click Close to close the dialog box. Click Refresh to update the settings. ... - Page 206 *2 SOURCE channels corresponding to CH1-8 will be the default value. If Input Selection is set to Direct Input Selection, the settings will be; CH1: Source CH1 - CH8: Source CH8. If Input Selection is set to Dolby Decoder Output, the settings will be; CH1: Dolby DEC 1 - CH8: Dolby DEC 8.
-
Page 207: System Settings
9-4. SYSTEM Settings Click Click the System tab at the top of the page. The System setting window will be displayed. The system setting window consists of Video System and Audio System pages. Those pages are alternated by at the top of the page. 9-4-1. - Page 208 SYNCHRO IN SEL Default FRAME ─ SDI1, 2 Composite (525/60) LINE Composite (625/50) Component (Y/C) Component (others) SDI1, 2 Composite (525/60) AVDL Composite (625/50) Component (Y/C) Component (others) SDI1, 2 Composite (525/60) INPUT Composite (625/50) Component (Y/C) Component (others) HD Phase Parameter Default Setting range (Steps)
- Page 209 Video Position Parameter Default Setting range (Steps) Description 525/60i ±92 625/50 ±92 1080/59i ±240 1080/50i ±240 H Position 1080/23PsF ±240 0 Pixel 1080/24PsF ±240 720/59p ±160 720/50p ±160 1080/59p ±240 1080/50p ±240 (Pixel) Adjusts the horizontal/vertical position of output videos. 525/60i ±30 625/60i ±36 1080/59i ±68...
- Page 210 520clk common in all formats. (HD: 74MHz, SD: 27MHz) Does not use a genlock signal. Auto Detect 525/60 625/50 Sets a system format for the FA-9500. 1080/59.94i 1080/50i Auto Detect: Detects and sets the detected Auto Sync Format 720/59.94p...
- Page 211 Table of Reference signals and Input formats that can lock Reference signal Input signal 525/60 1080/59i 720/59p 625/50 1080/50i 720/50p 1080/23PsF 1080/24PsF ✓✓✓ ✓✓✓ ✓ ✓ 525/60 ✓✓✓ ✓✓✓ ✓ ✓ 1080/59i ✓✓✓ ✓✓✓ ✓✓✓ ✓ 720/59p ✓✓✓ ✓✓✓ ✓✓✓ ✓...
- Page 212 Converter1 Ancillary Setting Parameter Default Setting range Description Selects ancillary data processing mode for the Converter1 output signal. H ANC and V ANC menu H/V ANC ANC Mode H/V ANC settings will become available when H/V ANC is Detail selected.
- Page 213 Converter1 Audio Group Parameter Default Setting range Description Disable: Does not insert GROUP 1-embedded Disable audio. Group1 Enable Enable Enable: Inserts GROUP 1-embedded audio. Disable: Does not insert GROUP 2-embedded Disable audio. Group 2 Enable Enable Enable: Inserts GROUP 2-embedded audio. Disable: Does not insert GROUP 3-embedded Disable audio.
-
Page 214: Audio System
9-4-2. Audio System If the user name and password are not set in the USER SETTING page (see section 9-8-5), the Logout is not shown. Click Refresh to update the settings. Fade In/Out Parameter Default Setting range Description Disable: Always outputs input audio signals without adding any effect such as Fade or Mute. - Page 215 *1 Embedded audio signal groups are automatically phase-adjusted when they are input to the FA-9500. If there is an abnormal audio signal in an audio group, whether the audio group is in use or not, audio streams may be obstructed by the auto phase adjustment. In such cases, audio stream obstruction can be avoided using this Alignment enable/disable function.
- Page 216 Normally set to Normal. Set to Disable for a specific program or duration when audio output has noise or is muted. The FA-9500 fades out audio or resets the delay circuit when a status change (SDI signal input interruption, signal switchover (by a router, etc.) is detected. Faulty ancillary data in normal audio signals may also be detected as status changes.
- Page 217 *3 Processes the audio signal as described if 9-3-11 SDI Audio Output Settings is set to Auto. Validity: FA-9500 determins whether the input audio signal is PCM or NON-PCM by Validity Bit (V Bit) in audio signal. If Validity Bit (V Bit) is incorrect the audio signal may cause inproper processing.
-
Page 218: Anc Settings
9-4-3. ANC Settings If the user name and password are not set in the USER SETTING page (see section 9-8-5), the Logout is not shown. Click Refresh to update the settings. ANC Detect Line For RP186 VI Parameter Default Setting range Description RP186 VI... - Page 219 ANC Data Embed Parameter Default Setting range Description CEA608 CC S334-1 CC SD CEA708 CC HD Selects an ancillary data type to be CEA608 CC S2016-3 AFD inserted into SDI signals. RP186 VI BT1119 WSS Selects a video format compatible with the ancillary data selected under ANC.
- Page 220 NOTE If CEA608 or S334-1 CC closed caption data is detected in the 525/60 input signal, and the CONV1 and/or CONV2 output format/s is/are 1080/59i and/or 720/59p, the detected closed caption data will not be converted to CEA708. The CEA708 closed caption data insertion will be automatically terminated.
- Page 221 ANC Loss Mode Settings Parameter Default Setting range Description S2016-3 AFD Selects an ancillary data type to insert S2016-3 AFD RP186 VI into the SDI signal. BT1119 WSS Selects a video format compatible with the ancillary data selected under ANC. Format Only compatible Video formats will be displayed...
-
Page 222: Gpi
9-5. GPI If the user name and password are not set in the USER SETTING page (see section 9-8-5), the Logout is not shown. Click Refresh to update the settings. Parameter Default Setting range(Steps) Description Input Selects whether to use GPI pins 1 In/Out Input Output... - Page 223 CONV1 Load 1 – 7 or CONV2 Load 1 – 7. In the following cases, the logo will not be inserted to the converter output signals, although data will be loaded to the FA-9500. - No logo is registered under the selected Logo ID.
-
Page 224: Utility Settings
9-6. Utility Settings Click Click the Utility tab at the top of the page. The Utility setting window will be displayed. If the user name and password are not set in the USER SETTING page (see section 9-8-5), the Logout is not shown. Click Refresh to update the settings. -
Page 225: Event Control
*1 Video Format selects an event that is stored for each video format. *2 Default recalls the default settings. Set Event Name Click Set next to Set Event Name. A window that allows you to name the FA-9500 and events 1 though 100 as shown below opens. ... -
Page 226: Backup Parameter
9-6-2. Backup Parameter The FA-9500 settings can be saved to a file, and the saved settings in a file can be loaded. Saving the FA-9500 Settings to a File Click Save. The File Download dialog appears. The Save As dialog appears. Specify the destination directory. - Page 227 Specify the destination directory and click Open. Click Load. A confirmation message appears. Click OK to start transferring the file to the FA-9500. To stop transferring the file, click Cancel. IMPORTANT BY-PASS On/Off and Freeze On/Off settings cannot be saved.
-
Page 228: Downloading A Mib File
The MIB file used when the FA-9500 is monitored and operated through the external SNMP manager can be downloaded from the FA-9500. The downloaded file is in zip format and so you will need to unzip the file before its use. -
Page 229: Backup Event Data
The Event Memory data (Events1 through 100 and the event data for each video format) can be saved in a file on the computer as a backup. You can also move the data to another FA-9500. Save File Click Save. - Page 230 Once the download is completed, the Download complete dialog box appears. Click Close. IMPORTANT Some versions of Internet Explorer may not save data having a long file name properly. In such case, save data in Internet Explorer using a short file name, then rename the file in Windows Explorer.
-
Page 231: Status Display
9-7. Status Display Click Click the Status tab at the top of the page. The Unit/Video Status page will be displayed. To go to the Audio Status page, click Audio Status at the top left of the page. In the same way, click Unit/Video Status to go to the Unit/Video Status page, and click Unit Information to go to the Unit Information page. - Page 232 Video Input Status Item Display Description Loss 525/60 625/50 1080/59i 1080/50i Displays the video format of the SDI1 input signal. 720/59p Displays “Loss” if there is no input signal. SDI1 In 720/50p Displays “Unknown” if there is an unsupported input signal. 1080/23PsF Displays “BY-PASS”...
- Page 233 *1 Shown if the FA-95AIO option is installed. Unit Status Item Display Description Displays the unit name. The default setting is “FA-9500”. Unit Name FA-9500 To change the unit name, see Unit Name in section 9-6-1 “Event Control” Displays the status of FAN1.
-
Page 234: Audio Status
9-7-2. Audio Status The audio statuses are shown on the Audio Status page. If the user name and password are not set in the USER SETTING page (see section 9-8-5), the Logout is not shown. Click Refresh to refresh the page. ... - Page 235 SDI1 Input Audio Item Display Description Displays the status of audio signal channels CH1 - Loss CH16 of the SDI1 input signal. Loss: No audio signals PCM: Normal audio signal Silence Silence: Mute signal Non-PCM CH1 - CH16 Non-PCM: Compressed audio data such as AC3 PCM(Async) PCM (Async): Normal audio signal (asynchronous) Silence (Async)
- Page 236 AES Output Audio Item Display Description Displays the status of the audio signal output from the DIGITAL AUDIO IO connectors. Silence PCM: Normal audio signal CH1 - CH8 Non-PCM Silence: Mute signal Non-PCM: Compressed audio data such as AC3 Unknown Unknown: Unidentifiable Input Setting...
-
Page 237: Unit Information
Logout is not shown. Click Refresh to update the settings. Unit Version Item Description Serial No: Displays the serial number of the FA-9500. FPGA1 Displays the FPGA1 version. FPGA2 Displays the FPGA2 version. FPGA3 Displays the FPGA3 version. -
Page 238: Anc Status
9-7-4. ANC Status Click Refresh to update the settings. Ancillary Input Stats Displays the status of CEA608, WSS, and VI ancillary data detection. The line number in which the ancillary data is in is displayed. AFD Input Status Displays the status of AFD detection in the input signal. - Page 239 Displays the ancillary data name, such as S334-1CDP(708), if the DID and SDID of the ancillary data match that of supported formats. See section 19. “FA-9500 Ancillary Data Packet Name List” for details on ancillary data names, and DID and SDID of formats.
- Page 240 Displays the content, names and inserted lines of the 4 total ancillary data packets inserted into Converter 1 and 2 output signals. See section 19. “FA-9500 Ancillary Data Packet Name List” for details on ancillary data names, and DID and SDID of formats.
-
Page 241: Changeover Status
9-7-5. Changeover Status The Changeover Status page is displayed only if FA-95CO option is installed. If the user name and password are not set in the USER SETTING page (see section 9-8-5), the Logout is not shown. Click Refresh to update the settings. ... - Page 242 Changeover Video Status Displays the status of video-related triggers at the time a changeover is performed. Item Description Disable: This trigger is disabled. SDI Error Non-Trigger: This trigger is enabled, but has not triggered a changeover. Trigger: This trigger is enabled, and has triggered a changeover. Disable: This trigger is disabled.
-
Page 243: Network Settings
9-8. Network Settings Click If the user name and password are not set in the USER SETTING page (see section 9-8-5), the Logout is not shown. Click the Network tab at the top of the page. The Network page will be displayed. Click NETWORK SETTING in at the top left to go to the NETWORK SETTING screen. -
Page 244: Snmp Setting
*1 The Remote Port Number must match that of the FA-95RU. *2 Logo Port Number settings in the FA-9500 and the FA-95LG GUI must match. 9-8-3. SNMP SETTING This page allows you to set the SNMP settings. After you are sure that all settings are appropriate, click Submit. - Page 245 Trap Setting Setting Range Item (Alphanumeric and Description symbolic characters) The SNMP manager’s IP address to which a trap Trap1 Address is sent. The SNMP manager’s IP address to which a trap Trap2 Address is sent. The SNMP manager’s IP address to which a trap Trap3 Address is sent.
-
Page 246: Trap Settings
9-8-4. TRAP SETTINGS Allows you to control SNMP trap transmission. Check the check box of a trap to be sent, then click Submit. Uncheck to stop sending. See the TRAP List in section 18 “About SNMP (Simple Network Management Protocol)” for details. ... -
Page 247: User Setting
Changes will be applied after rebooting or 9-8-6 “Restart” is performed. 9-8-6. Restart Click Restart to reboot the FA-9500. The FA-9500 performs the same operation as when it is on. Note that the video and audio signals will be distorted while rebooting the FA-9500. -
Page 248: Systen Block Diagram (Audio)
10. Systen Block Diagram (Audio) -
Page 249: Analog/Digital Audio Input/Output Level
11. ANALOG/DIGITAL Audio Input/Output Level 11-1. Analog Output Level Relative to the Digital Input Level Digital Reference Level: -18dBFS ANALOG OUT LEVEL setting Digital audio input level -10 dBm 0 dBm 4 dBm 8 dBm -24 dBFS -16 dBm -6 dBm -2 dBm +2 dBm... -
Page 250: Digital Output Level Relative To The Analog Input Level
11-2. Digital Output Level Relative to the Analog Input Level Digital Reference Level: -18dBFS ANALOG IN LEVEL setting Analog audio input level -10 dBm 0 dBm 4 dBm 8 dBm -20 dBm -28 dBFS -38 dBFS -42 dBFS -46 dBFS -10 dBm -18 dBFS -28 dBFS... -
Page 251: Analog Audio Connection
12. Analog Audio Connection For balanced input and output, connect the hot and cold wires of an analog audio signal to plus and minus pins respectively. For unbalanced input, connect the analog audio signal line to the plus pin and route the ground line to the minus pin and COM pin. -
Page 252: Dolby E Decoder/Encoder Channel Assignment Table
13. Dolby E Decoder/Encoder Channel Assignment Table Dolby E Decoder Output / Encloder Input Channel Assignment Out/In Out/In Out/In Out/In Out/In Out/In Out/In Out/In Program Configuration 5.1+2 1LFE 5.1+2×1 1LFE 4+2×2 4+2+2×1 4+4×1 4×2 3×2+2×1 2×2+4×1 2+6×1 8×1 1LEF None None Dolby E None... -
Page 253: Remote
See section 7-3. "GPI SETTING" for the function assignments for GPI1-GPI7. For GPI inputs, the function is ON when a pin is shorted to ground and OFF when open. 14-2. GPI Input Circuit FA-9500 inside PINs 2-8 PIN 9... -
Page 254: Gpi Input Control
14-3. GPI Input Control Level Control The pin assigned function is enabled or disabled by the pulse level. Trigger (state of pin) OPEN: Function is OFF CLOSE: Function is ON 500msec or more pulse width 500msec or more pulse width OPEN CLOSE ... -
Page 255: Gpi Output Circuit
14-4. GPI Output Circuit Select external or internal power. FA-9500 inside +5.4V Protective resistor PIN 1 5VDC PINs 2-8 (external power) PIN 9 IMPORTANT Note that the allowed current for each GPI output circuit is 10mA and the external power supply should be 5VDC. -
Page 256: How To Install The Fa-95Dacbl
15. How to Install the FA-95DACBL This section describes how to install the optional FA-95DACBL. If you have purchased the FA-95DACBL with the FA-9500, this procedure is unnecessary since the FA-95DACBL has been factory installed. 15-1. Procedure 1. Turn off the power of the FA-9500 and disconnect the power cord. -
Page 257: Installation Confirmation
5. Install the BNC connector panel of the FA-95DACBL into the slot from inside the unit. Secure the connector panel with the screws that were removed from the blank panel. (See the below picture.) 6. If you have install the FA-95DACBL in slot A, set switch 5 in the S2 DIP switch to OFF. If you have installed it into slot B, set switch 5 in the S2 DIP switch to ON. -
Page 258: Fa-95Aio Option
16. FA-95AIO Option 16-1. FA-95AIO Pin Assignments Be sure to use the supplied FA-95AIO connection cable. FA-95AIO Connector (15-pin D-sub female inch screws) Pin Assignment (15-pin D-sub female) Pin No. Connector Signal Y/G IN Y/G IN Pb/B IN Pb/B/C IN Pr/R IN Pr/R IN Y/G OUT... -
Page 259: Fa-95Aio Switch Settings
Dipswitch S1 settings below to return to the factory default setting. Futher note that adjustments and maintenance should only be performed by qualified technical personnel familiar with FOR-A equipment. WARNING Do not access MU internal cards or make connections with unit power ON. Always power OFF the main unit prior to accessing the interior. -
Page 260: System Requirements
17. System Requirements To use with the FA-9500, your computer must meet the following requirements. Windows® XP operating Windows Vista® Windows® 7 operating system SP2 or later operating system system Professional (32bit) Business (32bit) Professional (32bit/64bit) Browser Windows® Internet Windows® Internet Windows®... -
Page 261: About Snmp (Simple Network Management Protocol)
18. About SNMP (Simple Network Management Protocol) The FA-9500 can be remotely monitored and some of its settings can be remotely changed using the SNMPv2C protocol. Some menu items can also be set via the network. MIB (Management Information Base) is required for the monitoring and can be downloaded (see section 9-6-3 "Downloading a MIB File"). - Page 262 Menu name in Trap event Object group Item name in FA-9500 Description Object name in MIB file Type Write Read Trap FA-9500 (value) OID: 1.3.6.1.4.1.20175.1.301.2.4.1(FS MODE) 0: FRAME 1: LINE SYNCHRO MODE fa95VideoSyncMode INTEGER ○ ○ 2: INPUT 3:AVDL 0: Auto...
- Page 263 Menu name in Trap event Object group Item name in FA-9500 Description Object name in MIB file Type Write Read Trap FA-9500 (value) 0: AFD 1: AFD-ALT 2: Letterbox>16:9 3: Fullframe 16:9 CONV2 U/D 4: Pillarbox 4:3 Aspect(HD) fa95Conv2AspectHD INTEGER ○...
- Page 264 Trap Menu name in Object group Item name in FA-9500 Description Object name in MIB file Type Write Read Trap event FA-9500 (value) OID: 1.3.6.1.4.1.20175.1.301.3.3.3. (Remapping analog output) 0-15: Source Ch1-16 16: 500Hz 17: 1kHz 18: Silence Assign Signal CH1...
- Page 265 Trap Menu name in Item name in Object group Description Object name in MIB file Type Write Read Trap event FA-9500 FA-9500 (value) OID: 1.3.6.1.4.1.20175.1.301.5.2.(Input/Output Video format) 00: Loss 01: 525/60i 02: 625/50i 03: 1080/60i 04: 1080/59i 05: 1080/50i 06: 1080/30PsF 07: 1080/29.97PsF...
- Page 266 Trap Menu name in Item name in Object group Description Object name in MIB file Type Write Read Trap event FA-9500 FA-9500 (value) OID: 1.3.6.1.4.1.20175.1.301.5.3.11.(Audio source status) 0: Loss 1: PCM 2: PCM 48kHz 3: PCM 44.1kHz 4: PCM 32kHz...
- Page 267 Item name in Object group Description Object name in MIB file Type Write Read Trap event FA-9500 FA-9500 (value) OID: 1.3.6.1.4.1.20175.1.301.5.3.3.(AES input audio status) 0: Loss 1: PCM 48kHz 2: PCM 44.1kHz 3: PCM 32kHz 4: PCM Other 5: Silence 48kHz...
- Page 268 Trap Menu name in Item name in Object group Description Object name in MIB file Type Write Read Trap event FA-9500 FA-9500 (value) OID: 1.3.6.1.4.1.20175.1.301.5.3.24.(Analog Output Audio Status) 0: Silence fa95StatusAnalogOutCh1 INTEGER ○ 1: Out ANALOG Out Same as above...
- Page 269 TRAP List Traps can be sent or not be sent by settings. See section 9-8-4 “TRAP SETTINGS” for details. ○: Available -: Unavailable Trap event Write Read Trap Object name Description Object name in MIB file Type (value) OID:1.3.6.1.4.1.20175.1.301.6.1.(Unit trap) 0:Normal Change FAN1...
- Page 270 Trap event Write Read Trap Object name Setting Object name in MIB file Type (value) 00:Loss 01:525/60i 02:625/50i 03:1080/60i 04:1080/59i 05:1080/50i 06:1080/30PsF 07:1080/29.97PsF 08:1080/25PsF 09:1080/24PsF 10:1080/23.98PsF 11:1080/60p 12:1080/59p 13:1080/50p 14:1080/30p 15:1080/29.97p Change SDI OUT 1/2 16:1080/25p fa95OutSDI1-2ChangeTrap INTEGER ○ 17:1080/24p 18:1080/23.98p 19:720/60p 20:720/59p...
- Page 271 Trap Write Read Trap event Object name Setting Object name in MIB file Type (value) OID:1.3.6.1.4.1.20175.1.301.6.5.(FA-95D-D/DE-E TRAP) 0: Loss 1: PCM AUX Input fa95DolbyAuxInputChangedTrap INTEGER ○ Change 2: NON-PCM 3: Unknown 00: Loss 01: 525/60i 02: 625/50i 03: 1080/60i 04: 1080/59i 05: 1080/50i 06: 1080/30PsF 07: 1080/29.97PsF...
-
Page 272: Fa-9500 Ancillary Data Packet Name List
19. FA-9500 Ancillary Data Packet Name List DID/SDID FA-9500 Indication Description (hexadecimal) S353MMPEG(V) 08/08 MPEG recoding data, VANC space (Picture rate information) S353M MPEG(H) 08/0C MPEG recoding data, HANC space (Other part of recording data set) S305M SD-SDTI 40/01 ARIB STD-B17 Serial Data Transport Interface for Television... - Page 273 DID/SDID FA-9500 Indication Description (hexadecimal) ARIB TRB23(1) 5F/FC User data 1 in user data packets standarized in ARIB TR-B23 “ Operational Guidelines for Ancillary Data in Inter-Stationary Information Exchange” ARIBB.35ProgEx 5F/FD Trigger signal packets for data broadcasting standarized in ARIB STD-B35 “SD Data Program Exchange Specification for Digital Broadcasting”...
-
Page 274: About Afd (Active Format Description)
20. About AFD (Active Format Description) The FA-9500 can provide aspect ratio conversion according to S2016-3, RP186 VI (Video Index), or BT1119-2 WSS (Wide Screen Signalling) AFD code data in the ancillary data of input video signals. The below figure depicts example aspect ratio conversions using AFD code data. -
Page 275: Afd Codes
20-1. AFD Codes AFD 4:3 code WSS name FA-9500-specified name illustration in a 4:3 Description coded frame (VI, S2016) Image with a 16:9 aspect ratio as a letterbox on top of a 4:3 coded frame. BOX 16:9 TOP 4:3 L 16:9 T... - Page 276 AFD 16:9 code WSS name FA-9500-specified name Illustration in a 16:9 Description (VI, S2016) coded frame Image with an aspect ratio greater than 16:9 as a vertically centered letterbox in a 16:9 None 16:9 L>16:9 coded frame. Image is full frame, with an aspect ratio the same as that of the 16:9 coded frame.
-
Page 277: Aspect Ratio Conversion With Afd
20-2. Aspect Ratio Conversion with AFD 4:3 to 16:9 conversion Input AFD Input AFD Illustration in a 4:3 SD: AFD (16:9) conv. SD: AFD-ALT(16:9) conv. HD: AFD conversion HD: AFD-ALT conversion (WSS) (VI, S2016) coded frame BOX 16:9 TOP 4:3 L 16:9 T BOX 14:9 TOP 4:3 L 14:9 T... - Page 278 4:3 to 4:3 conversion Input AFD Input AFD Illustration in a 4:3 AFD (4:3) AFD-ALT (4:3) (WSS) (VI, S2016) coded frame conversion conversion BOX 16:9 TOP 4:3 L 16:9 T BOX 14:9 TOP 4:3 L 14:9 T BOX 16:9 CTR 4:3 L>...
- Page 279 16:9 to 4:3 conversion Input AFD Input AFD Illustration in a 16:9 AFD (4:3) AFD-ALT (4:3) (WSS) (VI, S2016) coded frame conversion conversion None 16:9 L>16:9 F 16:9 AMRPH 16:9 F 16:9 None 16:9 P 4:3 None 16:9 F PRTD None 16:9 P 14:9 None...
- Page 280 16:9 to 16:9 conversion Input AFD Input AFD Illustration in a 16:9 SD: AFD (16:9) conv. SD: AFD-ALT(16:9) conv. HD: AFD conversion HD: AFD-ALT conversion (WSS) (VI, S2016) coded frame None 16:9 L>16:9 F 16:9 AMRPH 16:9 F 16:9 None 16:9 P 4:3 None...
-
Page 281: Afd Supported Video Formats
CONV1 and/or 2. To enable devices that receive signals from FA-9500 to detect ancillary data, select the ancillary data type, output video format/s for CONV1 and/or 2 output/s, and line number into which the data is to be inserted in the ANC EMBED LINE menu (Sec. 5-10-17). The default setting should be set to the line number usually used. -
Page 282: How To Insert Afd Data To Output Video Signals
5-18) and CONV2 ANC OUT1 (Sec. 5-19) in the same manner. 20-5. How to Insert AFD Data to Output Video Signals FA-9500 can insert AFD data into input video signals that have no AFD data inserted. AFD system settings To insert AFD data into output video signals, set basic operational settings in the VIDEO SYTEM menus as follows. -
Page 283: Afd Code Abbreviations
20-6. AFD Code Abbreviations SMPTE S2016-3 AFD aspect ratio table In a 4:3 coded frame In a 16:9 coded frame Code UNDEFINED Undefined UNDEFINED Undefined 0000 RESERVED Reserved RESERVED Reserved 0001 4:3 L 16:9 T Letterbox 16:9 image, at 16:9 F 16:9 Full frame 16:9 image, the 0010... -
Page 284: Conversion Setting Version Differences
16:9 anamorphic 0111 20-7. Conversion Setting Version Differences Conversion settings in the FA-9500 ver. 6.00 and higher have been changed, due to added S2016-3 AFD support, as shown in the table below. Later version settings Former version settings... -
Page 285: About Colosed Captioning
21. About Colosed Captioning The FA-9500 supports 3 closed caption standards; CEA608 CC, S334-1 CC SD, and CEA708 CC Outline of each standard CEA608 CC Closed captioning for 525/60 video signals. Closed caption data is carried in line 21 in luminance level signals. -
Page 286: Loading Older Version Data From Fa-9500
If the software of your FA-9500 is newer than version 6.00, the below resets are not required. Do not load event data and/or files created by software of versions later than 6.00 to FA-9500 units having software versions earlier than 6.00. -
Page 287: Regarding Option Card Removal
23. Regarding Option Card Removal An alarm message described in section 23-1 Alert may appear when turning the FA-9500 on after removing or changing the location of the FA-95D-D, FA-95DE-E, or FA-95AIO option. Press the F1 UNITY button to return to the normal menu display. -
Page 288: Expansion Slots A / B Alert
S L O T B : S T A T U S The above alert that appears after turning on the FA-9500 indicates an alarm or alarms for an option card or cards installed in the expansion slot A and/or B. -
Page 289: Specifications And Dimensions
25. Specifications and Dimensions 25-1. Unit Specifications Input Video Formats 1080/59.94p, 1080/50p (Level-A), 1080/59.94i, 1080/50i, 1080/24PsF, 1080/23.98PsF, 720/59.94p, 720/50p, 525/60 (NTSC), 625/50 (PAL) Output Video Formats 1080/59.94i, 1080/50i, 1080/24PsF, 1080/23.98PsF, 720/59.94p, 720/50p 525/60 (NTSC), 625/50 (PAL), PAL-M Video Input 3G-SDI: 3 Gbps, HD-SDI: 1.5 Gbps or SD-SDI: 270 Mbps, 75Ω, BNC x 2 Analog Composite: 1.0 Vp-p, 75Ω, BNC x 1 Video Input SDTV... - Page 290 Synchronizer mode Frame Sync mode, Line Sync mode, AVDL mode, Input Sync mode (minimum delay) System Phase Control Frame Sync mode H phase: -1/2 H to +1/2 H V phase: -1/2 frame to +1/2 frame Maximum delay: 1 frame + 1H, Minimum delay: 1H Line Sync mode H phase: -1/2 H to +1/2 H V phase: -1/2 frame to +1/2 frame...
- Page 291 Power 100 VAC - 240 VAC ±10%, 50/60 Hz Power Consumption FA-9500: 50 VA (47 W) (at 100 - 120 VAC) 64 VA (52 W )(at 220 - 240 VAC) with FA-95PS: 60 VA (55 W) (at 100 - 120 VAC)
- Page 292 25-2. External Dimensions (All dimensions in mm) VIDEO IN FAN ALARM PROCESS CONV1 CONV2 POWER LOCK AES AUDIO ANALOG MASTER SDI AUDIO AUDIO IN DC POWER DISPLAY AREA A V O CLIP IN SEL OUT SEL BY-PASS MODE MAPPING DELAY DOWNMIX GENLOCK UNITY...
- Page 293 Index ANALOG REMAPPING 5 ANALOG SYSTEM 5.1Ch Down Mix (Web) ANC DATA EMBED ANC DETECT LINE A ANC DETECT SEL About AFD ANC EMBED LINE About Changeover ANC IN STATUS About Changeover (Web) ANC IN STATUS 1-2 About Colosed Captioning ANC LOSS SET About Scene Cut Detection and Frame Delay ANC Settings (Web)
- Page 294 Backup Parameter (Web) CONV1 IMPROVE Basic Operations CONV1 KEYER SET BLACK LEVEL CONV1 LOGO SEL BLACK VIDEO TRG CONV1 S2016 OUT BY-PASS / Operate (Web) CONV1 SIDE RGB CONV1 SIZE/POS C CONV1 U/D MODE CH STATUS CONV1 VI OUT Changeover and Input Switchover Using a CONV1 WSS OUT Router CONV2 (UP/DOWN/CROSS CONVERTER)
- Page 295 EVENT SETUP Removal Expansion Slots A / B Alert L External Dimensions Level Adjustment F Loading Older Version Data from FA-9500 FA-95AIO FA-95AIO Option Loading the Data Saved in a File FA-95AIO Switch Settings Logo Generator FA-95DACBL Logo Position Setting Range...
- Page 296 Unit/Video Status (Web) S Unpluging the AC cord Sample Area User 1 - 5 LEVEL SET (Web) Saving the FA-9500 Settings to a File User Area 1, 2 (Web) Scene Cut Detection USER SETTING (Web) SD INPUT ASPECT USER1 – 5 Default Settings...
- Page 297 YPbPr CLIP W YPbPr/RGB CLIP WHITE LEVEL YPbPr/RGB Clip (Web) WSS AFD ERROR YPbPr/RGB Output Format Y Y/C Output format...
- Page 299 Warning This equipment has been tested and found to comply with the limits for a Class A digital device, pursuant to Part 15 of FCC Rules. These limits are designed to provide reasonable protection against harmful interference when the equipment is operated in a commercial environment. This equipment generates, uses, and can radiate radio frequency energy and, if not installed and used in accordance with the instruction manual, may cause harmful interference to radio communications.
- Page 300 FOR-A America East Coast Office 2 Executive Drive, Suite 670, Fort Lee Executive Park, Fort Lee, NJ 07024, USA Phone: +1-201-944-1120 Fax : +1-201-944-1132 FOR-A America Distribution & Service Center 2400 N.E. Waldo Road, Gainesville, FL 32609, USA Phone: +1-352-371-1505 Fax: +1-352-378-5320...
Need help?
Do you have a question about the FA-9500 and is the answer not in the manual?
Questions and answers