Table of Contents
Advertisement
Quick Links
Download this manual
See also:
User Manual
Advertisement
Table of Contents

Summary of Contents for MeiTrack T311
- Page 1 MEITRACK T311 User Guide MEITRACK T311 User Guide...
-
Page 2: Change History
Change History File Name MEITRACK T311 User Guide Created By Kyle Lv Creation Date 2014-08-01 Project T311 Update Date 2015-08-31 Subproject User Guide Total Pages Version V1.6 Confidential External Documentation Copyright © 2015 Meitrack Group All rights reserved. - 2 -... -
Page 3: Table Of Contents
3.1.3 Other Functions ...............................- 5 - 3.1.4 Optional Accessory Function ...........................- 5 - 3.2 Specifications ..................................- 5 - 4 T311 and Accessories ..................................- 6 - 5 First Use ......................................- 6 - 5.1 Installing the SIM Card ................................- 6 - 5.2 LED Indicator ..................................- 7 - 5.3 Configured by Computer ..............................- 7 -... -
Page 4: Copyright And Disclaimer
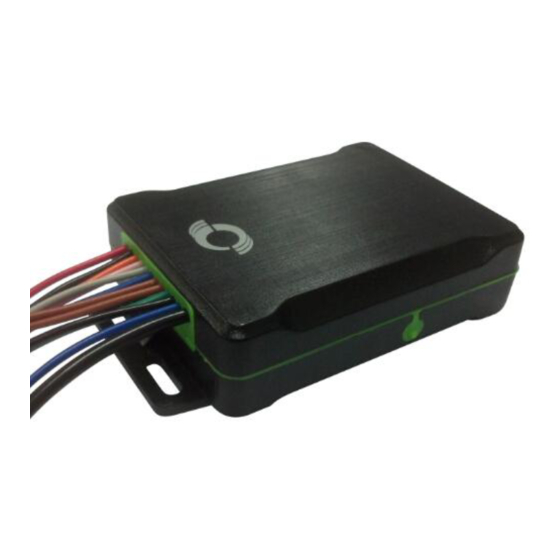
2 Product Overview The T311 is an anti-theft GPS tracking device specially designed for motorcycles and electric vehicles. The T311 is equipped with a wireless remote control and a buzzer, so that vehicle arming, disarming, and keyless start can be implemented. In arming state, if a vehicle is faulty, the buzzer will generate an alarm, and thus the engine is stopped and the vehicle is locked to prevent stealing. -
Page 5: Other Functions
1 output for motorcycle flameout (lower flameout cable) Port 1 output for motorcycle start or input for electric vehicle motor start detection 1 input for motorcycle positive/negative start 1 output for a buzzer alarm Copyright © 2015 Meitrack Group All rights reserved. - 5 -... -
Page 6: T311 And Accessories
Turn off the device. With the back panel facing you, use the mini screwdriver to remove the two screws to release the back cover. Then lift up the back cover from the notch at the bottom of the device. Insert the SIM card. Copyright © 2015 Meitrack Group All rights reserved. - 6 -... -
Page 7: Led Indicator
Power button GPS indicator (blue) GSM indicator (green) To start the T311, press and hold down the power button for 3s to 5s, or connect the T311 to external power supply. GPS Indicator (Blue) Steady on One button is pressed or one input is activated. -
Page 8: Tracking By Mobile Phone
This section describes how to query the current location of the T311, ensuring that the GPS is working normally. Call the SIM card phone number that is used in the T311, and hang up after the dial tone rings 2-3 times. -
Page 9: Common Sms Commands
If all function phone numbers need to be deleted, send 0000,A71. When the SOS button is pressed, the tracker dials phone numbers 1, 2, and 3 in sequence. The tracker stops dialing when a phone number responds. Example: 0000,A71,13811111111,13822222222,13833333333 Copyright © 2015 Meitrack Group All rights reserved. - 9 -... -
Page 10: Arming/Disarming
For details about SMS commands, see the MEITRACK SMS Protocol. Note: The default SMS command password is 0000. You can change the password by using Meitrack Manager and SMS commands. The device can be configured by SMS commands with a correct password. After an authorized phone number is set, only the authorized phone number can receive the preset SMS event report. -
Page 11: Rf Remote Control Code Matching Function
Visit http://ms03.meiligao.com, enter the user name and password, and log in to the MS03. (Purchase the login account from your provider.) For more information about how to add a tracker, see the MEITRACK GPS Tracking System MS03 User Guide (chapter 4 "Getting Started"). -
Page 12: Installing The T311
(GND), negative current drains to start the motorcycle. (Refer to the section 7.2.3.3 "Positive/Negative Start Wiring Diagram.") Buzzer output (PWM) Brown Buzzer plug: connects to the buzzer. cable 1 Copyright © 2015 Meitrack Group All rights reserved. - 12 -... -
Page 13: Port Pictures
Connected to the USB232 port. Used for parameter configuration and USB232 cable Bold black program upgrade. 7.2.2 Port Pictures Motorcycle cable Electric vehicle cable Remote control antenna Buzzer output USB232 port Copyright © 2015 Meitrack Group All rights reserved. - 13 -... -
Page 14: Motorcycle Wiring Diagram
MEITRACK T311 User Guide 7.2.3 Motorcycle Wiring Diagram 7.2.3.1 Motorcycle DC Ignition Wiring Diagram Turn the switch to the leftmost position (DC ignition mode): Copyright © 2015 Meitrack Group All rights reserved. - 14 -... -
Page 15: Motorcycle Ac Ignition Wiring Diagram
MEITRACK T311 User Guide 7.2.3.2 Motorcycle AC Ignition Wiring Diagram Turn the switch to the rightmost position (AC ignition mode): Copyright © 2015 Meitrack Group All rights reserved. - 15 -... -
Page 16: Positive/Negative Start Wiring Diagram
(Green, red and black cables are from the tracker.) If the device is installed on an electric vehicle, ignore the green cable. Copyright © 2015 Meitrack Group All rights reserved. - 16 -... -
Page 17: Electric Vehicle Wiring Diagram
7.3 Mounting the T311 Use cable ties to fasten the T311 on the motorcycle. Note: The device side with the Meitrack logo faces upwards to get better GPS signal. If you have any questions, do not hesitate to email us at info@meitrack.com.


Need help?
Do you have a question about the T311 and is the answer not in the manual?
Questions and answers