Table of Contents
Advertisement
Quick Links
Advertisement
Table of Contents

Related Manuals for FLIR FB-Series O


Summary of Contents for FLIR FB-Series O
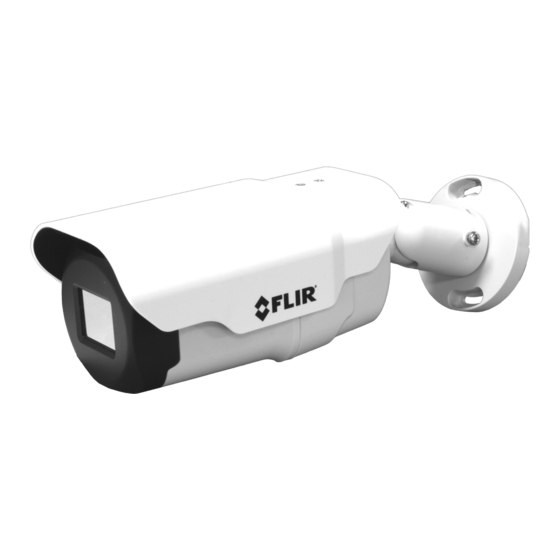
- Page 1 User and Installation Guide FB-Series FB-Series O...
- Page 2 © 2017 FLIR Systems, Inc. All rights reserved worldwide. No parts of this manual, in whole or in part, may be copied, photocopied, translated, or transmitted to any electronic medium or machine readable form without the prior written permission of FLIR Systems, Inc.
-
Page 3: Table Of Contents
Basic Operation and Configuration 2.1 IP Camera, ONVIF Profile S Compliant ..............13 2.2 Set IP Address using the FLIR Discovery Network Assistant (DNA) ......14 2.3 Camera Bench Test ....................15 2.3.1 Log in to the Camera Web Page ..............15 2.3.2 Live Video Page .................... - Page 4 Table of Contents Advanced Configuration 3.1 Setup Menu ....................... 27 3.1.1 Video Setup ...................... 28 3.1.2 Thermal Image Setup ..................29 3.2 Maintenance Menu ....................31 3.2.1 Sensor Menu ....................31 3.2.2 Files Menu ......................33 3.2.3 Product Info Menu .................... 34 Image from a thermal camera in the same Image from a standard camera in low light conditions...
-
Page 5: Camera Installation
Caution! Except as described in this manual, do not open the FB-Series O camera for any reason. Damage to the camera can occur as the result of careless handling or electrostatic discharge (ESD). Always handle the camera with care to avoid damage to electrostatic-sensitive components. -
Page 6: Installation Overview
1.3.1 Camera Connection Options The FB-Series O camera can be installed with an analog or digital (IP) video output (or both). Analog video requires a connection to a video monitor or an analog video matrix switch. The camera can be powered using Power over Ethernet (PoE) or with a conventional 24 Vac or 12 Vdc power supply. -
Page 7: Mounting Accessories
1.3.4 Mounting Accessories The following mounting accessories are available from FLIR Systems, Inc. for installing the FB-Series O camera. For more information on available options, contact your FLIR sales www.FLIR.com/security representative or visit to request details on where to get the accessories you need. -
Page 8: Camera Placement
Several types of third-party Video Management Systems (VMS) are supported by FLIR IP cameras. Because these systems tend to evolve and change over time, contact the local FLIR representative or FLIR Technical Support for information. -
Page 9: Camera Mounting
1.3.7 Camera Mounting The FB-Series O camera can be mounted with two fasteners in the bracket slots. Alternatively, the camera can be mounted with a 1/4-20 threaded fastener on the bottom of the camera. If using the 1/4-20 fastener on the bottom of the camera, the maximum depth of the fastener should not exceed 10.0 mm (0.4 in). -
Page 10: Bench Testing
Vac or Vdc The camera itself does not have an on/off switch. Generally the FB-Series O camera may be connected to a circuit breaker and Figure 1-3: Power Connector the circuit breaker will be used to apply or remove power to the camera. -
Page 11: Alarm Connections-Not Supported
Camera Installation 1.4.4 Alarm Connections—Not supported 1.4.5 Ethernet Connect a shielded Cat5e or Cat6 Ethernet cable to the RJ-45 jack. If using PoE to supply power to the camera, connect the other end of the cable to a PoE switch or PoE injector. Otherwise connect the cable to a network switch. -
Page 12: Camera Specifications
Camera Installation Camera specifications Camera Model FB-Series O Camera Platform Type Fixed Composite Video NTSC or PAL—switchable from the web page. Refer to Select Video format, pg. Thermal Camera Array Format 324 x 256 (17 µm pixel pitch) Detector Type... -
Page 13: Basic Operation And Configuration
Once the camera is connected to a network and powered on, set camera network parameters using the FLIR Discovery Network Assistant (DNA) software, perform a bench test by using a web browser to view the video and control the camera, or view video in the local Network Video Management System (for example, FLIR Latitude ). -
Page 14: Set Ip Address Using The Flir Discovery Network Assistant (Dna)
Set IP Address using the FLIR Discovery Network Assistant (DNA) The FB-Series O camera is shipped with a static IP address of 192.168.0.250. Assuming the existing network uses IP addresses that are unique and different than the default address, configuring the... -
Page 15: Camera Bench Test
Basic Operation and Configuration Camera Bench Test The camera offers both analog video and IP video, and since the camera can be powered by PoE or by a conventional power supply, there are several ways to bench test the camera. It is recommended that the installer test the camera using the same type of connections as in the final installation. -
Page 16: Live Video Page
Help The Help menu displays software version information. If it is necessary to contact FLIR Technical Support for assistance, it will be helpful to have the information from this page on hand. For Product information about the camera including hardware part numbers and serial numbers refer to Info Menu, pg. - Page 17 This same web interface is used with various FLIR cameras—some are fixed, such as the FB-Series O cameras, and some are pan/tilt cameras. The control panel may appear different for different FLIR cameras.
-
Page 18: Basic Camera Configuration
Menu, pg. 31). The Maintenance menu also provides access to other configuration options. For more information on setting or changing other camera parameters refer to the Nexus IP Camera Configuration Guide (FLIR Doc #427-0030-00-28). 2.4.2 Server Menu When a user logs in as expert or admin, the Maintenance Server menus are available. - Page 19 The default IP Address mode is set to Static; the mode can also be set to DHCP addressing if a Set IP Address using DHCP server is used by the network. To set the IP address using DNA, refer to the FLIR Discovery Network Assistant (DNA), pg. Scroll down to Save...
- Page 20 Basic Operation and Configuration Services Menu Date and Time: The Date and Time settings page is used to configure the date and time settings. The date, time, and time zone can be obtained from an NTP server, or can be entered manually. If NTP mode is selected, the NTP server information can be entered.
- Page 21 Basic Operation and Configuration Server Status: The Server Status page provides an indication of the current server status (either running or stopped) and buttons for starting or stopping the server or for rebooting the system. Toggle Server (Stop/Start) After making configuration changes, it is necessary to save the changes to the server (there is a Save button at the bottom of each configuration page).
- Page 22 Basic Operation and Configuration Security Options: Use the Security Options page to restrict access through the camera web server to specific IP addresses and to set or change passwords. As shown below, the expert login can only configure the user login password. Add IP address As an additional security measure, limit which computers have access to the web browser interface.
-
Page 23: Thermal Imaging Overview
Maintenance and Troubleshooting Tips If help is needed during the installation process, contact the local FLIR representative, or call the appropriate support number listed at: http://www.flir.com/security/display/?id=71083. FLIR Systems, Inc. - Page 24 It may only be possible to perform this test when the camera is on a work bench rather than in its installed position. If the camera still does not produce an image, contact the FLIR dealer or reseller who provided the camera, or contact FLIR directly.
- Page 25 When displaying video with FLIR Latitude or a VMS for the first time, the Windows Personal Firewall may ask for permission to allow the video player to communicate on the network. Select the check boxes (domain/private/public) that are appropriate for the network.
- Page 26 Image too dark or too light By default the FB-Series O camera uses an Automatic Gain Control (AGC) setting that has proven to be superior for most applications, and the camera will respond to varying conditions automatically.
-
Page 27: Advanced Configuration
Advanced Configuration In this chapter, additional setup and configuration settings related to the following topics are described: • Setting up the video streams to optimize quality and network performance • Selecting NTSC or PAL analog video format • Optimizing the thermal image •... -
Page 28: Video Setup
Video: By default, two video streams are enabled for the camera: Video 0 and Video 1. Both video streams are available for viewing from a client program such as FLIR Latitude, a stand-alone video player, or a third-party VMS (including ONVIF systems). To modify parameters that affect a particular IP Video stream from the camera, select the appropriate link (for example, Video - 0). -
Page 29: Thermal Image Setup
Advanced Configuration The video streaming is done using a protocol generally referred to as Real-time Transport Protocol (RTP), but there are actually many protocols involved, including Real-Time Transport Control Protocol (RTCP) and Real Time Streaming Protocol (RTSP). The default value for the stream from VIDEO - 0 is stream1/sensor1. - Page 30 Advanced Configuration To make adjustments to the thermal image, it is possible to modify the AGC ROI and AGC headings. The overall image display (also known as Polarity or Color Palette) is determined by the Look Up Table (LUT) selected in the Misc. (Lookup Table) section. AGC ROI: The AGC ROI determines what portion of the image is used in the calculation of the AGC.
-
Page 31: Maintenance Menu
IP Addresses. The default TCP port for most FLIR IP cameras is 1001. This is the port number that a client program such as FLIR Latitude can use to communicate with the camera. If using an ONVIF-compliant VMS as a client, refer to VMS Remote, below. - Page 32 The changes will not take effect until the server is stopped and started. ONVIF Interface An ONVIF-compliant VMS can be used to control a FLIR camera. Refer to the VMS documentation to determine what parameters are needed. By default, the camera is configured with a VMS Remote interface with ONVIF 2.0 parameters (Profile S).
-
Page 33: Files Menu
Caution! The firmware update procedure resets the FB-Series O camera to default settings. Before performing the update, detach the camera from any VMS. A firmware update resets video settings, IR settings, and rules to factory defaults. -
Page 34: Product Info Menu
Advanced Configuration In the Upload & Download section, the Download button can be used to save a copy to a PC for safe keeping. A pop-up window will ask for a file name and destination folder. The Upload button is used to transfer a configuration file from a PC to the camera. Use the Log page to set logging parameters. - Page 35 FLIR Systems, Inc. 6769 Hollister Ave Goleta, CA 93117 Corporate Headquarters FLIR Systems, Inc. 27700 SW Parkway Ave. Wilsonville, OR 97070 Support: http://www.flir.com/security/display/?id=71083 Document: 427-0064-00-12 Version: 100 Date: August 2017...
Need help?
Do you have a question about the FB-Series O and is the answer not in the manual?
Questions and answers