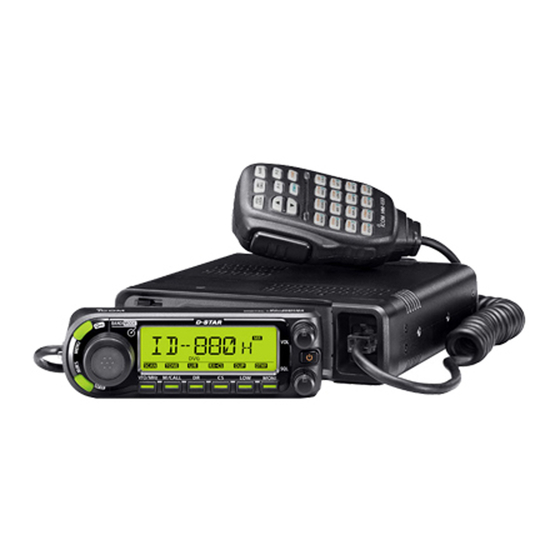
Icom ID-880H Instruction Manual
Vhf/uhf digital transceiver
Hide thumbs
Also See for ID-880H:
- Service manual (52 pages) ,
- Quick start manual (1 page) ,
- Instruction manual (196 pages)
Table of Contents
Advertisement
INSTRUCTION MANUAL
VHF/UHF DIGITAL TRANSCEIVER
ID-880H
This device complies with Part 15 of the FCC Rules. Operation is
subject to the following two conditions: (1) this device may not cause
harmful interference, and (2) this device must accept any interference
received, including interference that may cause undesired operation.
WARNING: MODIFICATION OF THIS DEVICE TO RECEIVE CEL-
LULAR RADIOTELEPHONE SERVICE SIGNALS IS PROHIBITED
UNDER FCC RULES AND FEDERAL LAW.
Advertisement
Table of Contents

Subscribe to Our Youtube Channel
Related Manuals for Icom ID-880H


Summary of Contents for Icom ID-880H
- Page 1 INSTRUCTION MANUAL VHF/UHF DIGITAL TRANSCEIVER ID-880H This device complies with Part 15 of the FCC Rules. Operation is subject to the following two conditions: (1) this device may not cause harmful interference, and (2) this device must accept any interference received, including interference that may cause undesired operation.
-
Page 2: Explicit Definitions
We want to take a couple of moments of your time to thank DR (D-STAR Repeater) mode and repeater you for making your ID-880H your radio of choice, and hope list allow you to operate D-STAR repeater you agree with Icom’s philosophy of “technology first.” Many... - Page 3 This may Changes or modifications to this device, not result in an electric shock or damage the transceiver. expressly approved by Icom Inc., could void your authority to NEVER place the transceiver where normal operation of the ve- operate this device under FCC regulations.
-
Page 4: Fcc Information
• Consult the dealer or an experienced radio/TV technician for help. Icom, Icom Inc. and the Icom logo are registered trademarks of Icom Incorporated (Japan) in the United States, the United Kingdom, Ger- many, France, Spain, Russia and/or other countries. -
Page 5: Installation
QUICK REFERENCE GUIDE Installation D Installation methods D Precaution— magnets • Single body installation RCAUTION Magnets are used for the controller’s attachment to the main Transceiver unit. NEVER attach the controller on the main unit’s top cover, particularly around the internal speaker grill. It may cause the contents of the CPU and memory device could be deleted. - Page 6 QUICK REFERENCE GUIDE D Location Select a location which can support the weight of the trans- • Remote installation ceiver and does not interfere with driving. We recommend the locations shown in the diagram below. Controller NEVER place the transceiver or remote controller where normal operation of the vehicle may be hindered or where it could cause bodily injury.
-
Page 7: Using The Mounting Bracket
QUICK REFERENCE GUIDE D Using the mounting bracket D Microphone connection A microphone connector is available on the main unit front q Drill 4 holes where the mounting bracket is to be installed. panel. Connect the supplied microphone connector as illus- ″) when using nuts;... - Page 8 QUICK REFERENCE GUIDE D Controller’s attachment/detachment D Separation cable connection You can attach or detach the controller to/from the main unit Using the supplied separation cable the con- (3.4 m; 11.2 ft), as below. troller can be separated from the main unit, doubling as a remote controller.
- Page 9 QUICK REFERENCE GUIDE D Remote installation e Attach the remote controller on to the optional MB-65 as The supplied remote controller bracket is used for remote in- stallation. below. • Attach the remote controller bracket onto a flat surface using with 4 self-tapping These screws screws , or double-...
-
Page 10: Battery Connection
• CONNECTING TO A DC POWER SUPPLY Use a rubber grommet when passing the DC power cable through a metal plate to prevent a short circuit. • CONNECTING TO A DC POWER SOURCE ID-880H Grommet to an DC power outlet ID-880H supply 13.8 V... -
Page 11: Antenna Installation
QUICK REFERENCE GUIDE D Antenna installation • Antenna connector • Antenna location To obtain maximum performance from the transceiver, se- The antenna uses a PL-259 connector. lect a high-quality antenna and mount it in a good location. It • PL-259 CONNECTOR is not necessary to use radials on a magnetic mount (“mag q- Slide the coupling ring 30 mm... -
Page 12: Your First Contact
QUICK REFERENCE GUIDE Your first contact Now that you have your ID-880H installed in your car or 2. Selecting the operating frequency band shack, you are probably anxious to get on the air. We would The ID-880H can use 2 m or 70 cm transmittable bands. - Page 13 QUICK REFERENCE GUIDE 4. Tune the frequency The tuning dial will allow you to dial in the frequency you want to use. Pages 17 and 18 will instruct you on how to set the tuning speed. [DIAL] Rotate [DIAL] to tune the frequency. Using the HM-133 You can directly enter the frequency with the HM-133 keypad.
-
Page 14: Repeater Operation
QUICK REFERENCE GUIDE Repeater operation Using the HM-133 1. Setting duplex Plus or minus duplex selection and the repeater tone setting Push [BAND] then rotate [DIAL] to select the frequency can be made easily via the HM-133. band. Then rotate [DIAL] to select the repeater frequency. Push [ 7(TONE)] for minus duplex;... -
Page 15: Programming Memory Channels
QUICK REFERENCE GUIDE Programming memory channels The ID-880H has a total of 1052 memory channels (including for storing often used 25 pairs scan edges and 2 call channels) Using the HM-133 operating frequency, repeater settings, etc. q Push [MR/CALL] to select memory mode. -
Page 16: Panel Description
PANEL DESCRIPTION Main unit r PACKET JACK [PACKET] (pgs. 120, 121) Connects a TNC , etc. for data (Terminal Node Controller) communications. The receiver can support 1200/9600 bps packet communication (AFSK/GMSK) t EXTERNAL SPEAKER JACK [SP] Connects an 8 Ω speaker. •... -
Page 17: Basic Operation
BASIC OPERATION Front panel— controller Function display (p. 3) BAND MODE VFO/MHz M/CALL MONI q MENU•LOCK KEY [MENU r BAND•MODE KEY [BAND•MODE] Push to enter menu screen indication ON and OFF. Push to enter band selection state. (p. 15) (p. 7) •... - Page 18 BASIC OPERATION During FM/FM-N mode operation, push and hold for 1 Push and hold for 1 sec. to enter duplex operation se- sec. to enter tone function selection state. lection state. (pgs. 86, 91) (p. 30) • Rotating [DIAL] selects the tone function. •...
-
Page 19: Function Display
PANEL DESCRIPTION Function display Function guide (p. 5) q TRANSMIT INDICATOR t OPERATING MODE INDICATOR (p. 21) Appears while transmitting. Shows the selected operating mode. (p. 17) w CALL SIGN TYPE INDICATORS • FM, FMN (FM narrow), AM, NAM (AM narrow) and DV (Digital voice) are available. - Page 20 PANEL DESCRIPTION i MEMORY CHANNEL NUMBER INDICATORS !6 TONE INDICATOR Shows the selected memory channel number. • During FM/FM-N mode operation: (p. 61) Shows the selected bank initial. “T” appears while the repeater tone is in use. (p. 64) (p. 30) “C0”...
- Page 21 PANEL DESCRIPTION D Function guide indicator q CLEAR KEY [CLR](DR) (p. 39) During programming state for call signs, repeater list, The function guide indicators allow you to simply using a vari- memory name, etc., push to erase the selected char- ety of functions.
-
Page 22: Microphone (Hm-133*)
PANEL DESCRIPTION Microphone (HM-133*) Push and hold either key for 1 sec. to start scanning. (p. 75) r ACTIVITY INDICATOR Lights red while any key, except [FUNC] and [DTMF-S], is pushed, or while transmitting. Lights green while the one-touch PTT function is in use. -
Page 23: Microphone Keypad
PANEL DESCRIPTION Microphone keypad FUNCTION SECONDARY FUNCTION ( +key) OTHER FUNCTIONS Switches between opening and closing the In VFO mode enters operating band selec- After pushing squelch. tion. (p. 24) Transmits the appropri- In memory mode enters bank selection. ate DTMF code. (pgs. - Page 24 PANEL DESCRIPTION FUNCTION SECONDARY FUNCTION ( +key) OTHER FUNCTIONS Cancels frequency entry. Stores the set frequency, etc., into the (p. 17) After pushing Cancels the scan or priority watch. selected memory channel when pushed Transmits the appropri- and held. (pgs. 75, 81) (p.
-
Page 25: Optional Microphone
PANEL DESCRIPTION Optional Microphone (HM-154) q PTT SWITCH Push and hold to transmit; release to receive. w UP/DOWN KEYS [UP]/[DN] Push either key to change operating frequency, memory channel, set mode setting, etc. (pgs. 17, 61, 98) Push and hold either key for 1 sec. to start scanning. (p. - Page 26 D Operating frequency band selection The ID-880H has 2 m and 70 cm bands for transmission and reception. In addition, extra frequency bands 127, 220, 350, Note that in this manual, sections beginning with a micro-...
-
Page 27: Vfo Mode
BASIC OPERATION D VFO mode D Memory mode VFO mode is used to set the desired frequency. Memory mode is used for operation on memory channels which store programmed frequencies. Push [VFO/MHz] to select VFO mode. q Push [M/CALL] to select memory mode. •... - Page 28 BASIC OPERATION D Call/Weather* channels D DR (D-STAR Repeater) mode Call channels are used for quick recall of most-often used DR (D-STAR Repeater) mode is used for the D-STAR re- frequencies. *Weather channels are available for the U.S.A. peater operation. In this mode, you can select the pre-pro- version only.
-
Page 29: Using The Tuning Dial
BASIC OPERATION Using the tuning dial Using the [Y]/[Z] keys Push [Y] or [Z] to select the desired frequency. q Rotate [DIAL] to set the frequency. • Pushing and holding [Y]/[Z] for 1 sec. activates a • If VFO mode is not selected, push [VFO/MHz] to select VFO scan. -
Page 30: Using The Keypad
BASIC OPERATION Using the keypad Tuning step selection The frequency can be directly set via numeral keys on the Tuning steps are the minimum frequency change increments microphone. when you rotate [DIAL] or push [Y]/[Z] on the microphone. Independent tuning steps for the left and right bands, as well z Push [BAND] to select the desired band (left or as each frequency band can be set for individual tuning con- right) as the main band. -
Page 31: Lock Functions
BASIC OPERATION Lock functions D Microphone keypad lock To prevent accidental frequency changes and unnecessary function access, use the lock function. The transceiver has 2 This function locks the microphone keypad. different lock functions. SQL Z Push [FUNC] then [ D(16KEY-L)] to turn D Frequency lock 16KEY-L... - Page 32 Appears when receiving a signal. IMPORTANT! (for 50 W transmission):- The ID-880H is equipped with protection circuits to protect CONVENIENT! the power amplifier circuit from high temperature. When The audio and squelch level can also be adjusted with...
-
Page 33: Selecting Output Power
BASIC OPERATION Selecting output power Operating mode selection The transceiver has 3 output power levels to suit your operat- Operating modes are determined by the modulation of the ing requirements. Low output powers during short-distance radio signals. The transceiver has total 5 operating modes communications may reduce the possibility of interference to . -
Page 34: Squelch Attenuator
BASIC OPERATION Squelch attenuator D Squelch attenuator setting The transceiver has an RF attenuator related to the squelch q Enter “AT-ATT” in FUNC set mode (SET). level setting. Approx. 10 dB attenuation is obtained at maxi- mum setting. MENU FUNC AT-ATT (p. -
Page 35: Monitor Function
BASIC OPERATION Monitor function Audio mute function This function is used to listen to weak signals without disturb- This function temporarily mutes the audio without disturbing ing the squelch setting. the volume setting. (microphone only) SQL Y Push [FUNC] then [ D(MUTE)] to mute MUTE audio signals.
Need help?
Do you have a question about the ID-880H and is the answer not in the manual?
Questions and answers