Table of Contents
Advertisement
Quick Links
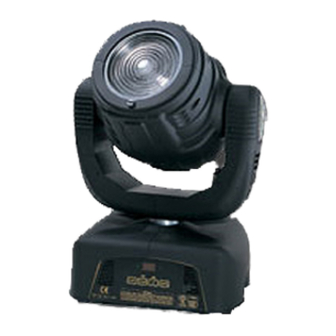
PILOT WASH
PR-2302
This product manual contains important information about the safe installation and
use of this projector. Please read and follow these instructions carefully and keep this
manual in a safe place for future reference.
PEARL RIVER LIGHT & ACOUSTICS INDUSTRIAL LTD.
Yingbin Road, Dashi Panyu, Guangzhou, 511430 China
h t t p : / / w w w . p r - l i g h t i n g . c o m
i n f o @ p r - l i g h t i n g . c o m
Advertisement
Table of Contents

Subscribe to Our Youtube Channel
Related Manuals for PR Lighting PR-2302


Summary of Contents for PR Lighting PR-2302
- Page 1 PILOT WASH PR-2302 This product manual contains important information about the safe installation and use of this projector. Please read and follow these instructions carefully and keep this manual in a safe place for future reference. PEARL RIVER LIGHT & ACOUSTICS INDUSTRIAL LTD.
-
Page 2: Table Of Contents
This manual (1 Piece) INTRODUCTION Thank you for purchasing the product PILOT WASH, PR-2302. This product manual contains important information about the safe installation and use of this projector. Please read and follow these instructions carefully and keep this manual in a safe place for future reference. -
Page 3: Safe Usage Of The Projector
SAFE USAGE OF THE PROJECTOR When unpacking and before disposing of the carton check there is no transportation damage before using the projector. Retain the carton for possible future transportation. Should there be any damage caused by transportation, consult your dealer and do not use the apparatus. The projector is for Indoor use only, IP20. -
Page 4: Installing The Projector
INSTALLING THE PROJECTOR 280mm Pass safety fixing through these holes BRACKET BRACKET BRACKET ADJUSTMENT SCREW FOR FRESNEL LENS 106mm FRESNEL LENS BRACKETS FIXED WITH 4 x M8x25 BOLTS The projector should be mounted via its brackets, each using 2 M12 bolts. The brackets attach to the underside of the projector with 4 M8x25 bolts provided. -
Page 5: Power Supply - Mains
POWER SUPPLY - MAINS L = BROWN E = GREEN/YELLOW FUSE HOLDER N = BLUE FUSE F6.3A/250V Use the plug provided to connect the mains power to the projector paying attention to the voltage and frequency marked on the panel of the projector. It is recommended that each projector is supplied separately so that they may be individually switched on and off. -
Page 6: Setup Options – Projector Configuration
DMX TERMINATOR At the last fixture in the chain, the DMX output has to be connected with a DMX terminator. This prevents electrical noise from disturbing and corrupting the DMX control signals. The DMX terminator is simply an XLR connector with a 120Ω (ohm) resistor connected across pins 2 and 3, which is then plugged into the output socket on the last projector in the chain. -
Page 7: Dmx Control Channel Functions
TO SET THE DMX START ADDRESS Press the UP or DOWN buttons and the display will show the DMX start address. Confirm your choice by pressing the ENTER button, this will save and set the DMX start address. The display will show the latest setting each time the projector is powered up. To control the projector with a DMX controller the DMX start address must be set. -
Page 8: Maintenance
MAINTENANCE If the projector’s lens becomes damaged or broken it should be replaced. If the lamp becomes damaged or deformed in any way it must be replaced. If the light from the lamp appears dim this would normally indicate that it is reaching the end of its life and it should be changed at once, old lamps run to the extremity of their life can explode. -
Page 9: Technical Data
TECHNICAL DATA POWER SUPPLY: 230V AC 50Hz Other Voltages Available To Order: 240V, 220V, 200V, 120V, 100V AC 50/60Hz POWER CONSUMPTION: 480W at 220V LAMP: Type: MSD 250W discharge lamp Colour Temperature: Socket: GY9,5 Manufacturers Rated Lamp Life: 2000hours COLOURS: Virtually infinite range of colours obtained by colour mixing cyan, yellow and magenta. -
Page 10: Electrical Diagram
LIGHT OUTPUT 2610 lux 652 lux 290 lux 163 lux 104 lux 72 lux 16º DISTANCE ∅ ∅ ∅ ∅ ∅ ∅ ∅ BEAM DIAMETER 1.4m 2.8m 4.2m 5.6m 8.4m ELECTRICAL DIAGRAM DC 24V LOWER FAN SHUTTER 1 SHUTTER 2 EFFECTS COLOUR MAGENTA YELLOW CYAN... -
Page 11: Component Order Codes
COMPONENT ORDER CODES NAME PART NO. REMARK TRANSFORMER 040030035 230V AC 50Hz THERMOSTAT 190010065 75℃/10A/250V CAPACITOR 140010018 60µF/370V BALLAST 040070024 230V/50Hz 95℃/10A THERMOSTAT 190010054 IGNITOR 040090016 230V/50Hz LAMP 100050023 MSD250W TOUCH SWITCH 191010028 030069006 DC24V MOTOR 1 (SHUTTER1) MOTOR 030040023 MOTOR 2 (SHUTTER2) MOTOR 17HS0002-38L. - Page 12 PEARL RIVER LIGHT & ACOUSTICS INDUSTRIAL LTD. Yingbin Road, Dashi, Panyu, Guangzhou, China Post-Code: 511430 TEL: 020-8478-1888 FAX: 020-8478-6023 www.pr-lighting.com P/N: 321010045 Last Revision: 12:11:2002 12/12 PILOT WASHen.doc...
Need help?
Do you have a question about the PR-2302 and is the answer not in the manual?
Questions and answers