
Related Manuals for Intelligent Home Alecto


Summary of Contents for Intelligent Home Alecto
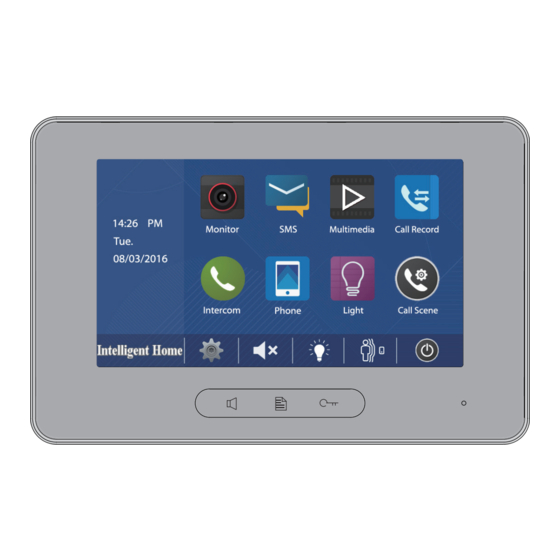
- Page 1 Alecto Video Door System 2-wire Series Installation and User Manual Digital Touch Screen 7 inch Monitor www.intelligenthomeonline.com...
- Page 2 PRECAUTIONS ● Read this manual through before using the product. ● Slots or openings in the back of the monitor, are provided for ventilation and to ensure reliable operation of the video monitor or equipment and to protect if from overheating. These openings must not be blocked or covered.
-
Page 3: Table Of Contents
CONTENT 1.Monitor Parts and Functions ...................4 2.Monitor Mounting ......................5 3.Main Menu .........................5 4.Answering a Door Call ......................5 4.1 Electric Lock Release ....................6 5.Monitor Setup Instructions ....................6 5.1 Sounds Settings ......................6 5.2 Date & Time Settings ....................7 5.3 Rename &... -
Page 4: Monitor Parts And Functions
1. Monitor Parts and Functions Digital TFT LCD Screen Talk/MON Button Menu Button Unlock Button Microphone Mounting Hook s Additional call button con- Cable Connection Port nection port Speaker Additional Call Button Additional call button can be connected to a monitor according to the diagram. Please note: There will be no video on the monitor when somebody rings this call button DIP switches Settings... -
Page 5: Monitor Mounting
2. Monitor Mounting 1. Use the screws to fix the mounting bracket on the wall 2. Hang the Monitor on the mounting bracket firmly 3. Main Menu Touch the screen anywhere while in- standby mode. The main menu page will be shown as pictured 4. -
Page 6: Electric Lock Release
4.1 Electric Lock Release UNLOCK Button or touching You can open the lock by touching icon on the screen There are two icons Lock1 and Lock2 which means you can have up to 2 electric locks connected and opened independently. If system connected to a lock, remember to set unlocking time and lock mode. -
Page 7: Date & Time Settings
5.2.Date & Time Settings Touch settings icon and choose “Date & Time”. Here you can set date and time. “Sync system clock” allows to set date and time on one monitor in multiple monitor system and sync all monitors to the same settings quickly. Touch icon to exit and return to home page. -
Page 8: Do Not Disturb
DOOR3 RENAME DS-3_ 5.4. Do Not Disturb Do Not Disturb function will set the monitor to not react to door station calls. Touch icon choose desired settings: Do Not Disturb for 1 hour, 8 hours, Always. Running clock the bottom of a screen shows the remaining time. Do Not Disturb Normal For 1 Hour... -
Page 9: Call Record(Register Of Calls)
5.6. Call Record (register of calls) All calls received by monitors either from the door station or from other monitors in the system (if installed) can be viewed in “Call Record”. Missed calls are marked by red arrows. Missed calls from door station have viewable pictures or video clips (if SD card was inserted). -
Page 10: Pictures And Video Playback
How to program the “User Code” (address) for Daisy Chain connection Go into Installer Setup by touching “Intelligent Home” icon on the left hand side, at the bot- tom. This will open the “About” page. Touch and hold “Unlock” button for 2 seconds, and the digital keypad page will open. - Page 11 2. Star - all monitors connected to an additional hub - DBC4 distributor. One DBC4 can connect up to a 4 video monitors Each monitor in the system should be assigned with “User Code” according the table below and have DIP-3 set “On” in each monitor in the system Input No.
-
Page 12: Intercom Function
5.10. Intercom Function Touch “Intercom” icon. It will open new page with four available Intercom functions. : use “Inner Broadcast” to talk to all monitors at the same time. Your Inner Broadcast speech will be heard from all monitors right away with no need to do anything else even if monitors are not active : use “Inner Call”... -
Page 13: Call Divert Function
6. Call Divert Function Forwarding a call from the door station to a mobile phone requires an additional TPS Tel- ephone or TPS GSM Interface. Up to 3 mobile or landline numbers can be programmed. There are 3 Divert modes: 1. -
Page 14: Staircase Light
The staircase light function will be activated only when the system has a light connected via an SC6V module. Touch Light icon to turn staircase light On. The light will switch off automatically 6.2. Restore to Default then touch “Intelligent Home” logo Touch Settings icon Touch icon all default settings will be loaded... -
Page 15: Changing Colour Of Led On The Button
6.4. Changing colour of LED on the button Default: Standby: Green; Call Waiting: Red flashing Available colours to choose and codes for setting: Standby Call Waiting 8051 red 8045 red flashing 8052 green 8046 green flashing 8053 blue 8047 blue flashing 8054 yellow 8048 yellow flashing... -
Page 16: Specifications
7. Specification ●Power for video monitor: DC20~28V ●Power consumption: Standby 12.4mA; Working270mA ●Monitor screen: 7 inch digital color LCD ●Display Resolution: 800*3(R,G,B)x480 pixels ●Video signal: 1 Vp-p, 75Ω, CCIR standard ●Wiring: 2 wires, no-polarity ●Dimensions: H139 × W212 × D15mm -16-... -
Page 17: Warranty Card
4. Attempting to force the device to perform functions for which it is not intended 5. Attaching the device to power supplies other than thoserecommended by the manufacturer Distributor for Warranty purposes: Intelligent Home Online Ltd 62 Hartley Old Road Purley Surrey... - Page 18 Alecto 2-wire series Right to interpret and copyright of this manual are preserved. www.intelligenthomeonline.com -18-...
Need help?
Do you have a question about the Alecto and is the answer not in the manual?
Questions and answers