Table of Contents
Advertisement
Quick Links
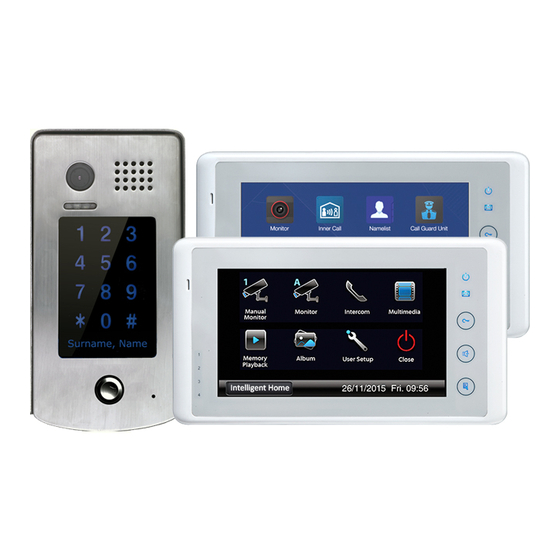
Cronus Video Door Phone
Installation and User Manual
Manual
Monitor
Intercom
Monitor
1
Album
User Setup
Memory
2
Playback
3
4
Intelligent Home
02/12/2010 Thu.10:41AM
Image Recording Version
Digital Touch Screen 7 inch Monitor
www.intelligenthomeonline.com
2-wire Series
Multimedia
Close
Main Menu
Monitor ...
Manual Monitor
Intercom
User Setup
1
Close
2
3
4
i
About
No Memory Version
Advertisement
Table of Contents

Subscribe to Our Youtube Channel
Related Manuals for Intelligent Home Cronus


Summary of Contents for Intelligent Home Cronus
- Page 1 Cronus Video Door Phone 2-wire Series Installation and User Manual Main Menu Monitor ... Manual Monitor Intercom Multimedia Manual Monitor Monitor Intercom User Setup Close Close Album User Setup Memory Playback About Intelligent Home 02/12/2010 Thu.10:41AM Image Recording Version No Memory Version Digital Touch Screen 7 inch Monitor www.intelligenthomeonline.com...
- Page 2 PRECAUTIONS ● Read this manual thoroughly before using the product. ● Slots or openings in the back of the monitor, are provided for ventilation and to ensure reliable operation of the video monitor or equipment and to protect if from overheating. These openings must not be blocked or covered.
-
Page 3: Table Of Contents
CONTENT 1. Monitor Parts and Functions ---------------------------1 2. Monitor Mounting ------------------------------------1 3. Installation ------------------------------------------1 4. Connection of Peripheral Devices -----------------------2 5. Cable specification -----------------------------------------3 6. Operating Instructions --------------------------------4 7. Built-in Memory and SD Card ---------------------------8 8. Specifications ---------------------------------------10... -
Page 4: Monitor Parts And Functions
Intercom Multimedia UNLOCK Button Monitor TALK/MON Button Album User Setup Close Memory Playback MENU Button Intelligent Home 02/12/2010 Thu.10:41AM Mounting Hook Speaker Peripheral Devices Connection Port DIP Switches DIPS 1 2 3 4 5 6 Mounting Hook SD card slot 2. -
Page 5: Connection Of Peripheral Devices
4. Connection of Peripheral Devices 4.1 Additional Doorbell Additional Door Bell can be connected according the diagram below. There will be no video on the monitor when this door bell used. EXT-RING Door bell call button VIDEO 4.2 Additional Ringer Additional Ringer can be connected according the External Ringer diagram below. -
Page 6: Cable Specification
4.5 TPC Telephone Interface TPC Telephone Interface Allows you to call-forward to telephone to telephone from a door station to a mobile phone or landline network phone. One TPC Telephone Interface per house system required. For Flats system one TPC Tel- ephone Interface per flat required. -
Page 7: Operating Instructions
6. Operating Instructions 6.1 Answering a Door Call When door station rings the monitor comes on with video. To start conversation, touch Talk/ Monitor button or Talk icon on the screen. To end conversation touch Talk/Monitor button once again or, monitor will shut down auto- matically after 90s. - Page 8 Image Recording Monitor settings can be accessed similar way. Intelligent Home Touch “Intelligent Home” icon on the left hand side, at the bottom. Where you see the text in the middle of the screen, touch and HOLD for approximately 2s. Go to “Installer Setup”.
- Page 9 Main Menu by touching the screen anywhere; digital clock will open, touch the screen again. Touch the icon “Intelligent Home” on the left hand side, at the bottom. Where you see the text in the middle of the screen, touch and HOLD. Go to ‘Installer Setup’. Using the keypad, type in fol- lowing codes: 8010 # for Power-on-to open lock;...
-
Page 10: Intercom Function
When CCTV monitored manually it will work the following way: for example Camera 2 is connected to a DCU with two CCTV cameras, so it will show video from CCTV cameras switching between two of them every 20 sec for as long as monitoring time was set. Auto monitoring will show in sequence all door stations/CCTV cameras connected with time inter- val was set by additional software. -
Page 11: Built-In Memory And Sd Card
7. Built-in Memory and SD Card Cronus Image Recording version has been equipped with an internal memory (about 120 Mb, enough to store approximately 800 pictures) together with a SD card reader which supports Micro SD card for a maximum 16 Gb. - Page 12 7.2 Pictures Playback To see recorded pictures open the Main menu and then touch icon. Memory Playback Touch icon to scroll the pictures, touch icon to delete selected Delete pictures or touch to delete all pictures. Touch icon to zoom selected pic- Zoom Home tures.
-
Page 13: Specifications
8. Specification ● Power consumption: Standby 15mA; Working status 400mA ● Monitor screen: 7 Inch TFT-LCD Touch screen ● Display Resolutions: 800 x 480pixels ● Built-in Memory: 120 MB >800 pcs ● Picture Memo: >30000pcs(2G SD card) ● Monitor Dimension: H125 W225 D23 mm... - Page 14 Notes:...
-
Page 15: Warranty Card
4. Attempting to force the device to perform functions for which it is not intended 5. Attaching the device to power supplies other than those recommended by the manufacturer Distributor for Warranty purposes: Intelligent Home Online Ltd. 62 Hartley Old Road Purley Surrey... - Page 16 Cronus 2-wire V1 2012-08-11 The design and specifications can be changed without notice to the user. Right to interpret and copyright of this manual are preserved. www.intelligenthomeonline.com...
Need help?
Do you have a question about the Cronus and is the answer not in the manual?
Questions and answers