Table of Contents
Advertisement
Quick Links
INTERFACING SOLUTIONS
DODGE
2015 - 2015 Challenger
2011 - 2014 Charger
2011 - 2017 Journey
CHRYSLER
2011 - 2014 300c
FIAT
2011 - 2014 Freemont
PARTS INCLUDED
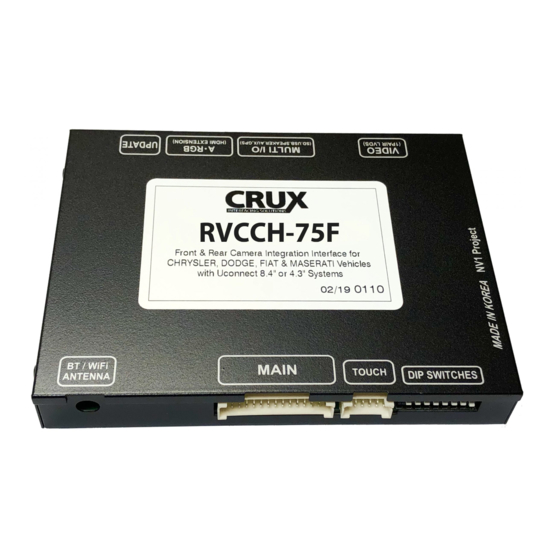
(1) CH-75F Main Interface Module
SW: Ver 25-140729-140506
(1) CH-75F CAN (Small) Module
SW: 140506
(1) CH-75F 22-Pin T-Harness
(1) CH-75F LVDS T-Harness
(1) 6-Pin Video Input Cable
(1) 6-Pin Audio In/Out Cable
(1) C-253 Camera (Bullet Camera)
(1) RGB Input Cable
(1) Instruction Sheet
TECH SERVICES
All our products are manufactured under strict quality control. Each device is being tested before shipment. If nevertheless do occur problems or if
you have technical questions, contact us directly:
Crux Interfacing Solutions Tech Support
1 (855) 822-1348 (Mon - Fri - 9:00 AM - 5:00 PM)
Rev. 042616
REAR-VIEW CAMERA INTEGRATION
FOR SELECT DODGE,
CHRYSLER & FIAT VEHICLES
SAFETY PRECAUTIONS
1. Please read through the entire instruction manual before starting any of the installation procedures.
2. We recommend disconnecting the negative side of the battery until ready to code the vehicle.
3. Do not install any of the main modules near any major components or near the HVAC system,
as placing items near the HVAC may cause damage or overheating to the vehicle or interface.
4. We recommend not disconnecting any of the air bag connections behind the dash panels.
5. This product is under Crux's 1 year manufacturer's warranty. Warranty may be voided in the case where
the device shows proof of being opened or improper extreme force.
Time
1
RVCCH-75F
APPLICATION NOTES:
THIS INTERFACE REQUIRES THE
VEHICLES TO HAVE A 4.3" OR
8.4" SCREEN (2-PIECE RADIO).
WORKS FOR:
U-Connect 4.3 and 8.4" Screens
This interface does not o er the
Force RVC feature.
www.cruxinterfacing.com
Advertisement
Table of Contents

Summary of Contents for Crux RVCCH-75F
- Page 1 4. We recommend not disconnecting any of the air bag connections behind the dash panels. (1) CH-75F LVDS T-Harness 5. This product is under Crux’s 1 year manufacturer’s warranty. Warranty may be voided in the case where (1) 6-Pin Video Input Cable the device shows proof of being opened or improper extreme force.
- Page 2 RVCCH-75F REAR-VIEW CAMERA INTEGRATION FOR SELECT DODGE, CHRYSLER & FIAT VEHICLES INTERFACING SOLUTIONS INSTALLATION OVERVIEW TO FACTORY HARNESS 22-PIN 22-PIN (male plug) (female plug) TO FACTORY HEADUNIT LVDS LVDS (T-Harness) (T-Harness) TO FACTORY DISPLAY (Top Unit) 8-PIN 6-PIN (male plug)
-
Page 3: Connecting The Interface
RVCCH-75F REAR-VIEW CAMERA INTEGRATION FOR SELECT DODGE, CHRYSLER & FIAT VEHICLES INTERFACING SOLUTIONS CONNECTING THE INTERFACE Follow these steps to properly install the interface module. Step 1 - Remove the factory radio to gain access to the factory 22-Pin connector. -
Page 4: Multimedia Module
MULTIMEDIA MULTIMEDIA INTERFACE INTERFACE MODULE MODULE RVCCH-75F REAR-VIEW CAMERA INTEGRATION FOR SELECT DODGE, VIDEO VIDEO CHRYSLER & FIAT VEHICLES INTERFACING SOLUTIONS DIP SET DIP SET DATA DATA INPUTS INPUTS 8-PIN 8-PIN (male plug) (male plug) 6-PIN 6-PIN CONNECTING THE INTERFACE... - Page 5 RVCCH-75F REAR-VIEW CAMERA INTEGRATION FOR SELECT DODGE, CHRYSLER & FIAT VEHICLES INTERFACING SOLUTIONS CONNECTING THE INTERFACE Using Side B of the interface (Camera & AV Inputs), connect the interface as described below. Step 5 - With the T-Harness and LVDS harnesses properly connected, use the 6-Pin harness to connect the smaller interface to the main interface box.
- Page 6 RVCCH-75F REAR-VIEW CAMERA INTEGRATION FOR SELECT DODGE, CHRYSLER & FIAT VEHICLES INTERFACING SOLUTIONS CONNECTING THE AUDIO AND VIDEO INPUTS In order for the interface to recognize the audio and video inputs, please do the following. Step 1 - Connect the 6-Pin Video Adaptor to the main interface module. This allows you 3 video inputs.
-
Page 7: Using The Menu Buttons
RVCCH-75F REAR-VIEW CAMERA INTEGRATION FOR SELECT DODGE, CHRYSLER & FIAT VEHICLES INTERFACING SOLUTIONS USING THE MENU BUTTONS The installer has MENU options available. These buttons are o ered on the bottom side the main interface module. Step 1 -Use the 3 buttons on the bottom to adjust the following:... - Page 8 RVCCH-75F REAR-VIEW CAMERA INTEGRATION FOR SELECT DODGE, CHRYSLER & FIAT VEHICLES INTERFACING SOLUTIONS SWITCHING AV INPUTS For the audio to be present from the AV sources, make sure the AUX source is selected on the radio. The interface also provides you with a optional Switch Button for toggling through the AV inputs.
-
Page 9: Specifications
RVCCH-75F REAR-VIEW CAMERA INTEGRATION FOR SELECT DODGE, CHRYSLER & FIAT VEHICLES INTERFACING SOLUTIONS COMPATIBLE RADIO: 8.4” Screen Radio (2-Piece Radio) SEPARATE CD SLOT SPECIFICATIONS Operation voltage 10.5 – 14.8V DC Stand-by power drain 10mA Power consumption 4.8W Temperature range -40°C to +85°C Weight 190g Measurements (box only) B x H x T 15.2 x 9 x 2.1 cm... - Page 10 RVCCH-75F REAR-VIEW CAMERA INTEGRATION FOR SELECT DODGE, CHRYSLER & FIAT VEHICLES INTERFACING SOLUTIONS HOW TO INSTALL THE BULLET CAMERA Step 1 Step 4 . After you have removed the 3rd brake light from the trunk lid, use . Clean and clear the hole for the camera to be inserted.


Need help?
Do you have a question about the RVCCH-75F and is the answer not in the manual?
Questions and answers