Sam4s ER-180U Series Operation And Programming Manual
Hide thumbs
Also See for ER-180U Series:
- User manual ,
- Operation and programming manual (95 pages) ,
- Operator's and programming manual (95 pages)
Table of Contents
Advertisement
Advertisement
Table of Contents

Related Manuals for Sam4s ER-180U Series


Summary of Contents for Sam4s ER-180U Series
- Page 1 ER-180U Series Electronic Cash Register Operation and Programming Manual...
- Page 2 Note: All specifications are subject to change without notice.
- Page 3 ATTENTION The product that you have purchased contains a rechargeable MS Lithium battery. This battery is recyclable. At the end of its useful life, under various state and local laws, it may be illegal to dispose of battery into the municipal waste system. Check with your local solid waste officials for details concerning recycling options or proper disposal.
-
Page 4: Precaution Statements
Precaution Statements Follow these safety, servicing and ESD precautions to prevent damage and to protect against potential hazards such as electrical shock. Safety Precautions Be sure that all built-in protective devices are 6. Observe the original lead dress, especially near the replaced. - Page 5 1-2 Servicing Precautions WARNING: First read the-Safety Precautions-section of this manual. If some unforeseen circumstance creates a conflict between the servicing and safety precautions, always follow the safety precautions. WARNING: An electrolytic capacitor installed with the wrong polarity might explode. Insulation Checking Procedure: Disconnect the Always unplug the units AC power cord from the power cord from the AC source and turn the power...
-
Page 6: Table Of Contents
Contents Getting Started Unpacking ..................4 Basic Features and Functions .............. 5 Mode Key ..................5 Paper and Take-Up Spool Installation ..........6 Display .................... 7 Keyboard ..................7 Key Functions ................... 8 Initial Setup Instructions Receipt or Journal Paper Usage ............10 Setting the Date and Time .............. - Page 7 Reporting Mode Reports ..................36 Cash Declaration ................37 User Messages User Messages ................40 Error Reset ..................41 Program Mode Tax Setting..................44 Department Keys ................45 Department Preset Price ............45 Department Name Programming ..........46 Department Status Programming ..........47 Price Look Up Codes (PLU’s) .............
-
Page 8: Getting Started
Getting Started Unpacking Unpack and unwrap the cash register. • Locate in the packaging the following items: • 1 roll of 57mm thermal paper 1 journal spool 1 set of control keys Remove the cardboard protectors from the cash drawer. •... -
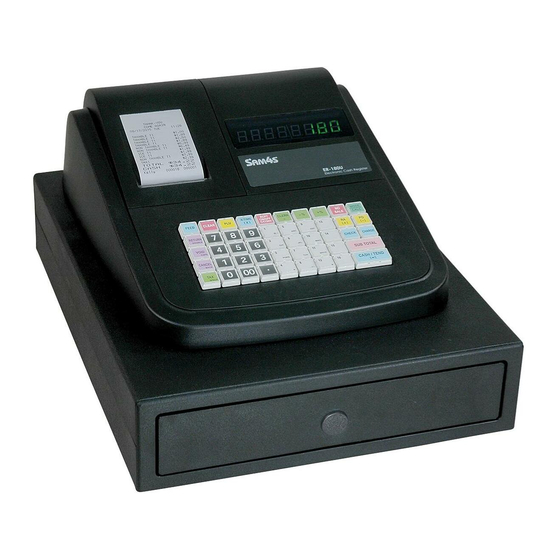
Page 9: Basic Features And Functions
Basic Features and Functions Standard Hardware 8 position segment display • 38 position keyboard, expandable for 10 departments • 57mm thermal, alpha printer • Software Features 500 Price Look Ups (PLU’s) for open or preset sales • Up to 5 standard departments for open or preset sales •... -
Page 10: Paper And Take-Up Spool Installation
Paper and Take-Up Spool Installation Remove the printer cover. (Fig A & B) • Open the paper arm. (Fig C) • Insert the roll as shown. (Fig D) • Push down the paper arm until it clicks in place. (Fig E) •... -
Page 11: Display
Display The display features fluorescent digits providing the user with information about the operation of the cash register. During use the register display will show the following symbols. 2 3 4 5 6 .7 8 All these symbols appear in position 1 of the display. Indicates the amount displayed is due in change. -
Page 12: Key Functions
Key Functions FEED When pressed this advances the printer paper. These “Number keys” are used to enter the numeric amounts 0 - 9 For Example - Enter 100 for £1 Department keys are used to sell open or preset items, with the DEPT.1 sales quantities and values recorded on the financial report. - Page 13 Key Functions This will remove a sales quantity and value from the report when RETURN the key is pressed prior to entering a sale. This key is used to clear error tones or numeric entries. CLEAR It is also used to clear the date and time display on screen. Entering a product’s tax rate number and pressing the TAX key prior to selling an item removes the tax and reports the product sales to NON TAX.
-
Page 14: Initial Setup Instructions
Initial Setup Instructions Receipt or Journal Paper usage The following sets the paper roll to act as either a customer receipt or journal Move to PGM mode • On the number keys enter • For Receipt printing X/TIME SUBTOTAL SUBTOTAL For Journal printing SUBTOTAL SUBTOTAL... - Page 15 Mode Password You can use ‘Mode Password’ function on X/Z/P/S mode. If you wish to use mode password function, you need to set system option and mode password on Programming. After set option and password, you should enter password before operate on X/Z/P/S mode.
-
Page 16: Register Mode
Register Mode • • • • 12... -
Page 17: Clerk Operation
Register The following explains the operation of the register REGISTER MODE (R) If an error occurs during operation in this mode press the CLEAR key to stop the tone and continue with the operation. Clerk Operation A clerk can be signed on to the register by entering a clerk number 1 to 10 followed by the CLERK key The register provides reporting totalisers per operator Clerk Sign On... -
Page 18: Printing (Receipt On / Off)
Printing (Receipt On / Off) The paper roll can be either a journal printout or customer receipt. This is set within the programming options. The following will turn off all printing, irrespective of settings. • Ensure the mode is in the REG position •... -
Page 19: No Sale Cash Drawer Open
No Sale Cash Drawer Open A NO SALE operation opens the cash drawer outside of a sale and the financial report records a count of the activity. Ensure the mode is in the REG position • Press the #/NO SALE key •... -
Page 20: Department Manual Price Operation
Department Manual Price Operation Department keys are used to classify the items sold, reporting the quantities and values to their own individual totals. Departments can be either manual or preset priced items, as set within PGM mode. For example, DEPT.1 is used for FOOD sales, DEPT.2 for NON FOOD sales and DEPT.3 for LOTTERY @ £1 Manual Example Sale Ensure the mode is in the REG position... - Page 21 PLU Manual Price Operation Price Look Up codes 1 to 500 can be used to classify the items sold either as preset or open priced items The sale of items can be totalled to any of the department keys for reporting For Example, Code 1 for Open Sweets and Code 2 for Cake Bar sales at 50p Manual Example Sale Ensure the mode is in the REG position...
-
Page 22: Multiplication Operation
Multiplication Operation It is possible to sell multiple products by entering the quantity required and pressing the X/TIME key. The product price will then multiply by the entered quantity. Manual Department Example Ensure the mode is in the REG position •... -
Page 23: Department Single Item Operation
Department Single Item Operation Products can be preset to open the cash drawer immediately after the item price has been recorded. This is set within the department status program. Manual Price Department Example • Ensure the mode is in the REG position •... -
Page 24: Percentage (%) Premium Or Discount
Percentage (%) Premium or Discount The % keys can be used to add or subtract a value to either the item retail price or the whole sale total, depending on the operation. If the % action is carried out immediately after the item, the % is calculated as part of the item retail price and reported Net, the premium is also added to the Gross Retail Price. - Page 25 Percentage (%) Premium or Discount Subtotal % - Manual Price Department Example Ensure the mode is in the REG position • Type in the price of the item on the number keys without a decimal point • I.e. enter 500 for £5 Press the DEPT.1 key to register the item •...
-
Page 26: Item Minus (-) Key Operation
Item Minus (-) Key Operation It is possible to deduct an amount from an item by entering the required value and pressing the (-) key. The minus value is always reported as a negative amount from the immediately preceding item, irrespective of the Subtotal key operation. Manual Price Department Example •... -
Page 27: Tendering Operation
Tendering Operation The register allows payment to be made either as Cash, Charge or Cheque with each reporting independently to the financial reports. Change Calculation – Manual Price Department Example • Ensure the mode is in the REG position • Type in the price of the item on the number keys without a decimal point I.e. - Page 28 Tendering Operation It is possible to split a transaction value into multiple methods of payment I.e. Cash and Charge. It is also possible to calculate the amount of change due to the customer for cash payments. Partial Tender – Manual Price Department Example •...
-
Page 29: Received On Account (Ra) Operation
Received on Account (RA) Operation It is possible to register monies added to the cash drawer which do not relate to a sale i.e. amount of float added to the drawer at the start of day • Ensure the mode is in the REG position •... -
Page 30: Currency Conversion Operation
Currency Conversion Operation It is possible for the current sale total to be converted to a new total as a foreign currency using the pre-programmed currency rate. The item sales will be entered in the home currency, the value due converted and tender taken in foreign currency, any change will be in the home currency. -
Page 31: Manual Tax Operation
Manual Tax Operation To exempt (remove) tax from an item, enter the tax rate number 1 to 4 and press the TAX key prior to selling the item. This removes the tax and reports the product sales to the NON TAX totals. If a tax rate number is entered that is not set to the item, then the product is taxable by the rate entered, in addition to the item’s existing rate. -
Page 32: Calculator Operation
Calculator Operation The register will also act as a calculator, during this operation values are not added into the sales totals and the register operates as a simple calculator Example Calculator • Ensure the mode is in the REG position •... -
Page 33: Voiding Items (Void)
Voiding Items (VOID) The VOID key can be used within an existing sale to correct the last item sold, or to remove previous items within the sale. Pressing VOID immediately after the sale of the item will remove the value. Voiding Last Item –... -
Page 34: Merchandise Return Operation
Merchandise Return The RETURN key can be used within or outside of an existing sale to record the following item as a negative. This function can be used when customers return goods for a monetary refund. Return – Manual Price Department Example •... - Page 35 • • • • 31...
-
Page 36: Void Mode
Void Mode • • • • 32... - Page 37 Void Mode The following explains the operation of the register whilst in VOID position VOID MODE (VOID) Void mode operates in exactly the same way as the REG mode. However the sales entered are reported as a negative and subtracted from the report totals. Manual Department Example Void Sale Ensure the mode is in the VOID position •...
- Page 38 Void Mode Preset Department Example Void Sale Ensure the mode is in the VOID position • Press the DEPT.3 key preset with a price • I.e. press DEPT.3 which has been preset as 100 (£1) for the lottery Repeat the above for further sales items •...
- Page 39 Void Mode • • • • 35...
-
Page 40: Reporting Mode
Reporting Mode • • • • 36... -
Page 41: Reports
Reports The register has two reporting modes X to Print reports MANAGER MODE (X) Z to Print and Reset reports Z MODE (Z) The following table below shows the report selections available To Print a Report • Ensure the mode is in either:- X to Print reports Z to Print and Reset •... - Page 42 This can be made compulsory prior to printing reports with a system option. Ensure the mode is in REG position • Press the #/NO SALE key to open cash drawer • Count the actual sum of cash • Ensure the mode is in X position •...
- Page 43 Reporting Mode • • • • 39...
-
Page 44: User Messages
User Messages • • • • 40 User Messages... - Page 45 User Messages The wrong key sequence has been used. - Press CLEAR A PLU code greater than 500 has been entered. - Enter a valid code between 1 and 500 A Clerk code greater than 10 has been entered. - Enter a valid code between 1 and 10 The amount count (quantity) is over the limit.
-
Page 46: Error Reset
A Clerk must be signed on in order to operate the Register. CLOSED - Enter Clerk Number 1 to 10 and press the CLERK key. I.e. 1 CLERK Error Reset If the register is in an error which cannot be cleared the following operation will reset the current transaction and clear the error without any loss of pre-programmed data. - Page 47 • • • • 43...
-
Page 48: Program Mode
Program Mode • • • • 44... -
Page 49: Tax Setting
Program The following explains the operation of the register, whilst in PGM (program) position PROGRAM MODE (P) If an error occurs during operation in this mode press the CLEAR key to stop the tone and continue with the operation. Tax Setting The following allows the pre-programming of four tax numbers with rates I.e. -
Page 50: Department Keys
Department Keys Sales made using the Departments on the keyboard can be either manual or preset priced, and named for printing purposes. The values are totalled for reporting and tax calculation. Department Preset Price It is possible when a department key is pressed that a preset price is registered. -
Page 51: Department Name Programming
Department Name Programming A 12 letter name can be programmed for each department key using alpha keys or codes as shown. This name is printed on receipts and reports. Name – By Alpha Keys to the PGM position Move • Enter 100 then the 2 digit Dept Key No. -
Page 52: Department Status Programming
Department Status The following determines the department action i.e. preset price, taxable Move to the PGM position • Enter 500 and press the SUBTOTAL key • Press a single department or for multiples the first and last department keys • I.e. -
Page 53: Price Look Up Codes (Plu's)
Price Look Up Codes (PLU’s) Sales made using the PLU codes 1 to 500 can be either manual or preset priced, and named for printing purposes. The values are totalled for reporting and tax calculation. PLU Preset Price It is possible when a PLU code is sold that a preset price is registered. Shown below is how to preset the price. -
Page 54: Plu Name Programming
PLU Name A 12 letter name can be programmed to each PLU key using alpha keys or codes as shown below. This name is printed on receipts and the PLU report. Name – By Alpha Keys Move to the PGM position •... -
Page 55: Plu Status
PLU Status The following determines the PLU action i.e. Preset price, taxable etc. Move to the PGM position • Enter 100 and then press the SUBTOTAL key • Enter a single PLU No. and press the PLU key or for multiples enter first and last codes •... -
Page 56: Plu Sales Link To Department
PLU Sales Link to Department All Price Look Up codes can be linked back to one of the departments for reporting purposes. When a product is then sold, the sales values will be totalled to the selected department. to the PGM position Move •... -
Page 57: System Option Programming
System Option Programming The register operation can be tailored using the following options. In order to change each option the question is entered followed by the answer, both of these entries are numeric and are shown on the subsequent page. Programming a System Option: to the PGM position Move... - Page 58 Programming a System Option: Question Answer Explanation A beep is made when the keys are pressed No beep is made when the keys are pressed 0 - 2 1 = DDMMYY, 2 = YYMMDD Date Format 0 = MMDDYY, 2 for £’s 0 –...
- Page 59 Continued.. Question Answer Explanation Allow triple multiplication using the X/TIME key Allow only single multiplication using the X/TIME key. Non UK Non UK Rounding 1, Europe 2,Swedish, 3, Thai, 4 NZ 0 – 10 Train Clerk is. RESERVED Use thousand separator (space) Do not use thousand separator.
-
Page 60: Print Option Programming
Print Option Programming The register operation can be tailored using the following options. In order to change each option the question is entered followed by the answer, both of these entries are numeric and are shown on the subsequent page. Programming a Print Option: to the PGM position Move... - Page 61 Programming a Print Option: Question Answer Explanation Print Z report counter on reports Do not print counter Do not print unused items on reports Print all items including zero totals Character Home Currency symbol I.e.029=£ or 031=Euro code See character code table for further options Character Currency symbol I.e.
- Page 62 Continued.. Print Grand Total on the Financial report Do not print running Grand Total Print Gross Total on the Financial report Do not Print Gross Total Grand Total is reported Net of adjustment Grand Total is reported Gross with no adjust Print receipt for No Sale operations Do not print receipt for No sale operations Print receipt top (pre-amble) message...
-
Page 63: Function Key Programming
Function Key Programming Function keys can be defined with an 8 letter name, which is printed on the customer receipt with the default retained for reporting. In addition there is a status which controls the functionality. The following outlines all the settings. Function key Name –... -
Page 64: Function Key Status
Function Key – Status The functions can be tailored using the following options. For each option set there are multiple questions answered by entering 0 or 1. The choices must be answered at the same time resulting in an entry of 0’s or 1’s. to the PGM position Move •... -
Page 65: Amount Restriction
Amount Entry Restriction – Cash/Cheque/Charge/Return/Void/RA/PO It is possible to restrict the value of a function I.e. Voids of £10 or more etc. to the PGM position Move • • Enter 90 and press the SUBTOTAL key • Enter the value to which operations are to be restricted I.e. -
Page 66: Clerk Name
Clerk Name An 8 letter name can be programmed to each Clerk 1 to 10 using alpha keys or codes as shown below. This name prints on receipts and reports. Name – By Alpha Keys Move to the PGM position •... -
Page 67: Receipt Message
Receipt Message It is possible to print a 6 line receipt message at the top and bottom of the receipt. This is used to show such details as store name, address and telephone number etc. Name – By Alpha Keys Move to the PGM position •... -
Page 68: Date And Time Setting
Date and Time Setting Follow the instructions below to set the time and date. to the PGM position Move • • Enter 1300 and press the SUBTOTAL key • Enter the time in the 24 hour and press X/TIME • Enter the date in 6 digits as MMDDYY and press X/TIME •... -
Page 69: Program Scans
Program Scans It is possible to print pre-programmed information as shown following. Settings Scans This prints the settings and options to the PGM position Move • • Enter 15 and press the SUBTOTAL key • Enter the Report Number and press X/TIME System Options Print Options Function Keys... - Page 70 • • • • 66...
-
Page 71: Service Mode
Service Mode • • • • 67... -
Page 72: Clear Totals
Service The following explains the operation of the register whilst in S position. (service) This position is for Service and for this reason is not marked on the lock. SERVICE MODE (S) If an error occurs during operation in this mode press the CLEAR key to stop the tone and continue with the operation. -
Page 73: Software Information
Software Information The following will print the related software information. • Move to the S position Enter 50 and press the SUBTOTAL key • SUBTOTAL Factory Reset WARNING – This will clear all sales and program data Note :- This procedure has been carried out prior to shipment and need not be carried out as part of the initial setup. -
Page 74: Maintenance
Maintenance Recommendations Shown below are common recommendations regarding care of the register. Avoid excess dust and extreme temperatures. Be certain that the AC cord poses no danger of accidental tripping and that it is inserted firmly into the outlet Use no chemicals or abrasives while cleaning cabinet or keyboard. Do not pull or hold the paper while the register is printing. -
Page 75: Specification
Specification Below are shown the technical specifications for this product. Specification DIMENSIONS Reg. Size 280 mm W × 360 mm L× 215 mm H (inc Drawer) DRAWER 400 mm W × 450 mm L 110 mm H Size Type Rubber contact type KEYBOARD Number of keys Keystroke buffer... -
Page 76: Appendix A - Character Codes
Appendix A – Character Codes CODE Ç ü é â ä à å ç ê ë CODE è ï î ì Ä Å É æ Æ ô CODE ö ò û ù ÿ Ö Ü ¢ £ ¥ CODE € "... - Page 77 Specification • • • • 73...
Need help?
Do you have a question about the ER-180U Series and is the answer not in the manual?
Questions and answers