HP netserver e 800 Service Manual
Hide thumbs
Also See for netserver e 800:
- Installation manual (24 pages) ,
- Manual (18 pages) ,
- Brochure (12 pages)
Table of Contents
Advertisement
Quick Links
Advertisement
Table of Contents
Troubleshooting

Related Manuals for HP netserver e 800


Summary of Contents for HP netserver e 800
-
Page 1: Service Manual
HP NetServer E 800 Service Manual Online Version: 1.0 Last Updated: May 2000... -
Page 2: Audience Assumptions
Notice The information contained in this document is subject to change without notice. Hewlett-Packard makes no warranty of any kind with regard to this material, including, but not limited to, the implied warranties of merchantability and fitness for a particular purpose. Hewlett-Packard shall not be liable for errors contained herein or for incidental or consequential damages in connection with the furnishing, performance, or use of this material. -
Page 3: Table Of Contents
Notice to Service Technicians........................1 Removing the Cover ............................1 Replacing the Cover............................3 Adjusting the HP NetServer Feet ........................3 Front Panel Control and Indicators ........................ 4 Additional Front Panel Controls and Indicators ..................5 Powering-Up the HP NetServer ........................7 Powering-Down the HP NetServer ........................ - Page 4 Keyboards ..............................27 Power Cords ............................27 Cables and Part Numbers........................27 4 Diagnostics ..............................29 Diagnostic Tests ............................29 Diagnostics Description..........................29 HP NetServer DiagTools ..........................29 DiagTools Capabilities ..........................30 Power-On Self Test (POST) Error Messages: ..................31 5 Troubleshooting ............................43 Preventive Maintenance Procedures ......................43 Troubleshooting Tips............................43 Troubleshooting Checklist........................44...
- Page 5 Contents CD-ROM Problems ............................56 SCSI Problems............................. 58 Processor Problems............................. 61 Memory Problems ............................61 Network Interface Card Problems........................ 62 6 Replacing Parts ............................63 Safety Information ............................63 Service Tools Required..........................63 Front Panel Bezel............................63 Removing the Bezel..........................63 Replacing the Bezel ..........................
- Page 6 Contents Removing the Processor..........................82 Replacing the Processor ..........................84 Installing the Cooling Fan-Heatsink ......................85 DIMMs ................................87 Removing DIMMs.............................87 Replacing DIMMs.............................88 Accessory Boards ............................89 Removing Accessory Boards ........................89 Replacing Accessory Boards ........................90 System Board ...............................92 Removing the System Board ........................92 Replacing the System Board........................93 Index.................................95...
-
Page 7: General Information
Notice to Service Technicians This is the service document for the HP NetServer E 800. You may also need to access the HP NetServer E 800 Installation Guide or the HP NetServer E 800 User Guide that are available on the Network Server Division WEB site: http://www.hp.com/netserver/... - Page 8 Key Lock Thumbscrews and Lock Holding on Cover 4. Remove the HP NetServer cover. a. Place both hands into the slot handles at the rear of the cover. b. Pull the cover back to release it from the front flange and then lift the cover up and away from the chassis.
-
Page 9: Replacing The Cover
6. Re-lock the cover with the key lock at the rear of the NetServer. Adjusting the HP NetServer Feet The stabilizing feet are used to steady the HP NetServer during normal operation and must be turned outward. When adding internal accessories to the NetServer, turn the feet inward so that the NetServer will lie flat on its side. -
Page 10: Front Panel Control And Indicators
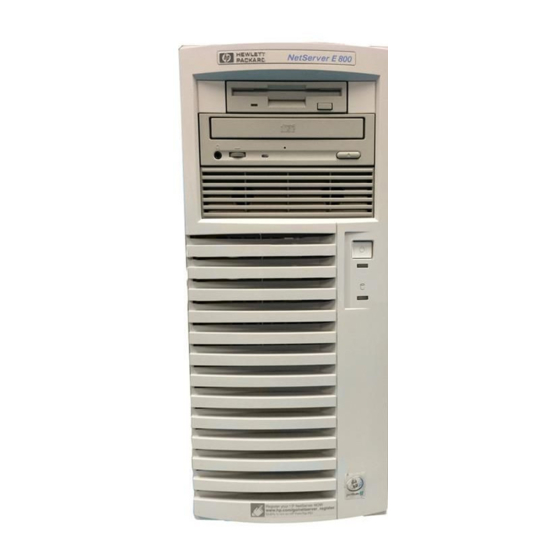
Chapter 1 General Information Front Panel Control and Indicators The HP NetServer E 800's switches, indicators, and the user-serviceable internal components of the NetServer are shown in the following illustrations. Flexible Disk Drive CD-ROM Dive Optional Tape Backup Drive Power On/Off/... -
Page 11: Additional Front Panel Controls And Indicators
* Flashing at 4 Hz rate ** Pulsing at 2 Hz rate NOTE For more information on the HP Tape Drive and its error codes, refer to the documentation provided with the tape drive or refer to Hewlett-Packard's web site, http://www.hp.com/netserver/... - Page 12 Chapter 1 General Information • The Power Connector accepts a standard power cable to connect the HP NetServer E 800 with the site power supply. • The Mouse Port accepts a standard mouse with a PS/2 connector. • The Keyboard Port accepts a standard keyboard with a PS/2 connector.
-
Page 13: Powering-Up The Hp Netserver
AC power source can handle the normal inrush current. However, if you install several HP NetServers on one circuit, precautions are necessary. If there is a power failure and power is then restored, all the servers immediately begin to draw inrush current at the same time. -
Page 14: Sleep States (Acpi)
The HP NetServer’s power button can be configured to initiate a sleep state (Sleep button) or a “soft off” or graceful shutdown of the NOS, rather than an immediate shutdown of the power supply. The power button configurations are dependent on the user interface provided by the ACPI-compliant NOS. -
Page 15: System Information
Mass Storage The HP NetServer E 800 comes standard with an IDE CD-ROM and a flexible disk drive with some configuration of SCSI hard disk drives. The internal mass storage cage can hold up to 5 additional SCSI drives (including a tape back up drive). -
Page 16: Boot Priority
68-pin, high-density connectors for the SCSI devices and has a terminator on the end of the cable. The optional HP supplied tape drive comes with a 50-to-68-pin adapter to connect to the ◊ SCSI connector on the cable used to connect the tape drive. -
Page 17: Duplexing Hard Drives
Voltage Differential) device. External SCSI Connector The HP NetServer E 800 can be configured to extend one of its SCSI channels (typically channel B) to an external SCSI connector. This allows connection of additional mass storage devices to the second channel of the NetServer’s embedded controller. -
Page 18: Memory Guidelines
Four MB of video memory is provided on the system board and cannot be upgraded. Accessory Board Guidelines The system board in the HP NetServer E 800 provides up to seven PCI slots (P1 through P7), five 32-bits lots and two 64-bit slots. -
Page 19: Using The Primary Or Secondary Pci Bus
Chapter 2 System Information Using the Primary or Secondary PCI Bus The E 800 has a Primary PCI bus and Secondary PCI bus supporting seven PCI accessory slots. The two busses are peer to peer which provides approximately equal performance except when using the two 64-bit slots versus the 32-bit slots. -
Page 20: Hardware
Chapter 2 System Information Weight and Dimensions Weight Approx. 30 lbs. (14 kg.), depending on configuration – excludes keyboard and monitor. Height 17.09 inches (434 mm) Width 7.1 inches (180 mm) 11.67 inches (296.5 mm) Feet opened Depth 19.57 inches (497 mm) Hardware Specification Characteristics... - Page 21 Chapter 2 System Information Video Display Modes Max. Refresh Rate @ Max. Refresh Rate @ Max. Refresh Rate @ 16.7M 256 Colors 65K Colors Colors Resolution 640x480 200 Hz 200 Hz 200 Hz 800x600 200 Hz 200 Hz 160 Hz 1024x768 150 Hz 150 Hz...
-
Page 22: Connector Pinouts
Chapter 2 System Information Connector Pinouts Unless otherwise noted, the following features apply to all models. Some features are factory installed; others are optional. Mini-DIN (PS/2) Connectors Mini-DIN Connector (female) for the Mouse and Keyboard Mini-DIN Connector Pinouts for the Mouse and Keyboard Pin Number Signal Description Data signal... -
Page 23: Parallel Port Connector
Chapter 2 System Information Serial Port Connector (male) Pinouts Pin Number Signal Description Data carrier detect Receive data Transmit data Data term ready Signal ground Data set ready Request to send Clear to send Ring indicator Parallel Port Connector Parallel Connector Parallel Port Connector (female) Pinouts Pin Number Signal Description... -
Page 24: Usb Connector
Chapter 2 System Information USB Connector USB Connector Universal Serial Bus Connector Pinouts Pin Number Signal Description VBUS NOTE Use of the USB port is supported for printers, scanners, and external modems. Video Connector – Accessory Board The built-in video uses the standard 15-pin analog display pinout configuration. The pinouts for your monitor may vary. -
Page 25: 50-Pin Narrow Scsi Port Connector - Accessory Board
Chapter 2 System Information 50-Pin Narrow SCSI Port Connector – Accessory Board Position 25 Position 1 Position 50 Position 26 SCSI Port Connector 50-Pin Narrow SCSI Port Connector Pinouts Pin Number Signal Description Pin Number Signal Description 1-11 Ground Reserved Reserved Termpwr Open... -
Page 26: Lan Connector - Accessory Board
Chapter 2 System Information LAN Connector – Accessory Board GRN LED YEL LED LAN Connector LAN Connector Pinouts Pin Number Signal Description Data signal Not used Ground Power (+5 V dc) Clock signal Not used... -
Page 27: Parts Information
3 Parts Information Exploded View – Cover and Bezel... -
Page 28: Exploded View - Drives (Shelf Mount)
Chapter 3 Parts Information Exploded View – Drives (Shelf Mount) -
Page 29: Exploded View - Power Supply And Drives (Cage Mount)
Chapter 3 Parts Information Exploded View – Power Supply and Drives (Cage Mount) -
Page 30: Exploded View - Exhaust Fan And System Board
Chapter 3 Parts Information Exploded View – Exhaust Fan and System Board... -
Page 31: Exploded View - System Board
Chapter 3 Parts Information Exploded View – System Board Slot 0 Slot 1 Slot 2 Slot 3 System Board... -
Page 32: Replaceable Parts List
The part numbers listed below were available at the time of publication. Part numbers may change after publication. Order parts by the number listed below; HP's parts price list database will generally contain a reference to the revised part number. If a system board needs to be replaced, remove processor modules, DIMMs, or adapter boards and transfer these to the new board. -
Page 33: Keyboards
Exchange DIMM, 256 MB D8266-63001 D8266-69001 DIMM, 512 MB D8267-63001 D8267-69001 Battery, 3V lithium 1420-0356 Foot D7140-63004 Nameplate, Bezel D9387-63008 HP Navigator CD-ROM D9387-xxxx Technical Reference Card D9387-63010 Keyboards Language Part Number Language Part Number D4950-63001 Danish D4950-63016 Arabic/French D4950-63025... - Page 34 Chapter 3 Parts Information Cable Description Replacement Part Nos. Internal/External SCSI Cable w/two connectors D9387-63006 Internal SCSI Cable w/three connectors and termination D9387-63007...
-
Page 35: Diagnostics
When the server boots, a series of tests are displayed on the screen. The number of tests displayed depends on the configuration of the server. The following are the kinds of errors a user might get with the HP NetServer. -
Page 36: Diagtools Capabilities
CD-ROM drives video monitor DiagTools is an off-line diagnostic. Off-line diagnostics do not use the main operating system (OS) of the HP NetServer. The alternate DiagTools OS has far fewer features than the full-fledged OS. Thus, its capabilities are limited to a set of basic tests and a series of advanced tests. In addition, DiagTools does not use any tests, which might write over and thus destroy user data. -
Page 37: Power-On Self Test (Post) Error Messages
Error messages (POST Codes) are encountered if an error condition occurs during the boot process of the HP NetServer E 800. All codes and their respective descriptions are listed in the following table, and all the codes may not apply to your NetServer. - Page 38 Battery problem The NetServer BIOS is not responding due to a possible battery discharge. If the HP NetServer was unplugged for a long period of time, the battery will discharge and not provide enough current to keep the system date and time current.
- Page 39 The processor cooling-fan needs to be connected. 0076 Integrated HP NetRAID This problem will prevent the operation of the Integrated HP processor is not responding. NetRAID, if it is enabled. The problem may also prevent operation of some PCI slots.
- Page 40 0101 Keyboard error The keyboard has reported an error during its self-test. To correct this: 1. Restart your HP NetServer. 2. If the error persists, your keyboard may need to be replaced. Contact your service representative. 0102 Keyboard controller error POST has detected a general failure in the integrated keyboard controller.
- Page 41 Chapter 4 Diagnostics Code Description Problem/Solution automatically validate the change. 2. Otherwise, verify the mouse connector is firmly connected. 3. If the problem persists, your mouse may need to be replaced. Contact your service representative. 0108 Mouse and Keyboard POST has detected the mouse and keyboard connections connections reversed are reversed.
- Page 42 POST has detected a general failure on the integrated boot error flexible disk controller. To verify this: 1. Restart your HP NetServer. 2. If the error persists, your system board may need to be replaced. Contact your service representative. 0307...
- Page 43 (primary) hard disk controller. To correct this: 1. Restart your HP NetServer. 2. If the error persists, your system board may need to be replaced. Contact your service representative. (The following does not apply to E 800) 1.
- Page 44 Chapter 4 Diagnostics Code Description Problem/Solution the secondary controller. Verify the secondary IDE controller is enabled in Setup. 2. If the IDE device operates with the secondary channel, your system board may need to be replaced to recover primary channel functionality. Contact your service representative.
- Page 45 Chapter 4 Diagnostics Code Description Problem/Solution 4. If the problem persists, your hard disk drive may need to be replaced. Contact your service representative. 053X Hard Disk drive connection POST has detected a hard disk drive on the second <slave> problem position on the IDE cable, but no hard disk has been found on the first <master>...
- Page 46 Chapter 4 Diagnostics Code Description Problem/Solution either disconnected, or have been replaced by smaller ones. To correct this: 1. If some main DIMMs have just been removed or replaced by smaller ones, press <F4> to automatically validate the change. 2. If no DIMM has been removed or changed, ensure all DIMMs are properly inserted in the slots.
- Page 47 Integrated LAN disable error The system could not disable the integrated LAN. To correct this: 1. Reset the Integrated LAN by powering off the HP NetServer. 2. Disconnecting the power cord for 20 seconds. 3. Reconnect the power cord and power on the HP NetServer.
- Page 48 Chapter 4 Diagnostics Code Description Problem/Solution Utility to avoid a blank or unreadable screen at power-up. 2. Use the Setup Utility to manually set the video refresh rates to the highest ergonomic refresh rates supported by the display. Refer to display monitor's User's Guide for specifications.
-
Page 49: Troubleshooting
These chemicals could damage the keyboard's plastic surfaces. HP recommends the periodic cleaning of tape heads, capstans, and guides on HP drive units and those products using high-density data cartridges and mini-data cartridges. This maintenance procedure prolongs... -
Page 50: Troubleshooting Checklist
3. Simplify the HP NetServer configuration to the minimum required: A monitor, one flexible disk drive, one CD-ROM drive, one hard disk drive, keyboard, mouse, and NIC. -
Page 51: Bios Recovery
Technical Reference Card, located in a plastic pouch on the interior of the NetServer cover. d. Verify the DIMMs are firmly seated on the System Board. Verify all added DIMMs are HP DIMMs. - Page 52 6. Replace the system board assembly and power on the NetServer in the normal manner. A BIOS Update diskette must be created from the HP NetServer Navigator CD-ROM to be used in flashing the new BIOS into the NetServer. To update the BIOS, you enable the Boot Block by setting the Boot Block switch (switch 7) of the configuration switch on the system board assembly to the ON (enabled) position.
-
Page 53: Password Problems
5. The flash program on the diskette will re-program the BIOS into the NetServer. 6. When the flash programming is completed, power down the HP NetServer. 7. Gain access to the system board assembly and set the Clear Configuration switch (Switch 4) from ON to OFF 8. -
Page 54: General Netserver Problems
Chapter 5 Troubleshooting 3. Move switch 3 in the configuration switch on the system board (labeled "Clear Password") to the ON position. 4. Turn on power to the NetServer and allow it to complete its startup routine. The old password will be erased. 5. - Page 55 4. If the POST reports a problem, check the error against the Error Messages and correct the problem. 5. Verify the video subsystem is configured correctly. 6. Verify the memory DIMMs are all of the same (specified) speed. 7. Verify the memory DIMMs are installed and configured correctly: a. Make sure only HP-supported DIMMs are used.
-
Page 56: Power Problems
4. If the fans aren't audible and the above steps are verified, check that power is getting to all fans. HP NetServers have multiple fans. All fans run when power is turned on; all are off when the power is off. -
Page 57: Video/Monitor Problems
Chapter 5 Troubleshooting 8. If, after replacing the power supply, the problem persists: a. Remove all accessory boards, including any hard disk drive controller board or the video board the customer might have installed, and reboot the NetServer. b. Disconnect all mass storage power cords and cables (except those to the boot device) and reboot the NetServer. - Page 58 When most EGA and VGA monitors are disconnected from the video connector, if the ◊ ◊ ◊ ◊ monitor is working, the screen is white. When some monitors (such as HP high-resolution monitors) are disconnected from the video ◊ ◊ ◊ ◊ connector, the monitor may be working, although the screen is black.
-
Page 59: Configuration Problems
5. If date and time are still requested, and the battery is good, perform the next procedure, below. If your HP NetServer repeatedly loses its configuration or the clock stops, you should replace the battery or install an external battery. -
Page 60: Printer/Datacomm Problems
Chapter 5 Troubleshooting 1. Review the Troubleshooting Checklist before you continue. 2. Configuration information is saved in the CMOS. If you continue to loose configuration information and the battery is good, or you cannot save the information to the CMOS: a. -
Page 61: Keyboard And Mouse Problems
• The mouse does not work or is intermittent The HP NetServer automatically detects a mouse when one is installed. If the mouse or other input device is not working, perform the following: 1. Review the Troubleshooting Checklist before you continue. -
Page 62: Cd-Rom Problems
Chapter 5 Troubleshooting • There are read/write errors • The NetServer will not start from a diskette If you cannot boot from, write to, or format the flexible disk, do the following: 1. Review the Troubleshooting Checklist and read about Boot Device Priority before you continue. - Page 63 • The CD-ROM drive is not working properly The CD-ROM drive that comes with certain HP NetServer models is a SCSI device; others are IDE devices. If the CD-ROM drive does not work, do the following: 1. Review the basic SCSI installation guidelines to ensure a proper configuration.
-
Page 64: Scsi Problems
If the banner is not displayed, the external SCSI controller is not recognized. ◊ ◊ ◊ ◊ 9. Verify the SCSI bus is terminated at both ends. By default, HP SCSI controllers are terminated. When a device is connected to a connector on the controller, bus termination for that connector is disabled. - Page 65 Chapter 5 Troubleshooting Symptom: • The SCSI BIOS has trouble loading If the NetServer has trouble loading the SCSI BIOS, do the following: 1. Review the Troubleshooting Checklist before you continue. 2. If you installed more than one SCSI controller, make sure that the BIOS of all SCSI controllers are disabled except for the boot controller.
- Page 66 15. Use only SCSI devices without built-in terminators. The HP NetServer embedded controllers are terminated automatically on the hot swap cage or at the end of the SCSI cable. If you are installing a SCSI device that uses a built-in terminator, you must remove the terminator from the device before proceeding with the installation.
-
Page 67: Processor Problems
Chapter 5 Troubleshooting Symptom: • The SCSI subsystem stops working If the SCSI subsystem should stop working, do the following: 1. Review the Troubleshooting Checklist and Mass Storage Guidelines before you continue. 2. Run DiagTools. Verify that the SCSI ID and other switch settings are correct and get specific information or verification that the problem is the SCSI bus. -
Page 68: Network Interface Card Problems
Chapter 5 Troubleshooting 2. If memory problems are being experienced, power the NetServer off and on. This performs a "cold" restart, rather than a "warm" restart (as it does when you press Ctrl+Alt+Del). 3. Check the BIOS event log (available on certain NetServer models) for messages indicating memory errors. -
Page 69: Replacing Parts
• Use an anti-static wrist strap and a grounding mat, such as those included in the Electrically Conductive Field Service Grounding Kit (HP 9300-1155). • Handle accessory boards and components by the edges only. Do not touch any metal-edge connectors or any electrical components on accessory boards. -
Page 70: Replacing The Bezel
Chapter 6 Replacing Parts Removing the Bezel Replacing the Bezel 1. Align the six bezel tabs with the six slots on the chassis, gently press the bezel onto the chassis front until the tabs snap into the slots. 2. Replace the cover. 3. -
Page 71: Flexible Disk Drive
Chapter 6 Replacing Parts Replacing the Bezel Flexible Disk Drive Removing the Flexible Disk Drive 1. If the NetServer is operating, power down the NetServer. 2. Disconnect the power cord and any external cables connected to the NetServer. If necessary, label each one to expedite re-assembly. -
Page 72: Replacing The Flexible Disk Drive
Chapter 6 Replacing Parts Removing the Flexible Disk Drive 8. Pull the flexible disk drive forward and out of the chassis. 9. Remove the four screws securing the flexible disk drive mounting guides to the flexible disk drive. 10. Remove the flexible disk drive mounting guides from the flexible disk drive and store them for future use. -
Page 73: Cd-Rom
Chapter 6 Replacing Parts Replacing the Flexible Disk Drive CD-ROM Removing the CD-ROM 1. If the NetServer is operating, power down the NetServer. 2. Disconnect the power cord and any external cables connected to the NetServer. If necessary, label each one to expedite re-assembly. 3. -
Page 74: Replacing The Cd-Rom
Chapter 6 Replacing Parts Removing the CD-ROM Replacing the CD-ROM 1. Remove the CD-ROM from the shipping container. 2. Make any settings required by the CD-ROM documentation. 3. With the cable connectors toward the rear of the chassis, guide the CD-ROM into the chassis opening. -
Page 75: Hard Disk Drive (Shelf Mounted)
Chapter 6 Replacing Parts Replacing the CD-ROM Hard Disk Drive (Shelf Mounted) Removing a Hard Disk Drive (Shelf Mounted) 1. If the NetServer is operating, power down the NetServer. 2. Disconnect the power cord and any external cables connected to the NetServer. If necessary, label each one to expedite re-assembly. -
Page 76: Replacing A Hard Disk Drive (Shelf Mounted)
Chapter 6 Replacing Parts Removing a Hard Disk Drive (DAT shown) Replacing a Hard Disk Drive (Shelf Mounted) 1. Remove the hard disk drive from the shipping container. 2. Make any settings required by the hard disk drive documentation. 3. With the cable connectors toward the rear of the chassis, guide the hard disk drive into the chassis opening. -
Page 77: Hard Disk Drive (Cage Mounted)
Chapter 6 Replacing Parts Replacing a Hard Disk Drive (DAT shown) Hard Disk Drive (Cage Mounted) Removing a Hard Disk Drive (Cage Mounted) The replacement of the mass storage cage mounted drives is the same for IDE or SCSI drives. The IDE drives require the setting of jumpers on the drives for the master and slave configuration before installing the drives. - Page 78 Moving the Air Duct 6. Unplug the power and SCSI or IDE cables to any hard disk drives already in the cage. 7. Loosen three captive screws on the mass storage cage. Top of HP NetServer Front of HP NetServer...
-
Page 79: Replacing A Hard Disk Drive (Cage Mounted)
Align the screw holes on the drive with the screw holes in the mass storage cage. NOTE If the hard disk drive you are planning to install already has a mounting tray attached, you must remove it before you can install the drive in your HP NetServer E 800 mass storage cage. - Page 80 All mounting screws used with the hard disk drive must be #6-32 and not exceed ¼- inch in length. Longer screws may cause internal damage to the mass storage device. Damage caused by incorrect mounting screws is not covered by the HP warranty.
- Page 81 Chapter 6 Replacing Parts Slots for Tabs Tabs(2) Captive Screws (3) Insert screws through round holes in back, first. (One each side.) Installing the Mass Storage Cage Ensure the tabs at the front on the cage slide into the slots provided. 5.
-
Page 82: Chassis Fan
Chapter 6 Replacing Parts Chassis Fan Removing the Chassis Fan The chassis fan is mounted at the rear of the chassis. WARNING Before removing the cover(s), always disconnect the power cords and unplug telephone cables. Disconnect the power cords to avoid exposure to high energy levels that may cause burns when parts are short-circuited by metal objects, such as tools or jewelry. -
Page 83: Replacing The Chassis Fan
Chapter 6 Replacing Parts Removing the Chassis Fan Replacing the Chassis Fan 1. Remove the replacement chassis fan from the shipping container. 2. With the power connector toward the rear of the chassis, guide the chassis fan into the chassis opening. -
Page 84: Power Supply
Chapter 6 Replacing Parts Replacing the Chassis Fan Power Supply Removing Power Supply The low voltage ON/OFF switch on the front panel controls the power supply. To replace the power supply: 1. If the NetServer is operating, power down the NetServer. 2. -
Page 85: Replacing The Power Supply
Chapter 6 Replacing Parts Removing the Power Supply Replacing the Power Supply 1. Place the new power supply into the chassis. 2. Connect the four power cables to the chassis connectors and the FDD. 3. Replace the four screws securing the power supply to the chassis. 4. -
Page 86: Battery
3. Remove the cover and turn in the NetServer feet (so that the NetServer will lie flat on its side). WARNING The power supply will continue to provide standby current to the HP NetServer until the power cord is disconnected. -
Page 87: Replacing The Battery
Chapter 6 Replacing Parts 7. Remove the existing battery. (The battery is spring loaded into the mounting socket and held in place by a latching mechanism. Press the release mechanism toward the outside of the mounting socket to release the battery.) Battery Location on the System Board Replacing the Battery 1. -
Page 88: Processor
3. Remove the cover and turn in the NetServer feet (so that the NetServer will lie flat on its side). WARNING The power supply will continue to provide standby current to the HP NetServer until the power cord is disconnected. - Page 89 Chapter 6 Replacing Parts Pin-1 Mark 11. Grasp the processor by its edges and lift it out of the socket and place it on a static-dissipating work surface or into an anti-static bag. 12. If you are not replacing the processor with a new or replacement processor, you must install the terminator in the empty processor socket.
-
Page 90: Replacing The Processor
FSB speed. The supported processors only perform at the rated speed indicated on the processor in the HP NetServer. 2. Open the ZIF (Zero Insertion Force) lever to allow removal of the terminator installed in the processor socket. -
Page 91: Installing The Cooling Fan-Heatsink
Chapter 6 Replacing Parts The socket has a mark for pin-1 that should match the mark for pin-1 on the processor near the end of the ZIF lever. CAUTION Ensure you align pin-1 of the processor with pin-1 of the processor socket or pin damage will occur. - Page 92 Chapter 6 Replacing Parts c. Ensure the ridge on the bottom of the heatsink rest between the processor and the edge of the processor socket base. Hook Latch (hidden) Step A Thumb Latch Step B Step C Processor Socket Base CAUTION Ensure you have made good contact with the processor to avoid thermal overheating.
-
Page 93: Dimms
3. Remove the cover and turn in the NetServer feet (so that the NetServer will lie flat on its side). WARNING The power supply will continue to provide standby current to the HP NetServer until the power cord is disconnected. -
Page 94: Replacing Dimms
Spread the two retaining latches on the slot outward. CAUTION Use only HP DIMMs, which are 3.3V, 133 MHz (PC133), and buffered SDRAM DIMMs. HP's warranty does not apply to non-HP parts. c. Remove a DIMM from its protective container, handling the module by its edges. -
Page 95: Accessory Boards
3. Remove the cover and turn in the NetServer feet (so that the NetServer will lie flat on its side). WARNING The power supply will continue to provide standby current to the NetServer E 800 until the power cord is disconnected. -
Page 96: Replacing Accessory Boards
Chapter 6 Replacing Parts CAUTION Wear a wrist-strap and use a static-dissipating work surface connected to the chassis when handling components. Ensure the metal of the wrist-strap contacts your skin. 4. Lay the NetServer on its side with the system board facing up (component side up). 5. - Page 97 Chapter 6 Replacing Parts Slot Cover Chassis Cross- Section View Removing the Accessory Slot Cover 5. Slide the accessory board into the slot. Inserting an Accessory Board...
-
Page 98: System Board
Chapter 6 Replacing Parts 6. Secure the accessory board using the screw you previously removed with the slot cover. Use the T-15 driver or flat blade screwdriver. 7. Once the accessory board is installed, you may need to install software drivers. The drivers for the new board are either part of your existing NetServer software or included on a flexible diskette included with the accessory board. -
Page 99: Replacing The System Board
Chapter 6 Replacing Parts Replacing the System Board 1. Remove the replacement system board and any cables from the anti-static shipping container. 2. Place the system board on an anti-static pad and set all jumper connections and settings as recorded during the system board removal. 3. - Page 100 Chapter 6 Replacing Parts...
-
Page 101: Index
Index accessory boards DAT tape drive removing, 89 error codes, 5 replacing, 90 Diagnostic Tests, 29 acetone, 43 diagnostics, 29 Administrator password DiagTools, 29 resetting, 47 Dimensions, 14 AGP video display modes, 15 DIMM sizes ammonia, 43 128 MB, 12 anti-static wrist strap, 63 256 MB, 12 APIC... - Page 102 7 parts information, 21 powering down, 7 parts list, 26 powering up, 7 password problems, 47 HP Tape Drive PCI bus, primary and secondary, 13 error codes, 5 PCI slots, 12 ports, 5 parallel, 5 IDE CD-ROM Cable, 27...
- Page 103 Index removing, 69 connectors, 18 replacing, 70 USB port Sleep States, 4 connectors, 18 NOS dependent, 4 User password specification, 13 resetting, 47 system board removing, 92 video port replacing, 93 connectors, 18 system information, 9 video specifications, 15 Video/Monitor Problems, 51 tape backup drive, 10 50-to-68 pin adapter, 10 Weight, 14...
Need help?
Do you have a question about the netserver e 800 and is the answer not in the manual?
Questions and answers