Table of Contents
Advertisement
Advertisement
Table of Contents

Subscribe to Our Youtube Channel
Related Manuals for HP ProLiant N40L


Summary of Contents for HP ProLiant N40L
- Page 1 T H E U L T I M A T E media s y s t e m HP ProLiant MicroServe r...
- Page 2 INTRODUCTION Hi there, I am the milkman, and this is my guide. I have written this guide for all you “regular people” out there who want to join the crowd of people building home theater Pc’s. HTPC for short. I’ve made it simple so that anyone can build their very own custom HTPC, that will be 100 times better than any “pre-built”...
-
Page 3: Icon Legend
DISCLAIMER DISCLAIMER I will not be held responsible for any bad advice, injury caused by assembling an HTPC or headaches caused by OpenELEC, XBMC or PseudoTV. I am also not responsible for copyrighted media and material that you acquire. Only use series, movies and other media that you legally own. -
Page 4: Table Of Contents
INDEX Technical Specs....................... Quick Overview......................Hardware Checklist....................Creating a USB Key....................Installing OpenELEC....................Configuring Samba....................Organizing your media..................... Scraping your media....................Installing PseudoTV....................Running PseudoTV....................Smart Playlists......................Adding Channels...................... Planning a Channel Setup..................Planning Network Channels..................Planning Playlist Channels..................Planning Directory Channels..................Organizing Channels.................... -
Page 5: Technical Specs
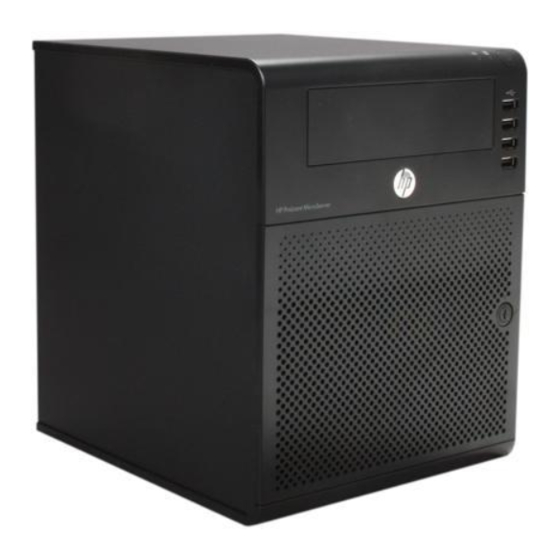
Power supply : 150 Watts Processor cache : 2 MB L2 HP ProLiant MicroServer EXIT * Remote not included with HP ProLiant MicroServer media s y s t e m T H E U L T I M A T E... -
Page 6: Quick Overview
QUICK OVERVIEW HTPC An HTPC and other convergence devices integrate components of a home theater into a unit co-located with a home entertainment system. An HTPC system typically has a remote control and the software interface normally has a 10-foot user interface design so that it can be comfortably viewed at typical television viewing distances. -
Page 7: Hardware Checklist
This guide is specifically written for HP ProLiant MicroServer owners in mind. Graphics Card You will need a low budget graphics card to enable the HP ProLiant Microserver to output sound and HD Video. The HP ProLiant Microserver only supports low profile cards with low profile brackets. -
Page 8: Network Cable
HARDWARE CHECKLIST Remote & Receiver There are many remotes and receivers to choose from, and this is one part that is up to you, your style, preferred button layout, quality, features and your budget. Prices range from cheap to very expensive. Hauppauge receivers and Logitech remotes make a good combo and are recommended. -
Page 9: Creating A Usb Key
OpenELEC. WHICH BUILD? For the HP ProLiant MicroServer + Msi N520GT setup, the latest “Generic Build” of OpenELEC should be the one to go for. If you are using other HTPC hardware setups, please read the website or forum to determine which build to use. - Page 10 CREATING A USB KEY Create the OpenELEC USB Key STARTING THE PROCESS Go to the path where you have just extracted your OpenELEC USB Installer files. Right click on the .BAT file called “create_installstick.bat” and select “Run as administrator”. The OpenELEC USB Installer should start Specify your USB Drive by typing it’s drive letter followed by a colon, for example F: or G: (F: is MY flash drive location, please make sure what the path is on your own computer! WARNING!
- Page 11 CREATING A USB KEY Create the OpenELEC USB Key After pressing ENTER it will start creating the OpenELEC USB Key for you, which will be used to install OpenELEC and XBMC on to your HTPC. Wow, that was quick! CHECK THE USB Let’s just have a quick look on the flash drive to see if all the files have been created for us.
-
Page 12: Installing Openelec
INSTALLING OPENELEC Installing OpenELEC on your HTPC LET’S DO THIS! - Insert the flash drive drive into your HTPC - Turn on your HTPC - it should boot into the OpenELEC Setup Press OK if you receive a “Beta Warning” message. - Page 13 So what should I do? I prefer installing to Hard Drive. I would suggest installing on the included 250GB Drive HP has provided you with. Hard drives are just faster than USB drives. Also remember that your whole OpenELEC/XBMC installation will be on this drive, and although that only takes around 80-120MB, all your media’s high quality covers and fanart...
- Page 14 INSTALLING OPENELEC Installing OpenELEC on your HTPC TIME TO RELAX After selecting your Installation drive, it should start to install. Come on progress bar, almost there! Go ahead, get yourself some coffee - we will soon start to configure Samba and other interesting things soon.
-
Page 15: Configuring Samba
CONFIGURING SAMBA What is Samba? Your HTPC needs a protocol to connect to a Windows based computer, since it’s running in a Linux environment (OpenELEC). Samba is that protocol that takes care of this. Samba is already pre-installed for you on both OpenELEC and your Windows PC. You don’t even have to install it, it’s actually already running..right now. - Page 16 CONFIGURING SAMBA Configuring Samba Shares The first thing to do is to navigate to \\OPENELEC\Configfiles\ and open the file called “samba.conf.sample”. You should open it with WordPad (Not Notepad). Most people prefer to delete the default shares and only have ConfigFiles, the Root File system and all their hard drives visible.
- Page 17 CONFIGURING SAMBA What’s going on here? As you can see my HTPC has 4 Drives in it right now. Note the paths of each hard drive. I would recommend you replace the default shares, but If you are happy with them and prefer not to remove the them at this moment, that’s ok.
- Page 18 CONFIGURING SAMBA Final Notes MOUNTING SHARES You can also have your HTPC’s hard drives seem like regular hard drives in Windows, by right-clicking on the Folder and selecting “Map network drive”. You can choose a drive letter, and the drive will appear under My Computer just like your other hard drives.
-
Page 19: Organizing Your Media
You may decide to use the S1E01, S1E02, S1E03 format - that’s okay too. Once your media is sorted into a decent folder structure, either copy the media to your HTPC, or simply move your hard drives into the HP ProLiant MicroServer. Your media is now ready for scraping. -
Page 20: Scraping Your Media
SCRAPING YOUR MEDIA What is Scraping? Scraping typically means that XBMC will connect to the internet when adding media, and download all the Movies & Series Covers, Fanart and Information. Scraping happens automatically when you add your media paths to XBMC. THE SCRAPED LIBRARY Here you can see what a typical XBMC library looks like after all the covers have... - Page 21 SCRAPING YOUR MEDIA STEP 1 To begin adding your media and scraping for covers on XBMC, go to Videos, press Right, and select “Files”. STEP 2 Select “Add source”. STEP 3 Add your Movies ROOT path. This is the main folder that contains all your Movies. media s y s t e m T H E...
- Page 22 SCRAPING YOUR MEDIA STEP 4 Select “Movies” as content type, and tick: - “Run automated Scan” - “Use folder names for lookups” You can also tick “scan recursively” if some of your movies are contained in further subfolders, eg: Movies\ A Bug’s Life\ CD1\ A Bug’s Life-CD1.avi...
-
Page 23: Installing Pseudotv
INSTALLING PSEUDO TV What is PseudoTV? As said before, PseudoTV gives you the ability to watch all of your media just as you would with normal cable. After the initial installation of this script, it will create a few default channels for you and you can see what it does in its basic form. -
Page 24: Running Pseudotv
RUNNING PSEUDO TV Running PseudoTV On the main XBMC menu, select “Programs” and then select PseudoTV. With your first run, PseudoTV might take a while to generate the default channels. If you have an extremely large media library, it could really take some time… Have a break, get some coffee, and let it do it’s thing. -
Page 25: Smart Playlists
SMART PLAYLISTS What are Smart Playlists? Smart playlists are generated by setting up specific rules/conditions to define your playlist. For example, you can define that you want your playlist to contain all movies containing the “Action” genre, but not “Horror”. This will cause your playlist to be populated by action movies, but not Action-Horror movies. - Page 26 SMART PLAYLISTS Type: With PseudoTV, we generally use either “Movies” or “Episodes” as the Playlist Type. Name of Playlist Here you can define the name of your playlist. (which will also be used as the channel name in PseudoTV) Find items where Below this section, is where you add all your playlist rules.
-
Page 27: Adding Channels
ADDING CHANNELS THE PSEUDOTV SETTINGS 1) On the XBMC Menu, select “Programs”. 2) Highlight “PseudoTV”. 3) Press the “Options” or ”Menu” button on your remote (”C” on your keyboard). 4) Select “Add-on settings”. 5) The PseudoTV Settings will appear. 6) Select “Open Channel Configuration” THE DEFAULT CHANNELS When you first installed PseudoTV, it should have created a set of default channels. - Page 28 ADDING CHANNELS NETWORK CHANNELS These channels use your TV-show’s studio tags to define what content should be played. This is the preferred way to add all your network channels such as ABC, NBC, FOX, CBS to PseudoTV PLAYLIST CHANNELS These channels use “Smart Playlists” to define what content should be played.
- Page 29 ADDING CHANNELS PROBLEMS ADDING A DIRECTORY CHANNEL? If you cannot browse to add a directory into PseudoTV, or the drive is simply just not available, you might need to allow access to that drive/directory in XBMC first. To do this: 1) Highlight the System Menu in XBMC, and press Right.
-
Page 30: Planning A Channel Setup
PLANNING A CHANNEL SETUP Introduction So now that you know the basics of PseudoTV, how to add channels, how to create Smart playlists and all the types of channels we can have, Let’s step back for a moment and plan a proper channel setup. -
Page 31: Planning Network Channels
PLANNING NETWORK CHANNELS What are Network Channels? These are TV-Networks – ABC, FOX, CBC, NBC, etc…. When scraping your media for covers and information, each series gets assigned a <Studio> tag, which can be found and edited in the series folder, in a file called “tvshow.nfo” (That is if you exported all your scraped covers, fanart and information. - Page 32 PLANNING NETWORK CHANNELS The PseudoTV Network Manager The PseudoTV Network Manager should be included with this PDF. You need to extract the Zip file to a folder on your PC, and then run the program. Make sure your Microsoft Visual C++ Libraries are installed (included in the folder) If it’s not installed you might get errors and have trouble starting the program.
- Page 33 PLANNING NETWORK CHANNELS STEP 1 - ADD SERIES PATHS Click the large “add source” icon on the top-left, and add all your series ROOT path(s). Some TV-shows might not have <studio> tags, and you may receive an error. Make a note of these shows, exit the PseudoTV Network Manager, and fix the tvshow.nfo file of these shows before starting it again.
- Page 34 PLANNING NETWORK CHANNELS Network Channel Planning is complete! Once you are done and happy with your Network Channels, type out a list of these channels into your Wordpad/Excel document. These channels will be sorted into specific channel numbers later on in the guide. This is what my list looks like: BBC One BBC Two...
-
Page 35: Planning Playlist Channels
PLANNING PLAYLIST CHANNELS Playlist Channels As we now know, we can use Smart Playlists to create some channels. Playlist channels will mostly be used to handle your Movie channels. So.. what movie channels are we going to have? Well – that’s entirely up to you really. The only thing we need to do here is write down what movie channels we want in our little Wordpad/Excel document. -
Page 36: Planning Directory Channels
PLANNING DIRECTORY CHANNELS Directory Channels So if you didn’t know this yet, directory channels are simply folders on your HTPC that can be loaded as channels in PseudoTV. These folders usually contain the stuff that can’t be scraped easily, or even at all. Channel bumpers and adverts also form part of this category. Typical things that usually aren’t scraped are: - Documentary Specials (BBC, Discovery, National Geographic, History Channel) - Documentary Movies / Indie Documentary Films... - Page 37 PLANNING DIRECTORY CHANNELS Music Channels What is a good way to get a lot of Music channels without having THAT much music videos? The answer lies in your directory structure. A single folder’s contents can be used by multiple channels if organized correctly. In the example below, you will see that the music videos in the MTV folder have been sorted into 4 Sub-Directories: Dance, Hip Hop, Pop and Rock.
-
Page 38: Organizing Channels
ORGANIZING CHANNELS Now that you have planned all your channel Networks, playlist and directory channels, it’s time to organize which channel goes where. Now, this is again completely up to you, but I would like to give a few tips here to help you. Everybody is going to have some great channels, and some not so great channels. -
Page 39: The Final Result
THE FINAL RESULT Once you have organized all your network, playlists and directory channels, you should end up with something like this: (The following Excel file should be included with this PDF) media s y s t e m T H E U L T I M A T E... -
Page 40: Putting It All Together
PUTTING IT ALL TOGETHER Create your Smart Playlists After all your channels have been organized and numbered, you could probably go ahead and create the Smart Playlists for your Playlist channels. Give the Playlists the same name as the channel name, eg: “TCM”, but name the file itself “29-TCM”... -
Page 41: Pseudotv Settings
PSEUDO TV SETTINGS GENERAL SETTINGS Here you can see the General Settings. These settings are focused mostly on how channels behave, their timing and how they are updated and synced. Open Channel Configuration Enables you to configure your channel setup. Auto off timer (in minutes) If no buttons are pressed, PseudoTV will power-off after X amount of minutes. -
Page 42: Visual Settings
PSEUDO TV SETTINGS VISUAL SETTINGS Here you can see the Visual Settings. These settings are focused mostly on how PseudoTV displays content such as logos, info, clock, pop-ups and the EPG. Show info when changing channels Displays the info box every time you change channels. Always show channel logo Adds a PNG logo on the bottom-right of each channel. -
Page 43: Final Touches
FINAL TOUCHES Make sure to tick “Always show channel logo” and then specify a “Channel Logo Folder”. This will help you identify what channel you are on when watching PseudoTV. Make sure the PNG Logo is renamed to the name of the Channel. You may also add a channel rule to rename the channel itself, which is helpful when adding directory channels. -
Page 44: Advanced Channel Rules
ADVANCED CHANNEL RULES Introduction Advanced Channel Rules enable you to do various things such as changing the channel name, showing/hiding the channel logo, playing shows in order, scheduling or excluding shows and interleaving other channels, shows, adverts or bumpers. CHANNEL RULES To access the Channel Rules menu, simply select the button called “Advanced Channel Rules”... - Page 45 ADVANCED CHANNEL RULES Best-Effort Channel Scheduling Want to watch The Daily Show every night at 7:00? Schedule your channel to play it. Channel Logo Does most of the videos on your CBS channel have the logo encoded into the video? Disable the drawing of the logo on that channel.
-
Page 46: Interleaving, Bumpers & Adverts
INTERLEAVING, BUMPERS & ADVERTS What is Interleaving? Interleaving enables you to mix channels together. This means you could have a Syfy channel channel that plays all the regular programming, that also interleaves a Sci-Fi Genre Movie every 10 shows. It can also be used to mix in some channel fillers, for example mixing “Manswers” clips into your Spike-TV Channel. - Page 47 CONGRATULATIONS! You made it to the end of the guide! All steps have been completed and you should now be ready to rock! Go ahead and give yourself a well deserved pat on the back. I hope you enjoy your new system! Don’t forget to visit the XBMC, OpenELEC and PseudoTV forums! media s y s t e m...
-
Page 48: Tips
Convert all downloaded bumpers to MPG or AVI, FLV is not the best format for XBMC. Buy 2TB or 3TB drives for your HP ProLiant Microserver to increase storage capacity. Drink lots of milk to give you strong bones (if you move your HTPC around a lot). -
Page 49: Faq
F.A.Q. Q: How do I Fix items that were scraped wrong in XBMC? A: Press the info button (“i”) on the item, and select “Refresh”. Q: How did you make the Marvel channel? A: I manually edited the .nfo files of all marvel movies and added my own custom <genre> tag called “marvel”. -
Page 50: Get Sound Working
GET SOUND WORKING Try this first: 1) Open \\openelec in your explorer window and browse to the Configfiles folder. 2) Copy the asound.conf file into this folder (Supplied with PDF) 3) Copy the sound.conf file into the modprobe.d folder. (Supplied with PDF) Reboot your HTPC and check if the sound works. -
Page 51: Useful Links
USEFUL LINKS HP ProLiant MicroServer Msi N520GT-MD1GD3/LP Graphics Card Logitech Harmony Remotes XBMC XBMC Downloads XBMC Forum XBMC Skins XBMC Add-ons OpenELEC OpenELEC Downloads OpenELEC Forum PseudoTV Thread PseudoTV Blog PseudoTV Download EASEUS Partition Master Video DownloadHelper for Firefox media... -
Page 52: Final Words
FINAL WORDS I hope you enjoyed the guide - It was great writing it all and even though it took some time, I'm sure it’s all worth it in the end knowing there will be many people out there that benefit from it in some way. -
Page 53: Notes
NOTES media s y s t e m T H E U L T I M A T E... - Page 54 T H E U L T I M A T E media s y s t e m...
Need help?
Do you have a question about the ProLiant N40L and is the answer not in the manual?
Questions and answers