Raymarine ST70+ Operating Manual
Hide thumbs
Also See for ST70+:
- Operating manual (82 pages) ,
- Installation manual (73 pages) ,
- User reference manual (60 pages)
Table of Contents
Advertisement
ST70+
Welcome to ST70+
Congratulations on having chosen Raymarine ST70+.
ST70+ Instruments and Pilot Controllers give you easy access to
the important information you need and fingertip control over your
Raymarine autopilot, to make your boating experience both safe
and enjoyable.
Contents
General
Getting started ......................................................................................................
Display grouping & control .................................................................................
Setting display brightness...................................................................................
Setting the correct local time ..............................................................................
Setting the screen colors.....................................................................................
Choosing the data units.......................................................................................
Data list................................................................................................................
Pilot Controller
Setting up a Pilot Controller display...................................................................
Basic autopilot operation ....................................................................................
Using AutoTack ....................................................................................................
Using autopilot Track mode ..............................................................................
Using autopilot Wind Vane mode......................................................................
Using autopilot fishing patterns........................................................................
Instrument
Switching instrument pages on & off ...............................................................
Setting instrument page rollover ......................................................................
Changing information on a page.......................................................................
Changing the page layout..................................................................................
Using alarm clock...............................................................................................
Using race timers ...............................................................................................
Setting alarms.....................................................................................................
Alarm events .......................................................................................................
This Operating Guide
This Operating Guide describes how to use ST70+ Instruments and Pilot Controllers on a
day-to-day basis. If you need more comprehensive information, refer to the ST70+ User
Reference Manual.
Raymarine UK Ltd, Anchorage Park, Portsmouth, Hampshire PO3 5TD, United Kingdom
Tel: +44 (0) 23 9269 3611, Fax:+44 (0) 23 9269 4642
Raymarine Inc,21 Manchester Street, Merrimack, New Hampshire 03054, USA
Tel: +1 603.881.5200, Fax: +1 603.864.4756
Part Number: 81309-1
Date: January 2009
Operating Guide
www.raymarine.com
Card 21
Card 14
Card 16
Advertisement
Table of Contents

Related Manuals for Raymarine ST70+


Summary of Contents for Raymarine ST70+
-
Page 1: Table Of Contents
If you need more comprehensive information, refer to the ST70+ User Reference Manual. Raymarine UK Ltd, Anchorage Park, Portsmouth, Hampshire PO3 5TD, United Kingdom Tel: +44 (0) 23 9269 3611, Fax:+44 (0) 23 9269 4642 Raymarine Inc,21 Manchester Street, Merrimack, New Hampshire 03054, USA Tel: +1 603.881.5200, Fax: +1 603.864.4756... -
Page 2: Emc Conformance
The WEEE Directive requires the recycling of waste electrical and electronic equipment. Whilst the WEEE Directive does not apply to some of Raymarine's products, we support its policy and ask you to be aware of how to dispose of this product. -
Page 3: Getting Started
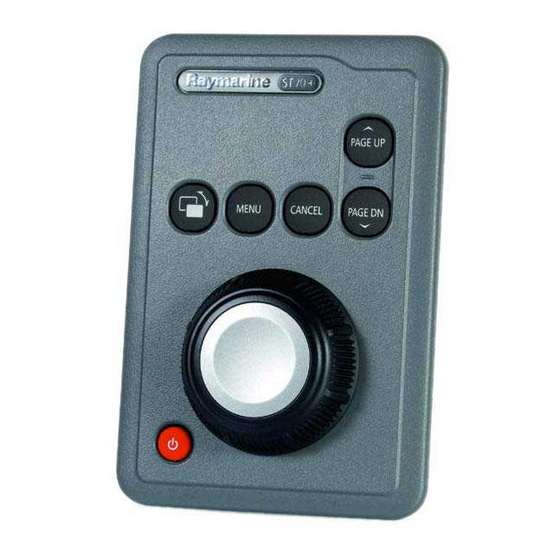
ST70+ general information Getting started Applicability: The procedures on this card apply to ST70+ Instruments and Pilot Controllers. ST70+ display functions Each ST70+ display is set up as an Instrument or a Pilot Controller during commissioning, and is controlled from an external keypad. Instrument and Pilot Controller keypad types are fitted as appropriate. -
Page 4: General Operation
ST70+ general information Getting started Card continued General operation For information on display/keypad grouping, refer to Card 2. Selecting & confirming options & values Many ST70+ setup functions, display options and values are set up by using the keyboard to scroll to the required option or value, then confirming, by pressing The manner in which you do this depends on keypad type. -
Page 5: Display Grouping & Control
ST70+ general information Display grouping & control Applicability: The procedures on this card apply to all configurations of ST70+ Instruments and Pilot Controllers. Your ST70+ displays can be configured to operate in groups. The ST70+ commissioning instructions describe how to set up groups and allocate keypads. Refer to the ST70+ User Reference Manual or the ST70+ Installation Guide. - Page 6 ST70+ - general information Display grouping...
-
Page 7: Setting Display Brightness
ST70+ general information Setting display brightness Applicability: The procedures on this card apply to all configurations of ST70+ Instruments and Pilot Controllers. Introduction Use this procedure to set the screen brightness on any ST70+ display type (Instrument or Pilot Controller). You can set the brightness on either just one display, all the displays in a group, or all displays in a system. -
Page 9: Setting The Correct Local Time
If you want to change the time or date format, use the procedure in the ST70+ User Reference Manual. Setting the time Note: If your ST70+ display is connected to a Raymarine multifunction display, then the time offset is controlled by the mul- tifunction display so you cannot use this procedure to change it. 1. Starting... - Page 10 ST70+ - general information Choosing data units...
-
Page 11: Setting The Screen Colors
ST70+ general information Setting the screen colors Applicability: The procedures on this card apply to all configurations of ST70+ Instruments and Pilot Controllers. Use these instructions to set the screen colors for optimum viewing (daytime and nighttime). There are four different color settings plus an inverse video option. Choosing colors 1. -
Page 13: Choosing The Data Units
ST70+ general information Choosing the data units Applicability: The procedures on this card apply to all configurations of ST70+ Instruments and Pilot Controllers. Use these instructions to choose the data units you want to use. You can choose from a range of imperial and metric units. - Page 14 ST70+ general information Choosing data units...
-
Page 15: Setting Up A Pilot Controller Display
ST70+ Pilot Controller Setting up a Pilot Controller display Card Applicability: The procedures on this card apply to ST70+ Pilot Controllers used with Raymarine SeaTalk and SeaTalk autopilots. They do NOT apply to ST70+ Instruments. Introduction Use this procedure to set up your ST70+ Pilot Controller display, to display: •... -
Page 16: Setting Up Data Boxes
ST70+ Pilot Controller Setting up a Pilot Controller display Card continued Selecting Pilot Controller page types MENU To change the type of view on your Pilot Controller screen, hold down for 1 second. The next view in the sequence is then displayed. You can also change the view by using the menu system. -
Page 17: Basic Autopilot Operation
ST70+ Pilot Controller Basic autopilot operation Card Applicability: The procedures on this card apply to ST70+ Pilot Controllers used with Raymarine SeaTalk and SeaTalk autopilots. They do NOT apply to ST70+ Instruments. Operating modes When you first switch on your system, your autopilot is in Standby mode. This means that you have full manual control, and the autopilot has no control over your boat. - Page 18 ST70+ Pilot Controller Basic autopilot operation Card continued Dodging obstacles To steer around an obstacle when running under autopilot control: DODGE 1. At the Pilot Control keypad, press .to regain man- ual control of the boat i.e. enter Standby mode. A DODGE screen is displayed.
-
Page 19: Using Autotack
ST70+ Pilot Controller Using AutoTack Card Applicability: The procedures on this card apply to ST70+ Pilot Controllers used with Raymarine SeaTalk and SeaTalk autopilots ON SAIL BOATS only. They do NOT apply to ST70+ Instruments. Introduction On a SAIL boat under autopilot control, you can use AutoTack to define how the boat tacks. - Page 20 ST70+ - Pilot Controller...
- Page 21 ST70+ Pilot Controller Using autopilot Track mode Card Applicability: The procedures on this card apply to ST70+ Pilot Controllers used with Raymarine SeaTalk and SeaTalk autopilots. They do NOT apply to ST70+ Instruments. Introduction You can use track mode to automati- cally steer your boat along a route plotted on your chartplotter.
-
Page 22: Using Autopilot Track Mode
ST70+ - Pilot Controller Using autopilot Track mode... -
Page 23: Using Autopilot Wind Vane Mode
ST70+ Pilot Controller Using autopilot Wind Vane mode Card Applicability: The procedures on this card apply to ST70+ Pilot Controllers used with Raymarine SeaTalk and SeaTalk autopilots ON SAIL BOATS only. They do NOT apply to ST70+ Instruments. Introduction Wind shift... - Page 24 ST70+ - Pilot Controller...
- Page 25 ST70+ Pilot Controller Using autopilot fishing patterns Card Applicability: The procedures on this card apply to ST70+ Pilot Controllers used with Raymarine SeaTalk and SeaTalk autopilots on POWER BOATS only. They do NOT apply to ST70+ Instruments. Introduction Fishing patterns are available on POWER boats, to enable you to automatically navigate over a preset course in Auto mode.
-
Page 26: Using Autopilot Fishing Patterns
ST70+ - Pilot Controller Using autopilot fishing patterns... -
Page 27: Switching Instrument Pages On & Off
ST70+ Instrument Switching instrument pages on & off Card Applicability: The procedures on this card apply to all configurations of ST70+ Instruments. They do NOT apply to ST70+ Pilot Controllers. Introduction If you need to quickly access only certain Instrument pages, you can switch OFF pages you do not need, to reduce the time it takes to access the pages you want to see. -
Page 29: Setting Instrument Page Rollover
ST70+ Instrument Setting instrument page rollover Card Applicability: The procedures on this card apply to all configurations of ST70+ Instruments. They are NOT relevant to ST70+ Pilot Controllers. Introduction You can set a rollover value so that each displayed Instrument page rolls on to the next page after a preset period, to thus automatically display all enabled pages in sequence, one after the other. -
Page 31: Changing Information On A Page
ST70+ Instrument Changing information on a page Card Applicability: The procedures on this card apply to all configurations of ST70+ Instruments. They are NOT relevant to ST70+ Pilot Controllers. Introduction You can change the information displayed in any frame on any Instrument page. You can either: •... - Page 32 ST70+ Instrument Changing information on a page Card continued 5. Select the required data group Scroll to the data group that contains the data item that you Page 6 Frame A want (Depth shown here). If you don’t know which group you need, select All. Note: ST70+ supports a wide range of data.
-
Page 33: Changing The Page Layout
ST70+ Instrument Changing the page layout Card Applicability: The procedures on this card apply to all configurations of ST70+ Instruments. They are NOT relevant to ST70+ Pilot Controllers. Introduction You can change the layout of a page by completely rebuilding it, as described below. Rebuilding pages 1. - Page 34 ST70+ Instrument Changing the page layout Card continued 6. Select the required data group. Page 6 Frame A Scroll to the data group that contains the data you want (Depth shown here). If you don’t know which group you need, select All. Depth Note: ST70+ supports a wide range of data.
-
Page 35: Using Alarm Clock
ST70+ Instrument Using alarm clock Card Applicability: The procedures on this card apply to all configurations of ST70+ Instruments. They are NOT relevant to ST70+ Pilot Controllers. Introduction This card tells you how to set and use the ST70+ alarm clock. Initial setup 1. - Page 36 ST70+ Instrument Using alarm clock Card continued Alarm Clock 9. Scroll to select the outer bottom box, then press accept and save the alarm setting and display the Timers menu. Returning to operating page Press CANCEL to exit without To return to normal operation from the Timers menu, press saving.
-
Page 37: Using Race Timers
ST70+ Instrument Using race timers Card Applicability: The procedures on this card apply to all configurations of ST70+ Instruments. They are NOT relevant to ST70+ Pilot Controllers. Introduction The ST70+ race timers provide: • Three race start count down timers, with default count down values as follows: •... - Page 38 ST70+ Instrument Using race timers Card continued Changing race start settings Use this procedure if you want to change any race start count down period. 1. Select Display Settings Display Settings MENU Press to display the Main Menu then scroll to Display Settings Press to display the Display Settings menu.
-
Page 39: Setting Alarms
ST70+ Instrument Setting alarms Card Applicability: The procedures on this card apply to all configurations of ST70+ Instruments. They are NOT relevant to ST70+ Pilot Controllers. Introduction This card describes how to use an ST70+ Instrument to set alarm levels and to enable or disable alarms. - Page 40 ST70+ - instrument Using timers...
-
Page 41: Alarm Events
ST70+ Instrument Alarm events Card Alarm indications A range of alarm functions are available, to alert you to particular events. When an alarm occurs, a popup box is displayed on the Depth Speed Heading ST70+ Instruments and an audible alarm indication may sound. - Page 42 ST70+ - instrument Using timers...
- Page 43 ST70+ general information Data list Data list This card lists the data supported by ST70+. Please note that these data are dependent on the configuration of individual systems, so will not all be available on all systems. Data Group Data Group Boost Pressure ENGINE...
- Page 44 ST70+ general information Data list Card continued Data Group Data Group WIND Sunset / Sunrise ENVIRONMENTAL HDOP Tack heading HEADING Heading HEADING Temperature offset ENVIRONMENTAL Heading response HEADING Temperature units ENVIRONMENTAL Humidity ENVIRONMENTAL Tilt BOAT Illumination SYSTEM Trim tabs BOAT Trip DISTANCE Local date...
Need help?
Do you have a question about the ST70+ and is the answer not in the manual?
Questions and answers