
Related Manuals for Beko B7S-B7SLED


Summary of Contents for Beko B7S-B7SLED
-
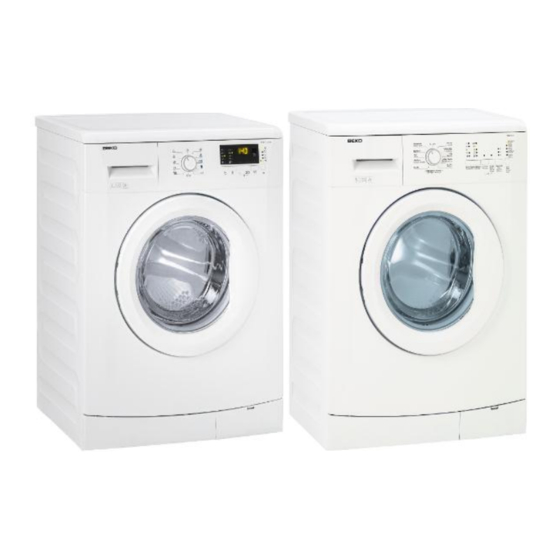
Page 1: Door
B7S B7SLED WASHING MACHINE SERVICE HAND BOOK SERVICE HANDBOOK NO:3 B7S-B7SLED CONTROL SYSTEM (WASHING MACHINE SERVICE HANDBOOK... -
Page 2: Table Of Contents
B7S B7SLED WASHING MACHINE SERVICE HAND BOOK 1. DOOR 2. CONTENTS DOOR……………………………………………………………………………………………..1 DOOR ........................2 CONTENTS ......................2 SECURITY WARNINGS ..................5 ..........................5 3.1. ENERAL ECURITY 3.2............................6 NTENDED 3.3............................6 HILD AFETY ....................6 3.4. HS D OMPLIANCE TO IRECTIVE 3.5. - Page 3 B7S B7SLED WASHING MACHINE SERVICE HAND BOOK ......................... 25 6.3. REPARING THE ACHINE 6.4......................... 26 ROGRAM SELECTION ..........................26 6.5. AIN PROGRAMS .......................... 28 6.6. PECIAL PROGRAMS 6.7..........................29 PEED ELECTION ........................ 29 6.8. EMPERATURE ELECTION ............................29 6.9.
- Page 4 B7S B7SLED WASHING MACHINE SERVICE HAND BOOK ........................... 61 9.26. ATER NLET 9.27............................61 ............................... 62 9.28. ULLEY ............................... 62 9.29. OTOR 9.30............................ 62 OWER ABLE ........................63 9.31. PPER OUNTERWEIGHT ......................... 63 9.32. OWER OUNTERWEIGHT 9.33................64 HOCK BSORBER AND HOCK...
-
Page 5: Security Warnings
B7S B7SLED WASHING MACHINE SERVICE HAND BOOK 3. Security Warnings This section includes security instructions which may help prevent the injuries and material damage risks. All kinds of warranties shall be invalid if these instructions are not observed. 3.1. General Security ... -
Page 6: Intended Use
B7S B7SLED WASHING MACHINE SERVICE HAND BOOK 3.2. Intended Use This product is for domestic use only. It is not suitable for commercial use and it must not be used out of its intended use. The product must only be used for washing and rinsing of laundry that are marked accordingly. - Page 7 B7S B7SLED WASHING MACHINE SERVICE HAND BOOK Is should be ensured that cable in the installation of cable group is not damaged. Stripped or damaged cables should not be installed. Cable route should be taken into account during installation; cable’s coming into contact with sharp surfaces should be avoided and it should not be pinched.
-
Page 8: Technical Specifications
B7S B7SLED WASHING MACHINE SERVICE HAND BOOK 4. Technical Specifications 4.1. PRODUCT DEFINITION : Arçelik A.Ş. Çayırova / İSTANBUL 4.1.1. Manufacturer 4.1.2. Model : B7S B7SLED xxxx d/d 4.1.3 VDE types : 92xx HN (Hot&Cold water) 92xx CN (Cold water) : 5 –... -
Page 9: Heater (With Double Thermocouple)
B7S B7SLED WASHING MACHINE SERVICE HAND BOOK 4.9. HEATER (WITH DOUBLE THERMOCOUPLE) : 230V – 1450 W (2 T/F) 4.10. WATER INLET : Cold/Hot and Cold 4.11. BODY 4.11.1. Material : DKP Split 4.11.2. Last Operation : Powder paint 4.12. DRUM 4.12.1. -
Page 10: Product Installation / Installation Rules / Settings
B7S B7SLED WASHING MACHINE SERVICE HAND BOOK 5. Product Installation / Installation Rules / Settings Apply to the nearest Authorized Service agent for the installation of your product. In order to make your machine ready for use, before calling the authorized service, make sure that electrical installation, clean water installation and water drain are appropriate by checking the user manual. -
Page 11: Removing The Transport Safety Bolts
B7S B7SLED WASHING MACHINE SERVICE HAND BOOK 5.3. Removing the Transport Safety Bolts WARNING: Do not remove the transport safety bolts before removing the packaging support. WARNING: Before operating the washing machine, remove the transport safety bolts! Otherwise, the product will be damaged. 1. -
Page 12: Connection To The Supply Water
B7S B7SLED WASHING MACHINE SERVICE HAND BOOK 5.4. Connection to the Supply Water Required water pressure is between 1-10 bar (0.1-1 MPa) for the proper operation of the machine. For the healthy operation of the machine, 10 – 80 liters of water per minute should be supplied from a fully opened tap. -
Page 13: Connection To The Water Drain
B7S B7SLED WASHING MACHINE SERVICE HAND BOOK 5.5. Connection to the water drain End of the drain hose should be attached directly to waste water drain, lavatory or bathtub. WARNING: If the hose is dislocated during water draining, it will flood your house. Also, there is risk of burning by hot water due to washing at high temperatures. -
Page 14: Adjustment Of Legs
B7S B7SLED WASHING MACHINE SERVICE HAND BOOK 5.6. Adjustment of legs WARNING: Product should stand on its legs stable and in a balanced way in order for it to operate silently and without vibration. Ensure balance by setting its legs. Otherwise, the product may move from its place and cause crushing and vibration problems. -
Page 15: Electrical Connection
B7S B7SLED WASHING MACHINE SERVICE HAND BOOK Figure 5.11 WARNING: Do not use any appliance or tool to loose the lock nuts. Otherwise, they may be damaged. 5.7. Electrical connection Plug the product into a grounded outlet protected by a 16-ampere fuse. If the machine is used without grounding which conform to the local regulations, our company will not be liable for any damages which may arise. -
Page 16: Use Of Product And Byproducts
B7S B7SLED WASHING MACHINE SERVICE HAND BOOK 6. Use of Product and Byproducts 6.1. Preparation 6.1.1. Sorting the Laundry Sort laundry according to type of fabric, color, and degree of soiling and allowable water temperature. Always obey the instructions given on the garment tags. Figure 6.1 Washing Symbols... -
Page 17: Preparation Of The Garments To Be Washed
B7S B7SLED WASHING MACHINE SERVICE HAND BOOK 6.1.2. Preparation of the garments to be washed Laundry items which contain accessories such as support wire, buckle or metal button may damage the washing machine. Remove the metallic parts or wash the laundry by putting them into a bag or pillow case. -
Page 18: Things To Do For Energy Saving
B7S B7SLED WASHING MACHINE SERVICE HAND BOOK 6.1.3. Things to do for energy saving Following information will help you use the product in an ecological and energy-efficient manner. Operate the machine with the highest capacity permitted by the program you selected and do not over load it. -
Page 19: Laundry Loading
B7S B7SLED WASHING MACHINE SERVICE HAND BOOK 6.1.5. Laundry loading Open the laundry cover. Put the garments into the machine in a loose manner. Push and close the loading cover until you hear the locking sound. Make sure that the garments do not get pinched between the door. - Page 20 B7S B7SLED WASHING MACHINE SERVICE HAND BOOK DETERGENT SELECTION Detergent type to be used depends on the fabric type and color. Use separate detergents for color and white laundry items. Wash your delicate garments only with the special detergents which are used for delicates (liquid detergent, wool shampoo, etc.).
- Page 21 B7S B7SLED WASHING MACHINE SERVICE HAND BOOK Use of gel and tablet detergent Apply the following actions when using tablet, gel detergents, etc. If the gel detergent is fluid and if your machine does not have a special liquid detergent container, put the gel detergent into the main wash detergent compartment during first intake of water.
-
Page 22: First Use
B7S B7SLED WASHING MACHINE SERVICE HAND BOOK 6.1.7. First Use Before starting to use the product make sure that the preparations are made which are in line with the “Important Safety Instructions” and the instructions in the “Installation” section. In order to make the machine ready to wash laundry, perform the first washing cycle with the Drum Cleaning program. -
Page 23: Recommendations For Correct Washing
B7S B7SLED WASHING MACHINE SERVICE HAND BOOK 6.1.8. Recommendations for correct washing Light Colored Items Black/Dark Colored Delicates/Woolens/Sil Colored Items and Whites Items k Items (Washing temperature (Washing temperature (Washing temperature (Washing temperature range recommended for range recommended range recommended range recommended for the soil amount: cold- for the soil amount:... -
Page 24: Control Panel
B7S B7SLED WASHING MACHINE SERVICE HAND BOOK 6.2. Control panel Instroduction of B7S Control System Auxiliary Speed Auxiliary Function_3 Auxiliary Temperature Level Function_2 Function_1 Level LEDs LEDs LED i LED i Delayed Start (may not be Button available in some models) 7S screen Program Monitoring... -
Page 25: Preparing The Machine
B7S B7SLED WASHING MACHINE SERVICE HAND BOOK B7S Introduction of LED Control System Temperature Speed Level Auxiliary Auxiliary Time Delay LEDs (3 Program Level LEDs (may LEDs Function_1 Function_2 LEDs as 3, 6, 9 hours) or Monitoring not be available LED i LED i Auxiliary Function_3... -
Page 26: Program Selection
B7S B7SLED WASHING MACHINE SERVICE HAND BOOK 6.4. Program selection Switch it to the desired program (For the models in which temperature selection can be made by means of the program selection switch, turn the program selection Switch to the appropriate “Program+Temperature” position). ... - Page 27 B7S B7SLED WASHING MACHINE SERVICE HAND BOOK Woolens You can wash your machine-washable woolen laundry at this program. Wash your laundry by selecting an appropriate temperature written on its label. It is recommended that you use appropriate detergent for woolens. Hand wash You can wash your woolen/delicate laundry, on the label of which it is written that it is not machine washable and which is recommended to be washed by hand.
-
Page 28: Special Programs
B7S B7SLED WASHING MACHINE SERVICE HAND BOOK Outdoor/Sport This program is appropriate for the clothes which are worn for a short period of time such as sport clothes. It is used to quickly wash a small amount of clothes which are made of cotton/synthetic blend. -
Page 29: Speed Selection
B7S B7SLED WASHING MACHINE SERVICE HAND BOOK Spinning/Pump This program is used to apply extra rinse to the laundry or drain the water inside. Before selecting this program, select the spinning speed you want and press “Start/Standby” button. Machine applies the set Spinning Speed and drains the water. If you want to drain the water only without spinning your laundry;... - Page 30 B7S B7SLED WASHING MACHINE SERVICE HAND BOOK Depending on the program, desired auxiliary function can be selected by pressing on the relevant auxiliary function buttons. Press the required buttons before the program is started. Some combinations cannot be selected together. For example: Prewash (11a) and Quick Wash Warning light on the selected Auxiliary Function will light up.
- Page 31 B7S B7SLED WASHING MACHINE SERVICE HAND BOOK Crease Reduction • If the Crease Reduction Auxiliary Function is selected, intermediate spinning steps are bypassed, last spinning step is performed at a low speed with a special spinning profile. This function provides crease reduction and makes it easy to iron the items. Soaking: •...
- Page 32 B7S B7SLED WASHING MACHINE SERVICE HAND BOOK Some LED models with Time Delay feature: It is achieved by assigning the Third Auxiliary Function button as Time Delay Button. There are 3 LEDs on the button which is assigned as Time Delay and these LEDs correspond to “3 hours, 6 hours and 9 hours”...
-
Page 33: Starting The Selected Programs
B7S B7SLED WASHING MACHINE SERVICE HAND BOOK (until you see “E00” on 7Segment display, and until all Time Delay LEDs are off in the LED model). 6.10. Starting the selected programs If the Time Delay duration has been reset by switching to “Pause” mode: -Press the “Start/Standby”... - Page 34 B7S B7SLED WASHING MACHINE SERVICE HAND BOOK Ready Wash Rins Spinning If the machine does not spin, program may be in the soaking mode or automatic spinning correction system might have been activated due to excessive unbalance (Please see ERROR CODES table). “Standby”...
- Page 35 B7S B7SLED WASHING MACHINE SERVICE HAND BOOK Changing the Settings of an Ongoing Program: Changing the Program Settings by Switching the Machine into the Standby Mode: When a program is in progress in the washing machine, the machine is switched to pause mode by pressing the “Start/Standby”...
- Page 36 B7S B7SLED WASHING MACHINE SERVICE HAND BOOK Deactivation of the Child Lock: There are two different situations in order to cancel the child lock: Cancelling the Child Lock when any program is in progress When a program is in progress with the machine, it is only possible to cancel the Child Lock by pressing the 1st and 2nd Auxiliary Function buttons for 3 seconds.
-
Page 37: Quick Instructions For Daily Use
B7S B7SLED WASHING MACHINE SERVICE HAND BOOK 6.11. Quick Instructions for Daily Use Preparation Open the water tap fully. Check whether the pipes are tightened securely or not. Also check that the drain pipe is hooked to the drain properly. ... - Page 38 B7S B7SLED WASHING MACHINE SERVICE HAND BOOK Adding More Laundry This is possible only in the following situations: During a Time Delay At the beginning of a wash (machine may let you add laundry at a later step only if the water level in the machine is low or the temperature is low).
-
Page 39: Maintenance And Cleaning
B7S B7SLED WASHING MACHINE SERVICE HAND BOOK 7. MAINTENANCE AND CLEANING Service life of product extends and frequently experienced problems will be reduced if it is cleaned at regular intervals. 7.1. Cleaning the detergent dispenser Clean the detergent drawer at regular intervals (every 4-5 washing cycles) as shown below in order to prevent accumulation of powder detergent in time. -
Page 40: Cleaning The Body And Control Panel
B7S B7SLED WASHING MACHINE SERVICE HAND BOOK Make sure that there is not any foreign bodies left inside the drum after each wash. Figure 7.2 Cleaning the bellows If the holes in the bellows shown in the Figure are clogged, open the holes by means of a toothpick. -
Page 41: Draining The Remaining Water And Cleaning The Pump Filter
B7S B7SLED WASHING MACHINE SERVICE HAND BOOK 7.5. Draining the remaining water and cleaning the pump filter The filter system in your machine prevents solid items such as buttons, coins and fabric fibers clogging the pump impeller during discharge of washing water. Therefore the waste water is discharged without any problems and the service life of the pump is increased. - Page 42 B7S B7SLED WASHING MACHINE SERVICE HAND BOOK If the filter cap is one piece, pull the cap from both sides at the top to open. Figure 7.5 Cleaning the filter - 2 You can remove the filter cover by slightly pushing downwards with a thin plastic tipped tool, through the gap above the filter cover.
- Page 43 B7S B7SLED WASHING MACHINE SERVICE HAND BOOK If the product does not have an emergency water drain hose, in order to drain the water: Figure 7.7 Cleaning the filter - 4 a. In order to collect the water to flow out of the filter, place a large vessel in front of the filter.
-
Page 44: Components
B7S B7SLED WASHING MACHINE SERVICE HAND BOOK 8. . COMPONENTS 8.1. Mechanical Parts All drums are made of a special plastic which is made of high-resistant plastic and reduces the level of the sound strength and does not have a oxidation problem. Drum cover which is used in the YOC series machines is also made of plastic and attached to the drum with special clips. -
Page 45: Motor
B7S B7SLED WASHING MACHINE SERVICE HAND BOOK Current of all components passes over the door safety lock. Machine will not work in case it is faulty. When 220V is supplied between the contacts numbered 3 and 1, the distance between the contacts numbered 3 and 2 should switch to closed position. -
Page 46: Valve
B7S B7SLED WASHING MACHINE SERVICE HAND BOOK Operating Voltage : 230VAC 50-60 Hz Power : 1950W : 26W ± 3 Resistance When the resistance is measured from both ends with multimeter, approx. 26 should be read. Picture 8.3 Heater 8.7. Valve ... -
Page 47: Water Level Sensor
B7S B7SLED WASHING MACHINE SERVICE HAND BOOK Resistance (25 C) : 4773 ohm (4.2%, Siemens)- 4837 ohm (3.2%, elth) Operating Temperature : -10C...+100C : 16 2 s Thermal time constant Resistance values which are read from the NTC ends by means of multimeter are compared to the below table. -
Page 48: Inlet Impedance Coil
B7S B7SLED WASHING MACHINE SERVICE HAND BOOK Cable inputs 5VDC / Data / GND. Operating Voltage : 5 VDC When it is empty, 625 ± 2 Hz frequency value should be read from the Data and GND terminals. Picture 8.6 Water level sensor 8.11. -
Page 49: Disassembly Procedures
B7S B7SLED WASHING MACHINE SERVICE HAND BOOK 9. DISASSEMBLY PROCEDURES IMPORTANT: WHEN THE MACHINE IS REQUIRED TO BE SERVICED BY BEING TILTED TO THE FRONT, TRANSPORT SAFETY BOLTS SHOULD BE INSTALLED. THIS IS NECESSARY FOR THE COMPONENTS AT THE FRONT OF THE MACHINE NOT TO BE DAMAGED. 9.1. -
Page 50: Front Door Group (Single Axis Front Door)
B7S B7SLED WASHING MACHINE SERVICE HAND BOOK Picture 9.3 Front Wall Disassembly / Assembly Bellows is removed from the Front Door. 2 screws fixing the Safety Lock to the Front Door are removed. Kick plate is removed. Sheet metal screws fixing the front wall to the body from its underside are removed. -
Page 51: External Door
B7S B7SLED WASHING MACHINE SERVICE HAND BOOK Picture 9.5 Front door disassembly /assembly 9.6. External Door Screws connecting the external door to the internal door are removed. External door is detached from the internal door by hand. 9.7. Inner Lid Front door group is removed. -
Page 52: Dispenser Panel
B7S B7SLED WASHING MACHINE SERVICE HAND BOOK 9.11. Dispenser panel Dispenser is pulled backwards from the detergent compartment. Picture 9.6 Disassembly/asembly of detergent dispenser Dispenser is removed by pressing on the area shown with arrow on the siphon. Picture 9.7 Disassembly/asembly of detergent dispenser Dispenser is reversed and the drawer panel is released from its tabs. -
Page 53: Panel
B7S B7SLED WASHING MACHINE SERVICE HAND BOOK Picture 9.9 Disassembly/asembly of detergent dispenser 9.12. Panel Dispenser is removed. Picture 9.10 Panel disassembly/assembly 3 pt screws which fix the panel to the panel reinforcement bracket and the detergent compartment and shown separately in the following pictures are removed. -
Page 54: Protective Foil
B7S B7SLED WASHING MACHINE SERVICE HAND BOOK 1 pt screw fixing the panel to the panel reinforcement bracket is removed. Picture 9.12 Panel disassembly/assembly Pt screws on the areas shown with arrow sign are removed and card group is detached from panel. Picture 9.11 Panel disassembly/assembly 9.13. -
Page 55: Reflector
B7S B7SLED WASHING MACHINE SERVICE HAND BOOK 9.14. Reflector Reflector is detached from its place on the card. Picture 9.13 Reflector disassembly/assembly 9.15. Program Control Card Card is detached from the tabs on the card holder shown with an arrow. Picture 9.14 Control card disassembly/assembly Picture 9.15 Control card disassembly/assembly... -
Page 56: Water Level Switch
B7S B7SLED WASHING MACHINE SERVICE HAND BOOK Picture 9.17 Control card disassembly/assembly 9.16. Water Level Switch 1 metal sheet screw is removed from the cable holder to which the water level sensor is fixed. Water level sensor socket and the air vent hose are removed. Picture 9.18 Water level switch disassembly/assembly... -
Page 57: Parasite Filter
B7S B7SLED WASHING MACHINE SERVICE HAND BOOK 9.17. Parasite Filter Upper table is removed. Parasite Filter cable terminals are removed. 2 screws, at the back of the body, attaching the terminal group to the body are removed. M8 nut which attaches the parasite filter to the terminal group is held by double-ended wrench and the parasite filter is removed by turning manually. -
Page 58: Single Valve
B7S B7SLED WASHING MACHINE SERVICE HAND BOOK 9.19. Single Valve Upper table is removed. Single valve cable terminals are removed. Single Valve Hose clamp is pulled back over the hose. Hose is ejected from the end on the valve. At the back of the body, the tab fixing the valve to the body is pushed inside with a screwdriver and the valve is turned towards left. -
Page 59: Safety Switch
B7S B7SLED WASHING MACHINE SERVICE HAND BOOK 9.21. Safety Switch Door is opened by pulling from the handle. Drum bellows clamp fixing the drum bellows is removed. 2 screws fixing the safety switch to the front door are removed. Safety Switch cable ends are removed. Picture 9.22 Disassembly/assembly of safety switch 9.22. -
Page 60: Pump
B7S B7SLED WASHING MACHINE SERVICE HAND BOOK 9.23. Pump Water inside the machine is drained. Kick plate is removed. Front wall is removed. Pump cable terminals are removed. Drum Filter Hose is removed from the pump. When the drum filter intermediate hose is being attached again, the marks on the pump and the hose should be aligned and hose should be attached so. -
Page 61: Drum Bellows Assembly
B7S B7SLED WASHING MACHINE SERVICE HAND BOOK 9.25. Drum Bellows Assembly The areas marked with arrows on the bellows and the drum cover are superimposed as to face each other. The large area on the bellows water drain and the drum front cover (marked areas in the picture) are combined in a balanced way and the bellows is stroked from below to the upper part to perform the assembly. -
Page 62: Pulley
B7S B7SLED WASHING MACHINE SERVICE HAND BOOK 9.28. Pulley Rear cover is removed. Poly V belt is turned and removed from over the pulley. Bolt attaching the pulley to the drum shaft is removed. Pulley is removed from the drum shaft. 9.29. -
Page 63: Upper Counterweight
B7S B7SLED WASHING MACHINE SERVICE HAND BOOK 9.31. Upper Counterweight Upper table is removed. Upper Counterweight is removed with its retaining bolts detached. Picture 9.30 Disassembly/assembly of upper counterweight 9.32. Lower Counterweight Front wall is removed. Lower Counterweight Retaining Bolts are removed. (When the upper and lower counterweights are assembled, torque value should be 2100 Ncm (-900 Tolerance). -
Page 64: Shock Absorber And Shock Absorber Pin
B7S B7SLED WASHING MACHINE SERVICE HAND BOOK 9.33. Shock Absorber and Shock Absorber Pin Rear cover is removed. Internal pin is pushed backwards with a tapered pin or punch. The pin which is pushed backwards with a pliers is pulled and removed The body pin which props up is flexed with a flat tip screwdriver and pulled backwards. -
Page 65: Modifications In X Junior
B7S B7SLED WASHING MACHINE SERVICE HAND BOOK 10. MODIFICATIONS IN X JUNIOR Junior body and XJ body cannot be used interchangeably. At the moment, in order to distinguish X Junior body, spring hanger brackets and chassis feet in the body group are marked the letter x. Picture 10.2 Currently, the difference between the bodies is perceived with the marked letter X. - Page 66 B7S B7SLED WASHING MACHINE SERVICE HAND BOOK As it is shown in the Picture 10.2. Since it is moved 5mm backwards compared to the driving group in Junior machines hanger spring is positioned 5mm backwards. Picture 10.2 Hanger spring Picture 10.3 X Junior body mark X-Junior as shown in Picture 10.3 to distinguish X-Junior body from Junior body, spring hanger brackets and chassis feet in the body group are marked with letter "X"...
-
Page 67: Picture 10.6 Buffer
B7S B7SLED WASHING MACHINE SERVICE HAND BOOK To prevent tearing of the bellows and increase the distance between the drum and the front wall, it has been taken 5 mm backwards and decided that bellows stock # 2827083700 is to be used only for this position. Picture 10.5 X Junior upper counterweight is 5mm back Lower and upper counterweights are moved 5mm backwards since they have a risk to crash to the wall before they are moved back. -
Page 68: Picture 10.6 Chassis Feet Were Marked With X
B7S B7SLED WASHING MACHINE SERVICE HAND BOOK Picture 10.6 Chassis feet were marked with x. Spring hanger brackets and chassis feet in the XJ body group are moved 5mm backwards. Chassis feet were marked with X. -
Page 69: Failure Flow Diagram
B7S B7SLED WASHING MACHINE SERVICE HAND BOOK FAILURE FLOW DIAGRAM Revisions: Rev.01 07.10.2012... - Page 70 B7S B7SLED WASHING MACHINE SERVICE HAND BOOK ONTENTS Revision page 1 Contents page 2 Starting up page 3 Error codes page 4 page 5 page 6 page 7 page 8 page 9 page 10 page 11 page 12 E9 and E10 page 13 E11_1 page 14...
- Page 71 B7S B7SLED WASHING MACHINE SERVICE HAND BOOK PICTURE ilk_1:program selection switch Listen to the socket removed. Supply Voltage is being customer's measured. complaint Close the machine door if opened. Switch to service mode. To switch to service mode, move program selection switch to CANCEL position. Then, while pressing START/PAUSE button, bring the program selection switch to the first program in the clockwise direction.
- Page 72 B7S B7SLED WASHING MACHINE SERVICE HAND BOOK * My machine continuously takes *It starts suddenly *Program lasts * Poor washing by *Does not heat in and discharges during washing Machine is boiling long. the machine water. water. cycle. *Moves for LIKELY the water.
- Page 73 B7S B7SLED WASHING MACHINE SERVICE HAND BOOK * Poor washing by Is there E1 error? the machine * Machine does not heat water * Program lasts PICTURE E1-1: There are NTC and Level long. sensor cables on the KN2 socket. Attach KN2 socket.
- Page 74 B7S B7SLED WASHING MACHINE SERVICE HAND BOOK *Does not heat water. *Machine boiled Is there E2 error? the water once, but now it does not heat at all. PICTURE E2-1: Heater socket on PICTURE E2-2: KN8 tacho socket is removed. the KN5 card is removed.
- Page 75 B7S B7SLED WASHING MACHINE SERVICE HAND BOOK Machine is boiling the water. PICTURE E2-1: Heater socket on the KN5 Laundry comes card out very hot; they are worn. Is there E3 error? * Heater continuously active error Important Note: The washing machine makes cold washing and ends the program before the heater is activated in NTC open circuit / short circuit and Heater open circuit conditions, i.e.
- Page 76 B7S B7SLED WASHING MACHINE SERVICE HAND BOOK * My machine continuously takes in and discharges water. * No wash movement action Is there E4 error? * Door jammed * Program does not come to an end. Is the machine taking water continuously? * Valve triac short circuit...
- Page 77 B7S B7SLED WASHING MACHINE SERVICE HAND BOOK *Program lasts long. *The machine Is there E5 error? does not drain water. *The machine does not spin Check machine supply voltage. If there is low supply voltage, the pump will not work. *Pump triac open circuit error *Pump clogged error *Pump triac diode error...
- Page 78 B7S B7SLED WASHING MACHINE SERVICE HAND BOOK *It starts suddenly during washing cycle. *Moves for a few times and finishes the program. *Program is not completed. Is there E6 error? * Motor triac Start the spin program short circuit error *Motor triac in diode mode error.
- Page 79 B7S B7SLED WASHING MACHINE SERVICE HAND BOOK * Machine discharges every time it is turned * Program does start. Is there E7 error? PICTURE E7-1: The socket on the level sensor must be fitted. Are the Level Sensor socket (Picture E7-1) and the control Repair the socket and cables card KN2 socket fitted (KN2 *Water level...
- Page 80 B7S B7SLED WASHING MACHINE SERVICE HAND BOOK *Program lasts long. *Machine does not finish the program. PICTURE E8-2: KN3 connector Is there E8 error? *Machine does not take in connector on the card water. *Machine does not work. *It does not spin and drain. *Machine continuously drains.
- Page 81 B7S B7SLED WASHING MACHINE SERVICE HAND BOOK * Machine gives bad wash results. * Washing comes to an end before the displayed washing time Is there E9 error? elapses. * Program is not completed. * Machine leaves water inside. Laundry comes out with detergent.
- Page 82 B7S B7SLED WASHING MACHINE SERVICE HAND BOOK * Program is not completed. * Machine makes sudden startups. * Machine drum Is there E11 error? does not rotate. Start the spin program *Motor open circuit error *Tacho open circuit error Machine is turned off. 1) Resistance value is measured between the 3rd and 4th pins of the KN1 socket which has been removed from the card.
- Page 83 B7S B7SLED WASHING MACHINE SERVICE HAND BOOK PICTURE E11-12: 8-pin motor connector IMPORTANT: First connector on the 8-pin motor connector is empty. This connector is also counted. Picture E11-12 PICTURE E11-6: Motor coil resistance is being PICTURE 11-4: Motor coil resistance is being checked over the 10-pin motor measured over the 8-pin motor.
- Page 84 B7S B7SLED WASHING MACHINE SERVICE HAND BOOK Cont'd from Are there 120 secs. between motor motions? Check the error code again when the machine PICTURE E11-8: Tacho resistance is being program is measured over the card. terminated. Machine is turned off and the KN8 connector on the card is removed to check over the socket if the resistance between the Tacho ends is approx.
- Page 85 B7S B7SLED WASHING MACHINE SERVICE HAND BOOK * Machine did not spin. * Time extended. * Machine did an additional rinse although I did not select the extra rinse. Is there E17 error? *Program terminated error without rinsing because of foam Check if the main wash and prewash valves are properly connected to the related compartment of the detergent drawer.
- Page 86 B7S B7SLED WASHING MACHINE SERVICE HAND BOOK * Machine did not spin. * Time lengthened. Is there E18 error? *Program terminated error without spinning because of unbalanced Explain the customer the load following unbalanced load preventive actions. Reasons for ending the program without spinning as a result of unbalanced load detection 1) Laundry may pile up on one side of the drum when you run your machinewith less laundry.
- Page 87 B7S B7SLED WASHING MACHINE SERVICE HAND BOOK Program selection switch does not function. Or the selected program and the running program are not identical some programs cannot be selected. For example, although spinning is selected, the machine takes in water. Replace the control card.
- Page 88 B7S B7SLED WASHING MACHINE SERVICE HAND BOOK Takes in water from the wrong detergent compartment Are the valves connected to KN6.2 - common (white) KN3.3 - Main wash (blue) Correct the connections. Check KN3.4 - Prewash (yellow) through a function test. KN3.5 - Hot washing (red) ends? Perform a function test on the...
- Page 89 B7S B7SLED WASHING MACHINE SERVICE HAND BOOK Make sure that water is not Is the machine continuously coming upon the control card, blowing the fuse and is there motor, heater, pump, door lock not an error code? and valves of the machine. Remove the heater sockets to check if there is heater short circuit.
- Page 90 B7S B7SLED WASHING MACHINE SERVICE HAND BOOK...
-
Page 91: Power Circuit Diagram
B7S B7SLED WASHING MACHINE SERVICE HAND BOOK 12. POWER CIRCUIT DIAGRAM... - Page 92 B7S B7SLED WASHING MACHINE SERVICE HAND BOOK...
- Page 93 B7S B7SLED WASHING MACHINE SERVICE HAND BOOK...
- Page 94 B7S B7SLED WASHING MACHINE SERVICE HAND BOOK...
-
Page 95: Exploded Drawings
B7S B7SLED WASHING MACHINE SERVICE HAND BOOK 13. EXPLODED DRAWINGS 13.1. Body Group 13.2. Control Group... -
Page 96: Water System
B7S B7SLED WASHING MACHINE SERVICE HAND BOOK 13.3. Water System 13.4. Visual Group... -
Page 97: Visual Group
B7S B7SLED WASHING MACHINE SERVICE HAND BOOK 13.5. Visual Group 13.6. Front Wall Group... -
Page 98: Front Door
B7S B7SLED WASHING MACHINE SERVICE HAND BOOK 13.7. Front door 13.8. Driving Group... -
Page 99: Part List
B7S B7SLED WASHING MACHINE SERVICE HAND BOOK 14. Part List SAP should be taken as a basis for the part list. 15. List of Figures and Pictures 5.1 ................................10 IGURE 5.2 ................................11 IGURE 5.3 ................................11 IGURE 5.4 ................................11 IGURE 5.5 ................................ -
Page 100: Table List
B7S B7SLED WASHING MACHINE SERVICE HAND BOOK 9.19 D ................57 ICTURE ISASSEMBLY ASSEMBLY OF PARASITE FILTER ............57 9.20 D ICTURE ISASSEMBLY ASSEMBLY OF DETERGENT COMPARTMENT ................58 9.21 D ICTURE ISASSEMBLY ASSEMBLY OF TWO WAY VALVE 9.22 D ................
Need help?
Do you have a question about the B7S-B7SLED and is the answer not in the manual?
Questions and answers