
Related Manuals for Philco POB77


Summary of Contents for Philco POB77
- Page 1 Istruzioni per User manual l’uso Oven Forno POB77...
-
Page 2: Table Of Contents
CONTENTS Safety information Using the accessories Safety instructions Additional functions Product description Helpful hints and tips Before first use Care and cleaning Control panel What to do if… Daily use Technical data Clock functions Installation Automatic programmes Environment concerns Subject to change without notice. SAFETY INFORMATION Before the installation and use of the appliance, carefully read the supplied instructions. -
Page 3: Safety Instructions
• Internally the appliance becomes hot when in operation. Do not touch the heating elements that are in the appliance. Al- ways use oven gloves to remove or put in accessories or ovenware. • Do not use a steam cleaner to clean the appliance. •... -
Page 4: Pliance
• If the mains socket is loose, do not con- – do not put ovenware or other objects in nect the mains plug. the appliance directly on the bottom. • Do not pull the mains cable to disconnect – do not put aluminium foil directly on the the appliance. -
Page 5: Product Description
• Only use lamps with the same specifica- • Cut off the mains cable and discard it. tions. • Remove the door catch to prevent chil- dren and pets to get closed in the appli- Disposal ance. Warning! Risk of injury or suffocation. •... -
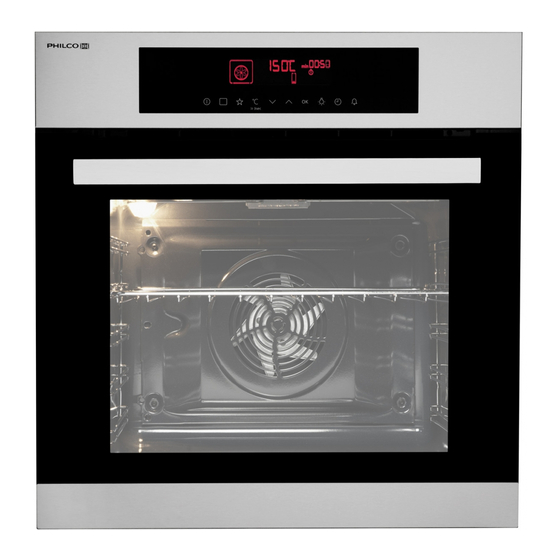
Page 6: Control Panel
4. Let the appliance operate for 15 mi- smoke. This is normal. Make sure that the nutes. airflow is sufficient. Accessories can become hotter than usual- ly. The appliance can emit an odour and CONTROL PANEL Electronic programmer Use the sensor fields to operate the appli- ance. -
Page 7: Daily Use
Display A) Heating function symbol B) Temperature / time display C) Clock / residual heat display (also Mi- nute Minder and Time of Day) D) Residual heat indicator E) Indicators for the clock functions (refer to the table "Clock functions") F) Heat-up indicator G) Number of a heating function / pro- gramme... - Page 8 Oven function Application Pizza Setting To bake food on one shelf position for a more intensive browning and a crispy bottom. When you use this function, decrease the oven temperature by 20 - 40 °C from the standard temperatures you use for Conventional Cooking. Slow Cook To prepare very lean and tender roasted food.
-
Page 9: Clock Functions
Activating the Fast heat up function: the cooking time must be longer than 30 minutes or you must use Touch and hold for more than three the clock functions (Duration, End, seconds. Time delay). This feature does not If you activate the Fast heat up function, the operate with the grill functions. -
Page 10: Pliance
Setting the DURATION Setting the SET+GO 1. Activate the appliance and set an oven 1. Set an oven function (or programme) function and temperature. and temperature (refer to "Setting the 2. Touch oven function" and "Changing the tem- again and again until the dis- perature"). -
Page 11: Automatic Programmes
AUTOMATIC PROGRAMMES Warning! Refer to the Safety chapters. There are two types of automatic programmes: There are 20 automatic programmes • Automatic recipes and recipes. Use an automatic pro- • Automatic programmes with weight input gramme or recipe when you do not have the knowledge or experience on how to prepare a dish. -
Page 12: Using The Accessories
4. Touch 6. When the set time ends, an acoustic or the settings save auto- matically after five seconds. signal sounds for two minutes. 5. The appliance activates. A symbol of flashes. The appliance deactivates. the weight unit flashes in the display. 7. -
Page 13: Additional Functions
ADDITIONAL FUNCTIONS My Favourite Programme Function Lock function You can activate the function only when the appliance operates. The Function Lock pre- Use this function to save your favourite vents an accidental change of the oven temperature and time settings for an oven function. -
Page 14: Cooling Fan
Indicator of the setting Description Value to set menu KEY TONE CLICK / BEEP / OFF SET3 SET4 FAULTY TONE ON / OFF SET5 SERVICE MENU SET6 RESTORE SETTINGS YES / NO TIME EXTENSION ON / OFF SET7 1) It is not possible to deactivate the tone of the ON / OFF sensor field. 2) Selected models only You can set the settings menu only 5. -
Page 15: Helpful Hints And Tips
HELPFUL HINTS AND TIPS • The appliance has five shelf levels. Count • If you use two baking trays at the same the shelf levels from the bottom of the time, keep one empty level between appliance floor. them. • The appliance has a special system Cooking meat and fish which circulates the air and constantly re- •... -
Page 16: Bread And Pizza
Conventional Cook- True Fan Cooking TYPE OF Cooking Notes DISH time [min] Shelf posi- Temp Shelf posi- Temp tion [°C] tion [°C] Christmas 90 - 120 In a 20 cm cake cake / Rich fruit mould cake Plum cake 50 - 60 In a bread tin Small cakes - 150 -... - Page 17 Conventional True Fan Cooking Cooking TYPE OF Cooking Notes DISH time [min] Shelf po- Temp Shelf posi- Temp sition [°C] tion [°C] Bread rolls 2 (2 and 4) 25 - 40 6 - 8 rolls in a baking tray Pizza 230 - 230 - 10 - 20...
-
Page 18: Turbo Grilling
Conventional True Fan Cooking Cooking TYPE OF Cooking Notes DISH time [min] Shelf po- Temp Shelf posi- Temp sition [°C] tion [°C] Goose 150 - 200 Whole Rabbit 60 - 80 Cut in pieces Hare 150 - 200 Cut in pieces Pheasant 90 - 120 Whole... -
Page 19: Slow Cook
Temperature TYPE OF DISH Quantity Shelf position Time [min] [°C] Roast beef or fillet, per cm of thick- 1 or 2 8 - 10 170 - 180 well done ness 1) Preheat the oven. Pork Temperature TYPE OF DISH Quantity Shelf position Time [min] [°C]... - Page 20 Do not use the automatic slow cook func- 2. Put the meat together with the hot tion for poultry. roasting pan into the oven on the wire shelf. When you use this function, always 3. Select the Slow Cook function. cook dishes without a cover.
-
Page 21: Care And Cleaning
Cooking time until Further cooking time PRESERVE Temperature [°C] simmering [min] at 100 °C [min] Cucumbers 160 – 170 50 – 60 – Mixed pickles 160 – 170 50 – 60 5 – 10 Kohlrabi, peas, aspara- 160 – 170 50 –... -
Page 22: Shelf Supports
if the door gasket is damaged. Contact Shelf supports the Service Centre. You can remove the shelf supports to clean • To clean the door gasket, refer to the the side walls. general information about cleaning. Removing the shelf supports 1. -
Page 23: Cleaning The Oven Door
Before you change the oven lamp: Use the same oven lamp type. • Deactivate the oven. 4. Install the glass cover. • Remove the fuses in the fuse box or de- Cleaning the oven door activate the circuit breaker. The oven door has three panels of glass. Put a cloth on the bottom of the oven You can remove the oven door and the in- to prevent damage to the oven light... - Page 24 3. Close the oven door to the first open- ing position (halfway). Then pull forward and remove the door from its seat. 4. Put the door on a soft cloth on a stable surface. 5. Release the locking system to remove the glass panels.
-
Page 25: What To Do If
7. Carefully lift (step 1) and remove (step 2) the glass panels one by one. Start from the top panel. 8. Clean the glass panels with water and soap. Dry the glass panels carefully. Installing the door and the glass panel When the cleaning is completed, install the glass panels and the oven door. -
Page 26: Technical Data
Problem Possible cause Remedy The display shows an error There is an electrical fault. • Deactivate the appliance with code that is not in this list. the house fuse or the safety switch in the fuse box and activate it again. •... -
Page 27: Environment Concerns
The manufacturer is not responsible if you do not follow the safety precau- tions from the chapter "Safety Informa- tion". min. 550 This appliance is supplied with a main plug and a main cable. min. 560 Cable Cable types applicable for installation or re- placement: H07 RN-F, H05 RN-F, H05 RRF, H05 VV-F, H05 V2V2-F (T90), H05 BB-F.
Need help?
Do you have a question about the POB77 and is the answer not in the manual?
Questions and answers