Table of Contents
Advertisement
Advertisement
Table of Contents

Related Manuals for Philco POB90


Summary of Contents for Philco POB90
- Page 1 User manual Oven POB90...
-
Page 2: Table Of Contents
CONTENTS Safety information Additional functions Safety instructions Helpful hints and tips Product description Care and cleaning Before first use What to do if… Daily use Installation Clock functions Environment concerns Using the accessories Subject to change without notice. SAFETY INFORMATION Before the installation and use of the appliance, carefully read the supplied instructions. -
Page 3: Safety Instructions
ways use oven gloves to remove or put in accessories or ovenware. • Do not use a steam cleaner to clean the appliance. • Before maintenance cut the power supply. • Do not use harsh abrasive cleaners or sharp metal scrapers to clean the glass door since they can scratch the surface, which may result in shattering of the glass. -
Page 4: Internal Light
fuses removed from the holder), earth – be careful when you remove or install leakage trips and contactors. the accessories. • The electrical installation must have an • Discoloration of the enamel has no effect isolation device which lets you discon- on the performance of the appliance. -
Page 5: Product Description
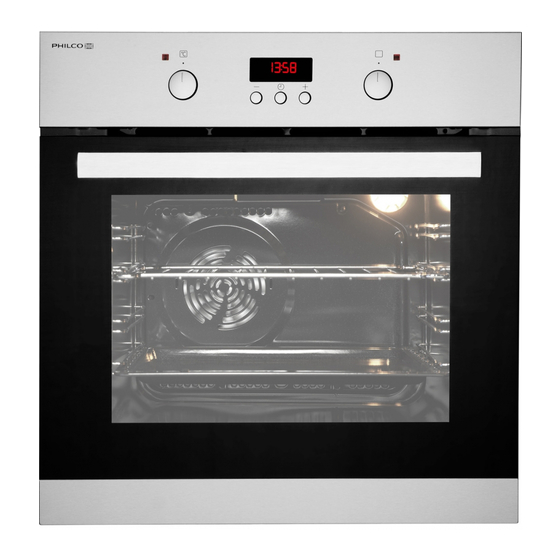
• Cut off the mains cable and discard it. • Remove the door catch to prevent chil- dren and pets to get closed in the appli- ance. PRODUCT DESCRIPTION Electronic programmer Oven function control knob Power indicator Air vents for the cooling fan Grill Oven lamp Rating plate... -
Page 6: Daily Use
6. Let the appliance operate for ten mi- smoke. This is normal. Make sure that the nutes. airflow is sufficient. Accessories can become hotter than usual. The appliance can emit an odour and DAILY USE Warning! Refer to the Safety chapters. 2. -
Page 7: Clock Functions
CLOCK FUNCTIONS Electronic programmer Function indicators Time display Button + Selection button Button - Clock function Application Time of day To set, change or check the time of day. Minute Minder To set a countdown time. This function has no effect on the opera- tion of the oven. -
Page 8: Additional Functions
Telescopic runners 1. Pull out the right and left hand tele- scopic runners. °C 2. Put the wire shelf on the telescopic runners and carefully push them into °C the appliance. Make sure you push back the tele- scopic runners fully in the appliance before you close the oven door. -
Page 9: Helpful Hints And Tips
HELPFUL HINTS AND TIPS • The appliance has four shelf levels. Count • If you use two baking trays at the same the shelf levels from the bottom of the time, keep one empty level between appliance floor. them. • The appliance has a special system Cooking meat and fish which circulates the air and constantly re- •... - Page 10 Conventional True Fan Cook- cooking Cooking TYPE OF DISH Notes time [min] Temp Temp Level Level [°C] [°C] Sponge cake 35 - 45 In a 26 cm cake mould (Fatless sponge cake) Christmas 50 - 60 In a 20 cm cake mould cake / Rich fruit cake Plum cake...
- Page 11 Conventional True Fan Cook- cooking Cooking TYPE OF DISH Notes time [min] Temp Temp Level Level [°C] [°C] Yorkshire pud- 20 - 30 6 pudding mould ding 1) Preheat for 10 minutes. MEAT Conventional True Fan Cook- cooking Cooking TYPE OF DISH Notes time [min] Temp...
- Page 12 Grilling Preheat the empty oven for 10 mi- nutes, before cooking. Quantity Grilling Cooking time [min] TYPE OF DISH Pieces Shelf posi- Temp. 1st side 2nd side tion [°C] Fillet steaks 12 - 15 12 - 14 Beef steaks 10 - 12 6 - 8 Sausages —...
-
Page 13: Care And Cleaning
Shelf position Temperature TYPE OF DISH Time [hr] [°C] 1 level 2 levels Vegetables for 60 - 70 5 - 6 soup Mushrooms 50 - 60 6 - 8 Herbs 40 - 50 2 - 3 FRUIT Shelf position Temperature TYPE OF DISH Time [hr] [°C]... -
Page 14: Removing The Shelf Supports
Removing the shelf supports 1. Pull the front of the shelf support away from the side wall. 2. Pull the rear end of the shelf support away from the side wall and remove it. 3. Clean the oven ceiling with a soft cloth Installing the shelf supports with warm water and a cleaning agent, Install the shelf supports in the opposite se-... -
Page 15: Cleaning The Oven Door
Cleaning the oven door The oven door can close if you try to remove the internal glass panel before The oven door has two glass panels. You you remove the oven door. can remove the oven door and the internal glass panel to clean it. - Page 16 3. Close the oven door to the first open- ing position (halfway). Then pull forward and remove the door from its seat. 4. Put the door on a soft cloth on a stable surface. 5. Release the locking system to remove the internal glass panel.
-
Page 17: What To Do If
7. Carefully lift (step 1) and remove (step 2) the glass panel. 8. Clean the glass panel with water and soap. Dry the glass panel carefully. Installing the door and the glass panel When the cleaning is completed, install the glass panel and the oven door. -
Page 18: Installation
Product number (PNC) ......... Serial number (S.N.) ......... INSTALLATION Warning! Refer to the Safety chapters. Building In Electrical installation Warning! Only a qualified person must do the electrical installation. The manufacturer is not responsible if you do not follow the safety precau- tions from the chapter "Safety Informa- tion". -
Page 19: Environment Concerns
ENVIRONMENT CONCERNS Recycle the materials with the symbol Packaging material Put the packaging in applicable containers The packaging material is environmen- to recycle it. tally-friendly and recyclable. Plastic Help protect the environment and human parts are marked with international ab- health and to recycle waste of electrical and breviations such as PE, PS, etc. - Page 20 892954540-A-242013...
Need help?
Do you have a question about the POB90 and is the answer not in the manual?
Questions and answers