Table of Contents
Advertisement
Advertisement
Table of Contents

Related Manuals for NANO CAM NCP-DVRGPS

Summary of Contents for NANO CAM NCP-DVRGPS
- Page 1 NCP-DVRGPS USER MANUAL FULL HD DASH CAM DVR WITH GPS LOGGER...
-
Page 2: Table Of Contents
Caution ..................................5 Battery warning ................................5 Notes on Installation ..............................5 Introduction ................................6 1.1 Features ................................6 1.2 Package Contents .............................. 6 1.3 Product Overview ............................... 6 Getting Started ................................. 7 2.1 Inserting the Memory Card..........................7 2.2 Installing Car DVR ............................... 7 2.2.1 Adjust the device position ........................ - Page 3 2.8.4 Exposure............................... 13 2.8.5 Motion Detection ........................... 13 2.8.6 Recording Audio ........................... 14 2.8.7 Date Stamp............................14 2.8.8 G Sensor .............................. 15 2.8.9 GPS ..............................15 Photo Mode ................................16 3.1 Photo Menu ..............................16 3.1.1 Capture Mode ............................16 3.1.2 Resolution .............................
- Page 4 3.4 Playback Menu ..............................27 3.4.1 Deleting Photos & Videos ........................27 3.4.2 Locking and Unlocking Photos and Videos ................... 28 3.4.3 Slide Show ............................28 3.3.4 Deleting Files ............................28 3.5 Playing Video & Viewing Pictures ........................29 3.5.1 Playback ............................... 29 Menu Tables ...............................
-
Page 5: Caution
Caution • Ensure you are using your Car DVR within your countries’ road laws. Please make sure you are familiar with your local road legislation before use. • Avoid leaving your Car DVR in direct sunlight for extended periods of time in an unventilated space. •... -
Page 6: Introduction
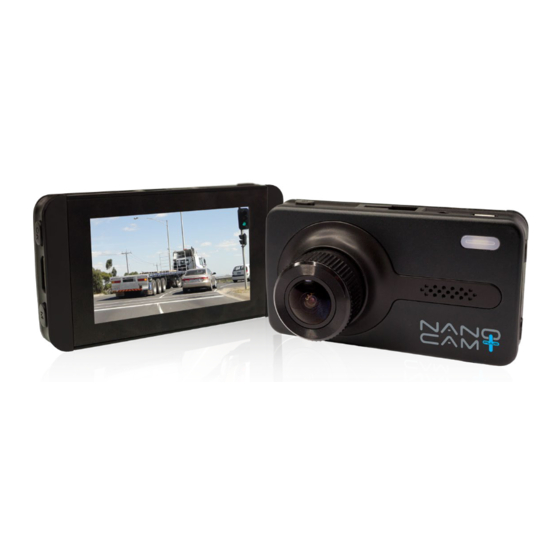
1. Introduction Thank you for purchasing a NanoCam Plus Car DVR. Please read through these instructions before attempting to install this product. For the latest manual updates, please see www.nanocamplus.com.au or www.nanocamplus.co.nz. 1.1 Features • Recording full high definition 1080P footage at 30 frames per second. •... -
Page 7: Getting Started
2. Getting Started 2.1 Inserting Memory Card With the Car DVR turned off and the screen facing towards you insert the memory card with the text on the Micro SD card facing toward you. Push the memory card in until a click is heard. Note: 1. -
Page 8: Led Indicator
2.3 LED Indicator STATUS EXPLANATION LED INDICATOR COLOUR Battery Charging Solid RED Light Power on, Battery Fully Charged Solid BLUE Light Power on, Recording Flashing BLUE light 2.4 Powering the Car DVR On / Off 2.4.1 Auto Power On/Off When the Car DVR is correctly installed and connected to your vehicle's 12v power supply, the Car DVR will automatically power up and start recording when the vehicle accessories are activated. -
Page 9: Formatting Inserted Micro Sd Card
2.6.1 Formatting the Inserted Micro SD Card Formatting the Micro SD card will delete all information on the inserted Micro SD Card and prepare the card for use with the Car DVR. 1. Press the Button to stop the Car DVR from recording. 2. -
Page 10: Using The Dvr
2.7 Using the Car DVR 2.7.1 Recording Video When the Car DVR is connected to your vehicle's 12v power supply, the Car DVR will automatically power up and begin recording when you start your vehicle. During the start up the buttons will be unresponsive and the camera will take a moment to begin recording. -
Page 11: Video Mode
Number Icon Item Description Exposure Shows the current exposure setting Microphone Shows if the microphone is muted or recording Wide Dynamic Range The WDR icon will appear when the Wide Dynamic Range setting is active Day/Night Mode Will show a sun or moon icon indicating if the LCD light is activated or not Gravity Sensing Icon shows the current Gravity Sensitivity Recording duration... -
Page 12: Loop Recording
2.8.2 Loop Recording Loop recording allows you to set the duration that the camera will record before creating a new clip. To set the clip length please follow the instructions below. 1. Press the Button to stop the Car DVR from recording. 2. -
Page 13: Exposure
2.8.4 Exposure Exposure is used to manually control the light sensitivity settings. To change the Exposure setting follow the instructions below. 1. Press the Button to stop the Car DVR from recording. 2. Press the Button to enter the Video Menu. 3. -
Page 14: Recording Audio
2.8.6 Recording Audio The Recording Audio setting allows you to mute the microphone during recording, or set it to record. To set your recording preferences, please follow the instructions below. 1. Press the Button to stop the Car DVR from recording. 2. -
Page 15: G Sensor
2.8.8 G Sensor (Gravity Sensing) The G Sensor defines the required force needed to trigger emergency recording. Once Emergency recording is triggered the current recording will be saved and protected from being saved over by the normal loop recording. To set the required sensitivity please follow the instructions below. -
Page 16: Photo Mode
3. Photo Mode This screen is used to capture still images using your Car DVR. To access the Photo screen ensure that the camera is not recording and hold the (Menu/Mode) button for 3 seconds. Photo mode also has a menu which is used to edit the photo settings. This menu can be accessed by pressing the (Menu/Mode) in the Photo Screen. -
Page 17: Sequence
3.1.3 Sequence When Sequence is activated, when a photo is triggered a sequence of 3 photos is taken. To activate or deactivate Sequence mode, follow the instructions below 1. Enter the Photo screen. 2. Press the Button to enter the Photo Menu. 3. -
Page 18: Sharpness
3.1.5 Sharpness Sharpness sets the boldness of the image. Images with a stronger sharpness will create bolder images with stronger outlines. To change the photo Sharpness, please follow the instructions below. 1. Enter the Photo screen. 2. Press the Button to enter the Photo Menu. 3. -
Page 19: Colour
3.1.7 Colour The Colour setting is used to set the colour palette. To change the Colour setting follow the instructions below. 1. Enter the Photo screen. 2. Press the Button to enter the Photo Menu. 3. Use the Buttons to navigate the Photo Menu and highlight the Colour setting and press to select. -
Page 20: Exposure
3.1.9 Exposure Exposure is used to manually control the light settings. To change the Exposure setting follow the instructions below 1. Enter the Photo screen. 2. Press the Button to enter the Photo Menu. 3. Use the Buttons to navigate the Photo Menu and highlight the ISO setting and press to select. -
Page 21: Quick Review
3.1.2.1 Quick Review Quick review displays the photo on screen for the set amount of time after the photo has been taken. To change the Quick Review setting follow the instructions below. 1. Enter the Photo screen. 2. Press the Button to enter the Photo Menu. -
Page 22: Setting Menu
3.2 Setting Menu This menu is used to edit the cameras operational settings. This menu can be accessed through either the Video or Photo menu by pressing the whilst in either of these menus. While in this menu the buttons are used to navigate and the button to select the highlighted setting. -
Page 23: Beep Sound
3.2.3 Beep Sound The Beep Sound setting is used to turn Off or On the beep that indicates a key press. To adjust the key beep settings, follow the instructions below. 1. Ensure that the DVR is not recording. 2. Press the Button to enter the Video or Photo Menu. -
Page 24: Frequency
3.2.5 Frequency The Frequency setting is used to set the cameras frequency. To adjust the frequency, follow the instructions below. 1. Ensure that the DVR is not recording. 2. Press the Button to enter the Video or Photo Menu. 3. Press the Button again to enter the Settings Menu. -
Page 25: Format
The Format setting is used to format the inserted Micro SD card. This optimises the Micro SD for the NCP-DVRGPS and deletes all data from the inserted Micro SD card. It is recommended that you format your Micro SD card before attempting to use the NCP-DVRGPS. -
Page 26: Delayed Shutdown
2. This setting can only be accessed through the Settings Menu which can be accessed via the Video and Photo Menus. 3.3.0 Default Settings Default Settings is used to revert the NCP-DVRGPS’s settings to their default settings. To reset the camera to restore the default settings, please follow the instructions below. -
Page 27: Playback Screen
3.3 Playback Screen This screen is used to playback photos and videos. To access the Playback screen ensure that the camera is not recording and hold the (Menu/Mode) button for 3 seconds. This will send the camera to the photo screen. While in the Photo Screen hold the (Menu/Mode) button for another 3 seconds which will bring you to the Playback Screen. -
Page 28: Locking And Unlocking Photos And Videos
3.4.2 Locking and Unlocking Photos and Videos To Lock or Unlock photos or videos from being deleted, please follow the instructions below. 1. Navigate to the playback screen using the instructions in the section labelled Playback Screen 2. In the Playback Screen use the buttons to select the photo or video that you want to lock or unlock (if you want to lock or unlock all photos and videos select any Photo or Video). -
Page 29: Playing Video & Viewing Pictures
3.5 Playing Videos and Viewing Pictures / GPS Data Playback Your videos can be viewed in most playback programmes like Windows Media Player and QuickTime. However, to playback your footage alongside the recorded GPS tracking and speed details please use the included Driving Recorder Player software. It is recommended when playing back the video alongside the GPS tracking that you transfer the video files from the Micro SD card to your computer and play the files locally from your computer’s hard drive. -
Page 30: Menu Tables
4.0 Menu Tables Single 55 Timer 1080FHD 1920x1080 Capture Mode 2S Timer 10S Timer 720P 1280x720 12M 4032x3024 3M 2048x1536 Resolution WVGA 848x480 10M 3648x2736 2MHD 1920x1080 Resolution VGA 640x480 8M 3264x2448 VGA 640x480 5M 2592x1944 1.3 1280x960 2 Minutes Sequence Loop recording 3 Minutes... - Page 31 Set Date and Time Date / Time 1 Minute Auto Power Off 3 Minutes 5 Minutes Beep Sound Language Select Language NTSC TV Mode 50Hz Frequency 60Hz Lamp Setting Internal Memory SD Card Format 30 Seconds 1 Minute Screen Saver 2 Minutes 5 Minutes 30 Seconds...
-
Page 33: Warranty
Warranty Terms & Conditions Our goods come with guarantees that cannot be excluded under the Australian & New Zealand Consumer Law. You are entitled to a replacement or refund for a major failure and for compensation for any other reasonably foreseeable loss or damage. You are also entitled to have the goods repaired or replaced if the goods fail to be of acceptable quality and the failure does not amount to a major failure. - Page 34 www.nanocamplus.com.au www.nanocamplus.co.nz...