
Subscribe to Our Youtube Channel
Related Manuals for PiXORD P-463


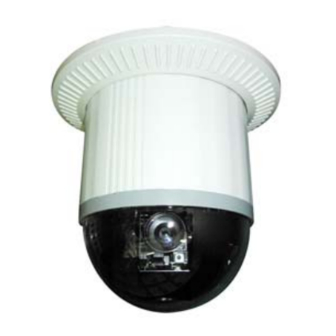
Summary of Contents for PiXORD P-463
- Page 1 PiXORD MPEG-4 Network Dome Camera P-463/463DW/463T User’s Manual Version: 1.4 Date: 03/26/2008...
-
Page 2: Table Of Contents
Content INTRODUCTION..................................4 HAT IS ETWORK AMERA ......................4 EATURES ...................................5 1 PHYSICAL CONNECTIONS..............................7 1.1 S ..............................7 TRUCTURAL LEMENT 1.2 C ........................8 ONNECTION ACK AND ABLE EQUIREMENT 1.3 DIP S ...............................10 WITCH ETTING 1.4 NDC ID A ........................11 DDRESS ETTING EFER HART 2 INSTALLATION...................................12 2.1 I ..............................12... - Page 3 7.1 C OSD S ...........................88 UT THE ETUP 7.2 S ................................90 ETUP UNCTIONS 8 SURVEILLANCE SYSTEM CONFIGURATION ......................101 8.1 NDC ..............................101 EYBOARD 8.2 I ............................103 NITIAL OWER NSPECTION 8.3 O ..........................103 PERATING WITH EYBOARD 9 SPECIFICATIONS................................113 APPENDIX A. UPGRADING THE SOFTWARE.........................118 APPENDIX B.
- Page 4 WARNING and PRECAUTIONS Please read the manual before attempting installation or operation ! Please be aware of the following: 1. Don't use any chemical detergent to clean the machine surface, use a damp cotton cloth only. Regularly clean the dome cover to ensure more accurate focusing.
-
Page 5: Introduction
Introduction What is Network Dome Camera? The Network Dome Camera (“NDC” here and after) is an Internet-based digital Network Speed Dome Camera, it has built in Pan/Tilt/Zoom and CCD module to distribute the compressed live video into Intranet/Internet through Ethernet connection. -
Page 6: Features
Features There are 3 types of the Network Dome Camera – P463 (25X Optical Lens) and P463DW (Wide Dynamic Range / 25X Optical Lens) P463T (Tracking / 25X Optical Lens). The specifications and functions will be different between these types. Common Features continuous rotation High speed rotation and tilt, speed range varies from 0.18°/sec ~ 360°/sec... - Page 7 P463T Auto tracking movement. P463 Aperture Correction Adjustment P463DW 2.56X Digital Zoom: For a total of 64X combined digital and optical zoom. Wide Dynamic Range: Uses two Shutter Speeds in alternative video fields and combines two fields into one progressive scan frame. As a result, combined field yield a frame of high-quality image. Dynamic Privacy Zone: With this function, unwanted or prohibited areas within an image can be masked appropriately.
-
Page 8: Physical Connections
1 Physical Connections 1.1 Structural Element 1. Dome Cover 6. Video In /Out Jack 2. Camera Case 7. Power In Jack 3. Ethernet Port 8. Alarm In/Out Jack 4. Power / Network Status LED 9. RS-485 In/Out Jack 5. Audio Line In Jack 10. -
Page 9: Connection Jack And Cable Requirement
Connection Jack and Cable Requirement Power In Jack DC12V Input Voltage, Power Consumption 1.2Adc, Center Pin 2.0mm Require Cable: 18 AWG x 2C Video Out BNC Jack Video Signal Output CVBS 1.0Vpp 75Ω BNC Recommend Data Cable:5C2V Alarm In/Out Jack Each NDC contains 6 alarm inputs and 1 alarm output Alarm Input Voltage 5.6V max, Output 0.5A 120Vac/ 1A 24Vdc Recommend Data Cable: UL 26 AWG 80 C 300V UL 24 AWG 80 C 300V... - Page 10 RS-485 In/ Out Jack RS-485 Input (TXDI+, TXDI-) to receiver signal from keyboard, matrix, DVR or multiplexer through twisted pair cable. RS-485 Output (TXDO+, TXDO-) sending out signal to next NDC through twisted pair cable. Recommend Data Cable: 2547 VW-ISC UL 24 AWG x 2C Transmission Distance: Max.
-
Page 11: Dip Switch Setting
DIP Switch Setting Fan Power Switch Turn the number 2 switch to ON position to activate the internal fan. This will maintain the temperature inside and make electric parts life. Alarm Mode Switch Alarm Mode can be set as Lock or Release mode. Turn number 1 switch to ON position to choose Release mode. Turn number 1 switch to OFF position to choose Lock mode. -
Page 12: Ndc Id Address Setting Refer Chart
NDC ID Address Setting Refer Chart Up to 64 NDC can be serial linking in one system. Therefore each dome is addressing by ID switch located at the base of the NDC. Below is the address setting for camera 1~64:... -
Page 13: Installation
2 Installation 2.1 Installation Preview There are 3 mains steps required to perform a successful installation: Hardware installation Software installation Network configuration Hardware installation consists of connecting cables to the NDC including network, video, and power cables. Software installation consists of the installation of software that is necessary to properly view the video from the NDC or to configure the NDC itself. -
Page 14: Hardware Installation
Hardware Installation – Indoor Installation Structural Drawing... - Page 15 – Outdoor Installation Structural Drawing (Pendant Mounting)
- Page 16 – Embedded Mounting (False Ceiling)
- Page 18 Note: After dome cover is attached, use glass-cleaning cloth to clean dome cover. Unclean dome cover may affect camera performance.
- Page 19 – Attached Mounting (Fixed Ceiling)
- Page 20 Note: After dome cover is attached, use glass-cleaning cloth to clean dome cover. Unclean dome cover may affect camera performance.
- Page 21 – Pendant Mounting (External Housing)
- Page 24 Note: When the NDC is installed inside outdoor housing, please don’t attach dome cover. Violation may affect camera performance.
-
Page 26: Software Installation
Software Installation With the exception of the Macromedia Flash Player all the software that is necessary for the proper display and use of the NDC is available on the included CD or from the Web site. For the following installation procedures it is assumed that all installation media will be taken from the CD. -
Page 27: Network Configuration
1. Once IP Installer has been successfully installed on the computer, double click the IP Installer icon on the desktop, or select it from Start > Programs > PiXORD Corporation > IP Installer > IP Installer. 2. The IP Installer window is displayed below. - Page 28 4. From the list, select the device with the MAC Address that corresponds to the device that is to be configured. The MAC Address is identical to the unit’s S/N (Serial Number). 5. Double click the item to open the Property Page dialog box for the selected device or click the menu bar View >...
-
Page 29: Verify And Complete The Installation From Your Browser
Opening the Web-based UI of the Selected NDC 1. To access the Web-based UI of the selected unit, run the View > Open Web on IP installer menu bar. 2. If the device has been configured correctly, the default Web browser will open to the home page of the selected device. - Page 30 5. A dialog box will pop up asking if the ActiveX control should be installed. Click [Yes] to start the installation. 6. Once the ActiveX installation is complete, return the security settings to their original value, as noted above.
-
Page 31: Usage Of Web-Based User Interface
3 Usage of Web-based User Interface Start your Web browser and enter the IP Address of your NDC Camera in the Address field. The Home page of the camera is now displayed. The Web UI can present up to 4 video source indicating 4 video channels. Each channel can be shown individually or in one of 4 split windows. - Page 32 – Video Channel Selection The Video Channel allows the users to choose viewing 1 channel at a time or 4 channels at the same time. CH1 displays the video stream of the NDC. CH2~4 display the video stream of the IP Camera or Video Server that connected the device via network.
- Page 33 To pan/tilt/zoom the external video sources CH2~CH4, click on [CH2~4 PTZ Control] button to open a new window. Select the channel in this window to display the PTZ control panel for operation. – Digital Zoom Selection The Digital Zoom enable user to select the digital size for the channels. Select [x1], [x4] or [x9] to enlarge the video.
-
Page 34: Video And Audio Recording
[Manual Recording] button again, the “REC” message will d isappear and the recording is stopped. By default, the recorded file will be saved in a folder named C:\PiXORD\Recfile\pppp\CHx\ ♦ pppp : The model number of the device ♦ x : The number of the recorded channel The default filename will be named under Locals_Rec- yyyymmdd-hhmmss.avi... -
Page 35: Video Conference
3.3 Video Conference Click [Video Conference] to open the conference page. Click this button to open Rotate this video for viewing the Configuration page Click this button backs to On/Off the audio of this the Home page video stream Camera Setting Record Stop... - Page 36 Speed : Click on the UP/Down arrows and select the speed of the Pan and Tilt movements. Values run from 1 to 7. Being 1 the slowest and 7 the fastest Manual Pan/Tilt : Click on the 4-directions button to move the camera to that direction. Click on the rectangle button to stop the movement.
- Page 37 – Manually Set Up Additional Camera This feature allows the user to temporary set an additional video source for the remote device. Note: This camera will be removed after leaving or closing the Web page. Click on [Camera Manual Setting] button on the Remote window, and configure the following settings: IP address : Enter a valid IP address from an IP Camera or Video Server.
-
Page 38: Configuration Of Web-Based User Interface
4 Configuration of Web-Based User Interface The Configurations of the NDC are presented as links in the margin of the Configuration Page. Simply click the relevant link for the settings you want to configure. 4.1 Configuration Preview A/V Settings Functions Description General Set the parameters of video and audio, and adjust... -
Page 39: Configuration Of A/V Setting
Event Functions Description General Enable/disable the event trigger and select the action when triggered. Motion Area Set the area on video for motion detection. Email / FTP Input the Email and FTP address to receive alert message or snapshot, sent by event trigger. Others Functions Description... - Page 40 Frame Rate : The frame rate can be set between 5 to 30 FPS. Encoder Format Format can be selected for: ♦ MPEG4 constant bitrates: Select MPEG4 and CBR. ♦ MPEG4 variable bitrates: Select MPEG4 and VBR ♦ Motion JPEG. Bitrate For Motion JPEG format, there are 4 variable bitrates between Low and High quality.
- Page 41 – Advanced A/V Settings Interlacing There are 2 modes available: Interlaced or Progressive. Interlaced mode is a storage mode. An interlaced video stream contains fields rather than frames, with each field containing half of the lines of a frame. A progressive video stream consists of only full frames. Interlaced video streams can bring a lower bitrate but may cause lower quality.
-
Page 42: Image Adjustment
– Image Adjustment Contrast, Brightness, Hue and Saturation : The value can be adjusted from -100 to 100. Rotation : Rotation degrees run from 0 to 270 degrees for a permanent digital position. ♦ 0: 0 degree ♦ 1: 90 degrees ♦... -
Page 43: Setting External Sources
4.3 Setting External Sources Video Select : Select the channel this external source will be displayed. IP Address : Enter a valid IP address from an IP Camera or Video Server. Http Port : Enter the port number used for the IP address for network connection. Video Type : Select MJPEG or MPEG4. -
Page 44: Ptz Settings
4.4 PTZ Settings Setting ID for NDC Managing Preset Points Select an ID number to match the ID Managing the Preset Points for quick address set by the dome camera. view and auto pan. Changing Lens Speed Switching the lens speed between default setting and manual setting. - Page 45 – Operating the Dome Camera To control the dome camera for viewing, follow the description shown on below: Pan / Tilt the Dome Camera To control the pan and tilt movement of the dome camera simply click on the buttons: To pan or tilt, just click on the 8-directions buttons for the Revolve desired direction.
- Page 46 – Preset Point Setting There are 128 individual preset points. Each preset stores the exact position of the camera and automatic pan, tilt, zoom, focus and iris setting. Once the data is set, the preset can be recalled for viewing, or the presets can be set for auto pan.
- Page 47 5. Set preset speed. The speed the dome travels to that preset point can be adjusted between 10 to 250 seconds. 6. The presets Group 1 ~ 4 (First 16 preset points) can be entered a name for identify. Just fill the text string into the Position Name field.
- Page 48 – Setting Day / Night Mode (available for P463, P463DW & P463T) There are 3 modes can be selected to set the IR Cut Filter for different environment. Click IR filter Swap to switch the modes. ICR ON (ICR IN): IR Cut Filter is ON and always produce constant color image. ICR OFF (ICR OUT): IR Cut Filter is OFF and always produce monochrome image.
-
Page 49: O Nscreen Display
4.5 On Screen Display On Screen Display: Select Enable/Disable for displaying the text over the video. OSD Text: Fill in the text string to display. The valid characters are a – z, A – Z, 0 – 9, !, @, #, $, %, &, *, ( and ). Note: The maximum display block area is 12X4 characters. -
Page 50: Configuration Of Network Setting
4.6 Configuration of Network Setting – General Settings MAC Address: Display MAC address information for this device. It is read only information. IP Address: IP address of the device. Subnet Mask: Subnet mask of your LAN. Note that the IP Address above and Gateway IP Address below should be in the same subnet. -
Page 51: Dynamic Dns Settings
Then NDC automatically “update” to the DDNS server by a fix frequency, so even the IP is changed by ISP, the DDNS server still could get and update internal database. Then, once users access from Internet with its register name, e.g. if registering with server name “demo” to DDNS server “ddns.pixord.com”, the NDC could be accessed by http://demo.ddns.pixord.com. - Page 52 Device Name: Specify server name. This name setting also used by the DDNS service to recognize each server. E.g. if configure name as “user” to DDNS address “ddns.pixord.com”, then this NDC can be accessed by URL http://user.ddns.pixord.com after register to the DDNS server.
- Page 53 Dynamic DNS Settings 2 Dynamic DNS Settings : Select [Enable] if you wish to activate the DDNS service through DynDns. DDNS Host Name : Specify server name that you have registered in http://www.dyndns.org E.g. if the registered name is “user” to DynDns, then this NDC can be accessed by URL http://user.dyndns.org Account ID : Enter the username provided by DynDns.
-
Page 54: Configuration Of System
4.7 Configuration of System – System Information MAC Address : Display MAC address information for this device. It’s read only. Language : Alternative language option. User may change the language of web contents for different application. Description : Useful as an administrative identifier. Does not affect the operation of the device. Location : Useful for identifying the position of the device. -
Page 55: Time Configuration
– Time Configuration Time Mode ♦ Synchronize with NTP server : Synchronize the current time with a NTP server over Internet. ♦ Set Manually: Manually set the time. Click on [Synchronize with computer time] button to set the date/time of the NDC as your PC’s, or Set the date and time by clicking on the arrow button beside each field and select the value from the pull-down list. -
Page 56: User Settings
– User Settings Add User To add a user, enter the user name and password in the respective fields. Select the [Group] and the [Permission] of each channel, and then click on [Add User] button. The user in Administrator group has all permission to operate the device. The user in General group can be configured to have limited permission to operate the device. -
Page 57: Firmware Upgrade
- Firmware Upgrade Upgrading firmware To upgrade firmware, first browse the folder where you have placed the newest firmware. After finding the path then click on “Update” to upgrade the device. -
Page 58: Configuration Of Event
4.8 Configuration of Event – General Trigger System provides “GPIN” and “Motion Detection” for event detection. GPIN & GPIO Input Status : They are auto detected and display the status. Motion Detection : Make a checkmark on this option to start detect the motion area. See next segment to set the motion area. - Page 59 – Set Motion Area The “Motion Detection” checkbox (Configuration>Event>General>Trigger) must be enabled when use this function. Use mouse to drag out a detection area on the video. Left-click the area and drag the c orner to change the size. Right-click the area and selec “Property”.
-
Page 60: Ftp Setting
– Set Email and FTP E-mail Setting The “Mail Image” checkbox (Configuration>Event>General>Action) must be enabled when use this function. ail From : Enter the mail address of the mail sender. Receipt To : Enter the mail address of the mail receiver Mail Server : Enter the mail server name or IP address. -
Page 61: Advanced Settings For P463
5 Advanced Settings for P463 You can use the Web-based user interface to configure the most of functions for the P463. Some advanced functions can be set via an on-screen display (OSD) setup menu. 5.1 Call Out the OSD Setup Menu In Configuration >... -
Page 62: Set Up Functions
10. Pedestal Adjustment 11. Horizontal & Vertical Aperture Correction Slice Level Adjustment 12. Vertical Aperture Correction Slice Level Adjustment 13. Horizontal Aperture Correction (Low Band) Gain Level Adjustment 14. Horizontal Aperture Correction (High Band) Gain Level Adjustment 15. Vertical Aperture Correction Gain Control Adjustment 16. - Page 63 Auto Gain Control Selection There are 3 different AGC levels can be selected. (Low = 8dB ; Medium = 22dB ; High = 36dB). Different AGC levels may make different camera performance under low light environment. (Factory Default AGC is Medium) Click OSD(Enter) to recall OSD Setup Menu.
- Page 64 Back Light Compensation Back Light Compensation can be turned on or off. (Factory Default is OFF) Click OSD(Enter) to recall OSD Setup Menu. Click the Up or Down button to select 4th item "BLC" on menu. Click Left or Right button to make selection : On -> Off Note : When "ON"...
- Page 65 Click ESC button to exit menu, when finish or click Up or Down button to select next item. White Balance Mode Selection One of four different White Balance Modes can be selected. (Factory Default is ATW) ATW : Auto Trace White Balance, is a feedback system that automatically aligns the white balance by detecting the R-G and B-G before gamma correction processing.
- Page 66 Click ESC button to exit menu, when finish or click Up or Down button to select next item. Gamma Adjustment (Brightness) 8 levels of Gamma (Brightness) can be adjusted. (Factory Default is 4) Click OSD(Enter) to recall OSD Setup Menu. Click the Up or Down button to select 9th item "Gamma"...
- Page 67 Pedestal Adjustment 16 levels of Pedestal can be adjusted. (Factory Default is D) Click OSD(Enter) to recall OSD Setup Menu. Click the Up or Down button to select 10th item "Pedestal" on menu. Click Left or Right button to make selection : 0 ~ F Click ESC button to exit menu, when finish or click Up or Down button to select next item.
- Page 68 Manual Iris Speed Selection Click OSD(Enter) to recall OSD Setup Menu. Click the Up or Down button to select 17th item "Iris SPD" on menu. Click Left or Right button to make selection: Fast -> Medium Click ESC button to exit menu, when finish or click Up or Down button to select next item. Manual Iris Speeds Switch After above steps were completed, the selected manual iris speed is stored in the NDC.
- Page 69 Manual Zoom Speeds Switch After above steps were completed, the selected manual zoom speed is stored in the NDC. To use the selected manual zoom speed under lens control, user has to click Lens Speed button before operation, otherwise manual zooming speed will be "FAST"...
- Page 70 Manual Focus Speeds Switch After above steps were completed, the selected manual focus speed is stored in the NDC. To use the selected manual focus speed under lens control, user has to click Lens Speed button before operation, otherwise manual focusing speed will be "MEDIUM"...
-
Page 71: Advanced Settings For P463Dw
6 Advanced Settings for P463DW You can use the Web-based user interface to configure the most of functions for the P463DW. Some advanced functions can be set via an on-screen display (OSD) setup menu. 6.1 Call Out the OSD Setup Menu In Configuration >... -
Page 72: Special Functions
6.2 Special Functions Display the Special Function Menu Position the cursor beside SPECIAL FUNCTION, and click OSD(Enter) to enter SPECIAL FUNCTION menu. Privacy Zone Up to 8 mask zones can be setup. Click on OSD(Enter) to call out the SETUP MENU. Position the cursor beside SPECIAL FUNCTION, and click OSD(Enter) to enter SPECIAL FUNCTION menu. - Page 73 To set up a new privacy zone, position the cursor beside POSITION SET, and click OSD(Enter) to enter. Select desired privacy zone by clicking the Up, Down, Left or Right button. Adjust zoom and focus. Click OSD(Enter) to save and return to the PRIVACY ZONE SET menu. Note: When set up privacy zone, Zoom ratio can only be adjusted from 1X to 12X.
- Page 74 2. Position the cursor beside VINTP, click the Left or Right button to select the E-Zoom vertical interpolation method. 3. Position the cursor beside RET, click OSD(Enter) to return to SPECIAL FUNCTION menu. Note: Linear interpolation Interpolation signals are created between original signals using liner approximation. It provides images with normal appearance.
-
Page 75: Camera Settings
6.3 Camera Settings Display the Camera Setting Menu Position the cursor beside CAMERA and click OSD(Enter) to display Camera Setting Menu. Expose Mode Setting Position the cursor beside EXPOSE MODE and select an AE mode by clicking the Left or Right button. Mode changes as follows: Note: EXPOSE MODE has four Exposure modes for selection. -
Page 76: Expose Mode Ae Setting
Expose Mode AE Setting Position the cursor beside Expose Mode AE and click OSD(Enter) to enter Expose Mode AE Shutter Speed Setting Position the cursor beside SHUT SPD MIN and select minimum shutter speed by clicking the Left or Right button. Mode changes as follows: Position the cursor beside SHUT SPD MAX and select maximum shutter speed by clicking the Left or Right button. - Page 77 Mode changes as follows: Disable control in UMS zone. SLOW Low-speed shutter control is activated when UMS zones are reached. As for the accumulated time when slow control is initiated, the starting shutter speed is as set in LOW SHUTTER (Slow shutter maximum accumulation time select) in the electric shutter control mode (EXPOSE MODE =WDR CONT, AE) or as selected in SHUTTER (Manual shutter Speed Select) when electric shutter control is manual.
- Page 79 Auto Gain Control (AGC) AGC control is activated when UMS reached. Set up AGC level by position the cursor beside Low Lux Mode and click OSD(Enter) to enter. Select a gain level by clicking the Left or Right button. Level changes as follows: LOW : Select lower gain control MID : Select normal gain control HIGH : Select higher gain control...
-
Page 80: Expose Mode Ae Shutter Setting
Position the cursor beside BLC SPEED and select the back light compensation converging speed by clicking the Left or Right button. Note: Increase the value will result in a faster converging speed. Position the cursor beside BLC REGION and select the back light compensation converging region by clicking the Left or Right button. -
Page 81: Expose Mode Manual Shutter Setting
Expose Mode WDR Setting Position the cursor beside Expose Mode WDR and click OSD(Enter) to enter WDR. Select a field by clicking the Left or Right button. See page 64 ~ 66 for detailed setup. Expose Mode Manual Shutter Setting Position the cursor beside Expose Mode Manu Shut and click OSD(Enter) to enter Expose Mode MANU SHUT. - Page 82 Push Mode (PUSH) Position the cursor beside WHITE BAL and select PUSH by clicking the Left or Right button. The white balance of camera is automatically set. Note: Operation is performed at a faster operating speed than ATW without an operation frame or other limitation.
-
Page 83: Gamma Function Setting
Outdoor Mode (OUTDOOR) Position the cursor beside WHITE BAL and select OUTDOOR by clicking the Left or Right button. Note: In outdoor mode the color temperature is fixed at approximately 6300K. Gamma Function Setting Position the cursor beside GAMMA and click OSD(Enter) to display Gamma Setting Menu. Position the cursor beside GAMMAMODE and select a gamma mode by clicking the Left or Right button. - Page 84 Active 1 (Low Compensation) Active 1 automatically raises the gamma curve in low areas according to the deviation in the brightness histogram. In cases where there are significant brightness differences (e.g., backlight) and Wide-D processing is not performed. (Input Level 100% of the following figures is the border of gamma and KNEE.) Active 2 (Contrast Improvement) Active 2 automatically compresses the low areas of the gamma curve and raises the high areas according to the brightness histogram.
-
Page 85: Special Function Setting
Special Function Setting Special Function Menu Display Position the cursor beside SPECIAL and click OSD(Enter) to display Special menu. Pedestal Level Setting (PEDESTAL) Position the cursor beside PEDESTAL, adjust the pedestal Level (black level) by clicking the Left or Right button. Aperture Level Setting (APERTURE GAIN) Position the cursor beside APERTURE GAIN, adjust the aperture level by clicking the Left or Right button. - Page 86 MIRROR Function Position the cursor beside MIRROR and select ON or OFF by clicking the Left or Right button. This mode reverses the left and right sides of the linear. ROTATE Function Position the cursor beside ROTATE and select ON or OFF by clicking the Left or Right button. This mode rotates the image 180 degrees.
-
Page 87: Lens Control
Position the cursor beside Y NEGATIVE and select ON or OFF by clicking the Left or Right button. This function inverse the Y signal. ON: Negative OFF: Positive C negative function (C NEGATIVE) Position the cursor beside C NEGATIVE and select ON or OFF by clicking the Left or Right button. This function inverse the chroma signal. - Page 88 Auto Iris Setting Level Setting Position the cursor beside LEVEL and clicking the Left or Right button to adjust auto iris level. ALC Setting Position the cursor beside ALC and clicking the Left or Right button to adjust ALC of auto iris. IR Cut Filter Setting (ICR Function) Position the cursor beside IR CUT FILTER and select IN, OUT or AUTO by clicking the Left or Right button.
-
Page 89: Advanced Settings For P463T
7 Advanced Settings for P463T You can use the Web-based user interface to configure the most of functions for the P463DW. Some advanced functions can be set via an on-screen display (OSD) setup menu. 7.1 Call Out the OSD Setup Menu In Configuration >... - Page 90 11. WB Cont 12. Iris speed 13. Zoom speed 14. Focus speed 15. Focus set 16. ICR 17. Gamma 18. Pedestal 19. VHAPSL 20. VAPSL 21. HAPGL 22. HAPGH 23. VAPG 24. VHAPG Setup Menu Item Selection 1. Click the DOWN button to select next item 2.
-
Page 91: Setup Functions
7.2 Setup Functions Initial Setting (Factory Default) To reset functions back to initial factory setting: 1. Click OSD(Enter) to recall OSD setup menu. 2. Click UP or DOWN button to select first option on menu and click LEFT or RIGHT button to make selection. Once selected, “Factory Initialize…”... - Page 92 Another way to activate tracking mode is under configuration > A/V Settings > Tracking Click on “Tracking On/Off” button to activate or deactivate tracking mode. RET Mode 1. Click OSD(Enter) to recall OSD Setup Menu. 2. Click the Up or Down button to select "RET Mode" on menu. 3.
- Page 93 RET Time 1. Click OSD(Enter) to recall OSD Setup Menu. 2. Click the Up or Down button to select "RET Time" on menu. 3. Click Left or Right button to make selection: 1min -> 12hrs 4. Click ESC button to exit menu when finished or click Up or Down button to select next item. Auto Gain Control There are 3 different AGC levels can be selected.
- Page 94 Sensitivity Up (Enhancement) Sensitivity Up function allows user to select different Video Gain (Y Gain) control. (Factor Default is AUTO). AUTO: System auto turn on or off Video Gain Control function according to target's brightness. ON: Video Gain Control Enhancement always on. OFF: Video Gain Control Enhancement always off.
- Page 95 Back Light Compensation Region There are five different regions to choose from for BLC: Top, bottom, left, right and center. (Default is center) 1. Click OSD(Enter) to recall OSD Setup Menu. 2. Click the Up or Down button to select "BLC Region" on menu. 3.
- Page 96 White Balance Mode Selection One of four different White Balance Modes can be selected. (Factory Default is ATW) ATW: Auto Trace White Balance, is a feedback system that automatically aligns the white balance by detecting the R-G and B-G before gamma correction processing. AWC: Auto White Balance Correction, is performed at a faster operating speed than ATW without an operation or other limitations.
-
Page 97: Zoom Speed
Iris Speed Click OSD(Enter) to recall OSD Setup Menu. Click the Up or Down button to select "Iris spd" on menu. Click Left or Right button to make selection : Medium -> Fast Click ESC button to exit menu, when finish or click Up or Down button to select next item Zoom Speed Click OSD(Enter) to recall OSD Setup Menu. -
Page 98: Focus Speed
Focus Speed Click OSD(Enter) to recall OSD Setup Menu. Click the Up or Down button to select "Focus Spd" on menu. Click Left or Right button to make selection: Medium -> Fast -> Slow Click ESC button to exit menu, when finish or click Up or Down button to select next item Focus Set Click OSD(Enter) to recall OSD Setup Menu. - Page 99 Click OSD(Enter) to recall OSD Setup Menu. Click the Up or Down button to select "ICRt" on menu. Click Left or Right button to make selection: Auto -> In -> Out Auto: When light level is over 30Lux, IR cut filter switches to IN automatically to produce color image. When light drops below 10 Lux, IR cut filter switches to OUT automatically to produce monochrome image.
- Page 100 Gamma 8 levels of Gamma (Brightness) can be adjusted. (Factory Default is 4) Click OSD(Enter) to recall OSD Setup Menu. Click the Up or Down button to select "Gamma" on menu. Click Left or Right button to make selection : 0 ~ 7 Click ESC button to exit menu, when finish or click Up or Down button to select next item.
- Page 101 Aperture Correction Adjustment The 19th to 24th options on the menu are different aperture correction function. 19. VHAPSL : Vertical & Horizontal Aperture Correction Slice level : 16 levels (Factory Default is 7) 20. VAPSL : Vertical Aperture Correction Slice level : 8 levels (Factory Default is 3) 21.
-
Page 102: Surveillance System Configuration
8 Surveillance System Configuration The NDC surveillance system is suitable for a wide range of surveillance applications. The system can be as single NDC with one keyboard or encompassing as 64 domes with comprehensive matrix switching, PC control and even Digital Video Recording. - Page 103 Multiple Dome means that more than one NDC is linked in the system. Each dome connects to next dome forming a serial linking. Each dome has an individual ID dip switch, which allows the keyboard to identify each NDC and make command.
-
Page 104: Initial Power Up Inspection
8.2 Initial Power Up Inspection After the power is first applied to a dome it will perform a self-test procedure. This calibrates and checks the basic functions of the dome; control is not possible during this self-test period. Once the camera has stopped moving, it will then be ready to control if preset points and tours have been programmed into a dome and the power is turned off, the dome will enter the Auto Pan (auto scan) mode once the power is turned on again (after self-test period). -
Page 105: Dome Camera Selection
Dome Camera Selection To call out a dome controlling or setting. To select 1st NDC Push key 1 follow by CAM key. To select 64th NDC Push key 6 then 4 followed by CAM key. * When matrix system is used, select monitor before camera selection. Please refer to matrix system user manual. Zoom Lens Control To Zoom In Push ZOOM IN key. - Page 106 Focus Control The focus function of the NDC can be set as Auto Focus or Manual Focus Manual focus far Push FOCUS FAR key. The target will become farther. Focusing will stop when the key is released. (PIH-801 keyboard LCD displays “F=M”) Manual focus near Push FOCUS NEAR key.
-
Page 107: Horizontal 180 Instant Flip
Horizontal 180 Instant Flip Some times it is hard to use the joystick to control the camera tracking the target directly under the camera. The instant flip key can rotate the camera 180 instantly. This allows the camera continue to track the target passing directly under the camera. - Page 108 Selecting Preset point Push key 1 followed by CAM key, confirming that first preset point selected. Example: To select 1st preset point: 1 PRESET key To select 128th preset point: 1 2 8 PRESET keys Joystick Control Move the Joystick to bring the camera to the desired view position.
-
Page 109: Recalling Preset Positions
Setting Preset Dwell Time The dwell time means the time user wants to view on certain preset position under Auto Pan the Preset Dwell Time can be set between 0 ~ 255 seconds. (The factory default is 0 second) * If the dwell is set to 0 second then that position will be omitted from the Auto Pan tour. To set dwell to 5 seconds: Push key 5 followed by F2 key. -
Page 110: Setting Preset Group
Setting Preset Group The purpose of setting preset group allows the management of the 16 preset points before auto scanning. The first 16 preset points of each dome are separated in 4 groups. Group 1 includes: 1st, 2nd, 3rd and 4th preset points. Group 2 includes: 5th, 6th, 7th and 8th preset points. -
Page 111: Activating Auto Pan
Activating Auto Pan When the Auto Pan function is activated, the NDC will auto touring the preset groups entered. Activate Auto Pan: Push AUTO PAN key, confirming the activation of auto pan. (When use PIH-800II, Auto Pan LED will be lit. When use PIH-801, LCD will display “F = A”) Stop Auto Pan: Push AUTO PAN key again, confirming the stop of auto pan. -
Page 112: Alarm Management
Alarm Management The 6 alarm inputs of each NDC are corresponding with the first 6 preset points. When an alarm signal is triggered, the dome will go to the relevant position at 360 /sec. Make sure the first 6 preset points are set to desired alarm areas. Alarm input can be set to NC (normally close) or NO (normally open) depends on alarm detector. -
Page 113: Alarm Output
Alarm Output Each NDC has 1 alarm output, with three contacts: Common, NC (normally close) and NO (normally open) to activate linking devices. When alarm response mode is set to LOCK Mode: When the alarm is triggered, NC contact to Common will be open and NO contact to common will be close. Alarm output will be back to the condition before alarm, 10 seconds after the last alarm is triggered. -
Page 114: Specifications
9 Specifications... -
Page 119: Appendix A. Upgrading The Software
Appendix A. Upgrading the Software The NDC software is contained in Flash Memory, a silicon chip allowed to be erased and re-written. It provides an easy way to update the software without change any parts; just simply load the newest software from network. The following procedures are to update the software: Check Software Version Open the home page of NDC in your web browser, go to Configuration ->... - Page 120 Note: If FTP session quits immediately after issued by command, you should continue pinging the NDC instantly. If the NDC replies to the ping command right after pinging, it means the NDC may not enter the self-programming stage to verify the software version. If not updated, then you should reboot the NDC and back to step 3 to try again.
- Page 121 Reply from 192.168.0.200: bytes=32 time<10ms TTL=255 Reply from 192.168.0.200: bytes=32 time<10ms TTL=255 Ping statistics for 192.168.0.200: Packets: Sent = 13, Received = 5, Lost = 8 (61% loss), Approximate round trip times in milliseconds: Minimum = 0ms, Maximum = 2ms, Average = 0ms Control-C C:\temp>...
-
Page 122: Appendix B. Upgrade Custom Web Pages
Appendix B. Upgrade Custom Web Pages The NDC has a built-in web server, so the web contents are contained in Flash Memory, the same as software parts, allowed to erase and re-written. It provides an easy way to update the web pages -- just simply load and issue command from network (FTP and Telnet). - Page 123 Verify updated contents After uploading the custom pages, open browser to verify the correctness of contents. If not correct, modify the pages and return to previous step to upload again. Save the changes to flash Telnet to the NDC. And run command “Up –w” to write the complete web pages into flash. The detailed procedures are list as below, Open DOS window Enter “telnet <IP Address of the NDC >”...
-
Page 124: Appendix C. Emergency Factory Default
Appendix C. Emergency Factory Default In certain circumstance, to restore the server to initial factory default state may be necessary, normally processed through web page (Miscellaneous Operation). If the user can’t get into web page (e.g. Missing Username and Password information), then he could use Emergency Factory Default to restore to factory default settings. The username and password will be removed, and the IP address of the device will back to 192.168.0.200. -
Page 125: Appendix D. Quick Reference Table For Keyboard Control
Appendix D. Quick Reference Table for Keyboard Control PIH-800II Quick Reference Table Function Operation To Tilt Up Push Joystick Forward To Tilt Down Push Joystick Down Pan/Tilt Control To Tile Left Push Joystick Left To Tilt Right Push Joystick Right Dome Selection Numeric Key + CAM Zoom In... -
Page 126: Quick Reference Table
PIH-801 Quick Reference Table Function Operation To Tilt Up Push Joystick Forward To Tilt Down Push Joystick Down Pan/Tilt Control To Tile Left Push Joystick Left To Tilt Right Push Joystick Right Dome Selection Numeric Key + CAM Zoom In ZOOM IN Zoom Out ZOOM OUT... -
Page 127: Appendix E. Trouble Shooting
Appendix E. Trouble Shooting No Power Check power supply connection Check fuse on the PCB Check connection between dome and base No Video Check camera video output Check cable (damaged cable) Check video input connection on monitor Check 20PIN connection between camera body and base No Telemetry Check camera ID switch setting Check RS-485 cable IN/OUT connection on camera...
Need help?
Do you have a question about the P-463 and is the answer not in the manual?
Questions and answers