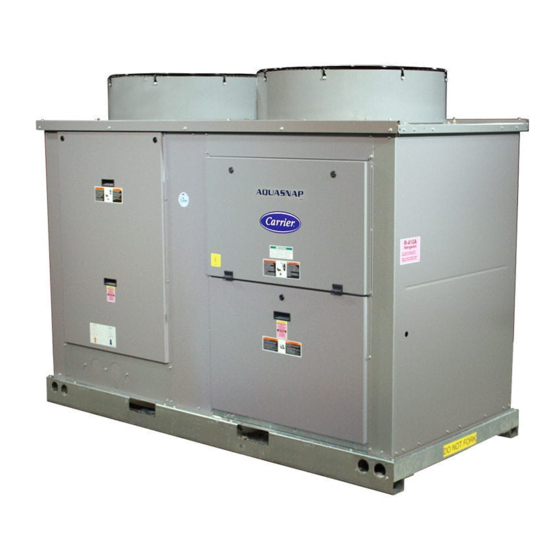
Carrier AQUASNAP 30RAP010-150 Controls, Start-Up, Operation, Service, And Troubleshooting
Air-cooled chillers with puron refrigerant (r-410a)
Hide thumbs
Also See for AQUASNAP 30RAP010-150:
- Start up & operation manual (132 pages) ,
- Installation instructions manual (72 pages) ,
- Controls, start-up, operation, service, and troubleshooting (152 pages)
Table of Contents
Advertisement
Controls, Start-Up, Operation,
Service, and Troubleshooting
Safety Considerations . . . . . . . . . . . . . . . . . . . . . . . 2,3
General . . . . . . . . . . . . . . . . . . . . . . . . . . . . . . . . . . . . . . . . . 3-7
Conventions Used In This Manual. . . . . . . . . . . . . . . . . . . .3
Basic Controls Usage . . . . . . . . . . . . . . . . . . . . . . . . . . . . . . .4
CONTROLS. . . . . . . . . . . . . . . . . . . . . . . . . . . . . . . . . . . . . . . 7-45
General. . . . . . . . . . . . . . . . . . . . . . . . . . . . . . . . . . . . . . . . . . . . . .7
Main Base Board (Mbb) . . . . . . . . . . . . . . . . . . . . . . . . . . . .23
Energy Management Module (Emm) . . . . . . . . . . . . . . . .24
Current Sensor Board (Csb) . . . . . . . . . . . . . . . . . . . . . . .24
Aux Board (Aux) . . . . . . . . . . . . . . . . . . . . . . . . . . . . . . . . . . .24
Expansion Valve Board (Exv) . . . . . . . . . . . . . . . . . . . . . .24
Compressor Expansion Board (Cxb) . . . . . . . . . . . . . .24
Enable/Off/Remote Contact Switch . . . . . . . . . . . . . . . . .24
Emergency On/Off Switch . . . . . . . . . . . . . . . . . . . . . . . . . .24
Board Addresses . . . . . . . . . . . . . . . . . . . . . . . . . . . . . . . . . . .24
Control Module Communication . . . . . . . . . . . . . . . . . . . .24
Carrier Comfort Network
®
Sensors . . . . . . . . . . . . . . . . . . . . . . . . . . . . . . . . . . . . . . . . . . . .26
• COOLER LEAVING FLUID SENSOR
• COOLER ENTERING FLUID SENSOR
• COMPRESSOR RETURN GAS
TEMPERATURE SENSOR
• OUTDOOR-AIR TEMPERATURE SENSOR (OAT)
• DISCHARGE TEMPERATURE THERMISTOR (DTT)
• REMOTE SPACE TEMPERATURE SENSOR OR DUAL
Energy Management Module . . . . . . . . . . . . . . . . . . . . . . .27
Loss-Of-Cooler Flow Protection. . . . . . . . . . . . . . . . . . . . .27
Electronic Expansion Valves (Exv) . . . . . . . . . . . . . . . . .27
Capacity Control . . . . . . . . . . . . . . . . . . . . . . . . . . . . . . . . . . .28
• MINUTES LEFT FOR START
• MINUTES OFF TIME
• LEAD/LAG DETERMINATION
• LOADING SEQUENCE SELECT
• CAPACITY CONTROL OVERRIDES
Head Pressure Control . . . . . . . . . . . . . . . . . . . . . . . . . . . . .30
• MOTORMASTER V OPTION
Operation of Machine Based on Control Method
and Cooling Set Point Selection Settings. . . . . . . . .33
Cooling Set Point Select. . . . . . . . . . . . . . . . . . . . . . . . . . . .33
Cooling Set Point (4 To 20 Ma). . . . . . . . . . . . . . . . . . . . . .34
Low Sound Mode Operation . . . . . . . . . . . . . . . . . . . . . . . .34
Heating Operation . . . . . . . . . . . . . . . . . . . . . . . . . . . . . . . . . .34
Service Test . . . . . . . . . . . . . . . . . . . . . . . . . . . . . . . . . . . . . . . .34
Optional Factory-Installed Hydronic Package. . . . . . .34
Cooler Pump Control . . . . . . . . . . . . . . . . . . . . . . . . . . . . . . .34
Cooler Pump Operation . . . . . . . . . . . . . . . . . . . . . . . . . . . .35
Cooler Pump Sequence Of Operation . . . . . . . . . . . . . . .35
Temperature Reset . . . . . . . . . . . . . . . . . . . . . . . . . . . . . . . . .37
Catalog No. 04-53300132-01
CONTENTS
Page
(CCN) Interface . . . . . . . . . .25
Printed in U.S.A.
®
with Puron
Refrigerant (R-410A)
Demand Limit . . . . . . . . . . . . . . . . . . . . . . . . . . . . . . . . . . . . . . 43
• DEMAND LIMIT (2-Stage Switch Controlled)
• EXTERNALLY POWERED DEMAND LIMIT
(4 to 20 mA Controlled)
• DEMAND LIMIT (CCN Loadshed Controlled)
Digital Scroll Option. . . . . . . . . . . . . . . . . . . . . . . . . . . . . . . . 45
• DIGITAL SCROLL OPERATION
• DIGITAL COMPRESSOR CONFIGURATION
Pre-Start-Up . . . . . . . . . . . . . . . . . . . . . . . . . . . . . . . . . . . . . 45
System Check . . . . . . . . . . . . . . . . . . . . . . . . . . . . . . . . . . . . . . 45
Start-Up And Operation . . . . . . . . . . . . . . . . . . . . 45-48
Actual Start-Up. . . . . . . . . . . . . . . . . . . . . . . . . . . . . . . . . . . . . 46
Check Refrigerant Charge . . . . . . . . . . . . . . . . . . . . . . . . . 46
Charge Adjustment For Brine Operation . . . . . . . . . . . 46
Operating Limitations . . . . . . . . . . . . . . . . . . . . . . . . . . . . . . 46
• COOLER FLOW RATES AND LOOP VOLUMES
• TEMPERATURES
• LOW AMBIENT OPERATION
• VOLTAGE — ALL UNITS
Operation Sequence . . . . . . . . . . . . . . . . . . . . . . . . 48
SERVICE . . . . . . . . . . . . . . . . . . . . . . . . . . . . . . . . . . . . . . . . 48-68
Electronic Components . . . . . . . . . . . . . . . . . . . . . . . . . . . . 48
• CONTROL COMPONENTS
Electronic Expansion Valve (Exv) . . . . . . . . . . . . . . . 48
Exv Troubleshooting Procedure . . . . . . . . . . . . . . . . . . . 49
• FIELD SERVICING INSTRUCTIONS
• EXV VALVE REPLACEMENT
• VALVE MOTOR REPLACEMENT
Compressor Replacement . . . . . . . . . . . . . . . . . . . . . . . 52
Crankcase Heater . . . . . . . . . . . . . . . . . . . . . . . . . . . . . . . . . . 52
Cooler. . . . . . . . . . . . . . . . . . . . . . . . . . . . . . . . . . . . . . . . . . . . . . 55
• BRAZED-PLATE COOLER HEAT EXCHANGER
REPLACEMENT
• BRAZED-PLATE COOLER HEAT EXCHANGER
CLEANING
Oil Charge. . . . . . . . . . . . . . . . . . . . . . . . . . . . . . . . . . . . . . . . . . 55
Microchannel Heat Exchanger (MCHX)
Recommendations . . . . . . . . . . . . . . . . . . . . . . . . . . . . . . 55
Round Tube, Plate Fin (RTPF)
Condenser Coil Maintenance and Cleaning
Recommendations . . . . . . . . . . . . . . . . . . . . . . . . . . . . . . 55
• REMOVE SURFACE LOADED FIBERS
• PERIODIC CLEAN WATER RINSE
• ROUTINE CLEANING OF COIL SURFACES
Check Refrigerant Feed Components . . . . . . . . . . . . 56
• FILTER DRIER
• MOISTURE-LIQUID INDICATOR
• MINIMUM LOAD VALVE
• PRESSURE RELIEF DEVICES
Form 30RAP-5T
Pg 1
AquaSnap
30RAP010-150
Air-Cooled Chillers
515
4-14
Replaces: 30RAP-4T
®
Page
Advertisement
Table of Contents
Troubleshooting

Related Manuals for Carrier AQUASNAP 30RAP010-150


Summary of Contents for Carrier AQUASNAP 30RAP010-150
- Page 1 Control Module Communication ....24 • TEMPERATURES (CCN) Interface ..25 Carrier Comfort Network ® • LOW AMBIENT OPERATION Sensors .
-
Page 2: Table Of Contents
rooms, etc.). Only trained, qualified installers and service CONTENTS (cont) mechanics should install, start up, and service this equipment. Page When working on this equipment, observe precautions in Check Unit Safeties ......56 the literature, and on tags, stickers, and labels attached to the •... -
Page 3: General
The CCN (Carrier Comfort Network ® ) point names are also referenced in the local display tables for users configuring the CAUTION unit with CCN software instead of the local display. -
Page 4: Basic Controls Usage
expansions will immediately change to the new language. No Table 1 — Unit Sizes power-off or control reset is required when reconfiguring UNIT NOMINAL CAPACITY (TONS) languages. 30RAP010 When a specific item is located, the item name alternates 30RAP015 with the value. Press the ENTER key at a changeable item 30RAP018... - Page 5 Table 2 — Scrolling Marquee Display Menu Structure* SERVICE TIME OPERATING MODE TEMPERATURES PRESSURES INPUTS OUTPUTS CONFIGURATION ALARMS STATUS TEST POINTS CLOCK MODES Auto Service Ent and Leave Unit Pressures Cooling General General Display Time of View of Modes Current Test Mode Temps Ckt A...
- Page 6 Timed override is in effect. This is a 1 to 4 hour temporary override of the programmed schedule, forcing unit to Occupied mode. Override can be implemented with unit under Local (Enable) or CCN (Carrier Comfort Network ® ) control. Override expires after each use.
- Page 7 ACCESSORY NAVIGATOR™ DISPLAY MODULE — Pressing will cause the “OFF” to flash. Use the up ENTER The Navigator module provides a mobile user interface to the or down arrow to change “OFF” to “ON”. Pressing ENTER ComfortLink control system, which is only available as a field- will illuminate all LEDs and display all pixels in the view installed accessory.
- Page 8 LOCATED OVER EMM AND EXV FB-1 TRAN CSB-A1 DISCONNECT OPTION/TB CWP1 CWP2 CWP1 CWP2 C-A1 COMPRESSOR CONTROL BOX a30-4962 Fig. 3 — Typical Control Box for 30RAP010,015 LOCATED OVER EMM AND EXV FB-1 TRAN CCB-2 CCB-1 FB-3 CSB-A1 CSB-A2 DISCONNECT OPTION/TB CWP2 CWP1...
- Page 9 a30-4964...
- Page 10 a30-5713...
- Page 11 a30-5721 Fig. 7A — Typical Wiring Schematic, 30RAP010,015 Units — Power Wiring...
- Page 12 a30-5720 Fig. 7B — Typical Wiring Schematic, 30RAP010,015 Units — Control Wiring...
- Page 13 a30-5722 Fig. 8A — Typical Wiring Schematic, 30RAP018-030 Units — Power Wiring...
- Page 14 a30-5723 Fig. 8B — Typical Wiring Schematic, 30RAP018-030 Units — Control Wiring...
- Page 15 a30-5724 Fig. 9A — Typical Wiring Schematic, 30RAP035-060 Units — Power Wiring...
- Page 16 a30-5725 Fig. 9B — Typical Wiring Schematic, 30RAP035-060 Units — Control Wiring...
- Page 17 a30-5714 Fig. 10A — Typical Wiring Schematic, 30RAP070-090 Units — Power Wiring...
- Page 18 5715 Fig. 10B — Typical Wiring Schematic, 30RAP070-090 Units — Control Wiring...
- Page 19 a30-5716 Fig. 11A — Typical Wiring Schematic, 30RAP100,115 Units — Power Wiring...
- Page 20 a30-5726 Fig. 11B — Typical Wiring Schematic, 30RAP100,115 Units — Control Wiring...
- Page 21 a30-5717 Fig. 12A — Typical Wiring Schematic, 30RAP130-150 Units — Power Wiring...
- Page 22 8 AMPS TRAN1 MBB J1-2 PL1-3 PL1-4 5 AMPS SECONDARY 24V MP-A1 AUX1 J1-12 GRN/YEL UPC GND a30-5456 J10A CB 4 PL2-3 PL2-4 12 AMPS MP-A2 PL4-3 PL4-4 MP-B1 RLY 11 PL5-3 PL5-4 LVT J10-16 MP-B2 PL3-3 PL3-4 MP-A3 RLY 9 PL6-3 PL6-4 MP-B3...
-
Page 23: Main Base Board (Mbb)
LEN (Local Equipment Network). The CCN channel information received from its inputs and from all other (Carrier Comfort Network) bus is also supported. Connections modules. The MBB receives inputs from the discharge and to both LEN and CCN buses are made at the LVT (low voltage suction pressure transducers and thermistors. -
Page 24: Energy Management Module (Emm)
a30-5381 Fig. 14 — CCN Wiring Diagram The EMM Energy Management Module (EMM) — module is available as a factory-installed option or as a field- installed accessory. The EMM module receives 4 to 20 mA inputs for the leaving fluid temperature reset, cooling set point and demand limit functions. -
Page 25: Ccn) Interface
Crankcase Heater Relay Output, Circuit A YELLOW LED — The MBB has one yellow LED. The Cooler / Pump Heater Carrier Comfort Network (CCN) LED will blink during times of network communication. Crankcase Heater Relay Output, Circuit B Energize Compressor B3 (070-150) Table 4 —... -
Page 26: Cooler Leaving Fluid Sensor
(SEN) and a RJ11 female 3. Connect the red wire to (+) terminal on LVT of the plug, connector. The RJ11 connector is used access into the Carrier the white wire to COM terminal, and the black wire to the Comfort Network (CCN) at the sensor. -
Page 27: Energy Management Module
5. Connect the other end of the communication bus cable to the remainder of the CCN communication bus. CAUTION Dual Leaving Water Temperature Sensor — For dual chiller applications (parallel only are supported), connect the dual Care should be taken when interfacing with other manufac- chiller leaving fluid temperature sensor (refer to Configuring turer’s control systems due to possible power supply and Operating Dual Chiller Control section on page 36) to the... -
Page 28: Capacity Control
ComfortVIEW™ or ComfortWORKS software) and The control system cycles com- ® Capacity Control — represents the amount of time to elapse before the unit will start pressors, digital scroll modulating solenoid (if equipped), and its initialization routine. This value can be zero without the minimum load valve solenoids (if equipped) to maintain the machine running in many situations. - Page 29 Table 9 — Part Load Data Percent Displacement, Standard Units with Minimum Load Valve CAPACITY STEPS CAPACITY % CONTROL 30RAP UNIT SIZE STEPS % Displacement Circuit A Circuit B — — — — — — *Minimum Load Valve energized. NOTE: These capacity steps may vary due to different capacity staging sequences.
-
Page 30: Head Pressure Control
2 STARTS DEADBAND EXAMPLE 1000 3 STARTS TIME (SECONDS) STANDARD DEADBAND MODIFIED LEGEND DEADBAND LWT — Leaving Water Temperature Fig. 19 — Deadband Multiplier First Stage Override — If the current capacity stage is zero, Low Saturated Suction Protection — The control will try to the control will modify the routine with a 1.2 factor on adding prevent shutting a circuit down due to low saturated suction the first stage to reduce cycling. - Page 31 Evaporating Temperature (°F) a30-5523 Evaporating Temperature (°F) a30-5292 Fig. 20A — 30RAP010-090 Operating Envelope for Fig. 20B — 30RAP100-150 Operating Envelope for R-410A Compressor R-410A Compressor a30-5459 OFM1 130-150 100-150 OFM1 ONLY ONLY OFM2 OFM3 OFM5 OFM7 OFM9 OFM1 TOP VIEW TOP VIEW SIZES 010,015 SIZES 018-030...
- Page 32 Table 10 — Fan Stages FAN STAGES 30RAP UNIT SIZE Fan Stage Contactor Energized Fans Operating 010,015 Stage 1 OFM1 Stage 1 OFM1 018-030 Stage 2 FC1,2 OFM1,2 Stage 1 OFM3 035-050 Stage 2 OFM1,2 Stage 3 FC1,2 OFM1,2,3 Stage 1 OFM4 Stage 2 FC1,3...
-
Page 33: Cooling Set Point Select
MOTORMASTER V OPTION — Motormaster V is stan- CCN CONTROL (Configuration OPT2 CTRL = 3) — ® dard on 30RAP010 and 015 size units. For all other units that An external CCN device such as Chillervisor System Manager need low-ambient operation, the lead fan on a circuit can be controls the On/Off state of the machine. -
Page 34: Cooling Set Point (4 To 20 Ma)
4 TO 20 mA INPUT — Unit operation is based on an external The Service Test function should be used to verify proper 4 to 20 mA signal input to the Energy Management Module operation of condenser fan(s), compressors, minimum load (EMM). -
Page 35: Cooler Pump Operation
Protection Alarm will energize the cooler pump relay also, as NO INTEGRAL PUMP — DUAL EXTERNAL PUMP an override. The cooler pump relay will remain energized if the CONTROL — With two external pumps, the following machine is in MODE 10 – Minimum Off Time. options must be configured: ... - Page 36 Connections can be Running Alert or T197 — Flow Lost While Pump 2 Running made to the CCN screw terminals on LVT. Refer to Carrier Alert for the appropriate pump and an A201 — Cooler Flow/ Comfort Network ®...
-
Page 37: Temperature Reset
allel configuration (Configuration RSET PARA) can THERMISTOR only be configured to YES. The variables LLBL, LLBD and WIRING* LLDY are not used by the slave chiller. MASTER LEAVING RETURN CHILLER FLUID FLUID Dual chiller start/stop control is determined by configura- ... - Page 38 Table 13 — Dual Chiller Configuration (Master Chiller Example) SUB-MODE ITEM KEYPAD ENTRY DISPLAY ITEM EXPANSION COMMENTS DISP UNIT OPT1 CTRL CONTROL METHOD ENTER OPT2 CTRL SWITCH DEFAULT 0 ENTER OPT2 ESCAPE CCNA CCN ADDRESS DEFAULT 1 ENTER CCNB CCNB CCN BUS NUMBER DEFAULT 0 ENTER...
- Page 39 Table 13 — Dual Chiller Configuration (Master Chiller Example) (cont) SUB-MODE ITEM KEYPAD ENTRY DISPLAY ITEM EXPANSION COMMENTS ENTER CRST COOLING RESET TYPE LLEN LEAD/LAG CHILLER ENABLE 15 ITEMS ENTER LLEN DSBL SCROLLING STOPS ENTER DSBL VALUE FLASHES ENBL SELECT ENBL ENTER LLEN ENBL...
- Page 40 Table 14 — Dual Chiller Configuration (Slave Chiller Example) SUB-MODE ITEM KEYPAD ENTRY DISPLAY ITEM EXPANSION COMMENTS DISP UNIT OPT1 CTRL CONTROL METHOD ENTER DEFAULT 0 OPT2 CTRL SWITCH (SEE NOTE 1) OPT2 ESCAPE CCNA CCNA CCN ADDRESS SCROLLING STOPS ENTER VALUE FLASHES ENTER...
- Page 41 Table 15 — 4 to 20 mA Reset KEYPAD ITEM SUB-MODE ITEM DISPLAY COMMENT ENTRY EXPANSION 0 = no reset 1 = 4 to 20 mA input COOLING RESET 2 = Outdoor air temp CRST ENTER TYPE 3 = Return Fluid RSET 4 = Space Temperature 5.0 F...
- Page 42 Table 17 — Configuring Outdoor Air and Space Temperature Reset DISPLAY MODE KEYPAD SUB- KEYPAD ITEM ITEM COMMENT Outdoor (RED LED) ENTRY MODE ENTRY EXPANSION Space DISP ENTER UNIT OPT1 OPT2 EXV.A EXV.B CONFIGURATION 2 = Outdoor-Air Temperature COOLING RESET RSET CRST 4 = Space Temperature...
-
Page 43: Demand Limit
Under normal operation, the chiller will maintain a constant leaving fluid temperature approximately equal to the chilled fluid set point. As the cooler load varies, the entering cooler fluid will change in proportion to the load as shown in Fig. 27. Usually the chiller size and leaving-fluid temperature set point are selected based on a full-load condition. - Page 44 DEMAND LIMIT (CCN Loadshed Controlled) — To con- Redline command is received, the current stage of capacity is figure Demand Limit for CCN Loadshed control set the De- set to the maximum stages available. Should the loadshed con- mand Limit Select (Configuration RSET DMDC) to 3.
-
Page 45: Controls
See Oil Charge section on system is varied by varying the time the compressor operates page 55 for Carrier approved oils. in an unloaded and loaded state during a 15-second period. If 6. Electrical power source must agree with unit nameplate. -
Page 46: Actual Start-Up
compressor circuit breakers off/open. The crankcase heaters peratures of 120 to 125 F (49 to 52 C). Block condenser airflow are now energized. as required to reach this temperature range. Add refrigerant un- til the system subcooling (SCT.A or SCT.B minus liquid line Actual start-up should be done only Actual Start-Up —... - Page 47 Digital chiller normally requires factory modification. Contact 010,015 12 (13) 3 (3.3) 12 (13) 6 (6.5) your Carrier representative for applicable LCWT range for 018-030 6 (6.5) 4 (4.3) 3 (3.3) 10 (10.8) 10 (10.8) 6 (6.5) standard water-cooled chiller in a specific application.
-
Page 48: Operation Sequence
2. Determine maximum deviation from average voltage: SERVICE (AB) 243 – 239 = 4 v (BC) 239 – 236 = 3 v WARNING (AC) 239 – 238 = 1 v Maximum deviation is 4 v. Electrical shock can cause personal injury and death. Shut 3. -
Page 49: Exv Troubleshooting Procedure
There are four different EXVs. Table 24 shows the number the valve position will flash. Use to select 100% valve of steps, by unit size, for each type of EXV. The EXV motor position (hold for quick movement) and press ENTER moves at 200 or 150 steps per second, respectively, for sizes The technician should be able to feel the actuator moving by... - Page 50 1. Be sure the refrigerant has been recovered from the VALVE MOTOR REPLACEMENT circuit. Sizes 025, 030, and 050-060 2. Disconnect the EXV cable from the EXV. For sizes 010- IMPORTANT: Obtain replacement gasket before opening 060, refer to Fig. 32 and remove the EXV retainer clip, EXV.
- Page 51 6. Manually depress the valve piston before installing the 8. After the motor is tightened, the cable should be replaced motor assembly. This will allow for the lead screw to en- on the valve. Care should be taken to ensure engagement gage the piston as the motor is installed.
-
Page 52: Compressor Replacement
DISASSEMBLY CLOSED ADAPTER 27mm / 1 OPEN NOTE: Open valve in Quick Test sub-mode before disassembling. OPEN VALVE IN QUICK TEST SUB-MODE BEFORE DISASSEMBLING ASSEMBLY CLOSED 50Nm (36 ft-lb)+ 30° 27mm / 1 OPEN GASKET a30-4072ef EF05BD271 NV 32.5mm EF05BD331 NV 36mm NOTES: 1. - Page 53 a30-4973 SUCTION ACCESS VALVE LEGEND — Discharge Pressure Thermostat — Discharge Temperature Thermistor — Entering Water Thermistor COMPRESSOR A2 — High Pressure Switch — Leaving Water Thermistor — Return Gas Thermistor COMPRESSOR A1 — Suction Pressure Transducer FLOW SWITCH Fig. 34 — Component Location — 30RAP010-030 SUCTION RGT SPT ACCESS...
- Page 54 a30-5373 DPT, HPS (NOT SHOWN LOCATED BEHIND A1) SIGHT GLASS DISCHARGE LEGEND ACCESS VALVE ONLY ON — Discharge Pressure Thermostat — Discharge Temperature Thermistor SIZE 080,090,115,130,150 UNITS — High Pressure Switch — Return Gas Thermistor — Suction Pressure Transducer Fig. 36 — Component Location — 30RAP070-150 a30-5736 in.
-
Page 55: Cooler
Puron refrigerant systems use a polyol ester (POE) oil. Use maintain proper operation of the unit. Elimination of contami- only Carrier-approved compressor oil. Oil should be visible in nation and removal of harmful residues will greatly increase compressor oil sight glass. An acceptable oil level is from the life of the coil and extend the life of the unit. -
Page 56: Check Refrigerant Feed Components
210 F (100 C). is essential to extend the life of coils. This cleaner is avail- able from Carrier Replacement parts division as part number Check Unit Safeties P902-0301 for a one gallon container, and part number HIGH-PRESSURE SWITCH —... -
Page 57: Thermistors
Insulate thermocouple to freeze solution mixture is considered abuse and may impair avoid ambient temperatures from influencing reading. or otherwise negatively impact the Carrier warranty. Temperature measured by thermocouple and temperature determined from thermistor voltage reading should be close, ±... - Page 58 For recommended maintenance, check the sensor tip for necessary, build-up (e.g., lime) can be removed with a common build-up every 6 months. Clean the tip with a soft cloth. If vinegar cleansing agent. 5/8 in. HEX 1/4-18 NPT 6" MINIMUM CLEARANCE FOR THERMISTOR REMOVAL...
- Page 59 Table 27 — 5K Thermistor Temperatures (°F) vs. Resistance/Voltage Drop (Voltage Drop for EWT, LWT, RGT, and OAT) VOLTAGE VOLTAGE VOLTAGE TEMP RESISTANCE TEMP RESISTANCE TEMP RESISTANCE DROP DROP DROP (Ohms) (Ohms) (Ohms) 1.982 7,686 0.511 1,190 –25 3.699 98,010 1.956 7,665 0.502...
- Page 60 Table 28 — 5K Thermistor Temperatures (°C) vs. Resistance/Voltage Drop (Voltage Drop for EWT, LWT, RGT, and OAT) VOLTAGE VOLTAGE VOLTAGE TEMP RESISTANCE TEMP RESISTANCE TEMP RESISTANCE DROP DROP DROP (Ohms) (Ohms) (Ohms) 1.982 7,855 0.506 1,158 –32 3.705 100,260 1.935 7,499 0.490...
- Page 61 Table 29 — 10K Thermistor Temperature (°F) vs. Resistance/Voltage Drop (For SPT) VOLTAGE VOLTAGE VOLTAGE TEMP RESISTANCE TEMP RESISTANCE TEMP RESISTANCE DROP DROP DROP (Ohms) (Ohms) (Ohms) –25 4.758 196,453 2.994 14,925 0.890 2,166 –24 4.750 189,692 2.963 14,549 0.876 2,124 –23 4.741...
- Page 62 Table 30 — 10K Thermistor Temperature (°C) vs. Resistance/Voltage Drop (For SPT) VOLTAGE VOLTAGE VOLTAGE TEMP RESISTANCE TEMP RESISTANCE TEMP RESISTANCE DROP DROP DROP (Ohms) (Ohms) (Ohms) –32 4.762 200,510 3.056 15,714 0.940 2,315 –31 4.748 188,340 3.000 15,000 0.913 2,235 –30 4.733...
-
Page 63: Strainer
The flow sensor cable is provided with (3) LEDs that indi- step in the motor shaft. For proper performance, fan should be cate if 24 vac power is present and also status of the switch positioned such that it is securely seated on this step. Apply re- contacts. - Page 64 VFD. block. The 30RAP units use operating modes 5-8. In these LOSS OF CCN COMMUNICATIONS — Carrier Comfort configurations, the MMV follows a 4 to 20 mA speed refer- Network (CCN) communications with external control sys- ®...
- Page 65 LOW AMBIENT OPERATION (MOTORMASTER V) FIOP/ACCESSORY MM-A BLK-1 OFM1 BLK-2 BLK-3 GRN/YEL HIGH SCCR ONLY * MM SIGNAL CONNECTION VOLTAGE 208/230/460/575 1/4W FROM AUX-J4 BLK-1 OFM2 BLK-2 BLK-3 GRN/YEL COOLER/PUMP COOLER/PUMP HEATERS HEATERS (380,460,575V) (208/230,230V) a30-4977 LEGEND CONFIGURATION TABLE — Auxiliary CONTROL INPUT —...
- Page 66 Table 32 — Fault Codes FAULT CODE DESCRIPTION SOLUTION High Temperature Fault: Ambient temperature is too high; Check cooling fan operation Cooling fan has failed (if equipped). Control Fault: A blank EPM, or an EPM with corrupted data Perform a factory reset using Parameter 48 — has been installed.
- Page 67 MODE 7 MODE 8 Line Voltage: 01 = low line, 02 = high line Carrier Freq: 01 = 4 kHz, 02 = 6 kHz, 03 = 8 kHz Startup mode: flying restart Stop mode: coast to stop Standard Speed source: 01= keypad,...
-
Page 68: Service
WARNING size available for that pump. The pump was selected based on the flow and head requirements as provided to Carrier. It is not Electrical shock can cause personal injury and death. Shut uncommon for actual pump duty to be different than what was off all power to this equipment during installation. -
Page 69: Maintenance
UNIT ENABLE-OFF-REMOTE CONTACT SWITCH IS MAINTENANCE OFF — When the switch is OFF, the unit will stop immediate- The fol- Recommended Maintenance Schedule — ly. Place the switch in the ENABLE position for local switch lowing are only recommended guidelines. Jobsite conditions control or in the REMOTE CONTACT position for control may dictate that maintenance schedule is performed more often through remote contact closure. -
Page 70: Motor Overload Protection
break motor overload located in the center of the Y of the mo- tor windings. This overload disconnects all three legs of the motor from power in case of an over-current or over-tempera- ture condition. The overload reacts to a combination of motor current and motor winding temperature. -
Page 71: Troubleshooting
NOTE: Turning off power to the module will reset it immedi- ately. CAUTION The motor protection system within the compressor is now CAUTION bypassed. Use this configuration to temporarily test mod- ule only. Failure to do this may result in unit damage. Restoring the compressor sooner may cause a destructive temperature build up in the scrolls. - Page 72 If the unit is in alarm and unable to operate, Control Mode ALL CURRENT ALARMS” is displayed. Press ENTER (STAT) = 4 (Off Emrgcy). The control will prompt the user for a password, by displaying Automatic alarms will reset without operator intervention if PASS and WORD.
- Page 73 Table 36 — Alarm and Alert Codes ALARM/ ALARM WHY WAS THIS ACTION TAKEN RESET PROBABLE ALERT DESCRIPTION ALARM BY CONTROL METHOD CAUSE CODE ALERT GENERATED? High-pressure switch open, solid-state motor protection module, internal overload Circuit A, Compressor 1 Compressor feedback signal Compressor A1 shut T051 Alert...
- Page 74 Table 36 — Alarm and Alert Codes (cont) ALARM/ ALARM WHY WAS THIS ACTION TAKEN RESET PROBABLE ALERT DESCRIPTION ALARM BY CONTROL METHOD CAUSE CODE ALERT GENERATED? Circuit B, Compressor 3 CSB reads ON while the Welded compressor contactor, Compressor B3 shut Alarm Stuck On compressor relay has been...
- Page 75 Table 36 — Alarm and Alert Codes (cont) ALARM/ ALARM WHY WAS THIS ACTION TAKEN RESET PROBABLE ALERT DESCRIPTION ALARM BY CONTROL METHOD CAUSE CODE ALERT GENERATED? Faulty expansion valve, low refrigerant charge, Mode 7 caused the com- plugged pressor to unload 6 con- filter drier, faulty suc- Circuit A Low Cooler secutive times with less...
- Page 76 Table 36 — Alarm and Alert Codes (cont) ALARM/ ALARM WHY WAS THIS ACTION TAKEN RESET PROBABLE ALERT DESCRIPTION ALARM BY CONTROL METHOD CAUSE CODE ALERT GENERATED? Critical Serial EEPROM Configuration/storage Chiller is not allowed Main Base Board A156 Alarm Manual Storage Failure failure with MBB...
- Page 77 Table 36 — Alarm and Alert Codes (cont) ALARM/ ALARM WHY WAS THIS ACTION TAKEN RESET PROBABLE ALERT DESCRIPTION ALARM BY CONTROL METHOD CAUSE CODE ALERT GENERATED? Wiring error, faulty Cooler Pump 1 Aux Pump 1 Auxiliary Contacts Chiller not allowed to Manual when pump contactor A198...
- Page 78 LEGEND — Carrier Comfort Network — Current Sensor Board — Chillervisor System Manager — Current Sensor Board EEPROM — Electronic Erasable Programmable Read Only Memory — Energy Management Module — Entering Fluid Temperature —...
- Page 79 COMPRESSOR FAILURE ALERTS In addition, if a compressor stuck failure occurs and the cur- rent sensor board reports the compressor and the request off, T051, T052, T053 (Circuit A Compressor Failures) certain diagnostics will take place as follows: T055, T056, T057 (Circuit B Compressor Failures) — Alert 1.
- Page 80 T074 (Space Temperature Thermistor Failure) — This alert will reset itself when discharge temperature is less than 250 F occurs when the space temperature sensor is outside the range (121.1 C). If this alert occurs 3 times within a day, the A118 of –40 to 245 F (–40 to 118 C).
- Page 81 A152 (Unit Down Due to Failure) — Both circuits are off If this condition is encountered, check the following items: due to alerts and/or alarms. Reset is automatic when all alarms • chilled water flow switch, for proper operation are cleared. This alarm indicates the unit is at 0% capacity. •...
- Page 82 This alert will reset automatically if one of two conditions is If this condition is encountered, check to be sure building met: load does not exceed unit capacity. 1. If the Leaving Water Temperature, LWT (Run Sta- T501, T502, T503 (Current Sensor Board Failure — A xx ...
- Page 83 APPENDIX A — DISPLAY TABLES Run Status Mode and Sub-Mode Directory SUB-MODE ITEM DISPLAY ITEM DESCRIPTION COMMENT AUTO VIEW OF RUN STATUS xxx.x °F Entering Fluid Temp xxx.x °F Leaving Fluid Temp SETP xxx.x °F Active Set Point CTPT xxx.x °F Control Point LOD.F Load/Unload Factor...
- Page 84 APPENDIX A — DISPLAY TABLES (cont) Run Status Mode and Sub-Mode Directory (cont) SUB-MODE ITEM DISPLAY ITEM DESCRIPTION COMMENT PREVENTIVE MAINTENANCE PUMP PUMP MAINTENANCE SI.PM xxxx HRS Pump Service Interval Default: 8760 P.1.DN xxxx HRS Pump 1 Service Countdown P.2.DN xxxx HRS Pump 2 Service Countdown P.1.MN...
- Page 85 APPENDIX A — DISPLAY TABLES (cont) Service Test Mode and Sub-Mode Directory SUB-MODE ITEM DISPLAY ITEM DESCRIPTION COMMENT* To enable Service Test mode, move Enable/Off/Remote contact switch to TEST Service Test Mode OFF. Change TEST to ON. Move switch to ENABLE OUTPUTS EXV.A xxx%...
- Page 86 APPENDIX A — DISPLAY TABLES (cont) Temperature Mode and Sub-Mode Directory SUB-MODE ITEM DISPLAY ITEM DESCRIPTION COMMENT ENTERING AND LEAVING UNIT TEMPERATURES CEWT xxx.x °F Cooler Entering Fluid CLWT xxx.x °F Cooler Leaving Fluid UNIT xxx.x °F Outside Air Temperature xxx.x °F Space Temperature DLWT...
- Page 87 APPENDIX A — DISPLAY TABLES (cont) Inputs Mode and Sub-Mode Directory SUB-MODE ITEM DISPLAY ITEM DESCRIPTION COMMENT GENERAL INPUTS STST ON/OFF Start/Stop Switch FLOW ON/OFF Cooler Flow Switch PM.F.1 ON/OFF Cooler Pump 1 Interlock PM.F.2 ON/OFF Cooler Pump 2 Interlock GEN.I HT.RQ ON/OFF...
- Page 88 APPENDIX A — DISPLAY TABLES (cont) Outputs Mode and Sub-Mode Directory SUB-MODE ITEM DISPLAY ITEM DESCRIPTION COMMENT GENERAL OUTPUTS FAN1 ON/OFF Fan 1 Relay FAN2 ON/OFF Fan 2 Relay FAN3 ON/OFF Fan 3 Relay FAN4 ON/OFF Fan 4 Relay FAN5 ON/OFF Fan 5 Relay FAN6...
- Page 89 APPENDIX A — DISPLAY TABLES (cont) Configuration Mode and Sub-Mode Directory SUB-MODE ITEM DISPLAY ITEM DESCRIPTION COMMENT DISPLAY CONFIGURATION TEST ON/OFF Test Display LEDs METR ON/OFF Metric Display Off = English On = Metric Default: 0 0 = English DISP LANG Language Selection 1 = Espanol...
- Page 90 APPENDIX A — DISPLAY TABLES (cont) Configuration Mode and Sub-Mode Directory (cont) SUB-MODE ITEM DISPLAY ITEM DESCRIPTION COMMENT UNIT OPTIONS 2 CONTROLS Default: 0 0 = Enable/Off/Remote Switch CTRL Control Method 2 = Occupancy 3 = CCN Control Default: 1 LOAD Loading Sequence Select 1 = Equal...
- Page 91 APPENDIX A — DISPLAY TABLES (cont) Configuration Mode and Sub-Mode Directory (cont) SUB-MODE ITEM DISPLAY ITEM DESCRIPTION COMMENT CIR A EXV CONFIGURATION Default:25% EXV Opening at Low LWT EXV.L Range:0 to 50% Default:10 F XX° F LWT for EXV Min Opening LWT.L Range:-20 to 40 F Default:50%...
- Page 92 APPENDIX A — DISPLAY TABLES (cont) Configuration Mode and Sub-Mode Directory (cont) SUB-MODE ITEM DISPLAY ITEM DESCRIPTION COMMENT MOTORMASTER MMR.S YES/NO Motormaster Select Default: No Default: 1 P.GAN Head Pressure P Gain Range: 1 to 4 Default: 0.1 I.GAN XX.X Head Pressure I Gain Range: -20 to 20 Default: 0.0...
- Page 93 APPENDIX A — DISPLAY TABLES (cont) Configuration Mode and Sub-Mode Directory (cont) SUB-MODE ITEM DISPLAY ITEM DESCRIPTION COMMENT SETPOINT AND RAMP LOAD Default: 0 0 = Single 1 = Dual Switch CLSP Cooling Set Point Select 2 = Dual CCN Occupied 3 = 4 to 20 mA Input (requires EMM) SLCT...
- Page 94 APPENDIX A — DISPLAY TABLES (cont) Time Clock Mode and Sub-Mode Directory SUB-MODE ITEM DISPLAY ITEM DESCRIPTION COMMENT TIME OF DAY TIME HH.MM XX.XX Hour and Minute Military (00:00 - 23:59) MONTH, DATE, DAY, AND YEAR 1 - 12 (1 = January, MNTH Month of Year 2 = February, etc.)
- Page 95 APPENDIX A — DISPLAY TABLES (cont) Time Clock Mode and Sub-Mode Directory (cont) SUB-MODE ITEM DISPLAY ITEM DESCRIPTION COMMENT HOLIDAY SCHEDULE 09 1 - 12 (1 = January, Holiday Start Month 2 = February, etc.) HD.09 Start Day 01-31 Duration (days) HOLIDAY SCHEDULE 10 1 - 12 (1 = January, Holiday Start Month...
- Page 96 APPENDIX A — DISPLAY TABLES (cont) Time Clock Mode and Sub-Mode Directory (cont) SUB-MODE ITEM DISPLAY ITEM DESCRIPTION COMMENT HOLIDAY SCHEDULE 20 1 - 12 (1 = January, Holiday Start Month 2 = February, etc.) HD.20 Start Day 01-31 Duration (days) HOLIDAY SCHEDULE 21 1 - 12 (1 = January, Holiday Start Month...
- Page 97 APPENDIX A — DISPLAY TABLES (cont) Time Clock Mode and Sub-Mode Directory (cont) SUB-MODE ITEM DISPLAY ITEM DESCRIPTION COMMENT SCH.N Schedule Number SCH.L LOCAL OCCUPANCY SCHEDULE OCCUPANCY PERIOD 1 OCC.1 XX:XX Period Occupied Time Military (00:00 - 23:59) UNC.1 XX:XX Period Unoccupied Time Military (00:00 - 23:59) MON.1...
- Page 98 APPENDIX A — DISPLAY TABLES (cont) Time Clock Mode and Sub-Mode Directory (cont) SUB-MODE ITEM DISPLAY ITEM DESCRIPTION COMMENT OCCUPANCY PERIOD 6 OCC.6 XX:XX Period Occupied Time Military (00:00 - 23:59) UNC.6 XX:XX Period Unoccupied Time Military (00:00 - 23:59) MON.6 YES/NO Monday In Period...
- Page 99 APPENDIX A — DISPLAY TABLES (cont) Operating Mode and Sub-Mode Directory SUB-MODE ITEM DISPLAY ITEM DESCRIPTION COMMENT MODES CONTROLLING UNIT MD01 ON/OFF CSM Controlling Chiller MD02 ON/OFF WSM Controlling Chiller MD03 ON/OFF Master/Slave Control MD05 ON/OFF Ramp Load Limited MD06 ON/OFF Timed Override in effect MD07...
- Page 100 APPENDIX B — CCN TABLES CCN DISPLAY TABLES — A_UNIT (General Unit Parameters) DESCRIPTION VALUE UNITS POINT NAME FORCIBLE Control Mode 0 = Test STAT 1 = Local Off 2 = CCN Off 3 = Clock Off 4 = Emergency Stop 5 = Local On 6 = CCN On 7 = Clock On...
- Page 101 APPENDIX B — CCN TABLES (cont) CCN DISPLAY TABLES — CIRCADIO (Circuit A Discrete Inputs/Outputs) DESCRIPTION VALUE UNITS POINT NAME FORCIBLE CIRC. A DISCRETE OUTPUTS Compressor A1 Relay On/Off K_A1_RLY Compressor A2 Relay On/Off K_A2_RLY Compressor A3 Relay On/Off K_A3_RLY Minimum Load Valve Relay On/Off MLV_RLY...
- Page 102 APPENDIX B — CCN TABLES (cont) CCN DISPLAY TABLES — OPTIONS (Unit Parameters) DESCRIPTION VALUE UNITS POINT NAME FORCIBLE FANS Fan 1 Relay Off/On FAN_1 Fan 2 Relay Off/On FAN_2 Fan 3 Relay Off/On FAN_3 Fan 4 Relay Off/On FAN_4 Fan 5 Relay Off/On FAN_5...
- Page 103 APPENDIX B — CCN TABLES (cont) CCN CONFIGURATION TABLES — OPTIONS1 (Options 1 Configuration) DESCRIPTION VALUE DEFAULT UNITS POINT NAME Cooler Fluid 1 = Water FLUIDTYP 2 = Med. Brine Minimum Load Vlv Select No/Yes MLV_FLG CSB Board Enable Dsable/Enable Enable CSB_ENA Cooler Pump Control...
- Page 104 APPENDIX B — CCN TABLES (cont) CCN CONFIGURATION TABLES — RESETCON (Temperature Reset and Demand Limit) DESCRIPTION VALUE DEFAULT UNITS POINT NAME COOLING RESET Cooling Reset Type 0 = No Reset CRST_TYP 1 = 4-20 mA input 2 = External temp – OAT 3 = Return Fluid 4 = External temp - SPT 4-20 MA RESET...
- Page 105 APPENDIX B — CCN TABLES (cont) CCN CONFIGURATION TABLES — DISPLAY (Marquee Display SETUP) DESCRIPTION VALUE DEFAULT UNITS POINT NAME Service Password nnnn 1111 PASSWORD Password Enable Enable/Disable Enable PASS_EBL Metric Display Off/On DISPUNIT Language Selection 0 = ENGLISH LANGUAGE 1 = FRANCAIS 2 = ESPANOL 3 = PORTUGUES...
- Page 106 APPENDIX B — CCN TABLES (cont) CCN SERVICE TABLES — SERVICE DESCRIPTION VALUE DEFAULT UNITS POINT NAME SERVICE F Brine Freeze Point nnn.n 34.0 BRN_FRZ Pump Service Interval nnnnn 876.0 hours SI_PUMPS COMPRESSOR ENABLE Enable Compressor A1 Disable/Enable Dependent on unit size ENABLEA1 Enable Compressor A2 Disable/Enable...
- Page 107 APPENDIX B — CCN TABLES (cont) CCN MAINTENANCE TABLES — STRTHOUR DESCRIPTION VALUE UNITS POINT NAME Machine Operating Hours nnnnnn hours HR_MACH Machine Starts nnnnnn CY_MACH Circuit A Run Hours nnnnnn hours HR_CIRA Compressor A1 Run Hours nnnnnn hours HR_A1 Compressor A2 Run Hours nnnnnn hours...
- Page 108 APPENDIX B — CCN TABLES (cont) CCN MAINTENANCE TABLES — ALARMS DESCRIPTION VALUE POINT NAME Active Alarm #1 Axxx or Txxx ALARM01C Active Alarm #2 Axxx or Txxx ALARM02C Active Alarm #3 Axxx or Txxx ALARM03C Active Alarm #4 Axxx or Txxx ALARM04C Active Alarm #5 Axxx or Txxx...
- Page 109 APPENDIX B — CCN TABLES (cont) CCN MAINTENANCE TABLES — PM-PUMP DESCRIPTION VALUE UNITS POINT NAME Pump Service Interval nnnnnn hours SI_PUMPS Pump 1 Service Countdown nnnnnn hours P1_CDOWN Pump 1 Maintenance Done Yes/No P1_MAINT Pump 2 Service Countdown nnnnnn hours P2_CDOWN Pump 2 Maintenance Done...
- Page 110 APPENDIX B — CCN TABLES (cont) CCN MAINTENANCE TABLES — TESTMODE DESCRIPTION VALUE UNITS POINT NAME Service Test Mode On/Off NET_CTRL Compressor A1 Relay On/Off S_A1_RLY Compressor A2 Relay On/Off S_A2_RLY Compressor A3 Relay On/Off S_A3_RLY Compressor A4 Relay On/Off S_A4_RLY Compressor B1 Relay On/Off...
- Page 111 APPENDIX B — CCN TABLES (cont) CCN MAINTENANCE TABLES — RUNTEST (cont) DESCRIPTION VALUE UNITS POINT NAME Minimum Load Valve Relay On/Off MLV_RLY Compressor B1 Feedback On/Off K_B1_FBK Compressor B2 Feedback On/Off K_B2_FBK Compressor B3 Feedback On/Off K_B3_FBK Fan 1 Relay On/Off FAN_1 Fan 2 Relay...
- Page 112 APPENDIX B — CCN TABLES (cont) CCN MAINTENANCE TABLES — DUALCHIL DESCRIPTION VALUE UNITS POINT NAME Dual Chiller Link Good? Yes/No DC_LINK Master Chiller Role Stand Alone, Lead Chiller, MC_ROLE Lag Chiller Slave Chiller Role Stand Alone, Lead Chiller, SC_ROLE Lag Chiller F Lead Chiller Ctrl Point...
-
Page 113: Pump And Manual Starters
APPENDIX C — FACTORY SETTINGS FOR PUMP AND MANUAL STARTERS 30RAP UNIT SIZE PUMP SIZE PUMP OPTION* UNIT VOLTAGE OVERLOAD SETTING 208/230-60 380-60 1.5 HP 2, 9 460-60 575-60 208/230-60 380-60 3 HP 3, 4, B, C 460-60 575-60 208/230-60 14.5 380-60 010-060... -
Page 114: Option
APPENDIX D — BACNET COMMUNICATION OPTION The following section is used to configure the UPC Open con- troller which is used when the BACnet* communication option is selected. The UPC Open controller is mounted in the 10's main control box per unit components arrangement diagrams. TO ADDRESS THE UPC OPEN CONTROLLER —... - Page 115 The example in Fig. C shows the BAS Port DIP Switches set for 76.8k (Carrier default) and MS/TP. due to echoing. See Fig. A, D, and E. Set the BAS Port DIP Switches DS2 and DS1 for the appro-...
- Page 116 APPENDIX D — BACNET COMMUNICATION OPTION (cont) Fig. E — BT485 Terminator Installation To install a BT485 terminator, push the BT485 terminator temperature rating specifications list two acceptable alterna- on to the BT485 connector located near the BACnet connector. tives. The Halar specification has a higher temperature rating and a tougher outer jacket than the SmokeGard specification, NOTE: The BT485 terminator has no polarity associated with and it is appropriate for use in applications where the user is...
- Page 117 APPENDIX D — BACNET COMMUNICATION OPTION (cont) Table D — Open System Wiring Specifications and Recommended Vendors WIRING SPECIFICATIONS RECOMMENDED VENDORS AND PART NUMBERS Connect Air Contractors Wire Type Description Belden RMCORP International Wire and Cable 22 AWG, single twisted shielded pair, low capacitance, CL2P, TC foam FEP, plenum rated.
- Page 118 10,000 hours of data retention during power out- Open defaults to CCN Acknowledger. If a Chiller Lead/Lag/ ages. Standby application is being used, then the Carrier technician IMPORTANT: Power must be ON to the UPC Open when must change the configuration to only one CCN Acknowledger replacing the battery, or the date, time, and trend data will on the CCN bus.
- Page 119 APPENDIX D — BACNET COMMUNICATION OPTION (cont) Table G — Network Points List CCN POINT READ/ DEFAULT BACNET BACNET POINT DESCRIPTION UNITS RANGE NAME WRITE VALUE OBJECT ID OBJECT NAME 4-20 ma Demand Signal LMT_MA AV:36 lmt_ma_1 4-20 ma Reset Signal RST_MA °F AV:33...
- Page 120 APPENDIX D — BACNET COMMUNICATION OPTION (cont) Table G — Network Points List (cont) CCN POINT READ/ DEFAULT BACNET BACNET POINT DESCRIPTION UNITS RANGE NAME WRITE VALUE OBJECT ID OBJECT NAME 1 = Test 2 = Local Off 3 = CCN Off 4 = Clock Off 5 = Emergency Stop Control Mode...
- Page 121 APPENDIX D — BACNET COMMUNICATION OPTION (cont) Table G — Network Points List (cont) READ/ DEFAULT BACNET BACNET POINT DESCRIPTION POINT NAME UNITS RANGE WRITE VALUE OBJECT ID OBJECT NAME Fan Relay 1 FAN_1 BV:60 fan_1_1 Fan Relay 2 FAN_2 BV:61 fan_2_1 Fan Relay 3...
- Page 122 APPENDIX D — BACNET COMMUNICATION OPTION (cont) Table G — Network Points List (cont) READ/ DEFAULT BACNET BACNET POINT DESCRIPTION POINT NAME UNITS RANGE WRITE VALUE OBJECT ID OBJECT NAME Saturated Condensing Tmp TMP_SCTA °F AV:16 tmp_scta_1 Saturated Condensing Tmp TMP_SCTB °F AV:25...
-
Page 123: And Log Sheets
APPENDIX E — MAINTENANCE SUMMARY AND LOG SHEETS 30RAP Weekly Maintenance Log Plant ___________________________ Machine Model No. ________________ CHECK ALARMS OPERATOR DATE OIL LEVEL REMARKS / FAULTS INITIALS NOTE: Equipment failures caused by lack of adherence to the Main- tenance Interval Requirements are not covered under warranty. - Page 126 Replacement Troubleshooting 69-82 Brazed plate cooler heat Capacity control Valve motor replacement, EXV exchanger Capacity control overrides Valve replacement, EXV MCHX condenser coil Carrier Comfort Network ® (CCN) Voltage RTPF condenser coil interface Winter shutdown Heater cable CCN tables 100-112...
-
Page 128: Manufacturer Reserves The Right To Discontinue, Or Change At Any Time, Specifications Or Designs Without Notice And Without Incurring Obligations
© Carrier Corporation 2014 Manufacturer reserves the right to discontinue, or change at any time, specifications or designs without notice and without incurring obligations. Catalog No. 04-53300132-01 Printed in U.S.A. Form 30RAP-5T Pg 128 4-14 Replaces: 30RAP-4T... - Page 129 START-UP CHECKLIST FOR 30RAP LIQUID CHILLER (Remove and use for Job File) I. Project Information JOB NAME ______________________________________________________________________________ ADDRESS _______________________________________________________________________________ CITY ____________________________________________ STATE _______________ ZIP______________ INSTALLING CONTRACTOR ________________________________________________________________ SALES OFFICE ___________________________________________________________________________ START-UP PERFORMED BY ________________________________________________________________ UNIT MODEL ______________________________ SERIAL ________________________________ II.
- Page 130 6. CHILLED WATER PUMP STARTER INTERLOCKED WITH CHILLER. 7. INTEGRATED 40 MESH Y STRAINER CLEAN. 8. WATER LOOP VOLUME GREATER THAN MINIMUM REQUIREMENTS. (See Table 20). 9. PROPER LOOP FREEZE PROTECTION PROVIDED TO _____ °F (°C). ANTIFREEZE TYPE _____________________ CONCENTRATION __________%.
- Page 131 10. CHECK VOLTAGE IMBALANCE: AVERAGE VOLTAGE = (A-B + A-C + B-C)/3 MAXIMUM DEVIATION FROM AVERAGE VOLTAGE = VOLTAGE IMBALANCE = ____________% (MAX. DEVIATION/AVERAGE VOLTAGE) X 100 VOLTAGE IMBALANCE LESS THAN 2%. (DO NOT START CHILLER IF VOLTAGE IMBALANCE IS GREATER THAN 2%. CONTACT LOCAL UTILITY FOR ASSISTANCE.) ...
- Page 132 Compressor Running Current — All readings taken at full load. COMPRESSOR MOTOR CURRENT COMPRESSOR A1 COMPRESSOR A2 COMPRESSOR A3 COMPRESSOR B1 COMPRESSOR B2 COMPRESSOR B3 CONDENSER FAN MOTOR CURRENT FAN MOTOR 1 FAN MOTOR 2 FAN MOTOR 3 FAN MOTOR 4 FAN MOTOR 5 FAN MOTOR 6 FAN MOTOR 7...
- Page 133 III. Unit Start-Up (cont) RECORD CONFIGURATION SETTINGS UNIT (Configuration Settings) SUBMODE ITEM ITEM EXPANSION DISPLAY ENTRY UNIT CONFIGURATION SIZE UNIT SIZE SZA.1 COMPRESSOR A1 SIZE SZA.2 COMPRESSOR A2 SIZE SZA.3 COMPRESSOR A3 SIZE SZB.1 COMPRESSOR B1 SIZE SZB.2 COMPRESSOR B2 SIZE SZB.3 COMPRESSOR B3 SIZE UNIT...
- Page 134 III. Unit Start-Up (cont) PRESS ESCAPE KEY TO DISPLAY ‘OPT1’. PRESS DOWN ARROW KEY TO DISPLAY ‘OPT2’. PRESS ENTER KEY. RECORD CONFIGURATION INFORMATION BELOW. OPTIONS2 (Options Configuration) SUBMODE ITEM ITEM EXPANSION DISPLAY ENTRY UNIT OPTIONS 2 CONTROLS CTRL CONTROL METHOD LOAD LOADING SEQUENCE SELECT LLCS...
- Page 135 III. Unit Start-Up (cont) PRESS ESCAPE KEY TO DISPLAY ‘HP.B’. PRESS DOWN ARROW KEY TO DISPLAY ‘EXV.A’. PRESS ENTER KEY. RECORD CONFIGURATION INFORMATION BELOW. EXV.A (Circuit A EXV Configuration) SUB-MODE ITEM ITEM EXPANSION DISPLAY ENTRY EXV OPENING AT LOW LWT EXV.L LWT FOR EXV MIN OPENING XX°...
- Page 136 III. Unit Start-Up (cont) PRESS ESCAPE KEY TO DISPLAY ‘EXV.B’. PRESS DOWN ARROW KEY TO DISPLAY ‘MM’. PRESS ENTER KEY. RECORD CONFIGURATION INFORMATION BELOW. MM (Motormaster Configuration Settings) SUB-MODE ITEM ITEM EXPANSION DISPLAY ENTRY MMR.S MOTORMASTER SELECT YES/NO P.GAN HEAD PRESSURE P GAIN I.GAN HEAD PRESSURE I GAIN XX.X...
- Page 137 III. Unit Start-Up (cont) PRESS ESCAPE KEY TO DISPLAY ‘RSET’. PRESS DOWN ARROW KEY TO DISPLAY ‘SLCT’. PRESS ENTER KEY. RECORD CONFIGURATION INFORMATION BELOW: SLCT (Setpoint and Ramp Load Configuration) SUBMODE ITEM ITEM EXPANSION DISPLAY ENTRY SETPOINT AND RAMP LOAD CLSP COOLING SETPOINT SELECT RL.S...
- Page 138 III. Unit Start-Up (cont) COMPONENT TEST USE ESCAPE/ARROW KEYS TO ILLUMINATE CONFIGURATION LED. PRESS ENTER TO DISPLAY ‘DISP’. PRESS ENTER AGAIN TO DISPLAY ‘TEST’ FOLLOWED BY ‘OFF’. PRESS ENTER TO STOP DISPLAY AT ‘OFF’ AND ENTER AGAIN SO ‘OFF’ DISPLAY FLASHES. ‘PASS’ AND ‘WORD’ WILL FLASH IF PASSWORD NEEDS TO BE ENTERED.
- Page 139 Service Test Mode and Sub-Mode Directory (cont) KEYPAD ITEM Completed SUB-MODE ITEM DISPLAY COMMENT ENTRY EXPANSION (Yes/No) CIRCUIT A COMPRESSOR TEST CC.A1 ON/OFF COMPRESSOR A1 RELAY ENTER DIG.P 0 to 15 COMP A1 UNLOAD PERCENT Digital Scroll option only CMPA CC.A2 ON/OFF COMPRESSOR A2 RELAY...
- Page 140 TECHNICIAN _____________________________ REPRESENTATIVE _____________________________ DATE ___________________________________ DATE ________________________________________ © Carrier Corporation 2014 Manufacturer reserves the right to discontinue, or change at any time, specifications or designs without notice and without incurring obligations. Catalog No. 04-53300132-01 Printed in U.S.A. Form 30RAP-5T...
Need help?
Do you have a question about the AQUASNAP 30RAP010-150 and is the answer not in the manual?
Questions and answers