Table of Contents
Advertisement
Advertisement
Table of Contents

Subscribe to Our Youtube Channel
Related Manuals for Ubiquiti EdgePoint S16


Summary of Contents for Ubiquiti EdgePoint S16
- Page 1 Intelligent WISP Control with FiberProtect ™ Model: EP-S16...
-
Page 3: Package Contents
Introduction Introduction Thank you for purchasing the Ubiquiti Networks® EdgePoint ™ Switch. This Quick Start Guide is designed to guide you through installation and includes the warranty terms. Package Contents EdgePoint Switch Wall-Mount Metal Straps Cable Sleeve Bracket (Qty. 2) -
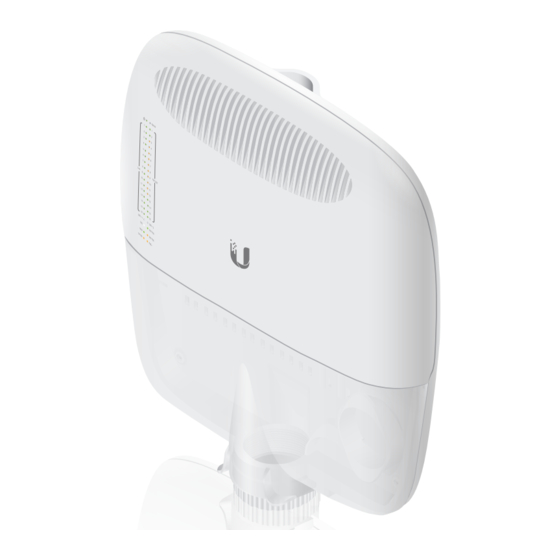
Page 4: Hardware Overview
EdgePoint EP-S16 Quick Start Guide ™ Hardware Overview Bottom Panel Button Reset Description Button There are two methods to reset the EP-S16 to factory defaults: Runtime Reset (Recommended) The EP-S16 should be running after bootup is complete, and the power LED is white. Press and hold the Reset button. - Page 5 Hardware Overview Bottom Panel Console Port Console Interface Description RJ45 serial console port for Command Line Interface (CLI) management. Use an RJ45-to-DB9, serial console cable, also known as a rollover cable, to connect the Console port to your computer. (If your computer does not have a DB9 port, then you will also need a DB9 adapter.) Then configure the following Console...
-
Page 6: Power Options
Bottom Panel DC Input Interface Description Terminal block connector uses auto-polarity detection and accepts +42 to +56VDC, 6A VDC In input (including the Ubiquiti Networks EdgePower , model EP-54V-150W) to power ™ the EdgePoint and passive PoE output. - Page 7 Hardware Overview Bottom Panel RJ45 Ports PoE In/1 5-16 PoE In/2 Description Interface RJ45 ports support 10/100/1000 Ethernet connections and have PoE input or output functionality: • PoE Input Accepts 54V, 1.5A PoE input to PoE In / 1-2 power the EdgePoint and PoE output. (54/24V •...
-
Page 8: Front Panel Leds
EdgePoint EP-S16 Quick Start Guide ™ Bottom Panel SFP Ports SFP+ 1-2 Description Interface SFP+ ports are hot-swappable and support SFP+ 1-2 1/10 Gbps fiber SFP/SFP+ modules. Note: For extreme temperatures, please use industrial-grade fiber SFP/SFP+ modules. Front Panel LEDs State Status White... - Page 9 Hardware Overview State Status No PoE Green 54V Passive No Link 10/100 Mbps Link Speed/ Amber Flashing Indicates Activity Link/Act 1000 Mbps (1 Gbps) Link Green Flashing Indicates Activity No PoE Amber 54V Passive, 4-Pair Output Green 24V Passive, 4-Pair No Link 10/100 Mbps Link Speed/ Amber...
-
Page 10: Back Panel
EdgePoint EP-S16 Quick Start Guide ™ Back Panel Lanyard Loop PicoStation Slot Pole-Mount Bracket Ground Bonding Point Lanyard Loop Used for temporary support during installation. PicoStation®M2HP Slot Used for mounting an optional PicoStationM2HP (not included) to the back of the EdgePoint. (You can use the PicoStationM2HP for wireless management of the EdgePoint.) Pole-Mount Bracket... - Page 11 Attaching the Cable Sleeve Attaching the Cable Sleeve 1. Insert and rotate the coupling to attach the Cable Sleeve to the EdgePoint. Note: You have two options for using a 2.0-inch NPT (National Pipe Thread) male conduit (not included): • Use the conduit instead of the Cable Sleeve. •...
-
Page 12: Hardware Installation
EdgePoint EP-S16 Quick Start Guide ™ Hardware Installation You can mount the EdgePoint on a pole or to a wall. Follow the appropriate instructions for your installation method. Pole-Mounting 1. Open the two Metal Straps and feed them through the mounting slots on the back of the EdgePoint. -
Page 13: Wall Mounting
Hardware Installation Wall-Mounting 1. Use M8 screws and anchors (not included) to attach the Wall-Mount Bracket to the wall. Note: The Wall-Mount Bracket must attach directly to a stud or other structurally stable surface. Pointing 2. Insert the tabs of the Wall-Mount Bracket into the slots of the EdgePoint. - Page 14 EdgePoint EP-S16 Quick Start Guide ™ 3. Use two M8x10 screws (not included) to attach the EdgePoint to the Wall-Mount Bracket.
- Page 15 Grounding the EdgePoint Grounding the EdgePoint Note: The ground wire should be as short as possible and no longer than one meter in length. 1. Remove the nut from the Ground Bonding Point located on the back of the EdgePoint. 2.
-
Page 16: Connecting Ethernet
EdgePoint EP-S16 Quick Start Guide ™ Connecting Ethernet 1. Use an S2 hex wrench to loosen the Screw and remove the port cover from the EdgePoint. Screw 2. Feed the Ethernet cables through the Cable Sleeve and connect them to ports in this range: 1-16. Note: PoE is disabled by default. - Page 17 Connecting Ethernet 3. You can create a strain relief for any Ethernet cable by feeding a cable tie (not included) through the tie slot under the cable. Then wrap the cable tie around the cable and tighten. 4. Connect the other ends of the Ethernet cables to your network devices.
- Page 18 EdgePoint EP-S16 Quick Start Guide ™ Using SFP Ports For information about compatible fiber SFP/SFP+ modules, visit: community.ubnt.com/edgemax To use an SFP+ port: 1. Plug a compatible fiber module into the SFP+ port. 2. Feed the fiber optic cable through the Cable Sleeve, and remove the cable jacket from the fiber optic cable.
- Page 19 Using SFP Ports 3. Separate the fiber optic strands and spool them around the strain relief reels in the direction of the arrows. Then connect a fiber optic strand to the fiber module. 4. To finish the strain relief: a. Feed a cable tie (not included) through the tie slot near the cable opening.
-
Page 20: Connecting To Power
EdgePoint EP-S16 Quick Start Guide ™ Connecting to Power Either the +42 to +56VDC input or PoE input is used at any one time. If both input types are connected, only the input type with the highest voltage will be used; the other can be used as a backup. - Page 21 Connecting to Power Connecting Power Using PoE The following instructions show port PoE In / 1; however, you can use port PoE In / 2 instead. Both PoE inputs can be used at the same time. If there is a voltage difference, the higher-voltage source will be used first.
- Page 22 EdgePoint EP-S16 Quick Start Guide ™ 5. When you are finished, replace the port cover and use an S2 hex wrench to tighten the Screw and secure the port cover. Mounting the PoE Adapter (Optional) 1. Remove the PoE Mounting Bracket from the adapter, place the bracket at the desired location, and mark the two holes.
-
Page 23: Accessing The Configuration Interface
Press enter (PC) or return (Mac). 2. The login screen will appear. Enter ubnt in the Username and Password fields. Read the Ubiquiti License Agreement, and check the box next to I agree to the terms of this License Agreement to accept it. - Page 24 Press enter (PC) or return (Mac). 4. The login screen will appear. Enter ubnt in the Username and Password fields. Read the Ubiquiti License Agreement, and check the box next to I agree to the terms of this License Agreement to accept it. Click Login.
- Page 25 Accessing the Configuration Interface 5. The EP-S16 Configuration Interface will appear. Go to System > Connectivity > IPv4. 6. Change the IP Address to a unique IP address or select DHCP on the IPv4 tab. Click Submit. Note: If you change the IP settings, then the session will be cut off, and you will need to reconnect to the EP-S16 using the new IP address.
-
Page 26: Configuring Poe Settings
EdgePoint EP-S16 Quick Start Guide ™ Configuring PoE Settings WARNING: Before activating 54V or 24V passive PoE, ensure that the connected device supports PoE and the supplied voltage. 1. Go to PoE > PoE Configuration. 2. Select the Ethernet port you want to configure. Then click Edit. 3. -
Page 27: Specifications
Specifications Specifications EP-S16 Dimensions 326.6 x 382.7 x 88.8 mm (12.86 x 15.07 x 3.50") With Wall-Mount 326.6 x 382.7 x 105.5 mm (12.86 x 15.07 x 4.15") Weight 3.4 kg (7.50 lb) With Wall-Mount 3.8 kg (8.38 lb) Max. Power Consumption 40W (Excludes PoE Output) Power Input (1) DC Terminal Block or (2) RJ45 (Ports 1 and 2) -
Page 28: Safety Notices
EdgePoint EP-S16 Quick Start Guide ™ Safety Notices Read, follow, and keep these instructions. Heed all warnings. Only use attachments/accessories specified by the manufacturer. WARNING: Do not use this product in location that can be submerged by water. WARNING: Avoid using this product during an electrical storm. -
Page 29: Limited Warranty
UBIQUITI NETWORKS, Inc (“UBIQUITI NETWORKS”) warrants that the product(s) furnished hereunder (the “Product(s)”) shall be free from defects in material and workmanship for a period of one (1) year from the date of shipment by UBIQUITI NETWORKS under normal use and operation. UBIQUITI NETWORKS’ sole and... -
Page 30: Limitation Of Liability
OF THE FOREGOING. In addition, UBIQUITI NETWORKS does not warrant that the operation of the Products will be error-free or that operation will be uninterrupted. In no event shall UBIQUITI NETWORKS be responsible for damages or claims of any nature or description relating to system performance, including coverage, buyer’s selection of products (including the Products) for buyer’s application and/or failure of... -
Page 31: Industry Canada
Compliance Compliance Changes or modifications not expressly approved by the party responsible for compliance could void the user’s authority to operate the equipment. This device complies with Part 15 of the FCC Rules. Operation is subject to the following two conditions: This device may not cause harmful interference, and This device must accept any interference received, including interference that may cause undesired operation. -
Page 32: Rohs/Weee Compliance Statement
EdgePoint EP-S16 Quick Start Guide ™ RoHS/WEEE Compliance Statement English European Directive 2012/19/EU requires that the equipment bearing this symbol on the product and/or its packaging must not be disposed of with unsorted municipal waste. The symbol indicates that this product should be disposed of separately from regular household waste streams. -
Page 33: Declaration Of Conformity
Vostro possesso, Vi invitiamo a contattare gli enti pubblici di competenza, il servizio di smaltimento rifiuti o il negozio nel quale avete acquistato il prodotto. Declaration of Conformity Česky UBIQUITI NETWORKS tímto prohlašuje, že toto UBIQUITI NETWORKS zařízení, je ve shod se základními požadavky a dalšími příslušnými ustanoveními směrnic 2014/30/ [Czech] EU, 2014/35/EU. -
Page 34: Online Resources
és más vonatkozó 2014/30/EU, 2014/35/EU [Hungarian] irányelvek rendelkezéseit. Íslenska Hér, UBIQUITI NETWORKS, því yfir að þetta UBIQUITI NETWORKS tæki er í samræmi við grunnkröfur og önnur viðeigandi ákvæði tilskipana 2014/30/ESB, 2014/35/ESB. [Icelandic] Italiano Con la presente, UBIQUITI NETWORKS, dichiara che questo dispositivo UBIQUITI NETWORKS, è... - Page 36 Ubiquiti U logo, the Ubiquiti beam logo, airFiber, airMAX, EdgeMAX, EdgePoint, EdgePower, EdgeSwitch, FiberProtect, PicoStation, and TOUGHCable are trademarks or registered trademarks of Ubiquiti Networks, Inc. in the United States and in other countries. All other trademarks are the property of their respective owners.
Need help?
Do you have a question about the EdgePoint S16 and is the answer not in the manual?
Questions and answers