Table of Contents
Advertisement
Quick Links
Publicly traded on NASDAQ
Symbol: NSSC
HARDWIRE
CONTROL PANEL/COMMUNICATOR
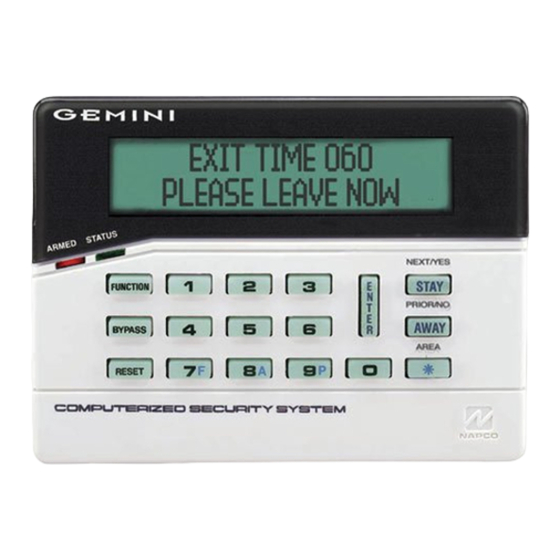
"Classic" GEM-RP1CAe2 Keypad and the "K Series" GEM-K1CA Keypad
G E M I N I
SYSTEM READY
01/01/06
A
1
B
4
C
7
C O M P UT E R I ZE D S E C U R I T Y SY S T E M
"Classic" GEM-RP1CAe2
Quick Start (for "Classic" GEM-RP1CAe2)
1. Refer to the wiring diagram, connect Siren, Aux. Power,
PGM Output, Remote Bus, Earth ground, Zone and Tele-
phone wiring.
NOTE:
(WI1093).
2. Connect AC power first and then the battery.
3. Configure the keypad (see page 60).
4. Access the Easy Menu Driven (Dealer Program) Mode:
Press
EEEEEE
Master Security Code
(on microshield)
Press NO (
) until "ACTIVATE PROGRAM Y/N" appears on the
g
keypad display.
Press YES (
) to Enter Dealer Program Mode. Go to page 5.
F
© NAPCO 2005
R
G E M - X 2 5 5
Programming the GEM-X255 Control Panel with the
12:00 AM
NEXT/YES
D
2
3
E
PRIOR/NO
F
5
6
AREA
8
9 0
G
See Installation Instructions
A
PROGRAMMING
INSTRUCTIONS
G E M I N I
C O M P UT E R I ZE D S E C U R I T Y S Y S T E M
Quick Start (for "K-Series" GEM-K1CA)
1. Refer to the wiring diagram, connect Siren, Aux. Power,
PGM Output, Remote Bus, Earth ground, Zone and Tele-
phone wiring.
(WI1093).
2. Connect AC power first and then the battery.
3. Configure the keypad (see page 60).
4. Access the Easy Menu Driven (Dealer Program) Mode:
Press
EEEEEE
Press NO (
Q
keypad display.
Press YES (
P
WIRELESS
SYSTEM READY
01/01/06
12:00 AM
U
R
1
2
3
B
4
5
6
C
7
8
9 0
"K Series" GEM-K1CA
NOTE:
See Installation Instructions
Master Security Code
(on microshield)
) until " ACTIVATE PROGRAM Y/N " appears on the
) to Enter Dealer Program Mode. Go to page 5.
NEXT/YES
P
PRIOR/NO
Q
AREA
G
R
WI1092E 10/05
Advertisement
Table of Contents

Related Manuals for NAPCO x255


Summary of Contents for NAPCO x255
- Page 1 HARDWIRE WIRELESS G E M - X 2 5 5 CONTROL PANEL/COMMUNICATOR Programming the GEM-X255 Control Panel with the "Classic" GEM-RP1CAe2 Keypad and the "K Series" GEM-K1CA Keypad G E M I N I G E M I N I...
-
Page 2: Important Note
VERSION 50 OR LATER. IMPORTANT NOTE This manual supports the keypad programming of the GEM-X255 control panel with the NAPCO "classic" GEM- RP1CAe2 keypad as well as the GEM-K1CA "K Series" keypad. The new "K Series" GEM-K1CA model offers the new STAY and AWAY buttons with simplified functionality, along with the new MENU and ENTER buttons. -
Page 3: Table Of Contents
GEM-X255 WIRING DIAGRAM .............. 72 SYSTEM DELAYS & TIMEOUTS (ADDRESS 2400, 2401, 2403- 2405, 4082 & 4083) ................20 KEYPAD SYSTEM CODES (ADDRESS 0490-0495 & 0500-0502) ..20 Refer to accompanying GEM-X255 Installation Instructions (WI1093) for installation information. NAPCO Security Systems GEM-X255 Programming Instructions... -
Page 4: System Programming Options
SYSTEM PROGRAMMING OPTIONS INTRODUCTION The GEM-X255 control panel may be programmed by various means, each of which will be covered in detail in the sections that follow. Keypad displays shown are for a GEM-K1CA (v.8), the recommended keypad for programming. -
Page 5: Easy Menu Driven Program Mode
Should it be necessary to create a new custom default program, (a) from the Dealer Program Mode, press the button to enter the Direct Address Program Mode; (b) access Location 4091 (Clear Program); (c) press the button and start over. NAPCO Security Systems GEM-X255 Programming Instructions... -
Page 6: Gem-Rp1Cae2/Gem-K1Ca Keypad Easy Program Menu
4. For example, if you enter 18, it will automatically convert this to 20 zones. Press save. Press the NEXT/YES button to proceed. The GEM-X255 is limited to a maximum of 96 zones and 15 keypads, which can be pro- Total Number of Zones in Area 2 (New Program Only) grammed in EZ Program Mode. -
Page 7: Chime 2 Zones In Area 1
Press the NEXT/YES button to enable Burg Output Chirp on KeyFob Arm / Disarm. Chirp? • Press the PRIOR/NO button to continue. NOTE: The Burg Output will chirp once on Keyfob Arm and twice on Keyfob Disarm. (Press YES or NO) NAPCO Security Systems GEM-X255 Programming Instructions... -
Page 8: Enable Sia Cp-01 Features
F 0 7 1 5 1 6 8 4 2 9 4 0 0 • Go to Central Phone # input screen and press: [*] [5] [0] [7] [1] [5] [1] [6] [8] [4] [2] [9] [4] [0] [0] NAPCO Security Systems GEM-X255 Programming Instructions... -
Page 9: Central Station Receiver 1 Account Number
Radionics Modem 2 only be entered in Direct Address Fast Programming. See CS Receiver Radionics Fast Ademco Point ID Silent Knight Fast Options. Ademco Express Radionics, DCI, Franklin Slow Pager Universal High Speed Radionics BFSK NAPCO Security Systems GEM-X255 Programming Instructions... -
Page 10: Enter User Codes
LEVEL 3 AMBUSH *Note: These entries are only Note: “Y” indicates option is enabled. available when address 3905 bit Note: “Y” indicates option is enabled. Note: “Y” indicates option is enabled. 7 is enabled. NAPCO Security Systems GEM-X255 Programming Instructions... - Page 11 CHANGING OR CANCELING A CODE: To change any code, merely program over the existing code as described above and press to save. Similarly, to cancel a code, blank out each number of the code and press to save to save. NAPCO Security Systems GEM-X255 Programming Instructions...
-
Page 12: Enter Proximity Card Users (Acm Use Only)
(•) NONE DATA ACCESS CODE ENTRIES LEVEL TYPE blank (•) NONE NONE NONE ARM/DISARM ARM/DISARM ARM/DISARM ARM ONLY ARM ONLY ARM ONLY Note: “Y” indicates option is enabled. Note: “Y” indicates option is enabled. NAPCO Security Systems GEM-X255 Programming Instructions... -
Page 13: Rf Transmitter Points
NEXT/YES button to proceed when all transmitters have been entered. • The GEM-X255 allows up to 255 RF Transmitter Points with the PCD-Windows Download software. NOTE: When programming the ID Code number, “0” through ”9” = 0 through 9; A = G0 ; B = G1 ; C = G2 ;... -
Page 14: Keyfob Transmitters As Zone Input Devices
Number using 3 and 6. Program new description as above. • NOTE: Zone Descriptions can only be entered through the GEM-RP1CAe2 Keypad or by using the Napco Quickloader Software. See Easy Menu Programming Worksheet for available zone description characters. Enter Date (Press to set cursor). -
Page 15: Direct Address Program Mode
Zones 2, 4, 5, and 7. (The "B" on the right indicates "Binary" format). DETERMINE THE DATA ENTRIES Referring to ZONE FEATURES in the Programming Worksheets that follow, the Exit/Entry Follower for Zones 1 through 8 are located at address 1218. NAPCO Security Systems GEM-X255 Programming Instructions... -
Page 16: Decimal Format Example
2. Answer NO to all questions until “ACTIVATE PROGRAM Y/N” is displayed; then press YES. NOTE: If you pass “ACTIVATE PROGRAM”, scroll backward using 3. Press to enter the Address Program Mode. Address "0000" will display. 4. Press to access Address 2406. The existing data will display and the cursor will 2406 NAPCO Security Systems GEM-X255 Programming Instructions... -
Page 17: Hexadecimal Format Example
0900. In the "Keypad Reporting Codes" table, the data entries needed to assign a code of "1B" are " " and " ". ADDRESS KEYPAD REPORTING 0900-0904 CODES LEFT ADDR RIGHT Ambush 0900 Panic 0901 Fire 0902 Auxiliary 0903 Tamper 0904 NAPCO Security Systems GEM-X255 Programming Instructions... -
Page 18: Programming Conventions Used In This Manual
It is recom- mended that the panel be uploaded to NAPCO's PCD-Windows software following any keypad programming and that the PCD-Windows's error-check feature be utilized to reduce the possibility of programming omissions or conflicts. -
Page 19: Programming Options & Worksheets
1. Enter delay/timeout in corresponding address locations above. Note: All entries for address 2407 are in quarter seconds (.25 seconds). Therefore, the default of 008 results in a 2 second timeout. 2. Press to save. NAPCO Security Systems GEM-X255 Programming Instructions... -
Page 20: System Delays & Timeouts (Address 2400, 2401, 2403- 2405, 4082 & 4083)
DEALER SECURITY CODE: Enter up to 6 digits to be used by the dealer to enter programming. 1. Enter in both left and right digits of address locations. 2. Valid entries are: 0-9. Note: If left blank, the Master Security Code must then be used to enter programming. NAPCO Security Systems GEM-X255 Programming Instructions... -
Page 21: Cs Receiver Format Options
* If both are selected, 1400Hz has priority over 2300Hz. RESERVED ** For NAPCO NetLink™ installations only: For each telephone num- ber desired, enable to allow the panel to report alarms via the NL-MOD accessory. See WI1242 for more information. -
Page 22: Cs Receiver Telephone Numbers
1. Enter digits in address locations above. 1. Valid entries are: 1 or 2. 2. Valid entries are: 0-9. Note: Download Security Code must match the code entered in the PCD-Windows Quickloader Download Software. NAPCO Security Systems GEM-X255 Programming Instructions... -
Page 23: Cs Subscriber Id Numbers (Address 0650-0787)
ADDRESS 0780-0783 ADDRESS 0784-0787 (DIGITS 1-4) (DIGITS 1-4) (DIGITS 1-4) (DIGITS 1-4) (DIGITS 1-4) 0768 0769 0770 0771 0772 0773 0774 0775 0776 0777 0778 0779 0780 0781 0782 0783 0784 0785 0786 0787 NAPCO Security Systems GEM-X255 Programming Instructions... -
Page 24: Cs Subscriber Id Numbers (Address 0790-0857)
NOTE: A is not permitted. Telemetry Trouble 0882 3. To disable a code leave boxes blank Telemetry Fail 0883 (•). NOTE: Dark shaded data value box shows option not available. 4. Press to save. NAPCO Security Systems GEM-X255 Programming Instructions... -
Page 25: Cs Reporting Codes (Address 0870-0904)
Disable Wait for Handshake * NOTE: If neither TouchTone Dialing nor TouchTone w/Rotary Backup is selected, then Handshake for Local Telemetry system defaults automatically to Rotary Dialing. Leave blank (•) to select Rotary Dialing. NAPCO Security Systems GEM-X255 Programming Instructions... -
Page 26: Cs Zone Reporting Codes (Address 0910-1005)
MODEM CODES determine the zone types reported for the following formats: SIA and ADEMCO Point ID. Hold up 1. Select the desired Modem Code for each zone from the table shown. Gas Alarm Heat Alarm 2. Press to save. Auxiliary Alarm 24 Hour Auxiliary NAPCO Security Systems GEM-X255 Programming Instructions... -
Page 27: Cs User Reporting Codes (Address 1030-1080)
User Opening Telco 3 1079 1080 User Closing Telco 3 NOTE: These opening events will report as the user number shown. Also, Keyfobs 1-16 (see Easy Menu Program Driven Mode) will report as Users 180-195, respectively. NAPCO Security Systems GEM-X255 Programming Instructions... -
Page 28: Global System Trouble Reporting Options (Address 1082-1116)
1. Select the desired option entering the option number (1-8) for each digit. 2. Enter corresponding option number in address location. NOTE: Dark shaded data value box shows option not available. Press to save. NAPCO Security Systems GEM-X255 Programming Instructions... -
Page 29: Area System Trouble Reporting Options (Address 1120-1157)
[Default = blank (•) blank (•) from address 1150-1157] Select the desired option entering the option number (1-8) for each digit. Enter corresponding option number in address location. NOTE: Dark shaded data value box shows option not available. Press to save. NAPCO Security Systems GEM-X255 Programming Instructions... -
Page 30: Area System Trouble Reporting Options (Address 1160-1197)
[Default = blank (•) blank (•) from address 1180-1187] Select the desired option entering the option number (1-8) for each digit. Enter corresponding option number in address location. NOTE: Dark shaded data value box shows option not available. Press to save. NAPCO Security Systems GEM-X255 Programming Instructions... -
Page 31: Zone Options / Zones 1-16 (Address 1200-1386)
See Zone Options on Page 37. Disable Auto-Reset on non-fire zones for SIA CP-01 installations. In UL installations, all Fire Zones must also be programmed for "Pulse Burg Output Cadence" (Address 2422, press 1 (bit zero)). NAPCO Security Systems GEM-X255 Programming Instructions... -
Page 32: Zone Options / Zones 17-32 (Address 1402-1586)
Disable Auto-Reset on non-fire zones for SIA CP-01 installations. In UL installations, all Fire Zones must also be programmed for "Pulse Burg Output Cadence" (Address 2422, press 1 (bit zero)). See Zone Options on Page 37. NAPCO Security Systems GEM-X255 Programming Instructions... -
Page 33: Zone Options / Zones 33-48 (Address 1602-1786)
Do not program if "K Series" keypads (with " " and " " buttons) are used in the system. Disable Auto-Reset on non-fire zones for SIA CP-01 installations. See Zone Options on Page 37. NAPCO Security Systems GEM-X255 Programming Instructions... -
Page 34: Zone Options / Zones 49-64 (Address 1802-1986)
Do not program if "K Series" keypads (with " " and " " buttons) are used in the system. Disable Auto-Reset on non-fire zones for SIA CP-01 installations. See Zone Options on Page 37. NAPCO Security Systems GEM-X255 Programming Instructions... -
Page 35: Zone Options / Zones 65-80 (Address 2002-2186)
Do not program if "K Series" keypads (with " " and " " buttons) are used in the system. Disable Auto-Reset on non-fire zones for SIA CP-01 installations. See Zone Options on Page 37. NAPCO Security Systems GEM-X255 Programming Instructions... -
Page 36: Zone Options / Zones 81-96 (Address 2202-2386)
Do not program if "K Series" keypads (with " " and " " buttons) are used in the system. Disable Auto-Reset on non-fire zones for SIA CP-01 installations. See Zone Options on Page 37. NAPCO Security Systems GEM-X255 Programming Instructions... -
Page 37: Zone Options / Zones 1-96 (Address 1200-2386)
Fire, Pulse Alarm Output and Fire Verification is enabled for the zone numbers entered in “FIRE ZONES” 2-Wire Smoke Detector is enabled for zone numbers entered in “2 WIRE FIRE ZONES” Note: See “Number of Zones & Keypads per Area” in Easy Menu Driven program Mode. NAPCO Security Systems GEM-X255 Programming Instructions... -
Page 38: System Options (Address 2415-2419)
Enable Local Alarm on First Zone “AND” Trip available. Press to save. Disable Keypad Function-Mode Download Disable Callback Download Disable Answering-Machine Download Disable Auto-Reset on Day Zone *Do not use on systems with "K Series " keypads. NAPCO Security Systems GEM-X255 Programming Instructions... -
Page 39: System Options (Address 2420-2422, 3874, 3905 & 3879- 3881)
2. Valid entries are: 1-9, 0 and B-F. Wireless Tamper 3881 [Default = blank (•) from address 3880-3881] NOTE: A is not permitted. 3. To disable a code leave boxes blank (•). 4. Press to save. NAPCO Security Systems GEM-X255 Programming Instructions... -
Page 40: System Options (Address 3882-3901, 3903-3905 & 4084)
OF DATA VALUES) OF DATA VALUES) Note: Right digit is RESERVED RESERVED blank (•) (not used). Enter data in left RESERVED digit only. Skip Automatic [Default = blank (•) blank (•)] Dial Tone Detect NAPCO Security Systems GEM-X255 Programming Instructions... -
Page 41: Keypad Options (Address 2425-2454)
* Note: For Remote Access Control only (no Arm/Disarm capability). Select the desired option entering the option number (1-8) for each digit. Enter corresponding option number in address location. Press to save. NOTE: Dark shaded data value box shows option not available. NAPCO Security Systems GEM-X255 Programming Instructions... -
Page 42: Acm Zone Options (Address 2740-2779)
Default ACM GLOBAL FLAGS: Enable Two-Swipe Arming Select the desired option entering the option number Enable NAPCO Proprietary Access Format (1-8) for each digit. Enable Facility Code Enter corresponding option number in address loca- Enable Access Logging into Burg Log tion. -
Page 43: Acm Door Area Options (Address 2784-2791)
ACM 3 – Door 1 – 4076 ACM 3 – Door 2 – 4077 ACM 4 – Door 1 – 4078 ACM 4 – Door 2 – 4079 [Default = blank (•) blank (•) from address 4072-4079] NAPCO Security Systems GEM-X255 Programming Instructions... -
Page 44: Keypad Home Area / Acm Door #1 Area (Hex) (Address 2425-2439)
2429 2430 2431 2432 2433 2434 2435 2436 2437 2438 2439 [Default = blank (•) 1 for address 2425 blank (•) blank (•) for addresses 2426-2439] * Note: First device should be a keypad. NAPCO Security Systems GEM-X255 Programming Instructions... -
Page 45: System Options (Address 2423)
EMER GEN CY FREE AC CESS (AD DRESS 40 8 0) ENABLE ACM OPTION: Select the Emergency Free Access ADDRESS 4080 Zone Number (1-255) and enter corre- Emergency Free Access sponding address location at right. Zone Number Press to save. [Default = 000] NAPCO Security Systems GEM-X255 Programming Instructions... -
Page 46: User Area Options (Address 2455-2550)
Area number (1-8) in the above table. Enter the corresponding Area number in each the address location, in Binary (Bit) Format. Press to save. NOTE: See Direct Address Programming Example on page 15. NAPCO Security Systems GEM-X255 Programming Instructions... -
Page 47: Ezm Group Options (Address 2555-2576)
1. Select the desired group number. 2. Enter the corresponding Area number in each the address location, in Binary (Bit) Format. NOTE: See Direct Address Programming Example on page 15. 3. Press to save. NAPCO Security Systems GEM-X255 Programming Instructions... -
Page 48: Area Arming Options (Address 2650-2657)
Enable Keypad 8 REMOTE ACCESS LOGGING: Enable logging of every keypad access event. Select the desired option entering the option number (1-8) for each digit. Enter corresponding option number in address location. Press to save. NAPCO Security Systems GEM-X255 Programming Instructions... -
Page 49: Area Output Control Options (Address 2700-2739)
AREA OUTPUT TURNS OFF UPON DISARM: Select options for any of the 5 Outputs per area when disarming a particular area. 1. Select the desired option. 2. Enter the corresponding Area number in each the address location, in Binary (Bit) Format. NOTE: See Direct Address Programming Example on page 15. 3. Press to save. NAPCO Security Systems GEM-X255 Programming Instructions... -
Page 50: Rf Receivers & Supervisory Timer Options
NOTE: These timers apply only to Supervised RF blank (•) 320 min. 700 min. Transmitters (see RF Transmitters in Easy Menu Driven Mode 330 min. Programming). 340 min. 350 min. 2550 min. = 42 Hr., 30 min. 360 min. 370 min. NAPCO Security Systems GEM-X255 Programming Instructions... -
Page 51: External Relay Control / Relays
(RELAY/entry 38) (RELAY/entry 39) ADDRESS 3814 & 2944-2947 ADDRESS 3815 & 2948-2951 ADDRESS 3816 & 2952-2955 3814 2944 2945 2946 2947 3815 2948 2949 2950 2951 3816 2952 2953 2954 2955 (•) (•) (•) NAPCO Security Systems GEM-X255 Programming Instructions... -
Page 52: External Relay Control / Relays
(RELAY/entry 77) (RELAY/entry 78) ADDRESS 3853 & 3100-3103 ADDRESS 3854 & 3104-3107 ADDRESS 3855 & 3108-3111 3853 3100 3101 3102 3103 3854 3104 3105 3106 3107 3855 3108 3109 3110 3111 (•) (•) (•) NAPCO Security Systems GEM-X255 Programming Instructions... -
Page 53: External Relay Control / Relays
5A. Select Alarm Type and Timeout Type from Table 5A (see page 56); enter in corresponding address location (left digit). NOTE: Select Timeout from Step 3. 5B. Select Activation from from Table 5B (see page 56); enter in corresponding address location (right digit). NAPCO Security Systems GEM-X255 Programming Instructions... - Page 54 Address 3778 = [blank (•) blank (•)] and Address 3779 = [1C]. For a desired relay not listed: 3 Quotient Left Digit A. Choose a desired relay, ex: 60 Continued B. Divide it by 16 16 60 C Remainder Right Digit NAPCO Security Systems GEM-X255 Programming Instructions...
- Page 55 Zone 48 Area 5 Keypad Fire Continued Zone 49 Area 5 Keypad Medical Zone 50 Area 5 Fail to Open Zone 51 Area 5 Fail to Close Zone 52 blank (•) Area 6 Keypad Ambush NAPCO Security Systems GEM-X255 Programming Instructions...
-
Page 56: Number Of Relay Board Modules (Address 3777)
1. Select the number of relay modules from the table blank (•) None [Default = blank (•) blank (•)] shown. 2. Enter in corresponding right digit address location shown (left digit is not used). NAPCO Security Systems GEM-X255 Programming Instructions... -
Page 57: System Reset Options (Address 4091-4093)
NOTE: For ease of programming, it is recommended that a GEM K1CA (or GEM-RP1CAe2) be used as Keypad #1. A new GEM- K1CA and a new GEM-RP1CAe2 are automatically configured as Keypad #1. See Keypad Configuration Mode. Press the button to silence the sounder and exit the User Program Mode. NAPCO Security Systems GEM-X255 Programming Instructions... -
Page 58: Accessing User Program Mode
Enter the new User Code using the number buttons (0-9). If an old code is displayed, program over it. To erase the digit at the cursor, press button. Press the button to save the code in memory. Repeat this procedure for each user. To proceed to Zone-Description programming, press the NEXT button or the PRIOR but- ton. NAPCO Security Systems GEM-X255 Programming Instructions... -
Page 59: Zone Descriptions
(Direct Entry) NOTE: To enter the date and time, GEM-RP1CAe2/GEM-K1CA keypad (version 6 or greater) must be used and “Enable Keypad Time/Date Display” (Address 3874) must be enabled. NAPCO Security Systems GEM-X255 Programming Instructions... -
Page 60: Keypad Configuration Mode
Keypad No. 1 may be used for programming. KEYPAD INSTALLATION Two types of keypads may be used with the GEM-X255: the GEM-RP1CAe2/GEM-K1CA. Each must be assigned an address num- ber (1–15) and each requires its own configuration procedure (see CONFIGURING THE KEYPADS, which follows, and DIRECT AD- DRESS KEYPAD AREA OPTIONS). - Page 61 (the display will loop back through selections, for changes) or press the 01 OUT OF SYSTEM button to exit the Keypad Configuration Mode (display will read “ ”). 4. Replace Jumper JP1 across Pins 1–2 (top two). NAPCO Security Systems GEM-X255 Programming Instructions...
- Page 62 Page 62 WI1092E 10/05 NOTES NAPCO Security Systems GEM-X255 Programming Instructions...
-
Page 63: Alphabetical Index
CS ZONE REPORTING CODES, Address 0910-1005 .... 26 Address MODE DISPLAYS ..........15 CUSTOMIZING A DEFAULT PROGRAM ........5 Burg. Alarm Output (Zone Option) ........31–36 Burg. Alarm Output Timeout, Address 2403 ......20 NAPCO Security Systems GEM-X255 Programming Instructions... - Page 64 2419 ..................38 Address MODE DISPLAYS ............16 Enable Manager’s Mode Outside Overview, Address 2418 ..38 Digital Dialer Rpt Enter/Exit Test Mode, Address 3905 ....39 Enable Napco Proprietary Access Format ........42 DIRECT Address OVERVIEW ............15 Enable No EOLR Zones Direct Address Program Mode Easy Program Menu ..............7...
- Page 65 MODEM CODES .................26 Easy Program Menu ..............6 Modem IIe ..................9 Function Mode ................4 NAPCO Address Information ............2 GEM-X255 WIRING DIAGRAM ..........72 Napco PCI2000/3000 computer interface ........4 General Programming Steps ............18 Never Arm (Zone Option) ............. 31–36 GLOBAL SYSTEM TROUBLE reporting OPTIONS, No EOL Resistor (Zone Option) ...........
- Page 66 ZONE OPTIONS / ZONES 81-96, Address 2202-2386 ....36 Easy Program Menu ..............6 ZONE REPORT CODE OPTIONS ..........26 Touch-tone Dialing Only, Address 1027 ........25 Zone Response ................61 Touch-tone Dialing w/Rotary Backup, Address 1027 ....25 Transmit “402” Opening/Closing Code, Address 1027 ....25 NAPCO Security Systems GEM-X255 Programming Instructions...
-
Page 67: Address Number Index
Callback Telephone No. Select 1023 Auto Download ID No. 1024-1027 CS AREA & SYSTEM REPORTING OPTIONS 1027 Backup Report on Telco 2 1027 Cancel Next Test Timer on Any Report 1027 CS System Report Options NAPCO Security Systems GEM-X255 Programming Instructions... - Page 68 2417 Status Report (Auto-Byp. Zones on Clos.) 2418 Access Control (Panel) on Aux. Output 2418 Auto Bell Test on Arming 2418 Auto Reset After Burg. Output Timeout 2418 Enable Burg. Output Warning on Entry NAPCO Security Systems GEM-X255 Programming Instructions...
- Page 69 Enable Smoke Detector Dirty Trouble 2422 Pulse Burg Output Cadence 2422 Supervised Alarm Output 2422 Wireless Smoke Low Battery Resound 2423 Enable ACM Access 2423 System Options 2423 Enable TCP/IP Communications 2423 TCP/IP Panel/Site Initiated Functions NAPCO Security Systems GEM-X255 Programming Instructions...
- Page 70 Telephone Dialing Prefix 3882-3901 SYSTEM OPTIONS 3902 CS Telco 3 Report Delay 3903 Pager Format: Re-Sends Of First Report 3903-3905 SYSTEM OPTIONS 3904 Pager Format: Maximum Pages Per Session 3905 Digital Dialer Rpt Enter/Exit Test Mode NAPCO Security Systems GEM-X255 Programming Instructions...
- Page 71 EMERGENCY FREE ACCESS 4082 Report Cancel Window 4083 Auto Disarm Rearm Delay 4084 SYSTEM OPTIONS 4084 Skip Automatic Dial Tone Detect 4088 Sensor Watch Delay (Hr.) 4089 Answer on Ring Number 4091-4093 SYSTEM RESET OPTIONS NAPCO Security Systems GEM-X255 Programming Instructions...
-
Page 72: Gem-X255 Wiring Diagram
Page 72 WI1092E 10/05 GEM-X255 WIRING DIAGRAM NAPCO Security Systems GEM-X255 Programming Instructions...
Need help?
Do you have a question about the x255 and is the answer not in the manual?
Questions and answers