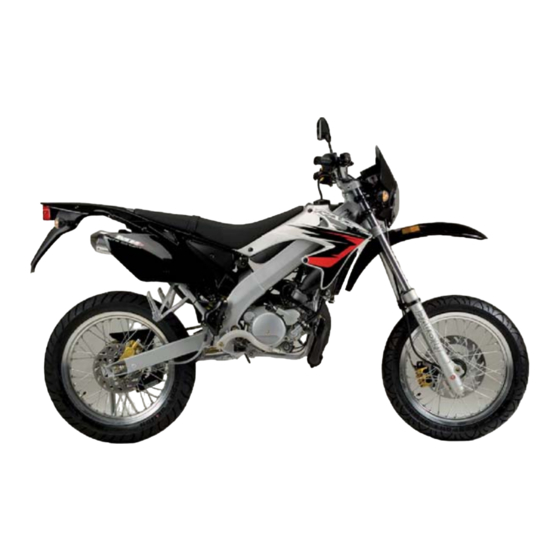

Summary of Contents for MH RYZ 50 Cross
- Page 1 SERVICE MANUAL REF. OF PUBLICATION: 0634111000004 USE THIS SERVICE MANUAL WITH THE RELATED MANUALS INDICATED IN THE FOREWORD TO THIS MANUAL EDITION 2007-10...
- Page 2 IMPORTANT Read this manual and follow the instructions carefully. Especia- lly important information is indicated with the words WARNING, CAUTION and N.B., which have quite precise meanings. Pay special attention to the instructions that follow these titles. WARNING: Contains a potential danger that may cause injury or even death.
- Page 3 This manual describes the procedures for the diagnosis, maintenance, adjustments, basic service work, changing of parts and the dismantling and assembling of the main parts. Model applicable: RYZ 50 CROSS (C) and RYZ 50 SUPERMOTARD (SM) with the following VIN numbers and later ones: VTVDV0C00XXXXXXXX ~...
- Page 4 NOTES:...
- Page 5 CONTENTS OF SECTION SECTION GENERAL INFORMATION SPECIFICATIONS MAINTENANCE CHASSIS ENGINE ELECTRICAL SYSTEM TROUBLESHOOTING...
- Page 6 NOTES:...
- Page 7 GENERAL INFORMATION 1-1 SECTION 1 GENERAL INFORMATION CONTENTS USING THIS MANUAL ................................... 1-2 IDENTIFICATION ................................... 1-3 Machine identifi cation ................................1-3 Engine identifi cation ................................1-3...
-
Page 8: Using This Manual
1-1 GENERAL INFORMATION USING THIS MANUAL At the beginning of this manual there is a GENERAL CON- TENTS LIST, enabling the SECTION containing the informa- tion needed for the service to be found quickly. In addition, each section has its own contents list on its fi rst page with a description of its main points. -
Page 9: Identification
GENERAL INFORMATION 1-1 IDENTIFICATION IDENTIFICATION OF THE MACHINE The machine is marked with a plate (1), situated on the right- hand side of the chassis. This plate has the VIN (VEHICLE IDENTIFICATION NUMBER) engraved on it. The VIN (VEHICLE IDENTIFICATION NUMBER) is engraved on the right-hand chassis beam (2). - Page 10 NOTES:...
- Page 11 SPECIFICATIONS 2-2 SECCION 2 SPECIFICATIONS CONTENTS GENERAL SPECIFICATIONS ................................ 2-2 ENGINE SPECIFICATIONS ................................2-2 CHASSIS SPECIFICATIONS ................................2-4 TIGHTENING TORQUES ................................2-5...
-
Page 12: General Specifications
2-2 SPECIFICATIONS GENERAL SPECIFICATIONS ELEMENT SPECIFICATION Model code RYZ TL RYZ SM RYZ UB DIMENSIONS Total length RYZ TL: 2.095 mm RYZ SM y UB: 1.980 mm Total width 820 mm RYZ TL: 1.210 mm Height without rear-view mirror RYZ SM: 1.170 mm RYZ UB: 1.150 mm Distance between axles 820 mm... - Page 13 SPECIFICATIONS 2-2 ELEMENT ESPECIFICACIÓN LUBRICATION Separate lubrication by a variable rate piston pump, synchronised Type with the throttle and driven by geared take-off from the crankshaft. The oil is injected directly into the carburettor. Recommended oil Semi-synthetic Motul 510 2St special “anti-smoke”...
-
Page 14: Chassis Specifications
2-2 SPECIFICATIONS CHASSIS SPECIFICATIONS ELEMENT SPECIFICATION WHEELS Front wheel RYZ TL: 1,85”X21” RYZ SM: 2,5”X17” RYZ UB: 1,85”X16” Front tyre RYZ TL: 90/90X21” RYZ SM: 100/80X17” RYZ UB: 90/90X16” Front pressure RYZ TL: 1,9 ± 1 bar RYZ SM: 2.0 ± 1bar RYZ UB: 2.3 ±... - Page 15 SPECIFICATIONS 2-2 ELEMENT SPECIFICATION REAR SUSPENSION Variable fl exibility swinging arm, combined with a 44 mm central Type of suspension single hydraulic shock absorber Travel of central single hydraulic shock absorber 44 mm STEERING Type Steering column mounted on ball bearings...
-
Page 16: Tightening Torques
2-2 SPECIFICATIONS TIGHTENING TORQUES ELEMENT TIGHTENING TORQUE BODY Side covers 0,1 daN·m (1 N·m) Front mudguard 0,1 daN·m (1 N·m) Rear mudguard 0,8/0,1 daN·m (8/1 N·m) Skirting 0,8/0,1 daN·m (8/1 N·m) CHASSIS 4,5 daN·m (45 N·m) Front wheel shaft Rear wheel shaft 1,2 daN·m (12 N·m) Rear wheel shaft nut 6,5 daN·m (65 N·m) -
Page 17: Table Of Contents
MAINTENANCE AND COMMISSIONING 3-1 SECTION 3 MAINTENANCE AND COMMISSIONING CONTENTS INTRODUCTION....................................3-2 MAINTENANCE PLAN ................................. 3-2 Checking ....................................3-2 Renewing ....................................3-2 Checking and decarbonising ..............................3-3 Checking and greasing ................................. 3-3 Checking and adjusting ................................. 3-3 Cleaning and adjusting ................................3-3 COMMISSIONING..................................... -
Page 18: Introduction
3-2 MAINTENANCE AND COMMISSIONING INTRODUCTION This section includes all the information needed to perform the recommended maintenance and commissioning operations. Obser- ving these procedures will ensure the machine functions more reliably and has a longer useful life, while reducing the need for costly repair work. -
Page 19: Checking And Decarbonising
MAINTENANCE AND COMMISSIONING 3-3 CHECKING AND DECARBONISING 500 KM MAINTENANCE OPERATIONS EVERY 3.000 KM EVERY 6.000 KM OR MONTHS Every 1.500 km Every 3.000 km REINFORCED MAINTENANCE Piston (1) Every 10.000 km Cylinder head (1) Every 10.000 km Exhaust port (1) Every 10.000 km (1) The need to decarbonise can be estimated by checking the quantity of carbonisation present in the cylinder exhaust outlet. -
Page 20: Commissioning
3-4 MAINTENANCE AND COMMISSIONING COMMISSIONING BATTERY PREPARATION (EXCEPT MAIN- TENANCE-FREE BATTERIES) Remove the battery Remove the six fi ller plugs and the air vent plug. Replenish with electrolyte up to the “UPPER LEVEL” mark. Electrolyte: (35% sulphuric acid = 1.28 g/cm) Allow the battery to stand for approximately half an hour. -
Page 21: Checks Before Delivery To Customer
MAINTENANCE AND COMMISSIONING 3-5 CHECKS BEFORE DELIVERY TO CUSTOMER Check the tightness of the wheel nuts. Front wheel tightness torque: 4.5 daN•m (5 N•m) Rear wheel tightness torque: 6.5 daN•m (75 N•m) Check the tightness of all nuts and bolts. Check the adjustment and effectiveness of the brakes. -
Page 22: Tightening Torque Specifications
N·m Front wheel shaft bolt Rear wheel shaft nut SERVICING MATERIALS REQUIRED MATERIALS RECOMMENDED MH PRODUCT Engine oil Motul 510 semi-synthetic 2-stroke oil Filling the engine oil tank Electrolyte 35% sulphuric acid = 1.28 g/cm³ Topping up the battery during maintenance... - Page 23 CHASSIS 4-1 SECTION 4 CHASSIS CONTENTS SERVICING THE MACHINE ................................4-2 FRONT WHEEL ....................................4-2 Removal ....................................4-2 Assembly ..................................... 4-2 Operations that can be performed with the front wheel removed ..................4-2 FRONT BRAKES ................................... 4-3 Dismantling the front brake calliper and brake pads ......................4-3 FORKS ......................................
-
Page 24: Servicing The Machine
4-2 CHASSIS SERVICING THE MACHINE FRONT WHEEL CAUTION: •Place the machine on a fl at surface. • Stand the machine on a suitable support, in such a way that the front wheel is off the ground. • Do not activate the brake lever during the removal and refi... -
Page 25: Front Brake
CHASSIS 4-3 • Changing the brake disk. N.B.: In refi tting, respect the order of assembly: mark the outer side and fi t the six self-locking bolts. • Changing the wheel bearings. • Changing the speedometer take-off. FRONT BRAKE N.B.: The brake pads are identical;... -
Page 26: Removal
4-4 CHASSIS REMOVAL Remove the headlight housing assembly. Remove the front mudguard. Disconnect the headlight and the turn indicators. Remove the two bolts from the brake calliper, and remove it without disconnecting it. Unscrew the speedometer cable from the speedometer take- off. -
Page 27: Sealing Rings
CHASSIS 4-5 SEALING RINGS REMOVAL Remove the forks. See “Dismantling the forks” in this section. Remove the fork tube plug (1). Remove the spacer (2) and the spring (3). Upturn the fork tube to empty the hydraulic fl uid into a container. N.B.: Slide the tube in and out of the fork arm several times to empty out the fl... -
Page 28: Assembly
4-6 CHASSIS ASSEMBLY WARNING: Check the condition of the fork tube: there should not be any signs of corrosion or impacts, and should be perfec- tly straight and clean. Fit a new seal (1), lightly lubricated, using a seal pusher. Refi... -
Page 29: Rear Wheel
CHASSIS 4-7 REAR WHEEL CAUTION: •Place the machine on a fl at surface. •Stand the machine on a suitable support, in such a way that the rear wheel is off the ground. • Do not activate the brake pedal during the dismantling and refi... -
Page 30: Operations That Can Be Performed With The Rear Wheel Removed
4-8 CHASSIS OPERATIONS THAT CAN BE PERFORMED WITH THE REAR WHEEL REMOVED • Changing the tyre, the inner tube or valve. N.B.: Identify the roll direction of the tyre before removing it, and refi t in the same direction (Supermotard only) •... -
Page 31: Seat
CHASSIS 4-9 Check the chain tension. CAUTION: A chain that is too tight causes rapid wear of the gearbox output shaft, the rear wheel bearings, the chain and the sprockets. SEAT REMOVAL Remove the plug (1) on the inside of the rear skirting. Remove the seat nut through the hole in the rear skirting, and pull the seat (2) backwards to separate it from the chassis. -
Page 32: Shock Absorber
4-10 CHASSIS SHOCK ABSORBER REMOVAL CAUTION: Stand the machine on blocks under the chassis to ensure that the rear wheel is off the ground. Remove the seat – see “Removing the seat” in this section. Remove the nut, the washer and the bottom securing shaft from the shock absorber (1). -
Page 33: Removing The Air Fi Lter Box
CHASSIS 4-11 REMOVING THE AIR FILTER BOX Remove the seat – see “Removing the seat” in this section. Remove the side fairings. Remove the shock absorber – see “Removing the shock ab- sorber” in this section. Remove the two bottom securing bolts (1) on the skirting. Remove the air intake connector (2) from the air fi... -
Page 34: Carburettor
4-12 CHASSIS Remove the bottom securing bolt (3) on the rear silencer. Unscrew the top securing bolt (4) on the rear silencer. Separate the silencer from the exhaust pipe. Remove the exhaust pipe. CARBURETTOR REMOVAL Remove the seat – see “Removing the seat” in this section. Remove the fuel tank –... -
Page 35: Adjustment
CHASSIS 4-13 ADJUSTMENT • Idle: screw (7). • Mixture: screw (8). DISMANTLING THE VALVES Remove the carburettor – see “Removing the carburettor” in this section. Remove the four bolts on the inlet connector, two of them (1) using the 4mm male safety spanner. Special tool –... -
Page 36: Removing The Frame
4-14 CHASSIS Disconnect: a) The neutral switch. b) The yellow magneto output cable. c) The starter connector. d) The temperature sensor. e) The ignition unit. f) The earth cables on the ignition module. g) The supply pipe on the oil pump. h) The petrol and choke valves. -
Page 37: Assembly
Front wheel shaft tightness torque: Fork tube drain bolt Fork tube plug SERVICING MATERIALS REQUIRED MATERIALS RECOMMENDED MH PRODUCT Air fi lter oil Motul Air Filter Oil Adhesive oil for the air fi lter sponge Forks hydraulic fl uid SAE 15 (Esso Univis N N46) type... - Page 38 NOTES:...
- Page 39 ENGINE 5-1 SECTION 5 ENGINE CONTENTS OPERATIONS THAT CAN BE CARRIED OUT ON THE ENGINE WITHOUT REMOVING IT ............ 5-3 Removing the cylinder head ............................... 5-3 Dismantling the cylinder-piston assembly ........................... 5-3 ENGINE ASSEMBLY ..................................5-4 Removal ....................................5-4 Installation.................................... 5-5 DISMANTLING THE ENGINE ................................
- Page 40 5-2 ENGINE TIGHTENING TORQUE SPECIFICATIONS ........................... 5-29 SERVICING MATERIALS REQUIRED ............................5-29 SPECIAL TOOLS ................................... 5-30...
-
Page 41: Removing The Cylinder Head
ENGINE 5-3 OPERATIONS THAT CAN BE CARRIED OUT ON THE ENGINE N.B.: The following operations do not require the engine to be re- moved. REMOVING THE CYLINDER HEAD Remove the seat – see “Removing the seat” in Section 4 “CHASSIS”. Remove the fuel tank –... -
Page 42: Engine Assembly
5-4 ENGINE Unscrew the side securing bolts on the engine support. Remove the engine securing bolt (1) and push the support forwards. N.B.: To remove the cylinder head, the cylinder and the piston, see corresponding chapter in this section. ENGINE ASSEMBLY REMOVAL Remove the seat –... -
Page 43: Installation
ENGINE 5-5 Loosen the three engine securing points (2), without removing the top rear securing nut. Loosen the two securing points (3) on the chassis strengthe- ners (4). Remove the front support securing shaft. Lower the two chassis strengtheners. Loosen the two side securing bolts (5) on the front engine su- pport (without removing the nuts). -
Page 44: Dismantling The Engine
5-6 ENGINE Hang the engine on the top rear securing shaft (2). Insert the engine securing shaft into the front support (3) and the two chassis strengtheners (4). Insert the rear bottom securing shaft (5). DISMANTLING THE ENGINE MOUNTING THE ENGINE ON ITS SUPPORT Mount the engine on the engine support mounting. -
Page 45: Removing The Armature
ENGINE 5-7 Screw the magneto extractor onto the rotor. Special tool: Ref. 2533002000198 Immobilise the magneto extractor and turn the pushing bolt un- til the rotor comes free. REMOVING THE ARMATURE Remove the three securing bolts (1) from the stator plate and armature assembly (2). Remove the stator plate and armature assembly. -
Page 46: Removing The Clutch Cover
5-8 ENGINE REMOVING THE CLUTCH COVER Remove the kick-start lever securing bolt (where fi tted). Apply the kick-start lever slightly and hold it in position. Loosen the stop (1) on the starter shaft and release the kick- start lever to slacken the spring. Remove the kick-start lever. - Page 47 ENGINE 5-9 Remove the assembly (3) consisting of four friction disks and three smooth disks. Remove the primary shaft: the pusher (4), the ball (5) and the push rod (6). Remove the clutch control lever (7) with its spring (8) and its washer (9).
-
Page 48: Removing The Crankshaft-Connecting Rod Gears And Balance Shaft
5-10 ENGINE REMOVING CRANKSHAFT-CONNECTING ROD GEARS AND BALANCE SHAFT Immobilise the balance shaft with a bolt (a) inserted in the threaded perforations. Turn the gear (1) on the balance shaft so that the bolt rests against a crankcase rib. Remove the crankshaft-connecting rod nut (2). Remove the balance shaft nut (3). -
Page 49: Removing The Cylinder Head/Cylinder Assembly
ENGINE 5-11 REMOVING THE CYLINDER HEAD/CYLINDER ASSEMBLY Remove the spark plug. In the order indicated, loosen the four securing nuts on the cylinder head/cylinder assembly in two or three steps Remove the four nuts and washers. Remove the cylinder head and the two O-rings. Remove the cylinder and the cylinder gasket. -
Page 50: Separating The Engine Crankcases
5-12 ENGINE SEPARATING THE ENGINE CRANKCASES Remove the three securing bolts on the left-hand crankcase. Fit the protective bush onto the crankshaft-connecting rod. Special tool (D) Fit the crankcase opening tool supplied with the plate onto the left-hand crankcase. Special tool (E) Special tool (F) Fit the assembly onto the crankcase with the four bolts. - Page 51 ENGINE 5-13 DISMANTLING THE GEARBOX AND THE SELECTION SYSTEM Position the selector drum to guide the Mecanindus pin against the secondary drive shaft selector fork shaft. . Remove the selection shaft (1) fi tted with its two friction was- hers. Remove the secondary drive shaft selector forks shaft (2).
- Page 52 5-14 ENGINE Remove together the secondary drive shaft assembly and the primary drive shaft fi tted with its selector fork. Remove the friction washer (7) from the secondary drive shaft, in the event of it being stuck with oil onto the right-hand crank- case.
-
Page 53: Removing The Balance Shaft
ENGINE 5-15 WARNING: When renewing a gear, renew the corresponding gear on the other drive shaft. The rubber rings must be renewed after every dismant- ling. REMOVING THE BALANCE SHAFT Remove the balance shaft (1) using a plastic mallet if neces- sary. - Page 54 5-16 ENGINE The eccentricity values measured at the ends of the cranks- haft-connecting rod must not exceed 4/100 mm, and must be measure at: - 50 mm from the transmission side - 50 mm from the magneto side Maximum eccentricity: 4/100 mm (0.4 mm).
-
Page 55: Fitting Specific Elements In The Engine
ENGINE 5-17 FITTING SPECIFIC ELEMENTS IN THE ENGINE FITTING THE CRANKSHAFT-CONNECTING ROD BEARINGS CAUTION: The crankshaft-connecting rod bearings and seals must be renewed after each opening of the engine crankcase. N.B.: On opening the crankcases, if the bearings remain fitted to the crankshaft-connecting rod, use a bearing remover (1). -
Page 56: Fitting The Output Seal
5-18 ENGINE FITTING THE OUTPUT SEAL Using the pusher tool, fi t the gearbox output seal. Special tool (G) FITTING THE SELECTOR SHAFT SEAL Using the pusher tool, fi t the selector shaft seal. Special tool (H) FITTING THE CLUTCH LEVER SEAL Using the pusher tool, fi... -
Page 57: Fitting The Gearbox
ENGINE 5-19 FITTING THE GEARBOX Lightly grease and fi t the friction washer (1) onto the right-hand crankcase secondary drive shaft needle bearing assembly. Fit the push spring and fi t the locking ball (2) lightly greased into its housing. Fit together the secondary drive shaft assembly and the primary drive shaft fi... -
Page 58: Fitting The Left-Hand Half-Crankcase
5-20 ENGINE Fit the selector fork (5) on the 6th speed gear. Position the selector fork guide (4) in the lower slot of the se- lector drum. Position the selector fork guide (5) in the upper slot of the se- lector drum. -
Page 59: Checking The Piston
ENGINE 5-21 Insert the support tool supplied with the plate on the stud Special tool (E) Special tool (F) Centre the assembly on the crankcase with the four bolts. (5). Fit the centring tool on the support tool. Special tool (K) Screw the stud nut down until the crankcases close completely with the screw-plate (1). -
Page 60: Fitting The Cylinder
5-22 ENGINE REFITTING THE PISTON Fit the needle bearing assembly (1) in the connecting rod small end, after lubricating it with 2-stroke oil. Fit the piston on the connecting rod, with the front positioning cams of the piston rings towards the intake side. Fit the gudgeon pin. -
Page 61: Fitting The Cylinder Head
ENGINE 5-23 FITTING THE CYLINDER HEAD Check that the O-ring housings are perfectly clean. Fit new O-rings (1) on the cylinder head. Fit the cylinder head onto the cylinder. Tighten the 4 cylinder head securing nuts diagonally in 2 or 3 stages. -
Page 62: Fitting The Crankshaft-Connecting Rod Gears And The Balance Shaft
5-24 ENGINE FITTING THE CRANKSHAFT-CONNECTING ROD GEARS AND THE BALANCE SHAFT Fit the key (1) into its housing on the crankshaft-connecting rod. Fit the key (2) into its housing on the balance shaft. Fit the crankshaft-connecting rod (3), with the marked tooth facing outwards. - Page 63 ENGINE 5-25 Immobilise the clutch dog with the special tool. Special tool (C) Tighten the nut. Nut tightness torque: 7.5 daN•m (75 N•m) Fold over the clutch nut tab washer. Fit the clutch control lever with its spring and its washer. Fit the pusher (8), the ball (9) and the push rod (10) onto the primary drive shaft.
-
Page 64: Adjusting The Clutch Control Lever
5-26 ENGINE ADJUSTING THE CLUTCH CONTROL LEVER Loosen the pressure plate locknut (1). Position the lever resting on the control rod. Turn the central pressure plate bolt (2) to position the control lever at 30° with respect to the sealing joint of the magneto cover. -
Page 65: Various Operations
ENGINE 5-27 Fit the rotor (3) onto the crankshaft connecting rod, ensuring that it is seated on the key. Immobilise the rotor with a front pivot adjustable spanner (1). Fit and tighten the rotor nut. Nut tightness torque: 5.2 daN•m (52 N•m) Fit the gasket and the magneto cover. -
Page 66: Dismantling The Oil Pump And Its Drive Gears
5-28 ENGINE DISMANTLING THE OIL PUMP AND ITS DRIVE GEARS Remove the eight clutch cover securing bolts. Remove the clutch cover. Remove the oil pump cover. Remove the two oil pump securing bolts. Remove the pump (1) with its O-ring. On the inside of the clutch cover, remove: a) the two rubber rings (2). - Page 67 Starter motor Rotor Stator Magneto cover Gearbox drain plug 1,18 Spark plug SERVICING MATERIALS REQUIRED MATERIALS RECOMMENDED MH PRODUCT Engine oil Motul 510 semi-synthetic 2-stroke oil Filling the engine oil tank Gearbox oil Motul TRANSOIL (SAE 10W30) Filling the gearbox...
- Page 68 5-30 ENGINE SPECIAL TOOLS 254002000199 2533002000198 Valve assembly male safety Magneto extractor Engine support adaptation Engine support key (4 mm) Crankcase opening and Clutch immobilisation tool Large model protection bush extraction tool Crankcase opening plate Primary transmission side crankshaft seal pusher Selector shaft seal pusher.
- Page 69 ELECTRICAL SYSTEM 6-1 SECTION 6 ELECTRICAL SYSTEM CONTENTS SERVICING THE MACHINE................................6-2 REMOVING THE BATTERY ................................6-2 REMOVING THE STARTER MOTOR RELAY ..........................6-2 REMOVING THE VOLTAGE REGULATOR/TURN INDICATOR CONTROLLER ................. 6-2 REMOVING THE IGNITION CONTROLLER ..........................6-3 REMOVING THE MAGNETO ROTOR AND ARMATURE ......................6-3 REMOVING THE NEUTRAL POSITION SWITCH .........................
-
Page 70: Servicing The Machine
6-2 ELECTRICAL SYSTEM SERVICING THE MACHINE REMOVING THE BATTERY Remove the seat – see “Removing the seat” in Section 4 (CHASSIS) Disconnect and remove the battery. WARNING: First disconnect the negative cable and then the positive cable. REMOVING THE STARTER MOTOR RELAY Remove the seat –... -
Page 71: Removing The Ignition Controller
ELECTRICAL SYSTEM 6-3 REMOVING THE IGNITION CONTROLLER Remove the right-hand radiator fairing. Disconnect and remove the ignition block (3). N.B.: The ignition block has two functions, an ignition box and a high tension coil. REMOVING THE MAGNETO ROTOR AND ARMATURE Remove the fi... -
Page 72: Removing The Diodes
6-4 ELECTRICAL SYSTEM REMOVING THE DIODES Remove the seat – see “Removing the seat” in Section 4 (CHASSIS) Disconnect the battery. WARNING: First disconnect the negative cable and then the positive cable. Remove the fuel tank – see “Removing the fuel tank” in Section 4 (CHASSIS). -
Page 73: Digital Instrument Panel (Where Fitted)
ELECTRICAL SYSTEM 6-5 DIGITAL INSTRUMENT PANEL (WHERE FITTED) BUTTON FUNCTIONS The button can be used to: Move from one function to another. Set the trip meter, chronometer and average velocity display to zero. Alter the wheel circumference value, the unit of measurement and the number of pulses per wheel turn or engine revolution. -
Page 74: Functions Of The Main Menu
6-6 ELECTRICAL SYSTEM FUNCTIONS OF THE MAIN MENU CURRENT SPEED The information is always displayed in large electronic digits (see fi gure), regardless of the function selected or the alarm active. The information is displayed on screen every 0.5 seconds. Representation of the current speed data: Representation in kph (original confi... -
Page 75: Average Speed (Ave)
ELECTRICAL SYSTEM 6-7 3) It stops 3 seconds after the reception of the last pulse from the speed sensor. The data is not memorised permanently. The meter can be zeroed by holding down the button (in relation to the LAP function) for approxi- mately 3 seconds, until the “0.0”... -
Page 76: Totaliser (Tod)
6-8 ELECTRICAL SYSTEM TOTALISER (TOD) The information is displayed in small electronic digits, accompa- nied by TOD, as can be seen in the fi gure. The data is memorised permanently in a non-volatile memory (up- dated with every kilometre travelled). If no data appears registered in the memory, the number “00000”... -
Page 77: Sleep Mode
ELECTRICAL SYSTEM 6-9 SLEEP MODE Every time the key switch is turned to the OFF position, the following operations take place: The screen and its lighting are switched off. All the indicator lights that were on are turned off. Entry into “sleep” phase, characterised by a low current con- sumption, in which the system interrupts every activity. -
Page 78: Altering The Wheel Circumference
6-10 ELECTRICAL SYSTEM ALTERING THE WHEEL CIRCUMFERENCE Once inside the confi guration menu, the fi rst parameter that can be altered is the wheel circumference. The screen displays the only information seen, which is the cir- cumference of the wheel, whereas all the other segments are off. The different fi... -
Page 79: Altering The Pulses Per Wheel Turn
ELECTRICAL SYSTEM 6-11 ALTERING THE PULSES PER WHEEL TURN Once the unit of measurement has been selected ( it appears fl as- hing), press the mode button for 3 seconds. It will then be possible to alter the number of pulses for the wheel. This parameter expresses the number of pulses which the elec- tronic sensor sends to the instrument panel for every turn of the wheel. -
Page 80: Starting The System Up
6-12 ELECTRICAL SYSTEM STARTING THE SYSTEM On switching on (key from OFF to ON), the system provides the user with a series of data, which, in order to simplify things, are shown on different screens in the form of pages: First page: software version and date. -
Page 81: Electrical Characteristics
ELECTRICAL SYSTEM 6-13 ELECTRICAL CHARACTERISTICS MAXIMUM FUNCTIONING CHARACTERISTICS CHARACTERISTICS Min. Max. Unit Max. operating temperature Storage temperature °C Maximum current internal Maximum input current Maximum output current CARACTERISTICAS OPERATIVAS DE FUNCIONA- MIENTO CHARACTERISTICS Min. Typ. Max. Unit Supply voltage 16,0 Operating temperature °C Abs. - Page 82 NOTES:...
-
Page 83: Troubleshooting
TROUBLESHOOTING 7-1 SECTION 7 TROUBLESHOOTING CONTENTS INTRODUCTION.................................... 7-2 FAILURE TO START ................................... 7-2 Engine ....................................7-2 Fuel system ..................................7-2 Electrical systems ................................7-2 INCORRECT IDLING ..................................7-3 Engine....................................7-3 Fuel system ..................................7-3 Electrical systems ................................7-3 FAULTY GEAR-CHANGE ................................7-3 Diffi... -
Page 84: Introduction
7-2 TROUBLESHOOTING INTRODUCTION N.B.: The following troubleshooting guide does not cover all the possible causes of faults. It may however prove useful as a guide for basic fault fi nding. Use this manual to consult the corresponding checking, adjusting and part renewal procedures. FAILURE TO START ENGINE •... -
Page 85: Incorrect Idling
TROUBLESHOOTING 7-3 INCORRECT IDLING ENGINE • Incorrect valve clearance. • Air filter element obstructed. FUEL SYSTEM • Incorrectly adjusted engine idling. • Incorrect throttle cable clearance. • Flooded throttle body. • Faulty air intake system. ELECTRICAL SYSTEMS • Flat battery. •... -
Page 86: The Gears Jump
7-4 TROUBLESHOOTING THE GEARS JUMP • Incorrect gear change pedal position. • Incorrect stop lever return. • Worn gear selector fork. • Worn selection drum slot. • Worn gear securing device. FAULTY CLUTCH THE CLUTCH SLIPS • Clutch incorrectly fitted. •... -
Page 87: Chassis
TROUBLESHOOTING 7-5 • Radiator fins bent or damaged. • Water pump damaged or failed. • Pipe connected incorrectly. • Damaged piping. CHASSIS • Brakes activated. ELECTRICAL SYSTEMS • Incorrect spark plug electrode gap. POOR BRAKING • Worn brake pad. • Worn brake pad. •... -
Page 88: Unstable Handling
7-6 TROUBLESHOOTING UNSTABLE HANDLING • Handlebars bent or incorrectly fitted. • Top support incorrectly fitted. • Bottom support fitted incorrectly (badly tightened lock nut). • Bent steering shaft. • Damaged ball bearings or bearing guide ring. • Uneven fluid levels (in the two front fork arms). •... - Page 89 TROUBLESHOOTING 7-7 BLOWN REAR LIGHT/BRAKE LIGHT BULB • Incorrect rear light/brake light bulb. • Battery faulty. • Incorrectly adjusted rear brake light switch. • Rear light/brake light bulb reached end of life. TURN INDICATORS DO NOT COME ON • Faulty turn indicator switch. •...
- Page 90 NOTES:...
- Page 92 G.H.E. ENGINEHISPANIA, S.L. RYZ 50 RYZ 50 SERVICE MANUAL 1st Edition Published November, 2006 © 2006 G.H.E. ENGINEHISPANIA, S.L. All rights reserved. No part of this publication may be reproduced or transmitted in any form, nor by any elec- tronic or mechanical means for any use whatsoever, without the written authorisation of ENGINEHISPANIA, S.L.
Need help?
Do you have a question about the RYZ 50 Cross and is the answer not in the manual?
Questions and answers